

Elegance Reimagined: Designing Your Elevated Lifestyle
Have you ever walked into a space and felt an immediate sense of peace, as if every element was whispering a story of intentionality and grace? We often spend our lives rushing through the motions, treating our homes and workspaces as mere pit stops rather than sanctuaries. But what if we shifted that perspective? An elevated lifestyle isn’t about the price tag; it’s about the curation of moments, textures, and environments that reflect the best version of ourselves.
In this guide, we are diving deep into the art of living beautifully. From the first impression of your front lawn to the digital serenity of your computer desktop, every corner of your life is an opportunity for elegance reimagined. Let’s explore how to weave together the practical and the poetic to create a lifestyle that truly feels like home.
Whether you are looking to overhaul your outdoor oasis or simply want to inject a bit of whimsy into your studio apartment, these ten transformations are designed to inspire. Grab a cup of tea, settle in, and let’s start designing your elevated life together.
How to Achieve Lush Front Yard Landscaping for Instant Curb Appeal

Why we love this
There is nothing quite like the intoxicating aroma of blooming gardenias and fresh damp earth that greets you as you step onto a well-manicured property. The visual feast of deep emerald hostas paired with the delicate, feathery texture of ornamental grasses creates a living tapestry that feels both regal and welcoming. When your front yard is lush, it acts as a soft transition from the chaotic outside world into your personal haven, providing a sensory experience that begins the moment you pull into the driveway.
Essential Elements:
- Layered perennial shrubs (Hydrangeas, Boxwoods)
- Organic cedar mulch for moisture retention
- Natural stone or brick edging
- Low-voltage warm LED path lighting
- A focal point tree, such as a Japanese Maple
How to make it
- Begin by clearing the area of all weeds and debris, then use a garden hose to outline natural, curving beds that break away from the rigid lines of your home’s foundation.
- Test your soil pH and amend it with high-quality organic compost to ensure a nutrient-rich base; use a garden fork to integrate the compost at least six inches deep into the soil.
- Plan your layout using the ‘rule of three’ for heights: place taller evergreens in the back, medium flowering shrubs in the middle, and low-growing groundcovers at the front edge.
- Dig holes twice as wide as the root balls of your plants, gently teasing the roots before placing them in the ground to encourage outward growth.
- Install a professional-grade landscape fabric to suppress weeds, then apply a three-inch layer of dark mulch, keeping it a few inches away from the plant stems to prevent rot.
How to Design a Productive Work Cubicle for Total Professional Focus

Why we love this
A workspace shouldn’t feel like a cage; it should feel like a cockpit for your ambitions, tailored to your every need. Imagine the cool, smooth touch of a marble desk organizer and the subtle, grounding scent of a small eucalyptus plant sitting beside your monitor. By curating your cubicle with intentional textures and soft, indirect lighting, you transform a sterile environment into a cozy nook where deep work flows naturally and the ticking clock becomes a rhythmic companion rather than a stressor.
Essential Elements:
- Ergonomic lumbar support cushion
- Small desk-sized air purifier or humidifier
- Minimalist desk lamp with adjustable color temperature
- Noise-canceling headphones with a dedicated stand
- A curated mood board with soft-touch linen backing
How to make it
- Empty your entire cubicle and wipe down all surfaces with a mild cleaner to create a sterile, fresh slate for your new design.
- Position your monitor so the top third of the screen is at eye level, approximately 20 inches from your face, to reduce neck strain and optimize visual focus.
- Introduce a ‘vertical garden’ by using magnetic or clip-on planters for the cubicle walls, choosing low-light plants like Snake Plants or Pothos that thrive in office environments.
- Organize your desk into zones: keep your ‘active’ zone clear for your keyboard and mouse, and place your ‘reference’ zone (notebooks, files) to the non-dominant side.
- Layer your lighting by adding a warm-toned task lamp to counteract the harsh overhead fluorescent lights, creating a soft glow that reduces eye fatigue during long sessions.
How to Style Your Desktop with Speaker Wallpapers for Ultimate Audio Vibes
Why we love this
Your digital environment is just as important as your physical one, and there is something incredibly satisfying about a desktop that looks the way high-fidelity audio feels. We love the crisp, symmetrical lines of vintage speaker cones and the warm, amber glow of vacuum tubes captured in high-definition wallpapers. It sets a mood of rhythmic precision and artistic soul, making every time you wake your computer feel like you’re stepping into a high-end recording studio or a velvet-lined jazz lounge.
Essential Elements:
- 4K resolution ultra-wide wallpapers
- Hidden taskbar settings for a clean look
- Customized folder icons in metallic or matte black
- Digital clock widget with vintage flip-clock aesthetic
- Color-coordinated desktop shortcut icons
How to make it
- Search for high-resolution (3840×2160 or higher) imagery featuring macro shots of speaker drivers or audio equipment to ensure the pixels remain sharp on large monitors.
- Right-click your desktop and select ‘Personalize,’ then upload your chosen image, setting the fit to ‘Fill’ to avoid any unsightly black bars on the edges.
- In your system settings, choose the ‘Auto-hide taskbar’ option to create an immersive, full-screen visual experience that highlights the wallpaper’s details.
- Use a third-party customization tool like Rainmeter to add audio visualizers that react in real-time to the music you play, effectively turning your desktop into a living equalizer.
- Group your essential desktop icons into a single, transparent dock at the bottom of the screen to keep the central focus on the high-end audio aesthetic.
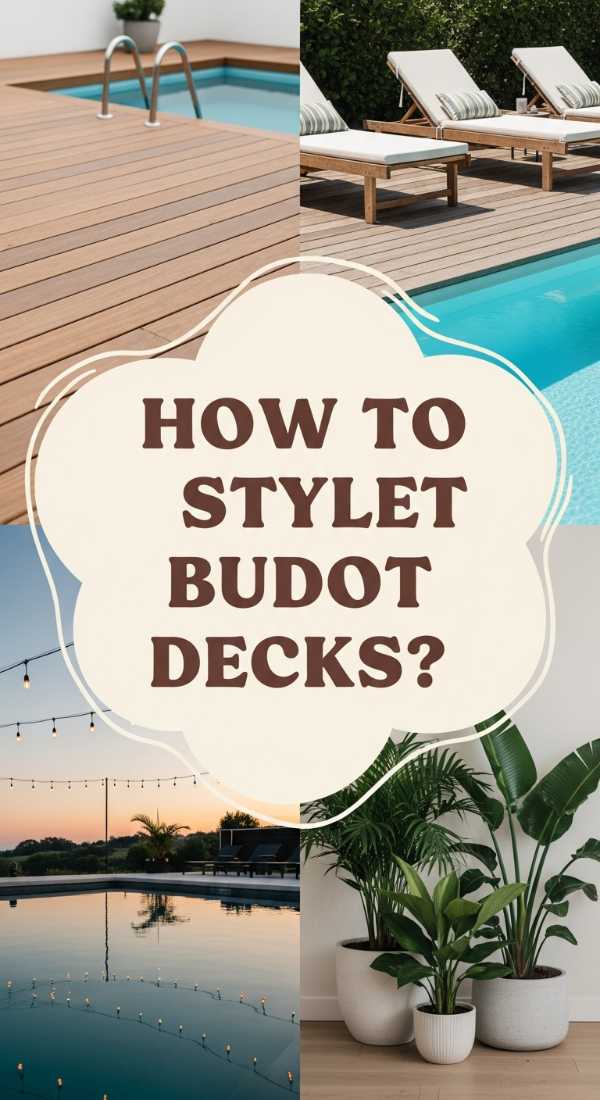
How to Build a Budget Pool Deck for Incredible Summer Memories

Why we love this
The feeling of sun-warmed wood beneath your bare feet and the rhythmic splashing of water against the side of the pool is the ultimate summer symphony. A budget-friendly deck doesn’t mean sacrificing style; it means being clever with materials like pressure-treated pine and staining it a deep, luxurious walnut. We love how a deck expands the living area, creating a dedicated space for lounging with an ice-cold lemonade while the golden hour light dances across the water’s surface.
Essential Elements:
- Pressure-treated 2×4 and 5/4 decking boards
- Concrete deck blocks for easy leveling
- Weather-resistant deck screws
- High-quality exterior stain and sealer
- Solar-powered post cap lights
How to make it
- Measure the circumference of your above-ground pool and mark the footprint of the deck using stakes and string, ensuring a level perimeter at least 6 inches below the pool rim.
- Place concrete deck blocks every 4 feet along the perimeter and interior of your footprint, using a long level to ensure each block is perfectly horizontal with the others.
- Construct the outer frame using 2×6 pressure-treated joists, securing them with galvanized lag bolts to create a sturdy, rigid skeleton for your platform.
- Lay your decking boards with a 1/8-inch gap between them to allow for wood expansion and water drainage, pre-drilling holes to prevent the wood from splitting.
- Sand the entire surface with 80-grit sandpaper to remove any splinters, then apply two coats of a semi-transparent stain using a long-handle roller for a professional finish.
How to Install Vinyl Lattice Panels for Complete Garden Privacy
Why we love this
Privacy is the ultimate luxury in a modern garden, and vinyl lattice offers a classic, romantic aesthetic that never fades or rots. There is a quiet joy in watching climbing roses or emerald ivy slowly weave through the white or wood-toned slats, creating a living wall that smells of nectar and greenery. It provides a soft, dappled light that filters into your seating area, making your backyard feel like a secluded European courtyard hidden away from the prying eyes of the neighborhood.
Essential Elements:
- Heavy-duty vinyl lattice sheets (1/4 inch thickness)
- U-channel molding for the edges
- Vinyl-coated screws or stainless steel fasteners
- 4×4 pressure-treated posts or existing fence structure
- Climbing plants like Clematis or Star Jasmine
How to make it
- Measure the distance between your existing fence posts or wall studs and cut the vinyl lattice panels using a circular saw with a fine-tooth blade to prevent chipping.
- Slide the cut lattice panels into the U-channel molding, which provides a finished, professional look and allows the lattice to expand and contract with temperature changes.
- Pre-drill oversized holes in the vinyl lattice every 12 inches; this is a critical professional tip to prevent the panels from buckling as the plastic reacts to sun exposure.
- Secure the panels to your vertical supports using screws, ensuring you don’t over-tighten them so the lattice can move slightly within the U-channel.
- Install a decorative cap or top rail over the posts to lock everything in place and provide a polished, high-end architectural finish to your privacy screen.
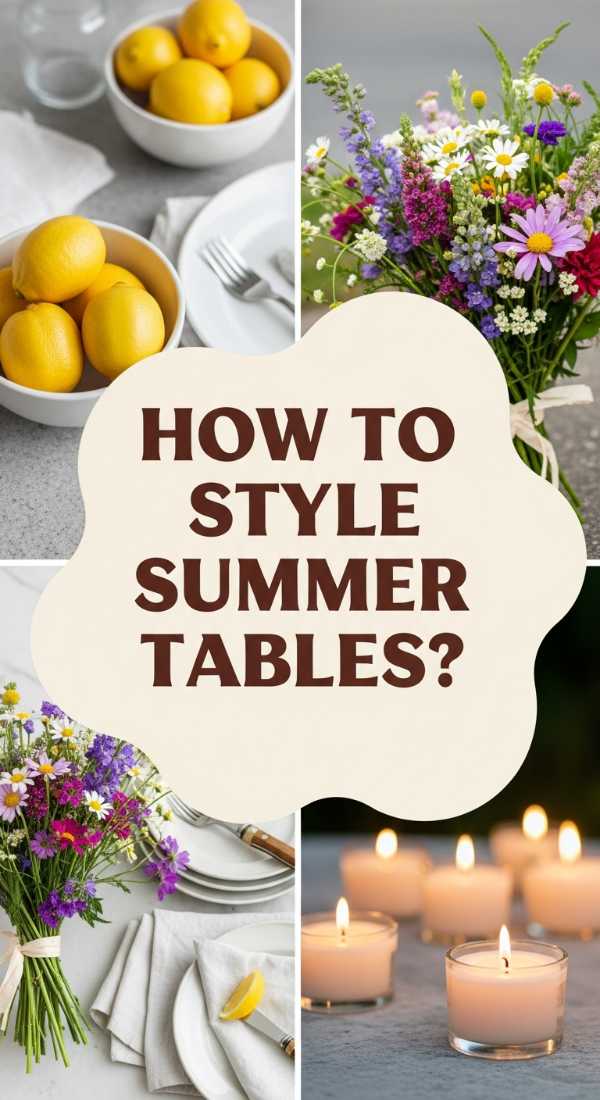
How to Create Summer Table Centerpieces for an Unforgettable Garden Party

Why we love this
A great centerpiece is more than just decoration; it is a conversation starter that sets the tone for an evening of laughter and connection. We love the vibrant pop of sliced lemons submerged in glass vases, the rustic charm of wild lavender tied with twine, and the soft flicker of unscented votive candles. The combination of citrusy brightness and floral softness creates a sensory anchor for your table, making every meal feel like a special occasion under the stars.
Essential Elements:
- Clear glass hurricane vases in varying heights
- Fresh citrus fruits (lemons, limes, oranges)
- Seasonal wildflowers (Zinnias, Sunflowers, Daisies)
- Unscented white pillar candles
- A natural linen or burlap table runner
How to make it
- Place a smaller glass cylinder inside a larger hurricane vase, then slide thinly sliced lemon or lime rounds into the gap between the two for a stunning visual effect.
- Fill the inner cylinder with cool water and arrange your wildflowers, cutting the stems at a 45-degree angle to maximize water absorption and longevity.
- Stagger three to five vases along the center of your table runner, mixing heights to create visual interest and movement across the dining surface.
- Intersperse the floral vases with small glass votives, ensuring the candles are at a height that won’t interfere with the line of sight between guests.
- Tuck small sprigs of fresh rosemary or mint into the gaps around the vases to add a subtle, refreshing herbal aroma that complements the summer air.
How to Style a Patriotic Front Porch for a Classic Seasonal Entrance
Why we love this
There is a timeless, nostalgic elegance to a patriotic porch that evokes memories of parades and homemade apple pie. We love the crisp contrast of deep navy blues against stark white wicker furniture, accented by the bold red of geraniums in full bloom. It’s a look that feels rooted in tradition but can be elevated with high-quality fabrics and thoughtful placement, turning your home’s entrance into a proud statement of heritage and hospitality.
Essential Elements:
- Cotton tea-stained American flags
- Red flowering annuals in navy blue ceramic pots
- A navy and white striped outdoor rug
- Bunting for the porch railings
- Classic white rocking chairs with blue cushions
How to make it
- Start by thoroughly power-washing your porch floor and railings to remove winter grime, ensuring a bright, clean canvas for your red, white, and blue accents.
- Hang cotton bunting along the top rail of your porch, using zip ties or clear hooks to create even, graceful swags that frame the entrance.
- Place a large American flag at a 45-degree angle from your main pillar using a heavy-duty brass bracket, ensuring the flag is positioned to catch the breeze.
- Arrange blue ceramic planters on either side of the front door, filling them with bright red geraniums and white ‘Diamond Frost’ euphorbia for a high-contrast floral display.
- Finish the look by placing a high-quality coir doormat over a slightly larger navy-striped rug for a layered, designer feel that welcomes guests with style.
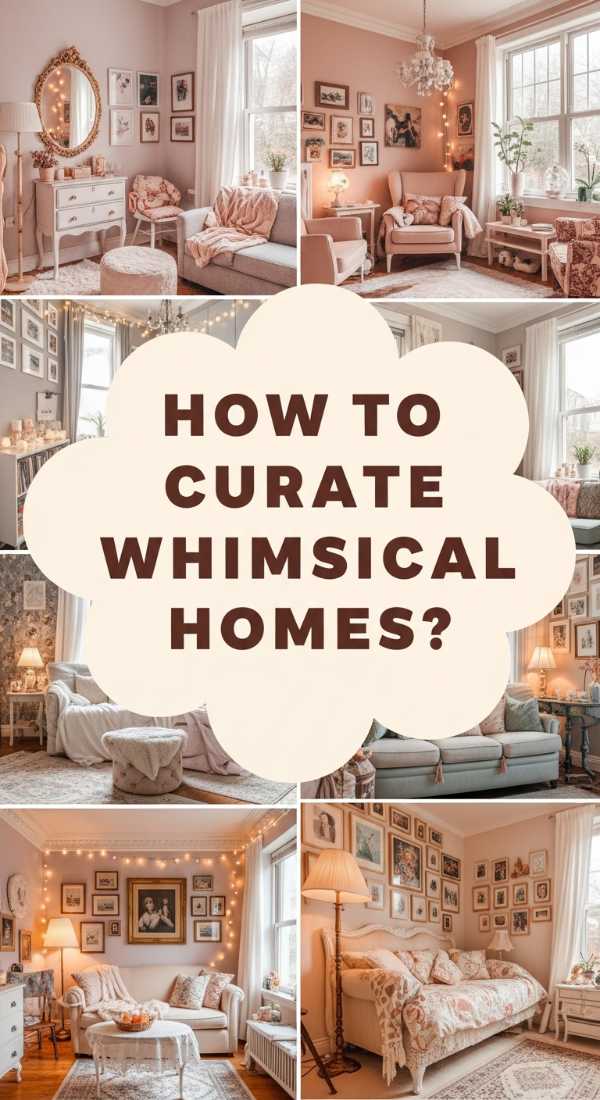
How to Craft a Whimsical Apartment Aesthetic for a Personal Sanctuary

Why we love this
In a small apartment, whimsy is the secret ingredient that makes the space feel expansive and magical. We love the play of light through iridescent window films, the softness of velvet throw pillows in jewel tones, and the unexpected charm of a vintage gold-leaf mirror leaning against a wall. A whimsical aesthetic is about embracing your inner child while maintaining an adult’s eye for quality, resulting in a sanctuary that feels uniquely yours and completely detached from the mundane.
Essential Elements:
- Fairy lights with warm white globes
- Assorted vintage-style picture frames
- Macramé or woven wall hangings
- Layered rugs of different textures (sheepskin on jute)
- Eclectic ceramic knick-knacks and crystals
How to make it
- Choose a focal point, like a reading nook, and drape sheer, airy curtains from the ceiling to create a ‘room within a room’ that feels intimate and dreamy.
- Install floating shelves at irregular heights and populate them with a mix of trailing plants, old leather-bound books, and small decorative curios.
- Use Command hooks to hang strings of warm LED fairy lights along the perimeter of the ceiling, allowing them to sag slightly for a relaxed, starry-night effect.
- Create a ‘gallery wall’ using frames of different sizes and finishes, filling them with personal sketches, dried flowers, and vintage postcards for a curated look.
- Introduce a variety of textures through textiles—a chunky knit throw over a velvet chair—to add depth and a sense of cozy ‘maximalism’ to your small footprint.
How to Design an Aquarium Setup for a Relaxing Interior Atmosphere

Why we love this
An aquarium is more than a pet habitat; it is a piece of living art that brings the tranquil pulse of the underwater world into your living room. We love the hypnotic dance of silver scales through lush green aquatic ferns and the soft, blue-toned light that washes over the room in the evening. It provides a natural white noise from the gentle water flow, lowering stress levels and providing a meditative focal point that grounds the energy of any room.
Essential Elements:
- Rimless glass aquarium (20+ gallons for stability)
- Live aquatic plants (Anubias, Java Fern)
- Natural dragon stone or driftwood
- Quiet canister filter system
- High-spectrum LED lighting with sunrise/sunset modes
How to make it
- Layer the bottom of the tank with two inches of specialized plant substrate, sloping it from front to back to create a sense of depth and perspective within the glass.
- Position your ‘hardscape’—large pieces of driftwood or stones—using the golden ratio (placing the main feature slightly off-center) to create a natural, pleasing composition.
- Affix live plants to the driftwood or tuck them into the substrate, ensuring you place larger plants in the back and shorter ones in the foreground to maintain scale.
- Slowly fill the tank with dechlorinated water by pouring it over a saucer to prevent the force of the water from disturbing your carefully placed substrate and plants.
- Set your LED lighting on a timer for 8 hours a day, gradually increasing the intensity to simulate a natural day cycle, which keeps both the fish and plants healthy.
How to Plan Simple Landscaping for a Low Maintenance Yard
[IMAGE_10]
Why we love this
There is an understated elegance in simplicity, especially when it means spending your weekends relaxing instead of weeding. We love the clean, modern look of gravel pathways contrasted with hardy, architectural plants like Agave or Lavender. A low-maintenance yard feels intentional and orderly, providing a serene backdrop that remains beautiful through the seasons with minimal intervention, allowing the natural beauty of the landscape to speak for itself without the clutter of high-maintenance annuals.
Essential Elements:
- Drought-tolerant perennials (Sedum, Coneflower)
- Decorative river rock or pea gravel
- Commercial-grade weed barrier fabric
- Automatic drip irrigation system
- Permanent metal or plastic edging
How to make it
- Identify the ‘low-use’ areas of your yard and replace thirsty grass with decorative stone or mulch, which drastically reduces the need for mowing and watering.
- Select ‘native plants’ for your region, as these species have evolved to thrive in your specific climate and soil without the need for constant fertilization or pesticides.
- Install a simple drip irrigation kit connected to a smart timer; this delivers water directly to the roots, minimizing waste and preventing weed growth in dry areas.
- Group plants with similar water needs together (hydro-zoning) to ensure each area of your garden receives the precise amount of care it requires.
- Apply a pre-emergent weed preventer in early spring before laying down a thick layer of rock or mulch to create a multi-year barrier against invasive growth.
Conclusion
Elevating your lifestyle is a journey of a thousand small, beautiful choices. Whether you are tending to a low-maintenance garden or curating the perfect digital wallpaper, the goal is always the same: to create an environment that supports your well-being and reflects your unique aesthetic. Elegance isn’t about perfection; it’s about the reimagining of your daily surroundings into something that brings you joy every time you look at it. Start with one section of this guide and watch how the ripple effect of intentional design transforms your entire life.