

Have you ever looked out your back window and felt like something was… missing? I’ve been there. For years, my backyard was just a rectangle of grass and a single, lonely plastic chair. It wasn’t a destination; it was just a chore that needed mowing. But then I realized that our outdoor spaces are actually an extension of our souls—a place where we can breathe deeper, laugh louder, and reconnect with the rhythms of nature that get lost in our busy, digital lives.
Transforming your yard from basic to breathtaking doesn’t require a professional landscaping crew or a lottery-winning budget. It requires a little bit of dirt under your fingernails and a vision for how you want to feel when you step outside. In this guide, I’m taking you through my favorite viral-worthy DIY projects that will turn your outdoor space into a sanctuary that feels like a permanent vacation. We’re talking about more than just curb appeal; we’re talking about creating a lifestyle.
Whether you have a sprawling acre or a tiny urban patio, there is magic to be made here. From the soothing sounds of songbirds to the tactile joy of a sensory garden for the kids, we’re going to build spaces that invite you to linger. Grab your coffee (or your garden trowel), and let’s dive into these ten transformative projects that will make your home the most beautiful spot on the block!
How to Create a Serene Garden Oasis for Local Songbirds

Why we love this
There is nothing quite like the gentle, melodic trill of a cardinal or the cheerful chirping of a chickadee to start your morning on a high note. Creating a bird sanctuary is like inviting a living choir into your backyard, filling the air with movement and music. We love this because it connects us to the local ecosystem, providing a vital habitat while offering us a front-row seat to the wonders of nature. The sight of soft feathers splashing in a stone basin and the scent of nectar-rich blooms creates an atmosphere of pure, unadulterated peace.
Essential Elements:
- A multi-tiered stone birdbath with a solar-powered bubbler.
- Native fruiting shrubs like elderberry or serviceberry.
- High-quality cedar bird feeders and varied seed mixes.
- Nesting boxes tailored to local species.
- A variety of nectar-producing perennials like bee balm and coneflower.
How to make it
- Identify a quiet, safe location in your yard that is visible from a window but protected from high-traffic areas and predators like neighborhood cats.
- Install a sturdy birdbath as your focal point. Use a solar-powered fountain insert to keep the water moving; the sound of trickling water is a beacon for traveling birds and prevents mosquito breeding.
- Layer your plantings by height. Place taller shrubs at the back to provide cover and nesting sites, then transition to mid-sized perennials, and finally low-lying groundcovers to create a natural staircase of greenery.
- Set up feeding stations at different elevations. Place tube feeders for small finches, platform feeders for ground-feeding birds, and suet cages for woodpeckers to ensure a diverse range of visitors.
- Maintain a year-round water source and clean your feeders bi-weekly with a diluted vinegar solution to keep your feathered friends healthy and coming back for more.
How to Design a Lush Entrance for Instant Curb Appeal

Why we love this
Your front entrance is the first handshake your home gives to the world, and we believe it should be a warm, fragrant embrace. A lush entrance transforms the daily act of coming home into a celebratory experience, greeting you with vibrant colors and the fresh, earthy scent of well-tended greenery. It’s about more than just resale value; it’s about the pride of place and the instant mood boost you feel when you see a perfectly framed doorway. The texture of soft ferns and the pop of bright hydrangeas create a visual symphony that says, ‘Someone who loves life lives here.’
Essential Elements:
- Over-sized resin or ceramic planters in a cohesive color palette.
- A curated mix of ‘Thriller, Filler, and Spiller’ plants.
- Low-voltage LED path lighting for evening ambiance.
- Fresh dark hardwood mulch for a polished finish.
- A high-quality, natural fiber doormat.
How to make it
- Clear the area of all debris and old mulch. Define your garden beds with a crisp edge using a half-moon edger for that professional, clean-cut look.
- Select two large, statement planters to flank your front door. Fill them with a high-quality potting mix and plant a tall ‘Thriller’ (like a Mandevilla or Fountain Grass), several ‘Fillers’ (like Petunias or Coleus), and a ‘Spiller’ (like Creeping Jenny or Sweet Potato Vine).
- Layer the surrounding ground beds with perennial shrubs that offer multi-season interest. Use Boxwoods for structure and Hydrangeas for soft, voluminous summer blooms.
- Install path lighting along the walkway. Position the stakes about 6 feet apart, angling the light downward to highlight the texture of the stone and the foliage of your low-lying plants.
- Finish the look with a 3-inch layer of dark mulch and a seasonal wreath that echoes the colors in your planters to create a unified, designer appearance.
How to Build Custom Cedar Planters for Your Backyard Patio

Why we love this
Cedar planters are the gold standard for backyard DIYs, offering a gorgeous, rustic aesthetic combined with incredible durability. We love the warm, reddish hues of the raw wood and that unmistakable, spicy cedar aroma that lingers in the air after a light rain. These planters allow you to bring gardening to a comfortable height, saving your back while creating architectural interest on a flat patio. They age beautifully to a silvery-grey patina over time, grounding your outdoor space with a sense of permanence and handcrafted quality that store-bought plastic just can’t match.
Essential Elements:
- Rough-sawn 1×6 and 2×4 Western Red Cedar boards.
- Exterior-grade deck screws (2-inch and 2.5-inch).
- Waterproof landscape fabric for lining.
- A cordless drill and a miter saw.
- Wood glue and galvanized finish nails.
How to make it
- Cut your 2×4 cedar boards into four legs of equal height (typically 18-24 inches) and your 1×6 boards into the side panels. For a standard large planter, aim for two sides at 36 inches and two sides at 18 inches.
- Build the frame by attaching the side boards to the 2×4 legs. Apply a bead of wood glue to each joint before driving two 2.5-inch exterior screws through the board into the leg. Ensure your corners are square using a speed square.
- Create a support ledge for the bottom by screwing 2×2 cedar cleats along the interior bottom edges of the side panels, approximately 6 inches from the ground.
- Cut 1×6 boards to fit the interior width and lay them across the cleats to form the floor of the planter. Leave 1/4-inch gaps between these floor boards for drainage.
- Staple landscape fabric to the interior walls to protect the wood from direct soil contact and fill with a mixture of compost and potting soil before planting your favorite herbs or flowers.
How to Arrange a Safe Outdoor Haven for Little Explorers

Why we love this
There is a profound joy in watching children engage with the outdoors, where every rock is a treasure and every leaf is a mystery. We love creating a dedicated haven for little explorers because it fosters independence and a lifelong love for the environment in a safe, controlled way. Imagine a space filled with the scent of crushed mint and the soft feel of clover underfoot, designed specifically for small hands and big imaginations. It’s a sanctuary where ‘no’ is replaced with ‘let’s find out,’ providing parents with peace of mind and kids with endless adventure.
Essential Elements:
- Natural cedar wood borders or smooth river stone edging.
- Soft-touch groundcover like creeping thyme or premium wood chips.
- A low-profile ‘exploration station’ with magnifying glasses and buckets.
- Child-safe, non-toxic plants like Sunflowers, Marigolds, and Snapdragons.
- Shade sails or a small canvas teepee for sun protection.
How to make it
- Choose a level area of the yard that is easily visible from the main patio or kitchen window. Remove any thorny weeds or sharp stones from the perimeter.
- Define the boundaries using smooth-sanded cedar 4x4s or rounded river stones to prevent tripping hazards while creating a clear sense of ‘their’ space.
- Lay down a thick base of playground-certified wood chips or plant a durable, soft groundcover. Creeping thyme is excellent as it withstands foot traffic and releases a lovely scent when stepped on.
- Create a ‘curiosity corner’ by installing a low wooden table equipped with plastic binoculars, magnifying lenses, and sorting trays for leaves and twigs.
- Add a vertical element, like a small canvas teepee or a willow dome, to provide a shaded retreat for quiet reading or imaginative play, ensuring all materials are anchored securely to the ground.
How to Style a Charming Play Kitchen for Messy Learning

Why we love this
The mud kitchen is the ultimate viral backyard trend for a reason: it celebrates the beautiful, tactile mess of childhood. We love this project because it transforms ‘dirt’ into ‘delicacies,’ encouraging sensory play and fine motor skill development through the alchemy of mud and water. The sound of a wooden spoon clacking against a metal pot and the concentrated look on a child’s face as they ‘season’ a mud pie with pine needles is pure magic. It’s a space where creativity has no boundaries and where the cleanup is as simple as a quick spray with the garden hose.
Essential Elements:
- Upcycled wooden pallets or a small, refurbished potting bench.
- Stainless steel bowls and old kitchen utensils (whisks, ladles, spoons).
- A functional water dispenser or a simple gravity-fed jug.
- Chalkboard paint for ‘daily specials’ and menu planning.
- Storage hooks and crates for organizing ‘ingredients’ like acorns and petals.
How to make it
- Source a sturdy wooden base; a second-hand potting bench is perfect, or you can build a simple frame using heat-treated pallets. Sand all surfaces thoroughly to remove any splinters.
- Cut a circular hole in the countertop using a jigsaw and drop in a stainless steel mixing bowl to act as a ‘sink.’ Secure it with a bead of silicone caulk around the rim.
- Install a row of small hooks across the backboard to hang ladles, spatulas, and measuring cups. Ensure they are at a height easily reachable for a toddler.
- Paint a small section of the backboard with chalkboard paint. This allows kids to write out their menus or draw the ‘ingredients’ they are looking for in the garden.
- Stock the kitchen with ‘nature’s pantry.’ Provide bins filled with pinecones, dried lavender, smooth stones, and a dedicated bucket of clean topsoil and water for the perfect mud consistency.
How to Create a Private Spa Sanctuary for Ultimate Relaxation

Why we love this
In our fast-paced world, having a private corner for decompression is not a luxury—it’s a necessity. We love the spa sanctuary because it brings the high-end resort experience right to your backdoor, utilizing the healing power of water and aromatherapy. Imagine stepping onto warm cedar planks as the steam rises around you, surrounded by the calming scent of eucalyptus and the soft glow of lanterns. It’s a space designed to lower your heart rate and quiet your mind, offering a sensory retreat where the only thing on your to-do list is to breathe.
Essential Elements:
- A cedar soaking tub or a modern inflatable spa with a custom surround.
- Bamboo or cedar privacy screens.
- Outdoor-rated essential oil diffuser.
- Plush, oversized white towels and a teak towel rack.
- Weatherproof LED candles and fairy lights.
How to make it
- Select a secluded corner of your yard, preferably against a fence or under a large tree. Level the ground and install a sturdy foundation of concrete pavers or a small cedar deck to support the weight of the water.
- Erect privacy screens using tall bamboo poles or horizontal cedar slats. This creates a ‘room’ feel and blocks the view from neighbors, enhancing the sense of seclusion.
- Position your water feature—be it a hot tub or a cold plunge—and surround it with potted aromatic plants like Jasmine or Lavender to provide natural scent therapy.
- Install soft, warm-toned lighting. String fairy lights through the overhead branches and place oversized LED candles in glass lanterns around the perimeter of the tub for a flickering, zen-like glow.
- Add a small teak side table for a glass of cucumber water and a dedicated ‘towel station’ with a basket of rolled white towels to complete the professional spa aesthetic.
How to Reclaim Rustic Wood for Sustainable Play Spaces

Why we love this
There is a unique beauty in wood that has a history, and reclaiming it for a play space adds a layer of soul and sustainability to your home. We love the rugged, weathered texture of reclaimed timber—it’s sturdy, full of character, and tells a story of transformation. By using salvaged materials, you’re creating a playground that feels like it’s always been part of the landscape. It’s a tactile, earthy experience that encourages kids to appreciate the value of repurposing while providing a rock-solid foundation for years of climbing, jumping, and imagining.
Essential Elements:
- Salvaged barn wood, chemical-free pallets, or fallen logs from local arborists.
- Heavy-duty sanding equipment and non-toxic wood sealant.
- Stainless steel hardware and carriage bolts for structural integrity.
- Hemp or manila rope for natural-looking climbing elements.
- Organic mulch for a soft landing zone.
How to make it
- Source your wood carefully. Ensure any pallets are marked ‘HT’ (Heat Treated) rather than chemically treated. If using logs, choose hardwoods like oak or cedar for their rot resistance.
- Power wash and sand every piece of wood. Use a low-grit sandpaper (60-80) to remove rough patches, then finish with a higher grit (120-150) until the surface is smooth to the touch to prevent splinters.
- Design a simple balance beam or a ‘stepper’ course using stump rounds of varying heights. Bury the bottom third of the stumps in the ground and pack them with gravel for stability.
- For a climbing wall or platform, use reclaimed 4×4 posts as the main supports. Drill pilot holes and use heavy carriage bolts to secure the structure, ensuring it is rock-steady.
- Apply a clear, non-toxic outdoor sealant to preserve the rustic look while protecting the wood from the elements, and surround the area with 12 inches of certified playground mulch for safety.
How to Construct a Sensory Splash Zone for Summer Days

Why we love this
When the sun is high and the air is thick with summer heat, the sensory splash zone becomes the undisputed heart of the home. We love this project because it offers a sophisticated, modern take on the traditional plastic pool, combining the cooling power of water with a variety of textures and visual delights. The shimmering reflections of water on smooth river stones, the refreshing mist from a hidden nozzle, and the tactile joy of colorful sponges create a multi-sensory playground that keeps everyone cool and captivated for hours on end.
Essential Elements:
- A low-profile recycled rubber or non-slip stone patio base.
- A recirculating pump and a decorative basin or hidden reservoir.
- Assorted river rocks, sea glass, and smooth pebbles.
- A series of adjustable misting nozzles.
- Water-safe toys like silicone buckets and textured sponges.
How to make it
- Excavate a shallow area for your reservoir. Line it with a heavy-duty pond liner and place a recirculating pump at the lowest point. This allows the water to be reused, making it an eco-friendly choice.
- Cover the reservoir with a sturdy metal or plastic grate and top it with a layer of large, smooth river stones. This creates a ‘disappearing’ fountain effect where water splashes and vanishes.
- Install a misting line along a nearby fence or pergola. Connect it to a standard garden hose with a timer so you can enjoy a cooling mist during the hottest parts of the day.
- Incorporate different textures around the splash zone. Use sections of artificial turf, smooth slate tiles, and rounded pebbles to provide a variety of sensations for bare feet.
- Set up a ‘bubble station’ nearby with large wands and a tray of eco-friendly bubble solution to catch the breeze and create a magical, shimmering atmosphere.
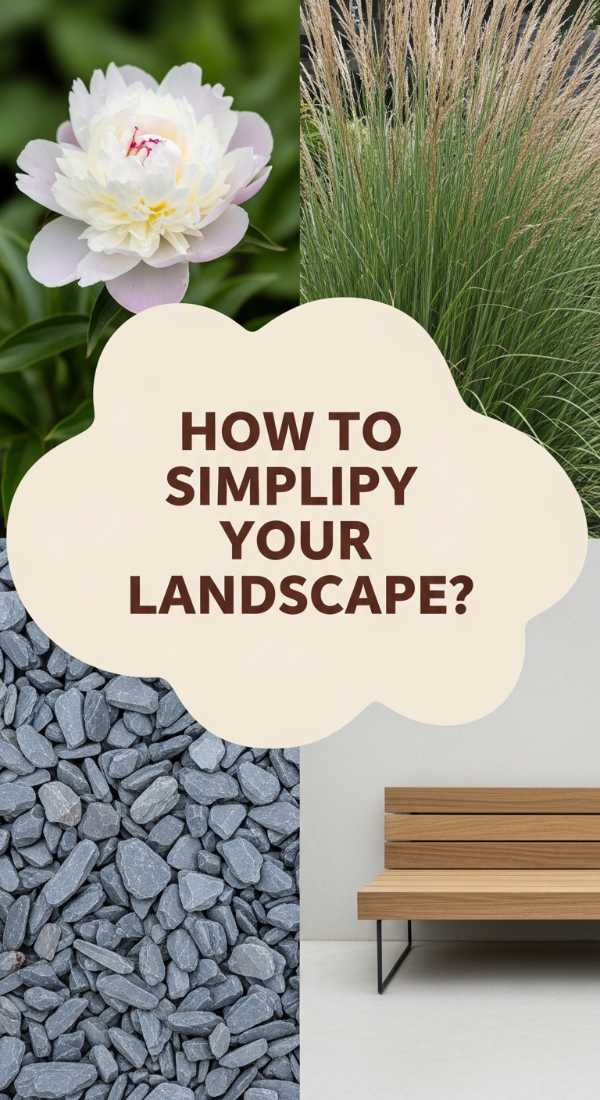
How to Curate a Minimalist Garden for Mindful Living
Why we love this
In a world of constant noise and visual clutter, a minimalist garden is a visual ‘deep breath.’ We love this style for its intentionality and the way it uses negative space to highlight the architectural beauty of a single plant or a perfectly placed stone. The color palette is restrained—think deep greens, slate greys, and crisp whites—creating a sophisticated environment that encourages mindfulness and reflection. It’s low-maintenance but high-impact, providing a serene backdrop for morning meditation or a quiet evening glass of wine in a space that feels utterly curated and calm.
Essential Elements:
- Architectural plants like Japanese Maples, Agave, or Ornamental Grasses.
- A monochromatic groundcover of white marble chips or black basalt gravel.
- Sleek, geometric concrete or matte black metal planters.
- Hidden, recessed lighting to highlight textures.
- A single, high-quality wooden or stone bench for seated contemplation.
How to make it
- Start with a clean slate. Remove all existing clutter and use a heavy-duty weed barrier to ensure your groundcover remains pristine and maintenance-free.
- Choose a limited color palette. Stick to two or three colors for your hardscaping (e.g., grey stone and dark wood) and focus on various shades of green for your plants to create a cohesive look.
- Plant for structure. Instead of a crowded flower bed, space your plants out so each one has room to be seen as an individual piece of ‘living art.’ Use geometric shapes like spheres or tall cylinders.
- Install hidden strip lighting under the rims of planters or along the edge of paths. This creates a soft, indirect glow that emphasizes the clean lines of the garden after sunset.
- Place one focal point—a large, smooth boulder or a minimalist water feature—at the end of a sightline to draw the eye and provide a central anchor for the entire space.
How to Craft a Natural Playground with Earthy Textures

Why we love this
A natural playground is the antithesis of the bright, plastic ‘cookie-cutter’ play sets we see in every park. We love this approach because it blends seamlessly into the landscape, using the earth’s own materials to inspire movement and discovery. The feel of rough bark under fingertips, the scent of fresh pine needles, and the challenge of balancing on a real cedar log provide a rich, organic experience that fosters resilience and creativity. It’s a playground that grows with the child, offering a beautiful, earthy aesthetic that complements the rest of your garden while providing a wild, wonderful space for play.
Essential Elements:
- Woven willow tunnels or hurdles for navigating.
- Boulders of varying sizes for climbing and sitting.
- A large sand pit framed with natural logs.
- Climbing ropes made from organic jute or sisal.
- Edible plantings like blueberry bushes or wild strawberries.
How to make it
- Map out a ‘flow’ for the playground that encourages continuous movement. Create paths of wood chips that lead from one ‘challenge’ to the next, like from a climbing boulder to a balance log.
- Install a log-framed sand pit. Use 8-inch diameter cedar logs, partially buried and secured with rebar, to create a natural-looking containment area for play sand.
- Create ‘secret passages’ using living willow. Plant willow switches in the spring and weave them together to form tunnels or domes that will leaf out and provide a magical, green hideaway.
- Place ‘clambering boulders’ in groups. Choose rocks with flat tops for sitting and angled sides for climbing, ensuring they are buried at least 1/3 into the ground for absolute stability.
- Integrate ‘grazing’ plants around the perimeter. Plant bushes that offer sensory rewards like the smell of rosemary or the taste of snap peas, teaching kids to interact gently and purposefully with the natural world.
Conclusion: Your Backyard Transformation Starts Today
Transforming your outdoor space from basic to breathtaking is more than just a home improvement project—it’s an investment in your well-being and the memories you’ll create with your loved ones. Whether you choose to start with a simple bird oasis or go all-in on a custom cedar planter project, remember that the most important element is your own personal touch. These viral-worthy designs are just the beginning; your yard is a canvas waiting for your unique story. So, put on your garden boots, step outside, and start building the breathtaking sanctuary you deserve!