
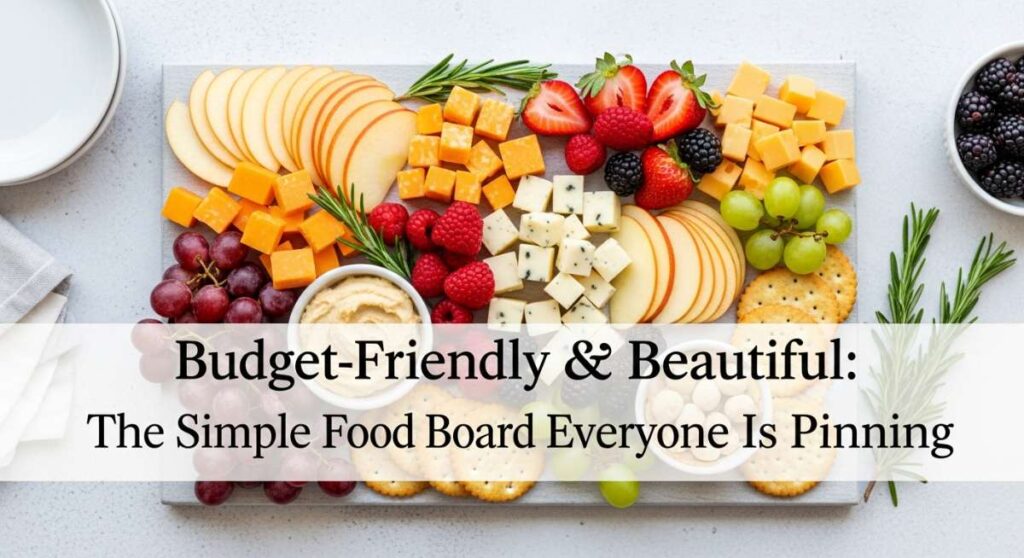
Budget-Friendly & Beautiful: The Simple Food Board Everyone Is Pinning
We’ve all been there—the sun is setting, the golden hour light is pouring through the kitchen window, and friends are due to arrive in less than thirty minutes. You want to serve something that looks like it belongs on a professional Pinterest board, but your bank account and your schedule are asking for a little mercy. That is exactly why I fell in love with the ‘Simple Food Board’ concept. It’s not just about food; it’s about creating a centerpiece of conversation that feels lush and abundant without the stressful price tag of a five-course meal.
The beauty of this approach is in the assembly. By focusing on vibrant colors, varied textures, and seasonal flavors, you can turn humble ingredients like corn, pasta, and seasonal fruits into a visual masterpiece. It’s a low-pressure way to host that allows you to actually spend time with your guests rather than being tethered to the oven. In this guide, I’m sharing the viral building blocks of the ultimate summer food board, from smoky sides to refreshing sips that will have everyone reaching for their phones to snap a photo.
12 Best Cookout Side Dishes (Step-by-Step Guide)

Why we love this
A great cookout is only as good as its sides, and our favorite is a charred Mexican Street Corn Salad that brings a smoky, campfire aroma right to your table. The texture is a delightful contrast between the snap of the flame-toasted corn and the velvet-smooth crumble of salty cotija cheese. As you mix it, the lime juice brightens the earthy scent of chili and cumin, creating a sensory experience that feels like a summer festival in every bite. It’s hearty enough to be satisfying but light enough to leave room for the main event, making it a staple for any outdoor gathering.
Ingredients
- 4 cups fresh sweet corn kernels (about 5-6 ears)
- 2 tablespoons unsalted butter or vegetable oil
- 1/4 cup Mexican crema or sour cream
- 2 tablespoons mayonnaise
- 1/2 cup crumbled Cotija cheese
- 1/2 cup chopped fresh cilantro
- 1 teaspoon chili powder
- 1 clove garlic, minced
- 1 lime, juiced and zested
- Salt and pepper to taste
How to make it
- Prepare the Corn: If using fresh ears, remove the husks and silks. Use a sharp knife to carefully shave the kernels off the cob into a large bowl.
- Charring the Kernels: Heat a large cast-iron skillet over medium-high heat. Add the butter or oil. Once shimmering and hot, add the corn in a single layer. Let it sit undisturbed for 2-3 minutes until the bottom kernels are golden brown and charred. Toss and continue cooking for another 4 minutes until the corn is tender and slightly blackened in spots.
- Visual Cues: Look for a deep golden-brown color and listen for a slight ‘popping’ sound, which indicates the sugars are caramelizing.
- Prepare the Sauce: In a separate small bowl, whisk together the crema, mayonnaise, minced garlic, lime juice, lime zest, and chili powder until smooth.
- Combine: While the corn is still warm, pour the sauce over it. The residual heat will help the flavors meld and the cheese soften slightly.
- Final Flourish: Fold in the chopped cilantro and crumbled Cotija cheese. Season with salt and pepper. Serve warm or at room temperature for the best flavor profile.
7 Refreshing Summer Cocktails (Step-by-Step Guide)
Why we love this
Nothing screams summer like a Sparkling Peach and Thyme Sangria, a drink that smells like a sun-drenched orchard. The fragrance of ripe, fuzzy peaches hits you first, followed by the subtle, woody aroma of fresh thyme sprigs. As the bubbles from the sparkling wine dance on your tongue, the sweetness of the fruit is balanced by the herbal notes, creating a sophisticated yet incredibly easy-to-sip beverage. It looks stunning in a glass pitcher, with the pale gold liquid and floating fruit slices catching the light and acting as a cooling balm for a hot afternoon.
Ingredients
- 1 bottle (750ml) chilled Pinot Grigio or Sauvignon Blanc
- 1 cup peach schnapps or peach brandy
- 2 cups sparkling water or club soda
- 3 large peaches, thinly sliced
- 5-6 sprigs of fresh thyme
- 1/2 cup fresh raspberries (for color)
- Ice for serving
How to make it
- Macerate the Fruit: Place the sliced peaches and thyme sprigs in the bottom of a large glass pitcher. Pour the peach schnapps over them and let them sit at room temperature for 15 minutes to draw out the natural juices.
- Combine the Base: Pour the chilled white wine over the fruit mixture. Use a long spoon to gently stir the fruit so the thyme releases its oils without breaking the leaves.
- Chill: Place the pitcher in the refrigerator for at least 2 hours. This timing is crucial for the flavors to fuse; if you skip this, the drink will taste like wine and fruit separately rather than a cohesive cocktail.
- Adding the Bubbles: Just before guests arrive, add the raspberries and top the pitcher with the sparkling water. This ensures the carbonation is at its peak when served.
- Serving: Fill highball glasses with ice. Pour the sangria, making sure each glass gets a few slices of peach and a sprig of thyme for a professional, ‘viral’ presentation.
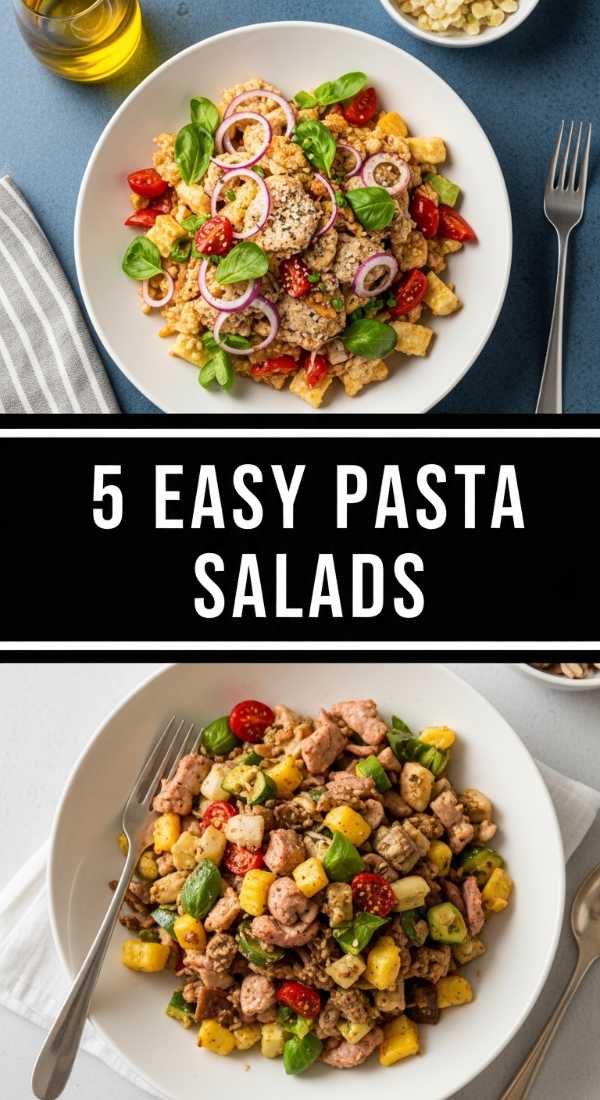
5 Easy Summer Pasta Salads (Step-by-Step Guide)

Why we love this
A Lemon-Herb Orzo Salad is the ultimate ‘food board’ companion because it stays fresh for hours and offers a vibrant, zesty aroma that awakens the palate. The texture of the tiny, rice-shaped pasta is silky and light, especially when paired with the crunch of cucumber and the briny pop of kalamata olives. Every forkful feels like a trip to the Mediterranean coast, with the scent of fresh dill and parsley lingering in the air. It’s a versatile dish that provides a bright, acidic counterpoint to heavier grilled meats, keeping the board feeling balanced and energized.
Ingredients
- 16 oz orzo pasta
- 1/2 cup extra virgin olive oil
- 1/4 cup fresh lemon juice (about 2 lemons)
- 1 cup cherry tomatoes, halved
- 1 English cucumber, diced
- 1/2 cup red onion, finely minced
- 1/2 cup crumbled feta cheese
- 1/4 cup fresh dill, chopped
- Salt and cracked black pepper
How to make it
- Boil the Pasta: Bring a large pot of heavily salted water to a rolling boil. Add the orzo and cook for 8-9 minutes. Aim for ‘al dente’—the pasta should have a slight bite. If overcooked, it will become mushy when the dressing is added.
- Drain and Cool: Drain the orzo in a fine-mesh sieve and rinse under cold water immediately. This stops the cooking process and removes excess starch, preventing the pasta from clumping together.
- Whisk the Vinaigrette: In a large mixing bowl, whisk together the olive oil, lemon juice, salt, and pepper until the mixture emulsifies and turns slightly opaque.
- Assembly: Add the cooled orzo to the bowl and toss to coat. Fold in the tomatoes, cucumbers, and red onions. These vegetables add the necessary moisture and crunch.
- Garnish: Just before serving, gently fold in the feta and fresh dill. Using fresh herbs instead of dried is the secret to that ‘viral’ bright green look and garden-fresh aroma.
10 Healthy Summer Dinner Ideas (Step-by-Step Guide)

Why we love this
Sheet Pan Lemon Garlic Salmon with Asparagus is the definition of effortless elegance. The aroma of roasting garlic and caramelizing lemon slices fills the house, signaling a meal that is as nutritious as it is beautiful. The salmon develops a tender, flake-away texture with a slightly crisp top, while the asparagus retains a satisfying snap and a nutty, charred flavor. It’s a clean-eating dream that looks like a rainbow on the tray, making it perfect for a healthy food board centerpiece that won’t leave you feeling weighed down in the summer heat.
Ingredients
- 4 salmon fillets (6 oz each)
- 1 lb thin asparagus, woody ends trimmed
- 3 tablespoons olive oil
- 3 cloves garlic, minced
- 1 lemon, thinly sliced into rounds
- 1 tablespoon fresh parsley, chopped
- Salt, pepper, and a pinch of paprika
How to make it
- Preheat and Prep: Set your oven to 400°F (200°C). Line a large rimmed baking sheet with parchment paper to prevent sticking and make cleanup a breeze.
- Season the Salmon: Pat the salmon fillets dry with a paper towel. This is essential for getting a good sear in the oven. Rub each fillet with 1 tablespoon of olive oil, minced garlic, salt, pepper, and paprika.
- Arrange the Tray: Place the salmon in the center of the pan. Toss the asparagus in the remaining olive oil and spread it in a single layer around the fish.
- Add Aromatics: Top each piece of salmon with 1-2 lemon slices. The juice will steam into the fish while the rinds provide a deep, concentrated citrus aroma.
- Roast: Bake for 12-15 minutes. The salmon is done when it reaches an internal temperature of 145°F and flakes easily with a fork. The asparagus should be bright green with slightly charred tips.
8 Best Summer Grilling Recipes (Step-by-Step Guide)

Why we love this
Nothing beats the primal, mouth-watering scent of Grilled Balsamic Glazed Flank Steak hitting the hot grates. The steak develops a gorgeous, dark crust that tastes of deep molasses and sharp vinegar, while the inside remains buttery and tender. It’s a showstopper for a food board, especially when sliced thinly against the grain to reveal a perfect pink center. The combination of the smoky grill char and the sweet-and-sour glaze creates a flavor profile that is bold, sophisticated, and guaranteed to have your guests asking for the recipe before the night is over.
Ingredients
- 1.5 – 2 lbs flank steak
- 1/4 cup balsamic vinegar
- 2 tablespoons soy sauce
- 1 tablespoon honey
- 2 cloves garlic, smashed
- 1 teaspoon dried oregano
- 1/2 cup olive oil
How to make it
- Marinate: Whisk the balsamic vinegar, soy sauce, honey, garlic, and oregano in a bowl. Slowly whisk in the olive oil. Place the steak in a gallon-sized bag with the marinade and refrigerate for at least 4 hours (overnight is better for maximum tenderness).
- Temper the Meat: Remove the steak from the fridge 30 minutes before grilling. Bringing the meat to room temperature ensures it cooks evenly.
- High Heat Searing: Preheat your grill to high heat (about 450°F). Clean and oil the grates. Sear the steak for 5-6 minutes per side.
- Visual Cues: You are looking for a deep brown, almost blackened exterior crust. Do not move the meat while it sears to ensure clear, professional grill marks.
- The Rest: This is the most important step! Transfer the steak to a cutting board and let it rest for 10 minutes. This allows the juices to redistribute so they don’t run out when you slice it.
- Slice: Always slice against the grain (perpendicular to the muscle fibers) into thin strips for the most tender bite.
9 Simple Picnic Food Ideas (Step-by-Step Guide)

Why we love this
For a portable board experience, Caprese Skewers with a Balsamic Reduction are the ultimate finger food. They capture the essence of a summer garden in one bite: the milky softness of fresh mozzarella, the juicy burst of a sun-ripened cherry tomato, and the spicy, peppery scent of fresh basil. Drizzled with a thick, syrupy balsamic glaze, they look like jewels on a platter. The simplicity is what makes them viral—they require no cooking, yet they offer a refined, gourmet aesthetic that feels incredibly thoughtful and high-end.
Ingredients
- 1 pint cherry tomatoes
- 8 oz fresh mozzarella pearls (ciliegine)
- 1 bunch fresh large basil leaves
- 1/2 cup balsamic glaze (store-bought or homemade)
- Wooden toothpicks or small skewers
How to make it
- Assembly Line: Wash the tomatoes and basil. Pat them dry completely—moisture is the enemy of a good presentation here.
- Layering: Thread a cherry tomato onto the toothpick, followed by a basil leaf (folded in half if it’s large), and finish with a mozzarella pearl.
- Pro Tip: Position the basil leaf so it ‘hugs’ the mozzarella; this keeps the leaf from wilting and ensures the aroma is released when the guest picks it up.
- Plating: Arrange the skewers in a circular pattern on your board or platter, leaving space in the center for a dipping bowl or extra garnish.
- The Glaze: Just before serving, drizzle the balsamic glaze in a zigzag motion across the skewers. If you do this too early, the white mozzarella will turn brown and lose its visual appeal.
6 Best Beach Food Ideas (Step-by-Step Guide)

Why we love this
Beach food needs to be hydrating, refreshing, and easy to handle with sandy fingers, which is why Tropical Fruit Skewers with a Honey-Lime Dip are a total game changer. The scent of fresh pineapple and mango instantly transports you to a tropical paradise, while the cool, juicy texture provides a much-needed reprieve from the afternoon sun. The dip, made with tangy Greek yogurt and bright lime zest, adds a creamy richness that makes the fruit feel like a decadent dessert rather than just a snack. It’s colorful, healthy, and perfectly portable.
Ingredients
- 1 fresh pineapple, cubed
- 2 ripe mangos, cubed
- 1 lb large strawberries, hulled
- 2 kiwis, peeled and sliced
- 1 cup plain Greek yogurt
- 1 tablespoon honey
- 1 teaspoon lime zest
How to make it
- Prep the Fruit: Cut all fruit into uniform 1-inch cubes. Uniformity is key for that ‘Pinterest’ look. For the strawberries, keep them whole if they are medium-sized.
- Skewer: Alternate colors on long wooden skewers—start with the yellow pineapple, then the orange mango, the green kiwi, and the red strawberry for a rainbow effect.
- Whisk the Dip: In a small bowl, combine the Greek yogurt, honey, and lime zest. Stir until the honey is fully incorporated and the dip is smooth.
- Chill: Place both the skewers and the dip in a cooler or refrigerator. Serving these ice-cold is the secret to their refreshing appeal.
- Beach Tip: If packing for the beach, place the skewers in a large airtight container and the dip in a separate jar. Keep them nestled against ice packs until the moment you’re ready to eat.
10 Easy Summer Crockpot Recipes (Step-by-Step Guide)

Why we love this
Slow Cooker BBQ Pulled Chicken is the ultimate ‘set it and forget it’ protein for a large summer board. As it cooks throughout the day, the sweet and tangy aroma of BBQ sauce and caramelized onions fills the air, creating a mouth-watering anticipation. The chicken becomes so tender it practically melts at the touch of a fork, soaking up all the smoky juices. It’s perfect for ‘build-your-own’ slider boards, allowing guests to customize their sandwiches with slaw and pickles while you stay cool and out of the kitchen.
Ingredients
- 2 lbs boneless skinless chicken breasts
- 1.5 cups of your favorite BBQ sauce
- 1/4 cup apple cider vinegar
- 1 tablespoon brown sugar
- 1 teaspoon garlic powder
- 1 small onion, diced
How to make it
- Layering the Base: Place the diced onions at the bottom of the slow cooker. This prevents the chicken from sticking and adds a deep, savory flavor to the sauce.
- Adding the Meat: Lay the chicken breasts over the onions in a single layer.
- The Sauce: In a small bowl, mix the BBQ sauce, apple cider vinegar, brown sugar, and garlic powder. Pour this mixture over the chicken, ensuring every piece is completely covered.
- Slow Cooking: Cover and cook on LOW for 6-7 hours or on HIGH for 3-4 hours. Pro tip: Always cook chicken on low if you have the time; it results in a much more tender, pull-apart texture.
- Shredding: Once the chicken is cooked (internal temp of 165°F), remove it to a large bowl. Use two forks to shred the meat.
- Final Soak: Return the shredded chicken to the crockpot and toss it with the juices and sauce for another 15 minutes to ensure every strand is moist and flavorful.
7 Fun Baseball Snack Ideas (Step-by-Step Guide)

Why we love this
Homemade Soft Pretzel Bites with a Warm Beer Cheese Dip are the ultimate crowd-pleaser that brings the stadium vibe right to your backyard. There is nothing like the smell of yeasty, freshly baked bread combined with the sharp, savory scent of melted cheddar. These bites have a classic chewy, golden-brown crust and a soft, pillowy interior that is perfect for dipping. They add a rustic, ‘pub-style’ element to your food board that feels cozy and nostalgic, making them the first thing to disappear during the big game.
Ingredients
- 1 tube of refrigerated pizza dough
- 1/4 cup baking soda
- 2 cups water
- 1 egg, beaten
- Coarse sea salt
- For the dip: 2 cups shredded sharp cheddar, 1/2 cup milk, 1/4 cup mild beer (lager works best).
How to make it
- The Dough: Roll out the pizza dough and cut it into 1-inch squares. They don’t have to be perfect; the rustic look is part of the charm.
- The Alkaline Bath: Bring the 2 cups of water and 1/4 cup of baking soda to a simmer. Drop the dough bites into the water for 30 seconds. This step is what gives them that authentic ‘pretzel’ crust and flavor.
- Baking Prep: Place the boiled bites on a parchment-lined sheet. Brush each with the beaten egg wash and sprinkle generously with coarse salt.
- Baking: Bake at 425°F for 8-10 minutes or until they are a deep, dark golden brown.
- The Cheese Dip: While the pretzels bake, whisk the milk and beer in a saucepan over medium-low heat. Slowly add the cheese, whisking constantly until smooth and bubbly. Never let the cheese boil, or it will become grainy.
- Serve: Arrange the warm bites in a basket on your board with the cheese dip in the center for easy dipping.
5 Best Kabobs On The Grill (Step-by-Step Guide)
[IMAGE_10]
Why we love this
Honey Garlic Shrimp and Pineapple Kabobs offer a stunning visual contrast of pink, gold, and green that pops against any serving board. The aroma is an intoxicating mix of sweet honey, pungent garlic, and the caramelized scent of grilled pineapple. Each bite delivers a burst of tropical sweetness followed by the savory, slightly charred snap of the shrimp. They are light, sophisticated, and incredibly quick to cook, making them the perfect ‘fast-finish’ item to add to your board just as people are starting to gather.
Ingredients
- 1 lb large shrimp, peeled and deveined
- 1 fresh pineapple, cut into chunks
- 1 red bell pepper, cut into squares
- Marinade: 1/4 cup honey, 3 tablespoons soy sauce, 2 cloves minced garlic, 1 tablespoon fresh ginger, grated.
How to make it
- Soak the Skewers: If using wooden skewers, soak them in water for at least 30 minutes to prevent them from burning on the grill.
- Marinate the Shrimp: Whisk the honey, soy sauce, garlic, and ginger together. Toss the shrimp in half of the mixture for 15 minutes. Reserve the other half for basting.
- Assembly: Thread the shrimp, pineapple, and bell pepper onto the skewers. Alternate the colors for the best visual impact.
- Grilling: Heat your grill to medium-high. Clean the grates thoroughly.
- Timing: Grill the kabobs for 2-3 minutes per side. Shrimp cook very quickly; they are done when they turn opaque and form a ‘C’ shape. Do not overcook, or they will become rubbery.
- Baste: During the last minute of grilling, brush the reserved marinade over the kabobs to create a sticky, glossy finish that glows on the food board.
The Secret to a Viral Summer Board
Creating a beautiful food board isn’t about being a professional chef; it’s about the joy of assembly and the celebration of seasonal ingredients. By combining these different elements—the smoky corn, the refreshing cocktails, and the perfectly grilled meats—you create a landscape of food that invites people to linger, taste, and enjoy. The best boards are those that reflect your personal style and the ease of summer living. So, grab a platter, pick a few of these guides, and start building your own Pinterest-worthy masterpiece today!