

10-Minute Food Board Hacks That Are Taking Over the Internet
We’ve all been there: the sun is setting, your friends are texting that they’re ten minutes away, and your kitchen feels more like a storage unit than an entertaining space. There is a specific kind of magic that happens when you stop worrying about the perfect three-course meal and start embracing the art of the ‘board.’ It’s about more than just food; it’s about that collective exhale when everyone gathers around a colorful spread, reaching for a roasted carrot or a charred pepper while sharing the highlights of their week. These simple, viral food board hacks are designed to transform humble vegetables into the star of the show without spending hours over a hot stove.
The secret to a truly viral food board isn’t expensive ingredients—it’s the textures and the ‘wow’ factor of perfectly prepared produce. When you master the art of the 10-minute roast or the perfect char, you’re not just serving food; you’re creating an experience. I’ve found that nothing brings people together quite like a board filled with steaming, seasoned, and vibrant vegetables that look like they came straight out of a professional kitchen. Let’s dive into the techniques that will make your next gathering effortless and unforgettable.
How to roast crispy vegetables

Why we love this
There is nothing quite like the satisfying crunch of a perfectly roasted vegetable that shatters slightly before giving way to a tender, buttery interior. When vegetables hit that high-heat sweet spot, they undergo a transformation where the natural sugars caramelize into a deep, savory crust that smells like a rustic autumn evening. We love this because it turns the simplest pantry staples into gold-standard snacks that disappear off a food board in seconds. The contrast between the salty, crispy exterior and the soft heart of the vegetable provides a sensory experience that feels both indulgent and wholesome at the same time.
Ingredients
- 2 lbs mixed vegetables (Brussels sprouts, cauliflower, or potatoes)
- 3 tbsp high-smoke point oil (avocado or grapeseed oil)
- 1 tsp sea salt
- 1/2 tsp cracked black pepper
- 1 tsp garlic powder
How to make it
- Preheat your oven to a staggering 425°F (220°C). High heat is the non-negotiable secret to achieving crispiness rather than sogginess; if the oven isn’t hot enough, the vegetables will steam in their own moisture.
- Dry your vegetables thoroughly after washing. Use a clean kitchen towel or paper towels to wick away every drop of water, as moisture is the enemy of the crunch.
- Cut the vegetables into uniform sizes to ensure they finish cooking at the same time. For Brussels sprouts, halve them; for cauliflower, break them into bite-sized florets with flat edges.
- In a large bowl, toss the vegetables with the oil and seasonings. You want a thin, even sheen on every piece—not a puddle at the bottom of the bowl.
- Spread the vegetables on a heavy-duty sheet pan, ensuring they are in a single layer with space between them. If they are crowded, they will steam; give them room to breathe.
- Roast for 20-25 minutes. At the halfway mark, use a metal spatula to aggressively flip and rotate the pieces. You are looking for deep golden-brown edges and a visible shrink in size, indicating the water has evaporated and the flavor has concentrated.
How to make perfect broccoli

Why we love this
Perfect broccoli is a revelation; it should never be the mushy, dull green side dish we remember from school cafeterias. Instead, it should be a vibrant, emerald masterpiece with slightly charred, nutty tips and a stalk that still retains a gentle snap. The aroma of toasted broccoli, especially when paired with a hint of garlic or lemon, is incredibly appetizing and brings a fresh, earthy element to any food board. It’s the kind of vegetable that makes you realize how delicious healthy eating can be when the texture is handled with care and respect.
Ingredients
- 2 large heads of broccoli
- 2 tbsp extra virgin olive oil
- 1/2 lemon, juiced
- 1/4 cup shaved parmesan cheese
- Pinch of red pepper flakes
How to make it
- Start by prepping the broccoli into long, elegant spears rather than tiny florets. Keeping some of the stem attached not only looks beautiful on a board but provides a great textural contrast.
- Bring a large pot of salted water to a rolling boil. Blanch the broccoli for exactly 90 seconds. This ‘shocks’ the color into a bright green and softens the tough fibers of the stem without making them limp.
- Immediately plunge the broccoli into an ice water bath to stop the cooking process. Drain and pat dry extremely well.
- Heat a cast-iron skillet over medium-high heat with a drizzle of oil. Once the pan is shimmering, lay the broccoli spears in the pan.
- Press down slightly with a spatula to create contact with the hot surface. Sear for 2-3 minutes until the edges are blackened and charred.
- Remove from heat, squeeze fresh lemon juice over the top to brighten the flavors, and sprinkle with parmesan and red pepper flakes while the heat is still radiating from the stalks.
How to glaze roasted carrots

Why we love this
Glazed carrots are like the candy of the vegetable world, offering a sophisticated sweetness that pairs beautifully with salty cheeses and cured meats on a food board. The way the glaze clings to the ridges of the carrot, creating a glossy, shimmering finish, makes them look like jewels under the dining room lights. As you bite into them, you experience a syrupy richness followed by the deep, earthy undertones of the roasted root. They bring a necessary warmth and a pop of bright orange color that anchors the visual aesthetic of your entire spread.
Ingredients
- 1 bunch of rainbow carrots (tops trimmed)
- 2 tbsp honey or maple syrup
- 1 tbsp balsamic glaze
- 1 tbsp melted butter
- Fresh thyme sprigs
How to make it
- Preheat your oven to 400°F (200°C). If using thick carrots, slice them in half lengthwise; if using slender garden carrots, leave them whole for a more rustic look.
- Whisk together the honey, melted butter, and a pinch of salt in a small ramekin. This creates the base of your lacquer.
- Place the carrots on a parchment-lined baking sheet and toss with half of the honey-butter mixture. Do not add the balsamic yet, as the high sugar content can burn too quickly.
- Roast for 15 minutes until the carrots are just starting to soften and the edges show a hint of color.
- Remove the pan and drizzle the remaining honey mixture and the balsamic glaze over the carrots. Use tongs to roll them around, ensuring they are fully coated in the bubbling liquid.
- Return to the oven for another 5-7 minutes. Watch closely; you want the glaze to reduce into a sticky, thick coating that adheres to the carrots. Finish with fresh thyme for an aromatic herbal lift.
How to blend vegetable soup

Why we love this
A silky, blended vegetable soup served in small dipping bowls is the ultimate ‘secret weapon’ for a viral food board. It adds a layer of creamy comfort and a dip-like functionality that encourages guests to dunk crusty bread or roasted florets into its velvety depths. The aroma of simmered aromatics and slow-cooked vegetables concentrated into a single spoonful is incredibly soothing. Its smooth, consistent texture acts as a palate cleanser against the crunchier items on the board, making the whole eating experience feel balanced and professionally curated.
Ingredients
- 4 cups roasted vegetables (butternut squash, carrots, or peppers)
- 2 cups vegetable broth
- 1/2 cup heavy cream or coconut milk
- 2 cloves sautéed garlic
- 1 tsp smoked paprika
How to make it
- Ensure your vegetables are already roasted or sautéed until very soft; raw vegetables will never yield that professional, silky-smooth finish.
- Place the warm vegetables into a high-speed blender. Avoid filling the blender more than halfway to prevent pressure buildup from the heat.
- Add the garlic and smoked paprika. Pour in half of the vegetable broth to start. It is always better to start thick and thin it out later than to end up with a watery soup.
- Start the blender on the lowest setting and gradually increase to the highest speed. Blend for at least 60 seconds. This long blending time breaks down the plant fibers completely, creating a ‘velouté’ texture.
- While the blender is running on low, slowly stream in the cream or coconut milk. This emulsifies the fats into the puree, giving it a glossy sheen and a rich mouthfeel.
- Taste and adjust seasoning with salt and pepper. Pour into small aesthetic ramekins or jars and place them directly onto your food board for easy dipping.
How to season roasted vegetables

Why we love this
Seasoning is where the soul of the dish lives; it’s the difference between a bland side and a viral sensation. We love the process of layering flavors—the way a pinch of salt draws out moisture, or how a dusting of smoked paprika can transport your senses to a campfire in the Mediterranean. When vegetables are seasoned correctly, every bite is an explosion of flavor that evolves on the tongue. It creates an irresistible aroma that fills the house, signaling to your guests that something truly special is about to be served.
Ingredients
- Mixed vegetables
- Kosher salt and cracked black pepper
- Dry rub: Oregano, cumin, and onion powder
- Finishing touch: Flaky sea salt and lemon zest
- High-quality olive oil
How to make it
- The first step to seasoning is ‘The Dry Phase.’ Pat your vegetables bone-dry so the oil and spices can actually stick to the surface rather than sliding off into a puddle of water.
- Apply your fat source. Drizzle the oil and use your hands to massage it into every nook and cranny of the vegetables. This ensures the seasoning is distributed evenly.
- Season from a height. Hold your salt and spices about 12 inches above the bowl as you sprinkle. This ‘waterfall’ technique prevents clumps of spice and ensures every piece of produce gets equal love.
- Don’t be afraid of salt. Vegetables, especially root varieties, need more salt than you think to unlock their natural sweetness. Use Kosher salt during the cooking phase as its grains are easier to control.
- Add ‘Hard Herbs’ early. If using rosemary or thyme, toss them in before roasting so their oils infuse into the vegetables under the heat.
- The ‘Finish’: Once the vegetables come out of the oven, immediately hit them with a spray of lemon zest and a pinch of flaky sea salt (like Maldon). The heat of the veggies will release the citrus oils, creating a bright, professional aroma.
How to roast root vegetables

Why we love this
Root vegetables are the sturdy, reliable heart of a food board, offering a dense, satisfying chew and a rich, earthy sweetness that feels incredibly grounding. There is something deeply comforting about the sight of golden parsnips, purple beets, and russet potatoes all tumbled together in a rustic display. We love the way they hold heat, staying warm on the board longer than thinner vegetables, and how they provide a perfect vessel for savory dips or herb-infused oils. They represent the bounty of the earth in its most concentrated, delicious form.
Ingredients
- 3 lbs mixed roots (beets, parsnips, sweet potatoes, radishes)
- 3 tbsp melted duck fat or olive oil
- 4 cloves smashed garlic
- 2 sprigs rosemary
- Coarse sea salt
How to make it
- Preheat your oven to 400°F (200°C). Root vegetables are dense, so they need a slightly lower temperature than ‘crispy’ veg to ensure the inside cooks through before the outside burns.
- Peel the vegetables if the skins are tough (like beets), but leave skins on for parsnips and potatoes for extra texture and nutrients.
- Cut all vegetables into 1-inch cubes. Uniformity is the key here; if the beet chunks are twice the size of the parsnips, you’ll end up with raw beets and burnt parsnips.
- Toss the roots in a bowl with your fat of choice. Duck fat provides a professional, restaurant-quality richness, but olive oil works beautifully for a lighter touch.
- Add the smashed garlic cloves and rosemary sprigs directly to the pan. They will perfume the oil as it roasts, infusing the vegetables with a subtle, sophisticated fragrance.
- Roast for 35-45 minutes. Every 15 minutes, give the pan a good shake. You’ll know they are done when a fork slides into the largest piece with zero resistance and the exteriors look like burnished gold.
How to char mediterranean vegetables

Why we love this
Charring is an art form that brings a sophisticated, smoky edge to Mediterranean favorites like bell peppers, zucchini, and eggplant. We love that blackened, blistered skin because it signifies a deep, complex flavor profile that mimics the intensity of an outdoor grill. It transforms the texture of the vegetables into something silky and supple, while the charred bits provide little bursts of bitter, smoky contrast to the sweet flesh. It’s a technique that looks effortlessly ‘chef-inspired’ and adds a vibrant, rustic visual to your board.
Ingredients
- 2 bell peppers (sliced)
- 2 zucchinis (sliced into rounds)
- 1 large eggplant (cubed)
- 3 tbsp olive oil
- 1 tsp dried oregano
- 1 tbsp red wine vinegar
How to make it
- Heat a heavy cast-iron griddle or skillet over high heat until it is nearly smoking. You need intense, direct heat to achieve a char without overcooking the interior into mush.
- Lightly coat your sliced vegetables in oil and oregano. Do not oversaturate them; you want them to sear, not deep-fry.
- Place the vegetables in the pan in a single layer. Do not move them! This is the hardest part. You must leave them undisturbed for 3-4 minutes to allow the sugars to blacken against the hot metal.
- Once a deep, dark char has formed, flip the pieces. The second side will cook faster, usually in about 2 minutes.
- Look for the ‘blister’—the skin of the peppers should look slightly puckered and blackened in spots.
- Remove the vegetables and, while they are still steaming, drizzle with a splash of red wine vinegar. The acidity will cut through the char and brighten the entire dish instantly.
How to prep sheetpan vegetables

Why we love this
Efficiency is the ultimate luxury for a busy host, and the sheetpan prep method is the king of kitchen hacks. We love this because it minimizes cleanup while maximizing the variety of flavors you can offer on a single board. It’s incredibly satisfying to see a rainbow of vegetables laid out in neat rows, ready to be transformed by the oven’s heat. This method ensures that every element of your board is cooked to perfection and ready at the exact same time, allowing you to spend less time at the counter and more time with your guests.
Ingredients
- Asparagus, cherry tomatoes, red onion, and snap peas
- Olive oil cooking spray
- Lemon slices
- 1 tsp garlic salt
- Fresh parsley for garnish
How to make it
- The key to a successful sheetpan is ‘The Zoning Method.’ Group vegetables with similar cook times together. Put the denser onions on one side and the delicate asparagus on the other.
- Use a large, rimmed baking sheet. If the vegetables are falling off the edges, you’re using too small a pan.
- Prep the vegetables by cutting them into ‘finger-food’ shapes—long stalks of asparagus, thick wedges of onion, and whole cherry tomatoes that will burst in the oven.
- Instead of tossing in a bowl, lay them directly on the pan and use an olive oil spray. This provides a very fine, even coating that helps with browning without making the bottom of the veg soggy.
- Place lemon slices tucked between the vegetables. As they roast, the juice will caramelize and seep into the surrounding produce.
- Roast at 400°F (200°C) for 12-15 minutes. This ‘quick-roast’ keeps the vegetables snap-fresh and prevents them from losing their vibrant colors. Garnish with parsley before sliding them onto the board.
How to make garlic vegetables
Why we love this
Garlic is the universal language of deliciousness, and when it’s properly infused into vegetables, it creates an aroma that is virtually impossible to resist. We love the way the garlic mellows as it cooks, turning from sharp and pungent to sweet, buttery, and golden. It adds a savory depth that clings to every crevice of the vegetables, making each bite feel hearty and complete. Whether it’s slivers of toasted garlic or a rich garlic-infused oil, this technique ensures your food board will be the most talked-about part of the evening.
Ingredients
- 1 lb green beans or broccolini
- 6 cloves of garlic (thinly sliced)
- 2 tbsp butter
- 1 tbsp olive oil
- Pinch of red pepper flakes
How to make it
- The biggest mistake in garlic prep is burning it. To avoid this, use the ‘Cold Start’ method for the oil. Place your sliced garlic and olive oil in a cold pan.
- Turn the heat to medium-low. As the pan warms up, the garlic gently infuses the oil without browning too quickly. This creates a much deeper garlic flavor.
- Once the garlic starts to sizzle and turns a very pale straw color (about 3 minutes), add your vegetables to the pan.
- Increase the heat to medium-high. Add the butter and a splash of water (about 2 tablespoons). Immediately cover the pan with a lid for 2 minutes. This steams the vegetables through using the garlic-infused butter-water.
- Remove the lid and sauté for another 3 minutes until the water has evaporated and the vegetables are glazed in the garlic butter.
- The garlic slices should now be golden and crisp. Toss with red pepper flakes and serve immediately while the aroma is at its peak.
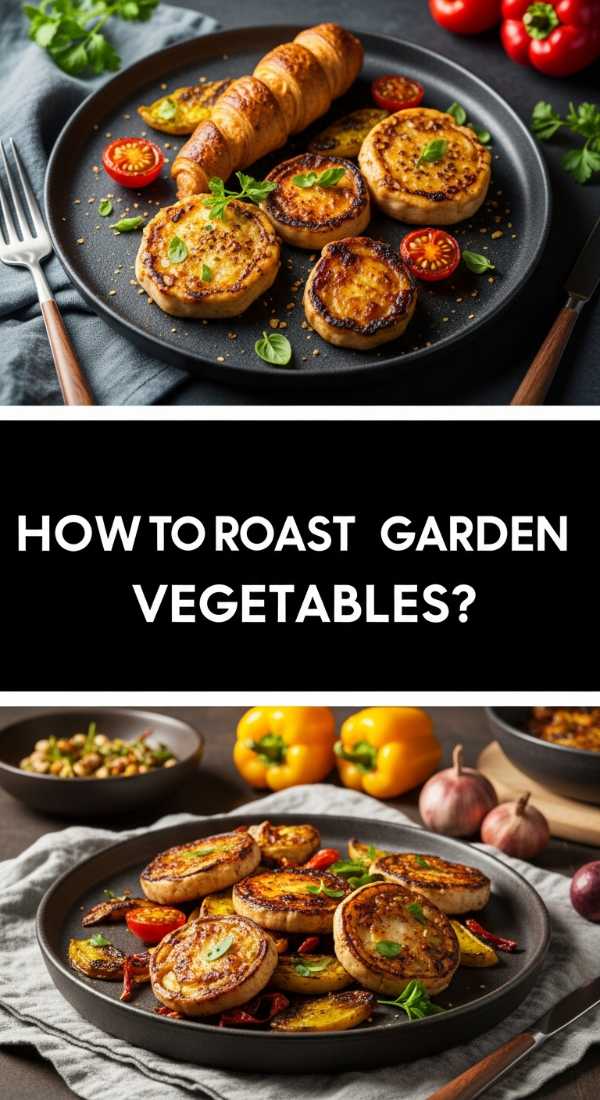
How to roast garden vegetables
[IMAGE_10]
Why we love this
There is a delicate, ephemeral beauty to roasting vegetables that are at the peak of their season. Whether they came from a local farmer’s market or your own backyard, garden vegetables have a sweetness and a snap that can’t be beat. We love this approach because it’s about minimal intervention; it’s about letting the natural flavor of a sun-ripened squash or a fresh radish shine through. The result is a board that feels fresh, light, and deeply connected to the cycle of the seasons, providing a colorful and nourishing centerpiece for any gathering.
Ingredients
- Summer squash, radishes, baby leeks, and heirloom tomatoes
- Light avocado oil
- Sea salt and white pepper
- Handful of fresh basil and mint
How to make it
- Treat these vegetables with a ‘light touch.’ Because they are often more hydrated and delicate than store-bought produce, they don’t need aggressive roasting.
- Preheat the oven to 375°F (190°C). This gentler heat preserves the delicate cell structures of summer squash and heirloom varieties.
- Slice the squash into thick rounds and the radishes in half. Keep the baby leeks whole but trim the very tops.
- Lightly coat in avocado oil and season with sea salt and a pinch of white pepper. White pepper provides a floral heat that doesn’t overpower the garden-fresh taste.
- Roast for 15-18 minutes. You aren’t looking for a heavy char here; you want the vegetables to be just tender and glistening.
- Remove from the oven and immediately scatter a handful of torn basil and mint over the hot vegetables. The residual heat will wilt the herbs just enough to release their perfume without turning them black, creating a fresh, garden-inspired finish.
The Final Word on the 10-Minute Board
Building a viral food board is less about following a rigid recipe and more about embracing the joy of fresh ingredients and simple techniques. By mastering these ten-minute hacks—from the perfect char to the silkiest blend—you can create a spread that is as beautiful to look at as it is delicious to eat. Remember, the best boards are the ones that reflect your personal style and the season’s best offerings. So, grab a tray, heat up that oven, and get ready to wow your guests with a vegetable feast that looks like it took hours but only took minutes.