

There is a profound, almost mystical shift that happens the moment you step out of your back door and into a space that feels like it belongs to another world. We spend so much of our lives rushing through concrete jungles and digital screens that we often forget the healing power of the earth beneath our fingernails and the scent of blooming jasmine on a warm evening breeze. Creating a garden sanctuary isn’t just about landscaping; it’s about crafting a slow-living retreat where time feels suspended and the soul can finally breathe.
I remember the first time I truly felt the ‘oasis’ effect in my own backyard. It started with a single terracotta pot and a packet of lavender seeds, but it grew into a daily ritual of connection. Whether you have a sprawling estate or a tiny urban balcony, the magic of gardening lies in the details—the way the morning light hits a dew-covered leaf or the satisfaction of harvesting a tomato that actually tastes like sunshine. Let’s dive into the secrets of turning your outdoor space into the ultimate sanctuary.
How to Spark Little Imaginations with Whimsical Gardening Activities

Why we love this
There is nothing quite as enchanting as seeing a garden through the eyes of a child, where every leaf is a roof for a beetle and every pebble is a treasure. Whimsical gardening transforms a simple plot of land into a playground for the imagination, filled with the aroma of crushed mint and the tactile delight of cool, damp moss. It encourages us to slow down, look closer, and appreciate the tiny miracles that happen at ground level, fostering a lifelong bond between the next generation and the natural world.
Essential Elements:
- Miniature wooden doors or fairy houses
- Smooth river stones and acrylic outdoor paints
- Low-growing mosses or ‘baby tears’ plants
- Small decorative lanterns or solar fairy lights
- A dedicated ‘digging corner’ with child-sized wooden tools
How to make it
- Select a secluded, shaded corner of your garden that feels naturally secretive, perhaps nestled under the protective canopy of a large shrub or behind a flowering perennial.
- Clear the area of large debris and lay down a base of soft, fine-textured mulch or sand to create a distinct ‘floor’ for the miniature world.
- Arrange small flat stones to create winding paths that lead to the base of tree trunks or large rocks where you will place your fairy doors.
- Paint stones with bright colors or ladybug patterns using weather-resistant acrylics; allow them to dry completely before nesting them among the foliage.
- Plant soft-textured groundcovers like Irish Moss or Thymus serpyllum to create ‘lawns’ for the imaginary inhabitants, ensuring they are tucked in tightly with fresh potting soil.
- Position the miniature structures and add a sprinkle of ‘pixie dust’ (fine white sand or eco-glitter) to finish the scene, then water gently with a fine-mist spray bottle to avoid disturbing the delicate arrangement.
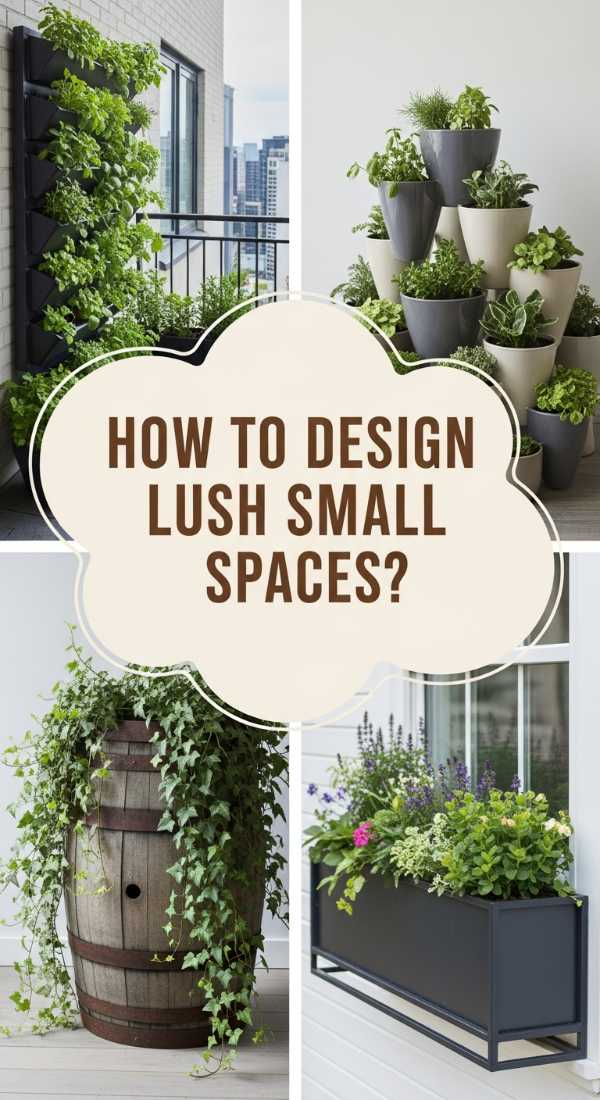
How to Design Lush Small Spaces with Creative Container Gardening Ideas
Why we love this
Small space gardening is an exercise in intentionality, allowing you to curate a dense, lush environment where every plant is chosen for its specific beauty and fragrance. There is a unique intimacy in a container garden; you can brush against the velvety leaves of a dusty miller or inhale the spicy scent of potted carnations without even bending down. It turns a balcony or a small patio into a multi-dimensional tapestry of textures and colors that feels both manageable and magnificently overflowing.
Essential Elements:
- A variety of containers in different heights (terracotta, glazed ceramic, or wooden crates)
- High-quality, well-draining organic potting mix
- Slow-release organic fertilizer granules
- Vertical elements like small obelisks or wall-mounted planters
- A mix of ‘thriller, filler, and spiller’ plants
How to make it
- Group your containers in odd numbers (three or five) to create a more natural, aesthetically pleasing cluster that draws the eye across different elevations.
- Ensure every pot has adequate drainage holes; if not, use a masonry bit to carefully drill them to prevent root rot and waterlogged soil.
- Fill the bottom third of large pots with lightweight filler or just more soil, then top with a premium potting mix enriched with compost.
- Follow the ‘Thriller, Filler, Spiller’ rule: place a tall, dramatic plant (like a Canna Lily) in the center, surround it with mid-height ‘fillers’ (like Petunias), and tuck ‘spillers’ (like Creeping Jenny) near the edges to cascade down.
- When planting, gently loosen the root balls of your nursery starts to encourage them to spread into their new home, then firm the soil around them leaving an inch of space at the top for watering.
- Water each container thoroughly until liquid runs out the bottom, then finish with a layer of decorative pebbles or moss to retain moisture and provide a polished look.
How to Master the Chic Gardener Look with the Perfect Gardening Outfit

Why we love this
There is a specific kind of confidence that comes from being dressed perfectly for the task at hand, blending utility with a timeless, rustic aesthetic. Stepping into a high-quality linen apron or pulling on a pair of well-worn leather gloves prepares the mind for the work ahead, making the act of gardening feel like a sacred ceremony. The feel of sturdy, breathable fabrics against the skin and the weight of a sun hat provide a sense of protection and style that makes every moment in the dirt feel like a scene from a romanticized countryside journal.
Essential Elements:
- Breathable linen or heavy-duty cotton canvas apron with multiple pockets
- Wide-brimmed straw or felt hat with a chin strap
- Durable, flexible goatskin or suede gardening gloves
- Ergonomic, waterproof garden clogs or boots
- Lightweight, long-sleeved button-down shirt for sun protection
How to make it
- Start with a base layer of moisture-wicking natural fibers to keep you cool during physical labor, ensuring the fit is loose enough for a full range of motion.
- Don a high-waisted apron and adjust the straps so the weight sits comfortably on your shoulders rather than your neck; use the pockets to keep twine and snips within reach.
- Select gloves that fit snugly but allow for dexterity; if working with roses, ensure they have long gauntlets to protect your forearms from thorns.
- Secure your hair back and place your wide-brimmed hat firmly, ensuring it provides shade not just for your face, but for the back of your neck as well.
- Choose footwear that is easy to slip on and off but offers arch support, especially if you plan on spending hours on your feet or using a heavy shovel.
- Apply a layer of mineral sunscreen to any exposed skin and keep a cotton bandana tied around your neck to wipe away perspiration or provide extra sun coverage as needed.
How to Cultivate Wild Beauty with the Magic of Chaos Gardening

Why we love this
Chaos gardening is the ultimate antidote to the rigid perfectionism of modern life, embracing the wild, untamed spirit of nature where plants find their own perfect niche. There is a breathtaking beauty in a meadow-style patch where poppies, cornflowers, and cosmos mingle in a riot of color, their stems swaying together in the wind. The aroma is a complex bouquet of sweet nectar and green stems, and the sound of bees humming through the ‘chaos’ creates a living, breathing symphony that feels far more vibrant than any manicured lawn.
Essential Elements:
- Regional wildflower seed mix (native species are best)
- A cleared patch of earth with at least 6 hours of sunlight
- Sand (to mix with seeds for even distribution)
- A garden rake and a light mulch or straw
- Patience and a ‘hands-off’ approach
How to make it
- Prepare your ‘chaos’ site by removing existing grass or aggressive weeds, then lightly scuffing the surface of the soil with a rake to create small grooves for the seeds.
- In a large bucket, mix your wildflower seeds with dry sand at a ratio of 1 part seed to 5 parts sand; this helps you see where you’ve thrown the seeds and ensures they aren’t buried too deep.
- Use the ‘scatter method’—literally tossing handfuls of the mix across the soil in a random, sweeping motion to mimic the natural dispersal of seeds in the wild.
- Walk over the area or use a light roller to press the seeds into the soil; most wildflowers need light to germinate, so do not bury them under heavy dirt.
- Water the area with a very gentle mist to avoid washing the seeds away, keeping the soil consistently moist for the first two to three weeks until sprouts appear.
- Once the plants are established, reduce watering and resist the urge to weed out ‘unknowns’ until you are certain they aren’t part of the floral mix, allowing the ecosystem to find its own balance.
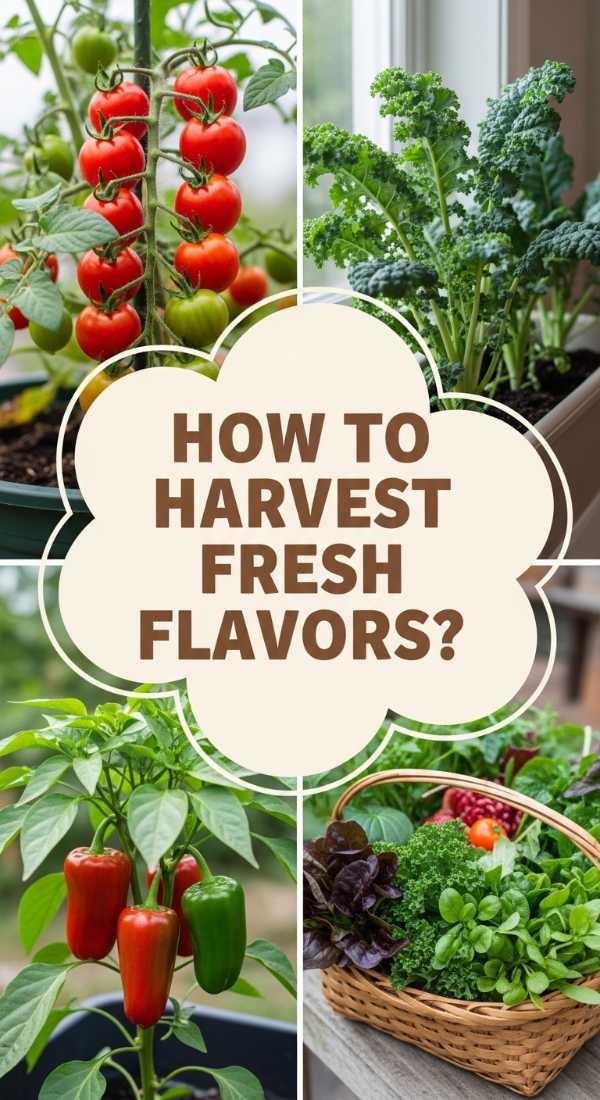
How to Harvest Fresh Flavors with Your Own Container Gardening Vegetables
Why we love this
There is no flavor on earth that compares to a vegetable harvested seconds before it hits the plate, still warm from the sun and bursting with intense, homegrown sugars. Growing vegetables in containers brings the farm to your doorstep, filling the air with the peppery scent of tomato leaves and the sharp brightness of fresh basil. It turns the act of cooking into a direct conversation with your garden, where the crisp snap of a fresh bean or the juicy sweetness of a patio-grown strawberry becomes the highlight of your day.
Essential Elements:
- Large pots (at least 12-15 inches deep)
- Organic vegetable-specific potting soil
- Compact or ‘determinate’ vegetable varieties
- Organic liquid seaweed or fish emulsion fertilizer
- Sturdy tomato cages or bamboo stakes
How to make it
- Select vegetable varieties specifically bred for containers, such as ‘Patio Choice’ tomatoes, ‘Fairytale’ eggplants, or any variety labeled ‘dwarf’ or ‘bush’.
- Fill your large containers with a rich potting mix, leaving space at the top, and mix in a handful of organic granular fertilizer to provide a steady supply of nutrients.
- Plant your seedlings deeper than they were in their nursery pots—especially tomatoes, which will grow extra roots along the buried stem for a stronger foundation.
- Install your stakes or cages immediately after planting to avoid damaging the roots later on, securing the main stems loosely with soft garden twine.
- Place the containers in the sunniest spot available, ideally receiving 8 hours of direct light, and monitor the moisture levels daily as pots dry out much faster than ground soil.
- Feed the plants every two weeks with a diluted liquid fertilizer to support the heavy energy demands of fruit production, and harvest frequently to encourage the plant to keep producing.
How to Extend Your Growing Season with Expert Greenhouse Gardening

Why we love this
Stepping into a greenhouse is like entering a sanctuary where the outside world and its harsh seasons simply do not exist. The air is always warm and thick with the scent of damp earth and life, a humid embrace that feels like a tropical escape even in the middle of autumn. It provides a controlled environment where you can nurture delicate seedlings and experiment with exotic plants, extending the joy of gardening into a year-round pursuit of growth and discovery.
Essential Elements:
- Greenhouse structure (glass, polycarbonate, or high-quality plastic)
- Minimum/Maximum thermometer
- Automated or manual ventilation system (roof vents)
- Sturdy potting benches and shelving
- Shade cloth for high-summer protection
How to make it
- Position your greenhouse in a spot that receives maximum southern exposure, ensuring it is away from the shadow of large buildings or evergreen trees during the winter months.
- Set up a multi-level shelving system to take advantage of vertical space, placing heat-loving plants on higher shelves and those that prefer cooler roots on the floor.
- Install a thermometer that tracks the high and low temperatures of the day; this is critical for knowing when to open vents or when to add a small heater.
- Manage humidity by ‘damping down’—splashing water on the floor or gravel paths during hot days to increase the moisture in the air and cool the environment.
- Maintain strict hygiene by cleaning pots and tools before they enter the greenhouse, as the warm, still air can be a breeding ground for pests like whiteflies and aphids.
- Utilize bubble wrap insulation on the interior walls during the coldest months to trap heat, and rotate your plants regularly to ensure they receive even light distribution from all sides.
How to Achieve Professional Results with Essential Gardening Tools

Why we love this
A master gardener is only as good as the extension of their hands, and high-quality tools turn labor into a rhythmic, satisfying craft. There is a distinct tactile pleasure in the weight of a forged steel trowel or the clean, effortless ‘snip’ of sharp bypass pruners cutting through a woody stem. Investing in well-made tools means less physical strain and more precision, allowing you to work with the soil rather than against it, feeling every vibration of the earth as you cultivate your sanctuary.
Essential Elements:
- High-quality bypass pruners (Swiss or Japanese steel)
- A Hori-Hori (Japanese soil knife)
- A stainless steel hand trowel with an ergonomic handle
- A long-handled garden fork and spade
- A high-volume, soft-spray watering wand
How to make it
- Select tools based on the size of your hand and your physical strength; an ergonomic handle can prevent repetitive strain injuries during long planting sessions.
- Always keep your cutting tools sharp using a whetstone or specialized sharpening tool, as clean cuts heal faster on plants and require less force from you.
- After every use, wipe your tools clean of soil using a stiff brush or a damp cloth to prevent the spread of soil-borne diseases and the buildup of rust.
- Once a season, deep-clean your metal tools and rub the wooden handles with linseed oil to prevent cracking and keep them feeling smooth in your grip.
- Store your tools in a dry, organized space—hanging them on a pegboard or storing them in a bucket of sand mixed with a little mineral oil keeps the edges conditioned.
- Use the Hori-Hori for everything from weeding to planting bulbs; the serrated edge makes it easy to cut through tough roots, while the measurements on the blade help with planting depth.
How to Create Instant Curb Appeal with Vibrant Container Gardening Flowers

Why we love this
Flowers are the jewelry of the home, providing a dazzling first impression that signals a well-loved and vibrant space. The sight of overflowing pots of petunias and snapdragons creates an immediate sense of welcome, while the sweet, honey-like fragrance of alyssum can drift all the way to the sidewalk. Container flowers allow you to change your home’s ‘outfit’ with the seasons, offering a burst of joy and a pop of saturated color that makes the transition from the street to your sanctuary feel truly special.
Essential Elements:
- Show-stopping floral varieties (Petunias, Geraniums, Calibrachoa)
- Coordinated decorative planters
- High-phosphorus ‘bloom booster’ fertilizer
- Deadheading snips
- Regular water access
How to make it
- Choose a color palette that complements your home’s exterior—warm oranges and yellows for a sunny look, or cool blues and purples for a sophisticated, calm feel.
- Pack your flowers tighter than you would in the ground; for a 12-inch pot, use 3-5 plants to ensure the container looks full and lush from day one.
- Place your pots in prominent areas like front steps, flanking the garage, or hanging from porch eaves to draw the eye upward and create visual interest at eye level.
- Water your floral containers every morning before the sun gets high; flowers in pots are sensitive to drying out and will wilt quickly in the afternoon heat.
- Deadhead (remove faded blooms) every few days by pinching the stem just above the first set of leaves; this prevents the plant from going to seed and forces it to produce more flowers.
- Apply a liquid bloom-boosting fertilizer every 7-10 days to provide the high levels of phosphorus needed to keep the colors vibrant and the blossoms plentiful.
How to Simplify Your Plant Care with Genius Gardening Hacks

Why we love this
Gardening should be a source of relaxation, not a mounting list of chores, and these clever shortcuts make the maintenance of your oasis feel like a breeze. There is a wonderful satisfaction in using common household items to solve complex garden problems, like recycling kitchen waste to nourish the soil or using simple physics to keep plants hydrated. These hacks save time and money, allowing you to spend less time working on the garden and more time simply sitting in it and enjoying the peace you’ve created.
Essential Elements:
- Recycled eggshells and coffee grounds
- Empty wine bottles (for self-watering)
- Cardboard boxes (for weed suppression)
- Epsom salts
- Old cinnamon sticks or powder
How to make it
- Create a self-watering system for thirsty pots by filling an empty wine bottle with water and quickly inverting it into the soil; the water will slowly release as the soil dries.
- Crush dried eggshells and sprinkle them around the base of vulnerable plants like hostas to create a sharp barrier that deters slugs and snails naturally.
- Use ‘sheet mulching’ to start a new garden bed: lay down thick layers of plain brown cardboard over grass, soak it with water, and top with mulch to kill weeds and create rich soil without digging.
- Sprinkle a little cinnamon on the soil of indoor or greenhouse seedlings; its natural anti-fungal properties help prevent ‘damping off,’ a common disease that kills young plants.
- Mix a tablespoon of Epsom salts into a gallon of water and use it to spray your roses or peppers once a month to boost magnesium levels, leading to greener leaves and more fruit.
- Add used coffee grounds directly to the soil around acid-loving plants like blueberries or hydrangeas to provide a gentle nitrogen boost and improve soil texture.
How to Cultivate a Peaceful Mindset with Inspiring Gardening Quotes

Why we love this
The garden is a teacher of patience, resilience, and the beauty of cycles, offering lessons that extend far beyond the fence line. Surrounding yourself with wisdom and setting a mindful intention for your gardening practice transforms it from a task into a form of meditation. The feeling of being grounded—literally and figuratively—while contemplating the slow growth of a tree or the sudden bloom of a flower provides a mental clarity and peace that is hard to find anywhere else in our fast-paced world.
Essential Elements:
- A garden journal or notebook
- A comfortable, quiet seating area (bench or hammock)
- Weatherproof plaques or stones with inscribed quotes
- A ‘no-phone’ rule for garden time
- A curated list of inspiring nature poetry or quotes
How to make it
- Designate a ‘quiet zone’ in your garden specifically for reflection, away from the noise of the street or the visual clutter of tool sheds.
- Inscribe a favorite quote onto a smooth stone using a permanent outdoor marker and place it somewhere you will see it every day, like at the foot of a favorite plant.
- Before you begin any gardening task, take three deep breaths and set an intention, such as ‘I am cultivating patience’ or ‘I am grateful for this growth.’
- Keep a garden journal near your favorite seat to jot down observations, not just about the plants, but about how you feel while tending to them.
- Practice ‘mindful weeding’—instead of rushing, focus entirely on the sensation of the soil, the sound of the wind, and the movement of your hands, treating it as a moving meditation.
- Spend at least ten minutes every day sitting perfectly still in your garden without a device, simply observing the light and listening to the birds to reset your nervous system.
Finding Your Peace in the Petals
Building a garden sanctuary is a journey that never truly ends, and that is perhaps its greatest gift. It is a living, breathing testament to your care and creativity, a place where you can witness the quiet miracles of nature every single day. By incorporating these secrets—from the whimsical to the practical—you aren’t just growing plants; you are growing a sense of peace that will radiate through every aspect of your life. So, grab your trowel, put on your favorite hat, and start creating your own little slice of heaven right in your backyard.