

There is something truly magical about the golden hour of a summer afternoon, when the light filters through the trees and the air is thick with the scent of jasmine and charcoal grills. It’s in these moments that we crave connection more than anything else—the clinking of glasses, the sound of laughter, and the simple joy of sharing a meal that feels as beautiful as it tastes. We’ve all seen those stunning food boards on our feeds, the ones that look like a work of art, and I’m here to tell you that you don’t need a culinary degree to create that same viral-worthy aesthetic in your own backyard.
Building a ‘Simple Food Board’ isn’t just about the food; it’s about the experience of slow living and intentional hosting. It’s about taking the pressure off yourself to be a perfect chef and instead focusing on fresh ingredients, vibrant colors, and the tactile pleasure of a shared platter. Whether you’re lounging by the pool or setting a table under the stars, these recipes are designed to be the stars of your next gathering, blending ease with an effortless, sun-drenched elegance.
How to make the Ultimate Pasta Salad

Why we love this
This pasta salad is the quintessential taste of summer, offering a refreshing crunch and a zesty brightness that dances on the palate. Imagine the springy texture of al dente fusilli catching every drop of a tangy herb vinaigrette, mingled with the burst of sun-ripened cherry tomatoes and the creamy richness of fresh mozzarella pearls. It’s a dish that feels light yet satisfying, filling the air with the herbaceous aroma of fresh basil and the sharp, clean scent of red wine vinegar, making every bite feel like a Mediterranean vacation.
Ingredients
- 1 lb Fusilli or Rotini pasta
- 1 cup cherry tomatoes, halved
- 8 oz fresh mozzarella pearls
- 1/2 cup sliced black olives
- 1/4 cup red onion, finely diced
- 1/2 cup Italian dressing (homemade or high-quality store-bought)
- Fresh basil leaves, torn
- Salt and cracked black pepper to taste
How to make it
- Fill a large pot with water and add a generous tablespoon of kosher salt; bring to a rolling boil over high heat. This ensures the pasta is seasoned from the inside out.
- Add the pasta and cook for exactly one minute less than the package instructions for ‘al dente.’ You want a firm bite because the pasta will absorb the dressing later.
- Drain the pasta and immediately rinse it under cold running water to stop the cooking process and remove excess starch, which prevents sticking.
- In a large mixing bowl, toss the cooled pasta with half of the dressing. This ‘pre-soak’ ensures the noodles stay moist.
- Gently fold in the halved tomatoes, mozzarella pearls, olives, and onions using a silicone spatula to avoid bruising the ingredients.
- Drizzle the remaining dressing over the top, add the torn basil, and season generously with salt and pepper. Chill in the refrigerator for at least 30 minutes before serving to allow the flavors to marry perfectly.
How to mix Refreshing Summer Cocktails

Why we love this
There is nothing quite as sophisticated as a perfectly balanced summer cocktail served in a sweat-beaded glass. The sharp, clean citrus notes of freshly squeezed lime hit you first, followed by the cooling, aromatic sweetness of muddled mint that lingers like a gentle breeze. As the ice clinks rhythmically against the glass, the effervescence of the soda water carries the subtle botanical notes of the spirit, creating a crisp, hydrating experience that is both invigorating and deeply relaxing under the heat of the sun.
Ingredients
- 2 oz White Rum or Vodka
- 1 oz fresh lime juice
- 3/4 oz simple syrup
- 6-8 fresh mint leaves
- Club soda or sparkling water
- Ice cubes (clear ice preferred)
- Lime wheels and mint sprigs for garnish
How to make it
- Begin by placing the fresh mint leaves and simple syrup in a sturdy highball glass or a cocktail shaker.
- Use a muddler to gently press the mint—do not shred it. You want to release the essential oils without releasing the bitter chlorophyll, which happens if the leaves are pulverized.
- Add the fresh lime juice and your choice of spirit. If using a shaker, fill it halfway with ice and shake vigorously for about 10-15 seconds until the outside of the tin feels frosty.
- Strain the mixture into a glass filled with fresh, large ice cubes. Using fresh ice prevents the drink from becoming watery too quickly.
- Top the glass with chilled club soda, pouring slowly to maintain the carbonation.
- Give it a brief, gentle stir with a long bar spoon, then garnish with a slapped mint sprig (slapping the mint wakes up the aroma) and a thin lime wheel.
How to grill Juicy Steak Kabobs

Why we love this
Steak kabobs bring a rugged yet refined element to your food board, offering deep, umami-rich flavors characterized by a smoky char and a tender, buttery interior. The aroma of searing beef mingled with the sweetness of caramelized bell peppers is intoxicating, drawing everyone toward the grill. Each bite provides a satisfying contrast between the crisp, slightly blackened edges of the vegetables and the succulent, juice-filled center of the steak, creating a savory symphony that is both hearty and festive.
Ingredients
- 1.5 lbs Top Sirloin or Ribeye, cut into 1.25-inch cubes
- 2 large bell peppers (red and green), cut into chunks
- 1 red onion, cut into wedges
- 1/4 cup olive oil
- 3 tablespoons soy sauce
- 2 cloves garlic, minced
- 1 teaspoon smoked paprika
- Wooden or metal skewers
How to make it
- In a bowl, whisk together the olive oil, soy sauce, garlic, and smoked paprika. Toss the steak cubes in this marinade and let them sit for at least 30 minutes at room temperature, or up to 4 hours in the fridge.
- If using wooden skewers, soak them in water for at least 30 minutes to prevent them from burning on the grill.
- Thread the steak, peppers, and onions onto the skewers, alternating colors for maximum aesthetic appeal. Leave a tiny bit of space between items so the heat can circulate and cook everything evenly.
- Preheat your grill to medium-high heat (about 400°F). Clean the grates thoroughly and lightly oil them to prevent sticking.
- Place the kabobs on the grill. Sear for about 3-4 minutes per side. For a perfect medium-rare, aim for an internal temperature of 130-135°F.
- Use tongs to rotate the skewers carefully, looking for those distinct grill marks as a visual cue for doneness.
- Remove from the heat and let the meat rest for 5 minutes before serving; this allows the juices to redistribute back into the fibers of the steak.
How to prep Poolside Snacks
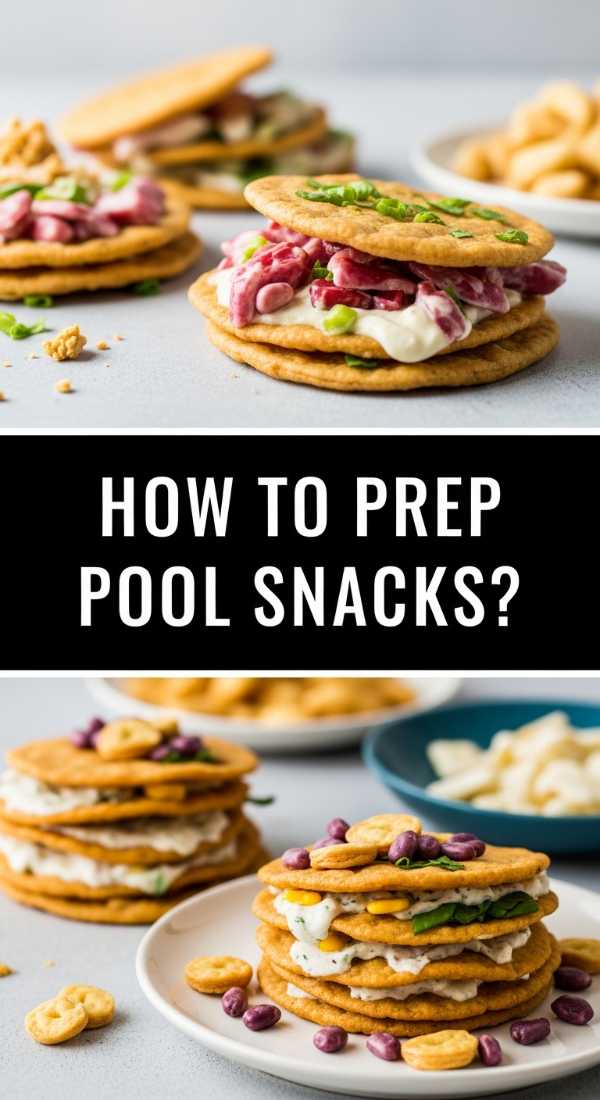
Why we love this
Poolside snacking should be an effortless affair of bright colors and hydrating textures that keep you feeling light and energized. Imagine a platter overflowing with crisp, chilled cucumber rounds, juicy wedges of watermelon dusted with tajin, and creamy hummus topped with a swirl of golden olive oil. The sensory experience is all about the ‘crunch’ and the ‘cool’—the snap of a fresh snap pea followed by the silky smoothness of a dip, providing a refreshing reprieve from the midday sun that feels indulgent yet incredibly wholesome.
Ingredients
- 1 English cucumber, sliced
- 2 cups watermelon chunks
- 1 cup baby carrots
- 1 cup snap peas
- 8 oz classic hummus
- 1 tablespoon extra virgin olive oil
- Pinch of sea salt and chili lime seasoning
How to make it
- Start by washing all produce in ice-cold water to ensure they are as crisp as possible.
- Slice the English cucumber into thick rounds; keeping them slightly thicker helps them hold up as ‘chips’ for dipping.
- Cut the watermelon into uniform triangles or cubes, removing as many seeds as possible for a seamless eating experience.
- Spread the hummus into a shallow bowl, using the back of a spoon to create a ‘well’ in the center. Pour the olive oil into this well and sprinkle with a touch of paprika or sea salt.
- Arrange the vegetables and fruit in clusters on a large wooden board or acrylic tray, grouping by color to create a rainbow effect that looks stunning in photos.
- Keep the board in a shaded area or atop a bed of ice if serving outdoors for an extended period to maintain the chill and prevent wilting.
How to brew Hummingbird Nectar

Why we love this
There is a quiet, meditative beauty in brewing nectar and watching these iridescent jewels of nature flit around your garden. This simple syrup is pure and clear, shimmering in the sunlight as it beckons hummingbirds to your space. While it isn’t for human consumption, the act of making it connects you to the rhythm of the outdoors, filling your patio with a sense of life and movement. The process is clean and simple, resulting in a sweet fuel that turns your backyard into a vibrant sanctuary of fluttering wings and soft chirps.
Ingredients
- 1 cup granulated white sugar
- 4 cups filtered water
- (Do not use honey, brown sugar, or red dye)
How to make it
- Combine the sugar and water in a medium saucepan. It is crucial to use a 1:4 ratio to mimic the natural concentration of flower nectar.
- Place the pan over medium heat and stir constantly until the sugar is completely dissolved. You do not need to reach a rolling boil, but heating helps the sugar integrate fully.
- Once dissolved, let the mixture simmer for 1-2 minutes. This helps remove any impurities in the water or sugar that could cause mold.
- Remove the pan from the heat and let the nectar cool completely to room temperature. Never put hot nectar into a feeder, as it can warp the plastic and harm the birds.
- Fill your clean hummingbird feeders with the cooled nectar. Store any extra in a sealed glass jar in the refrigerator for up to one week.
- Clean your feeders every 3-5 days with hot water (no soap) to ensure the nectar stays fresh and safe for your feathered visitors.
How to make Chilled Summer Soup

Why we love this
A chilled summer soup, like a classic Gazpacho, is the ultimate garden-to-table experience that captures the raw essence of August produce. It is a vibrant, ruby-red celebration of vine-ripened tomatoes and peppery cucumbers, blended into a texture that is both velvety and slightly rustic. The aroma is herbaceous and sharp, thanks to a splash of vinegar and fresh garlic, while the taste is a complex balance of acidity and earthy sweetness. It’s a cooling, spoonable salad that refreshes the soul on the hottest of days.
Ingredients
- 2 lbs ripe Roma tomatoes, cored
- 1 cucumber, peeled and seeded
- 1 red bell pepper, deseeded
- 1/2 small red onion
- 1 clove garlic
- 2 tablespoons sherry vinegar
- 1/4 cup extra virgin olive oil
- Salt and pepper to taste
How to make it
- Roughly chop the tomatoes, cucumber, bell pepper, and onion. Place the vegetables in a high-speed blender.
- Add the peeled garlic clove, sherry vinegar, and a generous pinch of salt.
- Pulse the blender until the mixture reaches your desired consistency. Some prefer it completely smooth, while others like a bit of vegetable ‘grit’ for texture.
- With the blender running on low, slowly drizzle in the olive oil. This emulsifies the soup, giving it a creamy mouthfeel and a beautiful orange-red hue.
- Taste the soup and adjust the acidity with more vinegar or salt if needed. The flavors will mute slightly when chilled, so season boldly.
- Pour the soup into a glass container and refrigerate for at least 4 hours. Serving it ice-cold is the secret to its refreshing quality. Garnish with a drizzle of oil and microgreens before serving.
How to toss a Vibrant Summer Salad

Why we love this
A truly great summer salad is a masterclass in textures and temperatures, combining the crisp snap of butter lettuce with the soft, jammy heart of a stone fruit or the crunch of toasted nuts. The visual appeal is undeniable—a canvas of deep greens punctuated by pops of purple radish and orange citrus. As you toss the leaves in a light, lemon-heavy dressing, the scent of fresh dill and parsley fills the air, promising a bite that is zesty, floral, and incredibly clean, leaving you feeling light and nourished.
Ingredients
- 5 oz mixed baby greens or arugula
- 1 peach or nectarine, thinly sliced
- 1/4 cup crumbled goat cheese or feta
- 1/4 cup toasted walnuts or pecans
- 3 tablespoons olive oil
- 1 tablespoon fresh lemon juice
- 1 teaspoon honey
- Fresh cracked pepper
How to make it
- In a small mason jar, combine the olive oil, lemon juice, and honey. Shake vigorously until the dressing is milky and emulsified. This ensures the oil and acid don’t separate on the leaves.
- Place the mixed greens in a very large chilled bowl. Using a large bowl allows you to toss the greens without bruising them or spilling.
- Drizzle about two-thirds of the dressing over the greens and use your hands or large tongs to gently lift and turn the leaves until they are just barely coated.
- Arrange the dressed greens on your serving board or platter.
- Artfully layer the peach slices and goat cheese over the top. By adding these last, you prevent the cheese from smearing and the fruit from getting soggy.
- Sprinkle the toasted nuts and a final crack of black pepper over the dish. Drizzle the remaining dressing only where needed right before the board hits the table.
How to cook Classic Picnic Sides

Why we love this
Picnic sides like creamy potato salad or herb-flecked slaw are the soulful anchors of any outdoor spread, offering a nostalgic comfort that reminds us of childhood summers. The texture is key here—tender, waxy potatoes that hold their shape while being enveloped in a rich, tangy dressing that smells of mustard and fresh chives. These dishes are meant to be hearty and stable, providing a savory counterpoint to the lighter fruits and salads on the board, and they only get better as the flavors meld together over a few hours in the cooler.
Ingredients
- 2 lbs Yukon Gold potatoes, cubed
- 1/2 cup mayonnaise
- 1 tablespoon yellow mustard
- 2 stalks celery, finely chopped
- 2 hard-boiled eggs, chopped
- 1/4 cup fresh chives, snipped
- Salt and paprika for dusting
How to make it
- Place the cubed potatoes in a large pot and cover with cold water. Starting with cold water ensures the outside of the potato doesn’t turn to mush before the inside is cooked.
- Bring to a boil and cook for 10-12 minutes until fork-tender. Drain and let them steam-dry in the colander for 5 minutes; removing excess moisture is vital for a creamy, not watery, salad.
- In a small bowl, whisk the mayo, mustard, salt, and pepper.
- While the potatoes are still slightly warm, toss them with the dressing. Warm potatoes absorb the flavor much better than cold ones.
- Gently fold in the celery, eggs, and half of the chives. Use a folding motion to keep the potato cubes intact.
- Transfer to a serving bowl, dust with paprika for that classic aesthetic, and top with the remaining chives. Chill for at least 2 hours before the picnic.
How to grill the Best Corn on the Cob

Why we love this
Nothing says ‘summer’ quite like the sound of corn kernels popping gently on a hot grill, followed by the intoxicating aroma of toasted husks and melting butter. The flavor is a perfect duality: the natural, milky sweetness of the corn enhanced by the deep, charred bitterness of the grill marks. When you peel back the charred outer layers to reveal the glistening, golden kernels underneath, it feels like uncovering a treasure—especially when finished with a sprinkle of flaky sea salt and a squeeze of lime.
Ingredients
- 4-6 ears of fresh sweet corn
- 4 tablespoons unsalted butter, softened
- 1 teaspoon sea salt
- 1/2 teaspoon chili powder
- 1 lime, cut into wedges
How to make it
- Preheat your grill to medium-high (about 400°F).
- For the best flavor, remove the husks and silk entirely. This allows for direct flame contact, which creates those beautiful ‘viral’ char marks.
- Lightly brush each ear of corn with a tiny bit of melted butter or oil to prevent it from sticking to the grates initially.
- Place the corn directly onto the grill grates. Close the lid and cook for about 2-3 minutes.
- Open the lid and use tongs to rotate the corn about a quarter turn. Repeat this until all sides have some golden-brown and blackened spots, roughly 8-10 minutes total.
- Remove the corn from the grill and immediately slather with the softened butter while it’s still piping hot.
- Sprinkle with sea salt and chili powder, and serve with a lime wedge for a bright, acidic finish that cuts through the richness of the butter.
How to slow cook a Summer Dinner

Why we love this
Slow cooking in the summer is the ultimate ‘hosting hack’ because it keeps your kitchen cool while delivering a main dish that is pull-apart tender and incredibly flavorful. Think of a succulent pork shoulder or a shredded chicken tinga that has spent the day bathing in aromatic spices and citrus juices. The meat becomes so soft it practically melts on the tongue, releasing a rich, concentrated savory steam when the lid is finally lifted. It’s the perfect, low-stress centerpiece for a food board, allowing you to focus on the aesthetic assembly while the heat does the hard work.
Ingredients
- 3 lbs Pork Butt or Chicken Thighs
- 1 cup orange juice
- 1 onion, sliced
- 3 cloves garlic, smashed
- 1 tablespoon cumin
- 1 tablespoon dried oregano
- Salt and pepper
How to make it
- Season the meat generously on all sides with salt, pepper, cumin, and oregano. Pat the spices in so they adhere well.
- Optional but recommended: Sear the meat in a hot skillet for 2 minutes per side to develop a crust. This adds a depth of flavor that a slow cooker alone cannot achieve.
- Place the sliced onions and garlic at the bottom of the slow cooker to act as a ‘rack’ for the meat.
- Set the meat on top of the onions and pour the orange juice around the sides (not directly over the meat, so you don’t wash off the spices).
- Cover and cook on LOW for 7-8 hours or HIGH for 4-5 hours. Low and slow is always better for achieving that signature ‘shred-ability.’
- Once the meat is fork-tender, remove it to a board and shred using two forks.
- Toss the shredded meat with a splash of the leftover cooking liquid to keep it moist before arranging it in the center of your food board.
Conclusion: The Art of the Effortless Board
Creating a viral-worthy food board is less about following strict rules and more about embracing the textures, colors, and flavors of the season. By combining these simple yet elevated elements—from the charred sweetness of grilled corn to the cooling crunch of a pasta salad—you create an invitation for your guests to linger, graze, and enjoy. Remember to play with heights, use fresh herbs as garnishes, and most importantly, enjoy the process of bringing people together around a beautiful, shared table. Happy hosting!