

Effortless & Aesthetic: The Secret to a Perfect Viral Simple Food Board
There is something truly magical about a table filled with warmth, color, and textures that invite everyone to dig in without a second thought. I remember the first time I put together a food board; it wasn’t just about the cheese and crackers, it was about the communal feeling of sharing a variety of flavors. These viral food boards have taken over my feed for a reason: they are the ultimate expression of ‘low effort, high reward’ entertaining that makes every guest feel like they are at a five-star retreat.
The secret isn’t just in the layout, but in the components themselves. By mixing perfectly seared meats, slow-cooked comforts, and vibrant roasted vegetables, you create a visual and culinary masterpiece that captures the light perfectly for your next post. It’s about that cozy, lived-in aesthetic where the steam is still rising from the bread and the glaze on the carrots glistens under the kitchen lights. Let’s dive into the essential components that will make your board the talk of the town.
How to cook creamy chicken in a crock pot

Why we love this
This dish is the definition of comfort in a bowl, offering a velvety, rich sauce that clings to every tender fiber of the chicken. As it slow-cooks, the aroma of garlic, herbs, and cream wafts through the house, creating an atmosphere of pure warmth. The texture is so soft it practically melts on your tongue, providing a luxurious base for your food board that pairs beautifully with crusty bread. It’s the kind of effortless meal that feels like a warm hug on a rainy afternoon.
Ingredients
- 2 lbs boneless skinless chicken breasts
- 1 cup heavy cream
- 1/2 cup chicken broth
- 4 cloves minced garlic
- 1 tsp dried thyme
- 1/2 tsp smoked paprika
- Salt and pepper to taste
- Fresh parsley for garnish
How to make it
- Begin by seasoning your chicken breasts generously on both sides with salt, pepper, and smoked paprika to build a base layer of flavor.
- Place the chicken in the bottom of your crock pot, ensuring they are in a single layer for even cooking.
- In a small bowl, whisk together the heavy cream, chicken broth, minced garlic, and thyme until well combined, then pour this mixture over the chicken.
- Set your crock pot to ‘Low’ and cook for 5 to 6 hours. Cooking on low is crucial here; it allows the connective tissues to break down slowly, resulting in that signature tender texture without drying out the meat.
- Once the time is up, use two forks to gently shred the chicken directly in the pot, allowing it to soak up all that concentrated, creamy sauce.
- Turn the crock pot to ‘Warm’ for 15 minutes before serving to let the sauce thicken slightly around the shredded meat.
How to make crispy potatoes fast

Why we love this
There is nothing quite as satisfying as the audible crunch of a perfectly roasted potato yielding to a fluffy, cloud-like center. These potatoes provide the essential structural element to your food board, offering an earthy saltiness and a golden-brown hue that catches every bit of natural light. The contrast between the shattered-glass exterior and the steamy, buttery interior is a sensory delight that keeps everyone coming back for ‘just one more.’ They are the ultimate crowd-pleaser that adds a rustic, artisanal touch.
Ingredients
- 1.5 lbs Yukon Gold potatoes, chopped into 1-inch cubes
- 3 tbsp olive oil
- 1 tsp garlic powder
- 1 tsp dried rosemary
- 1/2 tsp sea salt
- 1/4 tsp black pepper
How to make it
- Preheat your oven to 425°F (220°C). High heat is the secret to getting that fast, crispy exterior without overcooking the inside.
- Place your potato cubes into a large pot of salted water and bring to a boil. Par-boil them for only 5 minutes; you want the edges to be slightly soft but the potato still firm.
- Drain the potatoes and give the colander a vigorous shake. This ‘scuffs’ the edges of the potatoes, creating more surface area for maximum crispiness.
- Toss the potatoes in a bowl with olive oil, garlic powder, rosemary, salt, and pepper until every piece is thoroughly coated.
- Spread them out on a preheated baking sheet (the sizzle when they hit the pan is a good sign!) in a single layer with plenty of space between them.
- Roast for 20-25 minutes, flipping halfway through, until they are a deep amber gold and sound hollow when tapped.
How to grill perfect steak outside

Why we love this
The primal scent of woodsmoke and searing beef is the heart of any great outdoor gathering. A perfectly grilled steak brings a sophisticated, bold protein to your board, featuring those iconic charred grill marks and a juicy, pink center that screams professional quality. Basting it with a touch of butter as it rests ensures a glossy finish and a rich, savory depth that elevates the entire meal. It’s the centerpiece that commands attention both for its flavor and its visual appeal.
Ingredients
- 2 thick-cut Ribeye or New York Strip steaks
- 2 tbsp avocado oil (high smoke point)
- 2 tbsp unsalted butter
- 2 sprigs fresh rosemary
- Coarse kosher salt and cracked black pepper
How to make it
- Remove your steaks from the fridge at least 30 minutes before grilling to bring them to room temperature; this ensures even cooking from edge to center.
- Pat the steaks completely dry with paper towels—moisture is the enemy of a good sear—and season aggressively with salt and pepper.
- Preheat your grill to high heat (about 450°F-500°F). Clean the grates thoroughly and lightly oil them.
- Place the steaks on the grill and sear for 3-4 minutes without moving them to develop a deep crust. Flip and cook for another 3-4 minutes for medium-rare (internal temp of 130°F-135°F).
- During the last minute of cooking, place a small dollop of butter and a rosemary sprig on top of each steak, letting it melt down the sides.
- Remove from the grill and let the meat rest on a warm plate for at least 8 minutes. This allows the juices to redistribute so they don’t run out when you slice it for your board.
How to bake cheesy casserole recipes
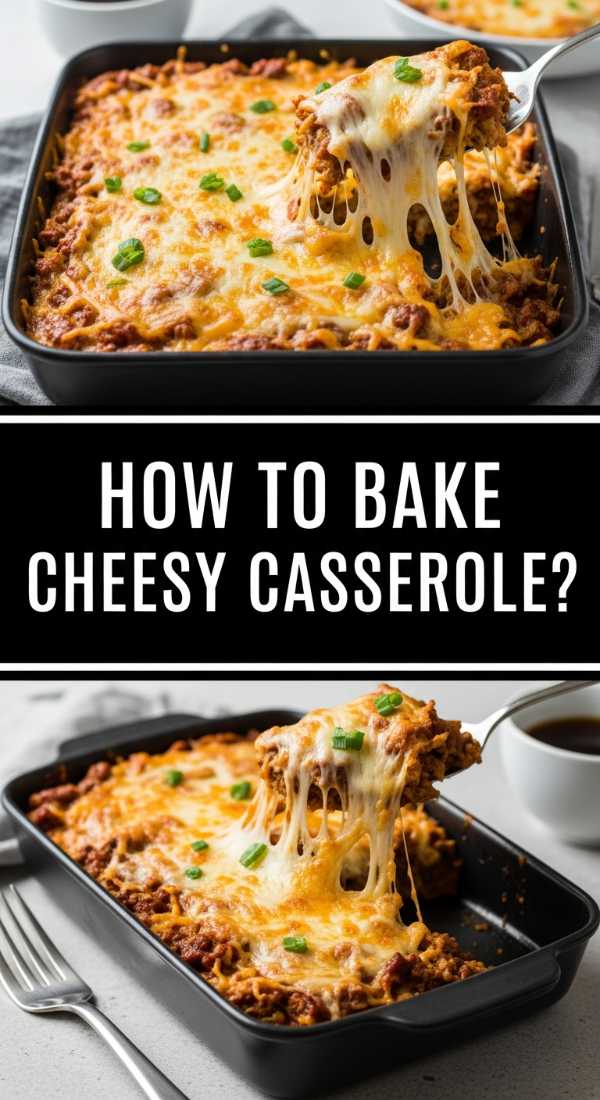
Why we love this
A cheesy casserole is the soul of home cooking, offering layers of gooey, melted cheese and savory fillings that bubble up at the edges. The way the cheese browns into a golden, slightly chewy crust provides a wonderful textural contrast to the soft interior. It brings a vibrant pop of yellow and orange to your board, signaling warmth and abundance. The scent of toasted cheese and savory spices filling the kitchen is enough to make anyone’s mouth water instantly.
Ingredients
- 4 cups cooked pasta or sliced potatoes
- 2 cups shredded sharp cheddar cheese
- 1 cup shredded mozzarella
- 1.5 cups whole milk
- 2 tbsp butter
- 2 tbsp flour
- 1/2 tsp mustard powder
- Salt and panko breadcrumbs for topping
How to make it
- Preheat your oven to 375°F (190°C) and lightly grease a medium baking dish.
- In a saucepan, melt the butter over medium heat, whisk in the flour, and cook for 1 minute to create a roux—this is the base for a smooth, non-grainy sauce.
- Slowly pour in the milk while whisking constantly. Continue to cook until the sauce thickens enough to coat the back of a spoon.
- Remove from heat and stir in 1.5 cups of the cheddar and the mustard powder until completely melted and glossy.
- Fold your base (pasta or potatoes) into the cheese sauce and transfer the mixture to the baking dish.
- Top with the remaining cheese and a sprinkle of panko breadcrumbs. Bake for 25-30 minutes until the edges are bubbling vigorously and the top is a beautiful golden brown.
How to sear juicy scallops quickly

Why we love this
Scallops are the jewels of the sea, providing an elegant and delicate addition to your food board. When seared correctly, they have a butter-soft texture and a natural sweetness that is highlighted by a salty, caramelized crust. They cook in minutes, making them a fantastic ‘last-minute’ addition that looks incredibly impressive. Their pearly white color and golden caps add a level of aesthetic refinement that makes any simple board look like a gourmet feast.
Ingredients
- 10-12 large sea scallops
- 1 tbsp grapeseed oil
- 1 tbsp unsalted butter
- A squeeze of fresh lemon juice
- Fine sea salt
How to make it
- Remove the small side muscle from the scallops if present, then pat them extremely dry with paper towels. Any moisture will cause them to steam rather than sear.
- Season only the top side with a pinch of sea salt just before they hit the pan.
- Heat a cast-iron skillet over high heat until it is just starting to smoke. Add the oil and swirl to coat the bottom.
- Place the scallops in the pan, seasoned side down, making sure they don’t touch. Press down lightly with a spatula to ensure full contact.
- Sear undisturbed for 90 seconds until a deep golden-brown crust forms. Flip them over and add the butter to the pan.
- Cook for another 60-90 seconds while spooning the melted butter over the tops (basting). They should be opaque on the sides but still slightly translucent in the very center. Serve immediately.
How to smoke tender ribs outdoors

Why we love this
There is a deep satisfaction in meat that effortlessly slides off the bone, infused with the complex, sweet, and tangy notes of woodsmoke and barbecue glaze. These ribs provide a dark, rich color to your board and a ‘wow’ factor that is hard to beat. The sticky, lacquered finish glistens under the sun, while the smoky aroma draws everyone toward the table. It’s a labor of love that rewards you with incredible depth of flavor and a tender, melt-in-your-mouth experience.
Ingredients
- 1 rack of St. Louis style pork ribs
- 1/4 cup dry rub (brown sugar, paprika, garlic powder, onion powder)
- 1/2 cup apple juice (for spritzing)
- 1 cup high-quality BBQ sauce
- Hickory or apple wood chips
How to make it
- Prepare your smoker to a steady 225°F (107°C). Remove the thin membrane from the back of the ribs to ensure seasonings can penetrate the meat.
- Apply the dry rub generously on all sides, pressing it in so it adheres well to the meat.
- Place the ribs in the smoker, bone-side down. Close the lid and smoke for 3 hours, spritzing with apple juice every hour to keep the surface moist.
- Wrap the ribs tightly in heavy-duty aluminum foil with a splash of apple juice and return to the smoker for another 2 hours. This ‘Texas Crutch’ method steams the meat to perfect tenderness.
- Unwrap the ribs, brush them generously with BBQ sauce, and place them back on the grates for 30-60 minutes to allow the sauce to ‘set’ into a sticky glaze.
- Look for the ‘bend test’—when you lift the rack, it should crack slightly but not break. Let them rest for 10 minutes before slicing.
How to roast honey carrots perfectly

Why we love this
Roasted carrots are the perfect way to add a pop of vibrant orange and a natural, earthy sweetness to your aesthetic board. The honey caramelizes in the oven, creating sticky, charred edges that are absolutely addictive. They provide a tender-crisp bite that balances out the richer, heavier meats on the board. Garnished with a bit of green, they look like they’ve come straight from a rustic farmhouse garden, adding that essential ‘farm-to-table’ vibe.
Ingredients
- 1 lb whole carrots (thinner ones work best)
- 2 tbsp honey
- 1 tbsp olive oil
- 1/2 tsp cumin
- Salt and pepper
- Fresh thyme for garnish
How to make it
- Preheat your oven to 400°F (200°C). If using large carrots, slice them in half lengthwise so they cook at the same rate.
- In a small bowl, whisk together the honey, olive oil, and cumin. The cumin adds a subtle earthy depth that prevents the honey from being cloyingly sweet.
- Place the carrots on a parchment-lined baking sheet and pour the honey mixture over them. Use your hands to toss them, ensuring every inch is coated.
- Arrange the carrots in a single layer, ensuring they aren’t crowded, which allows the hot air to circulate and brown the edges.
- Roast for 20-25 minutes. About halfway through, toss them again to redistribute the honey glaze that has pooled on the tray.
- They are done when they are fork-tender and have developed dark, caramelized spots. Sprinkle with fresh thyme and a final pinch of flaky salt while hot.
How to slow cook beef tender
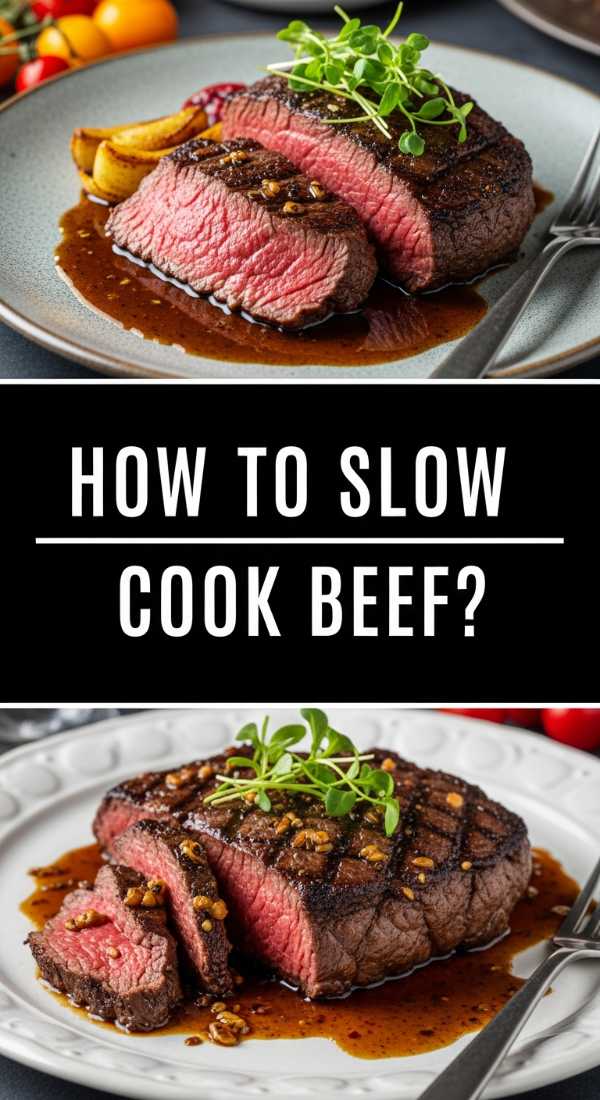
Why we love this
Slow-cooked beef is the ultimate ‘set it and forget it’ protein that delivers high-end results with minimal active work. The long cooking time breaks down the tough marbling into a rich, savory jus that infuses the meat with incredible flavor. It’s hearty, rustic, and provides a deep brown color palette to your board that feels incredibly grounded and satisfying. The way the meat falls apart at the touch of a fork is a visual cue for quality and care that your guests will notice immediately.
Ingredients
- 3 lb chuck roast
- 1 cup beef bone broth
- 1/4 cup soy sauce (for umami)
- 2 onions, quartered
- 3 cloves garlic, smashed
- 2 bay leaves
- 1 tbsp vegetable oil
How to make it
- Heat the vegetable oil in a large skillet over high heat. Sear the beef roast on all sides until a dark brown crust forms—this ‘Maillard reaction’ is vital for deep flavor.
- Place the onions and garlic in the bottom of the slow cooker, then set the seared beef on top.
- Pour the beef broth and soy sauce around the sides of the meat (not over the top, to preserve the crust). Add the bay leaves.
- Cover and cook on ‘Low’ for 8 to 10 hours. Slow cooking beef at a low temperature is the only way to ensure the collagen transforms into gelatin for a moist result.
- Once finished, remove the meat and let it rest for 15 minutes before pulling it into large, chunky pieces.
- Strain the liquid from the pot and simmer it in a saucepan until reduced by half to create a concentrated ‘jus’ to drizzle over the meat on your board.
How to fry golden chicken breasts

Why we love this
There’s something universally appealing about a golden, pan-fried chicken breast with a perfectly seasoned crust. It offers a clean, crisp protein option that pairs well with everything from honey carrots to creamy sauces. When fried correctly, the exterior has a light, shattered-glass crunch while the inside remains remarkably juicy. It adds a bright, sunny golden tone to your food board and provides a satisfying texture that contrasts beautifully with softer, slow-cooked items.
Ingredients
- 2 large chicken breasts, pounded to even thickness
- 1/2 cup all-purpose flour
- 1 tsp garlic salt
- 1/2 tsp black pepper
- 1/4 tsp cayenne pepper
- 3 tbsp butter and 1 tbsp oil
How to make it
- Pound the chicken breasts to a uniform thickness of about 1/2 inch. This is the most important step to ensure the outside doesn’t burn before the inside is cooked.
- In a shallow dish, mix the flour, garlic salt, black pepper, and cayenne. Dredge the chicken in the flour, shaking off the excess so only a thin veil remains.
- Heat the butter and oil in a large skillet over medium-high heat. The oil prevents the butter from burning, while the butter provides flavor and color.
- Once the butter is foaming, add the chicken. Fry for 4-5 minutes per side. Do not move the chicken until it naturally releases from the pan.
- Look for a deep golden-brown color and an internal temperature of 165°F (74°C).
- Remove to a wire rack (not a paper towel) for 2 minutes before slicing. A wire rack prevents the bottom from getting soggy, maintaining that viral-worthy crunch.
How to bake fluffy bread rolls

Why we love this
No food board is complete without the warm, yeasty embrace of a freshly baked bread roll. These rolls act as the ‘vessel’ for all the other flavors, perfect for mopping up sauces or creating mini-sandwiches. The sight of steam rising from a torn-open roll and the smell of toasted flour is the ultimate sensory hook. They provide a soft, matte texture and a pale golden color that softens the overall look of the board, making it feel complete and home-cooked.
Ingredients
- 3 cups bread flour
- 1 cup warm milk (110°F)
- 2.25 tsp active dry yeast
- 2 tbsp sugar
- 1 tsp salt
- 4 tbsp melted butter
- 1 egg
How to make it
- In a large bowl, combine the warm milk, sugar, and yeast. Let it sit for 5-10 minutes until it becomes foamy, which indicates the yeast is alive and active.
- Stir in the melted butter, egg, and salt. Gradually add the flour until a soft dough forms.
- Knead the dough on a floured surface for about 7-10 minutes until it is smooth and elastic. If you poke it, it should spring back slowly.
- Place the dough in a greased bowl, cover, and let rise in a warm, draft-free spot for 1 hour, or until doubled in size.
- Punch the dough down and divide into 12 equal pieces. Roll them into tight balls and place them in a greased baking dish. Cover and let rise again for 30 minutes.
- Bake at 375°F (190°C) for 15-18 minutes until the tops are golden. Brush with more melted butter immediately after removing them from the oven for a professional, glossy finish.
Conclusion
Creating the perfect viral food board is less about following a rigid set of rules and more about embracing the textures, colors, and aromas of well-cooked food. By combining these ten elements—from the crunch of the potatoes to the fluffiness of the rolls—you create a landscape of flavor that is as beautiful to look at as it is to eat. Remember, the best boards are the ones that feel lived-in and shared, so don’t be afraid of a few crumbs or a little sauce drizzle. Now, go grab your biggest wooden board and start building your masterpiece!