
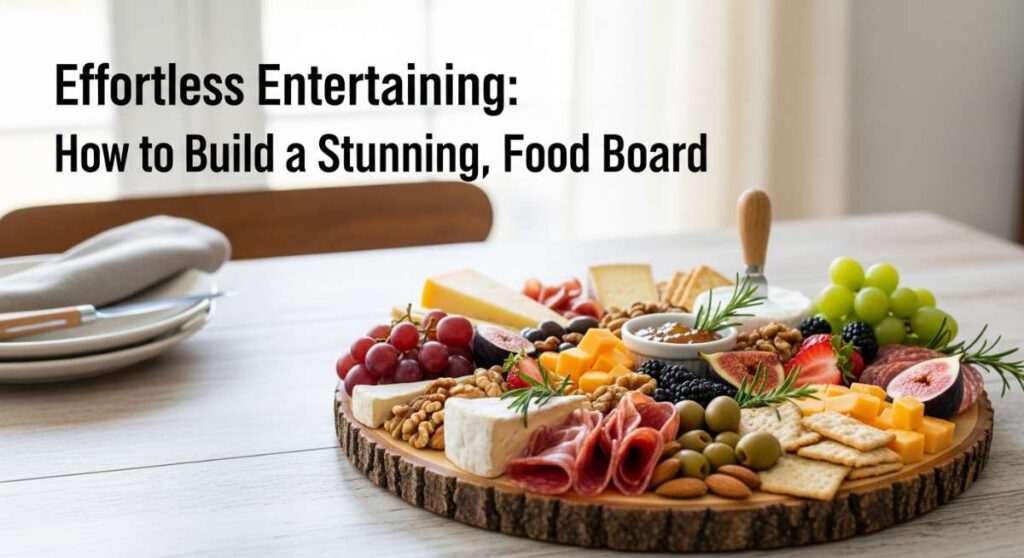
Effortless Entertaining: How to Build a Stunning, Simple Food Board
There is something inherently magical about a gathering where the food is at the center of the conversation, not just as a meal, but as an experience. We have all felt that flutter of hosting anxiety—the desire to create a Pinterest-perfect evening without spending the entire night trapped in the kitchen. I remember one specific Saturday where I spent four hours at the stove, only to realize I’d missed every laugh and every story being shared in the living room. That was the day I decided to embrace the art of the communal board: a vibrant, abundant spread that invites guests to pick, choose, and linger over every bite.
The secret to a viral-worthy board isn’t just about pretty garnishes; it’s about providing a variety of perfectly prepared proteins that satisfy every palate. By mastering a few key chicken preparation techniques, you can turn a simple wooden plank into a culinary masterpiece. This approach to effortless entertaining focuses on the ‘Hero Topic’ of the season—the Simple Food Board—where the textures are varied, the flavors are bold, and the host is actually present to enjoy the party. Let’s dive into the essential components that will make your board the talk of the neighborhood.
How to bake chicken thighs

Why we love this
Baking chicken thighs is the ultimate foundation for any food board because it yields an incredibly juicy result with very little active effort. We love the way the fat renders down during the slow heat of the oven, basting the meat from the inside out and filling your kitchen with a cozy, savory aroma that whispers of home-cooked comfort. The texture is consistently silky, providing a rich mouthfeel that pairs beautifully with crunchy elements like radishes or toasted nuts. It is the reliable workhorse of the entertaining world, offering a tender bite that feels both indulgent and wholesome all at once.
Ingredients
- 4-6 bone-in, skin-on chicken thighs
- 2 tablespoons extra virgin olive oil
- 1 tablespoon sea salt
- 1 teaspoon cracked black pepper
- 3 sprigs of fresh rosemary
- 4 cloves of smashed garlic
How to make it
- Begin by preheating your oven to 400°F (200°C), ensuring your rack is positioned in the center for even air circulation.
- Use paper towels to pat the chicken thighs completely dry; removing surface moisture is critical for preventing the meat from steaming rather than baking.
- Place the thighs in a large mixing bowl and drizzle with olive oil, then rub the salt, pepper, rosemary leaves, and smashed garlic into every crevice, including under the skin.
- Arrange the thighs on a parchment-lined baking sheet, skin-side up, making sure they aren’t touching to allow the heat to circulate around each piece.
- Bake for 25 to 30 minutes; look for the skin to turn a deep golden brown and the juices to run clear when pierced.
- Check for an internal temperature of 165°F (74°C) using a meat thermometer, then let the meat rest for 5 minutes before slicing to ensure all those flavorful juices stay locked inside.
How to make crispy chicken

Why we love this
There is an undeniable sensory joy in that first audible crunch of perfectly crispy chicken, a sound that signals a job well done. This preparation adds a necessary structural contrast to your food board, offering a shatteringly crisp exterior that gives way to a moist, flavorful interior. The aroma of toasted breadcrumbs and hot oil is intoxicating, evoking memories of summer picnics and elevated comfort food. It provides a satisfying weight to the meal, making the board feel substantial and luxurious while the golden hue adds a beautiful visual warmth to your spread.
Ingredients
- 1 lb chicken breast tenders
- 1 cup panko breadcrumbs
- 1/2 cup all-purpose flour
- 2 large eggs, beaten
- 1 tablespoon smoked paprika
- High-smoke point oil (like avocado or vegetable oil)
How to make it
- Set up a dredging station with three shallow bowls: one with flour mixed with paprika, one with the beaten eggs, and one with the panko breadcrumbs.
- Dredge each piece of chicken in the flour first, shaking off the excess so the coating isn’t cakey.
- Dip the floured chicken into the egg wash, ensuring it is fully coated to act as the ‘glue’ for the crumbs.
- Press the chicken firmly into the panko, flipping and pressing again to create a thick, even layer of crunch.
- Heat about 1/2 inch of oil in a heavy skillet over medium-high heat until it shimmers (approximately 350°F); test it by dropping a crumb in—it should sizzle immediately.
- Fry the chicken in batches for 3-4 minutes per side until the coating is a rich, dark amber color and the meat is cooked through.
- Drain on a wire rack rather than a paper towel to prevent the bottom from becoming soggy, maintaining that viral-worthy crunch.
How to slow cook chicken

Why we love this
Slow cooking chicken transforms humble cuts into melt-in-your-mouth perfection that can be easily shredded for a more interactive board experience. We love the effortless nature of this method, as the low and slow heat breaks down connective tissues until the meat practically falls apart at the touch of a fork. The aroma is deep and developed, carrying the concentrated essence of the seasonings throughout your home for hours. It creates a tender, moist texture that acts as a perfect canvas for dipping into aiolis or stacking onto crusty baguette slices, making it a versatile crowd-pleaser.
Ingredients
- 1.5 lbs boneless, skinless chicken thighs
- 1/2 cup low-sodium chicken broth
- 1 tablespoon onion powder
- 1 teaspoon dried oregano
- Salt and pepper to taste
How to make it
- Place the chicken thighs in the bottom of your slow cooker, ensuring they are in a single layer if possible for even cooking.
- Whisk the chicken broth with the onion powder, oregano, salt, and pepper in a small bowl to create a concentrated flavor liquid.
- Pour the liquid over the chicken, then cover the pot with a tight-fitting lid to trap the steam and moisture.
- Set the slow cooker to ‘Low’ for 6 to 7 hours or ‘High’ for 3 to 4 hours; the low setting is preferred for the most tender results as it prevents the protein from toughening.
- Check that the chicken reaches an internal temperature of at least 165°F and appears opaque and soft.
- Transfer the chicken to a clean board and use two forks to pull the meat into bite-sized shreds, then drizzle a little of the leftover cooking liquid back over the meat to keep it succulent for the board.
How to sear chicken thighs

Why we love this
Searing chicken thighs is all about the Maillard reaction—that magical chemical process that creates a complex, savory crust on the surface of the meat. This method delivers a sophisticated, restaurant-quality finish that looks stunning against the greens and fruits of a food board. We love the contrast between the deeply browned, slightly salty exterior and the buttery, tender meat underneath. The fragrance of browning protein is primal and inviting, immediately drawing guests toward the board with the promise of bold, smoky flavors and a refined culinary touch.
Ingredients
- 4 boneless, skin-on chicken thighs
- 2 tablespoons high-heat oil (grapeseed or canola)
- Kosher salt
- Freshly ground black pepper
- 1 tablespoon butter
How to make it
- Ensure the chicken thighs are at room temperature for about 15 minutes before cooking to ensure even searing through to the center.
- Season the skin side generously with salt and pepper, pressing the seasoning in so it adheres during the high-heat process.
- Heat a cast-iron skillet over medium-high heat until a drop of water flicked onto it dances and evaporates instantly.
- Add the oil, then place the chicken thighs skin-side down into the pan; you should hear a loud, aggressive sizzle immediately.
- Do not move the chicken for at least 5-6 minutes; resisting the urge to peek is the secret to a perfect, unbroken golden crust.
- Once the skin releases easily from the pan and is a deep bronze color, flip the thighs and add the butter to the pan, spooning it over the chicken as it finishes cooking for another 4-5 minutes.
- Verify the internal temperature hits 165°F and let rest before serving on your board.
How to roast chicken legs

Why we love this
Roasting chicken legs brings a rustic, farmhouse charm to your entertaining spread, offering a nostalgic and hearty element that is incredibly satisfying to eat. We love how the high heat of the oven tightens the skin into a glossy, crackling sheath while the dark meat on the bone remains exceptionally moist and flavorful. The aroma of roasting poultry is the quintessential scent of a Sunday feast, creating an atmosphere of abundance and warmth. These are the perfect ‘finger food’ for a board, encouraging guests to get comfortable and truly enjoy the tactile nature of the meal.
Ingredients
- 6 chicken drumsticks (legs)
- 3 tablespoons melted butter
- 1 tablespoon garlic powder
- 1 teaspoon smoked paprika
- Fresh parsley for garnish
How to make it
- Preheat your oven to 425°F (220°C); the higher temperature is essential for achieving that glossy, roasted finish on the skin.
- In a small bowl, combine the melted butter with garlic powder and smoked paprika, stirring until it forms a vibrant, orange-hued basting liquid.
- Lay the chicken legs out on a wire rack set over a baking sheet; the rack allows hot air to reach the bottom of the legs, preventing ‘soggy bottom’ syndrome.
- Brush the butter mixture liberally over every inch of the chicken legs using a pastry brush.
- Roast for 35 to 40 minutes, turning the legs halfway through the cooking time to ensure the color is uniform and the skin is tightening evenly.
- Look for the meat to start pulling away slightly from the bone at the bottom, a visual cue that they are perfectly done and ready for the board.
How to flavor chicken thighs
Why we love this
Flavoring chicken is where your personality as a host really shines, allowing you to curate a specific ‘vibe’ for your board through spices and aromatics. We love the way a well-balanced rub can permeate the meat, creating layers of flavor that reveal themselves with every bite. The aroma is a complex tapestry of spices—perhaps cumin and coriander for a Mediterranean feel, or ginger and soy for an Asian-inspired board. It’s an evocative process that turns a simple piece of protein into a conversation piece, providing the ‘spark’ that makes your viral board stand out from the rest.
Ingredients
- 1 lb chicken thighs
- 2 tablespoons olive oil
- 1 tablespoon brown sugar (for caramelization)
- 1 teaspoon ground cumin
- 1 teaspoon chili powder
- 1/2 teaspoon ground cinnamon (the secret ingredient)
How to make it
- Start by creating a dry rub: whisk the brown sugar, cumin, chili powder, and cinnamon in a bowl until there are no clumps.
- Lightly coat the chicken thighs in olive oil, which acts as a carrier for the fat-soluble flavors in the spices.
- Massage the rub into the meat thoroughly; don’t just sprinkle it on—actually work the spices into the fibers of the chicken.
- For the best results, let the flavored chicken sit in the refrigerator for at least 30 minutes (or up to 4 hours) to allow the salt and spices to penetrate deeply.
- Cook the chicken using your preferred method (grilling or searing works best for this rub) over medium heat to prevent the sugar in the rub from burning.
- The visual cue for success is a beautiful, dark crust that smells slightly sweet and deeply savory.
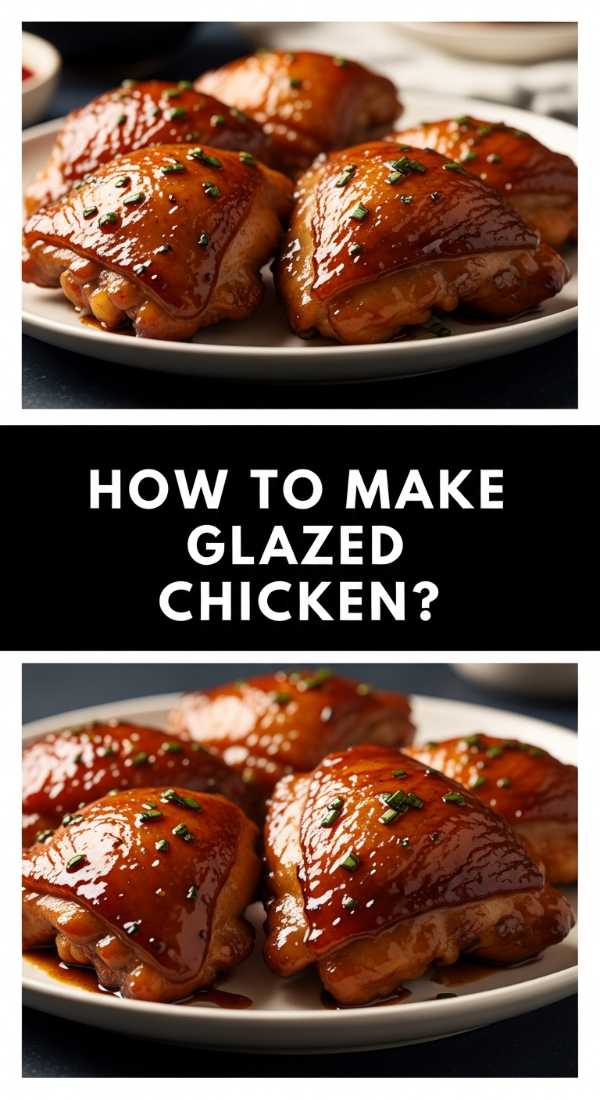
How to make glazed chicken

Why we love this
Glazed chicken brings a stunning, high-gloss finish to your food board that looks like it was plucked straight from a professional food photoshoot. We love the sticky, tacky texture of a reduced glaze that clings to the meat, offering a burst of concentrated sweetness followed by a savory finish. The aroma of bubbling sugars and balsamic or honey reduction is sweet and sharp, cutting through the richness of other board elements. It provides a beautiful visual highlight, catching the light and acting as a delicious ‘sauce’ that is built right onto the protein itself.
Ingredients
- 4 boneless chicken thighs
- 1/4 cup honey or maple syrup
- 2 tablespoons balsamic vinegar
- 1 tablespoon Dijon mustard
- 1 tablespoon soy sauce
How to make it
- In a small saucepan over medium heat, combine the honey, balsamic vinegar, mustard, and soy sauce.
- Simmer the mixture for 5-8 minutes until it reduces by half and becomes thick enough to coat the back of a spoon; this is your glaze base.
- Sear or bake your chicken until it is about 80% cooked (around 145°F internal temperature).
- Using a brush, apply a thick layer of the glaze over the chicken and return it to the heat (or under a broiler).
- Apply a second layer of glaze every 2 minutes for the final 5 minutes of cooking; this ‘layering’ technique creates a deep, professional-looking lacquer.
- Watch closely for the glaze to start bubbling and slightly charring at the edges—this caramelization is where the flavor lives.
How to prep chicken thighs

Why we love this
Proper preparation is the unsung hero of effortless entertaining, ensuring that the cooking process is seamless and the final result is elegant. We love the feeling of a clean, organized workspace where every piece of chicken is trimmed and ready for the pan. This step is about more than just hygiene; it’s about ensuring every bite your guests take is tender and free of gristle or excess fat. The texture of well-prepped chicken is uniform and professional, and the feeling of confidence it gives you as a host is the secret ingredient to a stress-free evening.
Ingredients
- 2 lbs fresh chicken thighs
- A sharp chef’s knife or kitchen shears
- A clean cutting board (preferably plastic for easy sanitizing)
- Paper towels
How to make it
- Remove the chicken from its packaging and place it on your dedicated poultry cutting board.
- Use paper towels to pat each thigh dry; this is the most important prep step for both safety (preventing slips) and cooking results (ensuring browning).
- Using your knife or shears, trim away any large pockets of yellow fat or overhanging skin that won’t crisp up properly.
- Locate any small fragments of bone or cartilage that may have been left behind during processing and carefully remove them.
- If the thighs vary greatly in size, gently pound the thicker sections with a meat mallet to create an even thickness for uniform cooking.
- Organize the prepped chicken on a clean plate, wash your hands and tools thoroughly, and you are ready to season and cook with total ease.
How to cook tender chicken

Why we love this
The hallmark of a great cook is the ability to produce chicken that is consistently tender, offering a delicate, soft texture that requires almost no effort to chew. We love the way tender chicken seems to absorb the flavors around it, becoming a succulent vehicle for whatever herbs or oils you’ve paired it with. The feeling of slicing into a piece of chicken and having it offer no resistance is incredibly satisfying. It ensures that every guest, regardless of their preference, will find the board approachable and delicious, making the meal feel inclusive and expertly prepared.
Ingredients
- 1 lb chicken breast or thighs
- 1/2 cup plain Greek yogurt (the secret tenderizer)
- 1 lemon, juiced
- 2 tablespoons olive oil
- Salt and pepper
How to make it
- The secret to ultimate tenderness is an acidic marinade; combine the yogurt, lemon juice, and olive oil in a bowl.
- Submerge the chicken in the mixture, ensuring every surface is covered; the lactic acid in the yogurt gently breaks down the proteins without making them mushy.
- Refrigerate for at least 1 hour, but no more than 4 hours, as over-marinating can actually toughen the meat.
- When ready to cook, wipe off the excess marinade so it doesn’t burn, but leave a thin coating for moisture.
- Cook over medium heat—avoiding high heat is key to preventing the muscle fibers from tightening up and becoming stringy.
- Use a thermometer to pull the chicken exactly at 165°F; even a few degrees over can sacrifice that perfect tenderness.
How to make lemon chicken
[IMAGE_10]
Why we love this
Lemon chicken is the bright, zesty highlight that every viral food board needs to feel fresh and vibrant. We love the way the citrus acidity cuts through the richness of cheeses and nuts, cleansing the palate and making every bite feel new again. The aroma is uplifting and clean—a mix of bright lemon zest and warm herbs that smells like a Mediterranean summer. The visual appeal of charred lemon slices scattered across the chicken adds a pop of sunny color that makes the entire board look more professional and thought-out, inviting guests to dig in with gusto.
Ingredients
- 1 lb boneless chicken thighs
- 2 large lemons (one zested and juiced, one sliced into rounds)
- 3 cloves garlic, minced
- 1 tablespoon fresh thyme
- 2 tablespoons olive oil
How to make it
- Create a bright marinade by whisking together the lemon juice, lemon zest, minced garlic, thyme, and olive oil.
- Toss the chicken and the lemon slices in the marinade, letting them sit for about 20 minutes to absorb the citrus oils.
- Heat a large skillet over medium-high heat and add the chicken pieces along with the lemon slices.
- Sear the chicken for 5-6 minutes per side; as the lemon slices cook, they will caramelize and lose their bitterness, becoming sweet and jammy.
- The visual cue for doneness is the chicken turning an opaque white with charred, golden edges from the lemon sugars.
- Serve the chicken on your board topped with those beautiful, caramelized lemon rounds and a final sprinkle of fresh thyme for that ‘viral’ look.
The Art of the Final Spread
Building a stunning, simple food board is about more than just the recipes; it’s about the intention behind the gathering. When you lay out these different preparations of chicken alongside some crisp crackers, a few artisanal cheeses, and handfuls of fresh grapes, you aren’t just serving dinner—you’re creating a space for connection. The variety ensures that there is something for everyone, while the simple preparation methods allow you to stay relaxed and engaged with your guests. Remember, the most important element of any board is the joy shared around it. So, pour a glass of wine, take a deep breath, and enjoy the beautiful spread you’ve created.
Frequently Asked Questions
Got questions about building the perfect chicken-centric food board? We’ve got the answers to help you host like a pro.