

We’ve all been there—scrolling through social media, staring at those impossibly complex charcuterie boards that look like they belong in a museum rather than on a coffee table. While those marble-slab masterpieces are stunning, let’s be honest: who has the time to fold salami into roses or source fifteen different types of artisanal goat cheese? Recently, I’ve decided to embrace a new trend that’s taking over my kitchen and my feed: the Viral Simple Food Board. It’s all about ditching the pretension and bringing back the comfort of classic, crowd-pleasing snacks and meals.
This isn’t just about food; it’s about the feeling of home. It’s about that warm, fuzzy emotion you get when you see a big spread of things you actually want to eat, rather than things you’re supposed to photograph. Whether it’s a nostalgic pie that reminds you of childhood road trips or a cheesy dip that makes every Sunday afternoon feel like a party, these recipes are the heart of what makes gathering together so special. Let’s dive into the ultimate components for your next simple, viral-worthy spread.
How to make Shoneys strawberry pie?

Why we love this
This pie is pure, unadulterated nostalgia served on a plate. There is something inherently magical about the way a warm, golden crust shatters under a fork to reveal a mountain of glistening, ruby-red berries held together by a crystal-clear glaze. The aroma is sweet and light, smelling of summer afternoons and roadside diners where time seemed to slow down. Each bite offers a perfect contrast between the buttery, crumbly pastry and the cool, sweet gelatinous glaze that hugs every curve of the fruit, making it feel like a decadent, refreshing hug for your soul.
Ingredients
- 1 pre-baked 9-inch pie crust
- 1.5 lbs fresh strawberries, hulled and cleaned
- 1 cup granulated sugar
- 3 tablespoons cornstarch
- 1 cup water
- 1 small box (3oz) strawberry gelatin mix
- Whipped cream for topping
How to make it
- Begin by preparing your berries; wash them thoroughly and remove the green hulls, leaving them whole or slicing large ones in half to ensure they sit evenly in the crust.
- In a medium saucepan, whisk together the granulated sugar and cornstarch until no lumps remain, then slowly pour in the water while continuing to whisk over medium heat.
- Cook the mixture, stirring constantly, until it begins to boil; once it thickens and becomes translucent (usually 3-5 minutes), remove it from the heat immediately.
- Stir in the dry strawberry gelatin powder until it is completely dissolved, creating a vibrant, glossy red liquid that will serve as your binder.
- Allow the glaze to cool slightly for about 10 minutes, but do not let it set; meanwhile, pile your fresh strawberries into the pre-baked pie shell in an attractive mound.
- Slowly pour the slightly cooled glaze over the strawberries, ensuring every single berry is coated and the gaps are filled, then refrigerate for at least 3-4 hours until the glaze is firm and the pie is chilled through before serving with a dollop of whipped cream.
How to make Rotel dip?

Why we love this
If there is one dish that defines the “simple food board” aesthetic, it is the legendary Rotel dip. This is comfort food in its most liquid, golden, and glorious form. The aroma of melted processed cheese mingling with spicy green chilies and browned meat is enough to bring everyone to the kitchen before you’ve even set the bowl down. It has a silky, velvety texture that clings perfectly to a salty tortilla chip, delivering a punch of heat and a creamy finish that is addictive, warm, and heart-meltingly satisfying for any game day or movie night.
Ingredients
- 1 lb ground beef or pork sausage
- 1 block (32 oz) Velveeta or processed cheese, cubed
- 2 cans (10 oz each) Ro-Tel Diced Tomatoes and Green Chilies
- 1/2 cup whole milk (optional for thinning)
- Fresh cilantro and sliced jalapeños for garnish
How to make it
- Start by browning your ground beef or sausage in a large skillet over medium-high heat, breaking it into very small crumbles with a wooden spoon until no pink remains.
- Carefully drain the excess fat from the meat to ensure your dip isn’t oily; returning the pan to low heat once drained.
- Add the cubed processed cheese to the skillet, stirring frequently to prevent the bottom from scorching as it begins to melt into a smooth pool.
- Pour in the cans of Ro-Tel (do not drain them, as the juices provide essential flavor and acidity), and stir until the tomatoes and chilies are evenly distributed throughout the cheese.
- If the dip feels too thick, stir in a splash of milk or heavy cream a tablespoon at a time until you reach your desired “drizzling” consistency.
- Transfer the mixture to a slow cooker on the ‘warm’ setting to keep it silky and scoopable throughout your gathering, garnishing with fresh cilantro just before serving.
How to pack beach snacks?

Why we love this
Beach snacks require a special kind of alchemy: they must be refreshing, sand-proof, and capable of surviving the heat without turning into a soggy mess. The joy of a perfectly packed beach cooler is the relief of biting into something crisp and hydrating while the sun beats down on your shoulders. Think of the crunch of chilled grapes, the salty snap of a cracker, and the way a cold drink feels against your palm. It’s about bright colors, ease of access, and food that feels as light and breezy as the ocean air itself.
Ingredients
- Individual airtight containers
- Frozen water bottles (serve as ice packs)
- Pre-cut watermelon and pineapple wedges
- Hard cheeses (cheddar or gouda) cut into cubes
- Individual bags of pretzels or pita chips
- Skewered meats and veggies (kabobs)
How to make it
- The first step to a successful beach board is temperature management; freeze several water bottles 24 hours in advance to act as “ice” that won’t leave a puddle when it melts.
- Wash and thoroughly dry all fruits and vegetables; moisture is the enemy of freshness, so use paper towels to ensure everything is bone-dry before packing.
- Portion out snacks into individual-sized, reusable silicone bags or rigid plastic containers to prevent cross-contamination and to keep the inevitable sand away from the communal supply.
- Layer your cooler with the heaviest items and the frozen water bottles at the bottom, creating a cold base for more delicate items like cheese or sliced fruit.
- Pack your “Viral Board” components in a flat, shallow container so that when you arrive, you can simply pop the lid and have an instant spread without having to assemble anything on the sand.
- Always include a separate small bag for trash and a pack of wet wipes to clean salty, sandy hands before anyone starts reaching for the snacks.
How to bake squishy bread?

Why we love this
There is no scent on earth more welcoming than that of fresh, squishy bread pulling right out of the oven. This isn’t the crusty, hard-to-chew sourdough of fancy bakeries; this is the pillowy, cloud-like bread that yields instantly to the touch. The texture is soft and airy, with a delicate crumb that practically melts on the tongue. It smells of yeast, butter, and warmth, evoking memories of grandma’s kitchen and Sunday dinners. When you tear into a warm loaf, the steam rises in a gentle puff, promising a bite that is pure, comforting bliss.
Ingredients
- 4 cups all-purpose flour
- 1 package (2 1/4 tsp) active dry yeast
- 1 1/2 cups warm milk (110°F)
- 4 tablespoons melted unsalted butter
- 2 tablespoons granulated sugar
- 1 teaspoon salt
- 1 egg (for egg wash)
How to make it
- In a large bowl, combine the warm milk, sugar, and yeast; let it sit for about 5-10 minutes until it becomes foamy and fragrant, indicating the yeast is active.
- Slowly stir in the melted butter and salt, then begin adding the flour one cup at a time, mixing until a shaggy dough forms and starts to pull away from the sides of the bowl.
- Turn the dough onto a lightly floured surface and knead by hand for 8-10 minutes, or use a stand mixer with a dough hook for 5-7 minutes, until the dough is smooth, elastic, and bounces back when poked.
- Place the dough in a greased bowl, cover with a damp cloth, and let it rise in a warm, draft-free spot for about 1 to 1.5 hours, or until it has doubled in size.
- Gently punch down the dough to release air bubbles, shape into a loaf or individual rolls, and place into a greased baking pan for a second rise of 30-45 minutes.
- Brush the top with a whisked egg wash and bake at 350°F (175°C) for 25-30 minutes until the top is golden brown and the internal temperature reaches 190°F; brush with extra butter immediately after removing from the oven for that signature squishy crust.
How to prep camping meals?

Why we love this
Camping meals are all about the primitive satisfaction of cooking over an open flame while the forest whispers around you. There’s a specific, rugged charm to food that has been kissed by woodsmoke and charred by a campfire. These meals are designed to be hearty and soul-warming, filling your belly after a long day of hiking or exploring. The aroma of sizzling protein and caramelizing vegetables in a cast-iron skillet, mixed with the crisp night air, creates a sensory experience that makes even the simplest ingredients taste like a five-star feast.
Ingredients
- Pre-marinated steak or chicken strips
- Chopped potatoes, peppers, and onions
- Heavy-duty aluminum foil
- Cast iron skillet or Dutch oven
- Pre-mixed spice blends in small containers
- Oil or butter
How to make it
- Do all your heavy prep work at home; chop your vegetables and slice your proteins into uniform pieces so they cook evenly in a single pan or foil packet.
- Store your ingredients in leak-proof bags, marinating the meats inside the bags to save space and infuse maximum flavor during the transit to the campsite.
- When ready to cook, build a fire and allow it to burn down until you have a thick bed of glowing red coals, which provide a much steadier and more controllable heat than active flames.
- For foil packets, place a portion of meat and veggies on a large square of foil, add a pat of butter and seasonings, then fold the edges tightly to create a sealed steam chamber.
- Place the packets or your cast iron skillet directly on a grate over the coals; if using a skillet, sear the meat first to develop a crust before adding the vegetables.
- Monitor the heat by moving the pan closer to or further from the center of the coals, and always use a meat thermometer to ensure proteins reach safe temperatures while enjoying the rustic outdoors.
How to make cucumber salad?
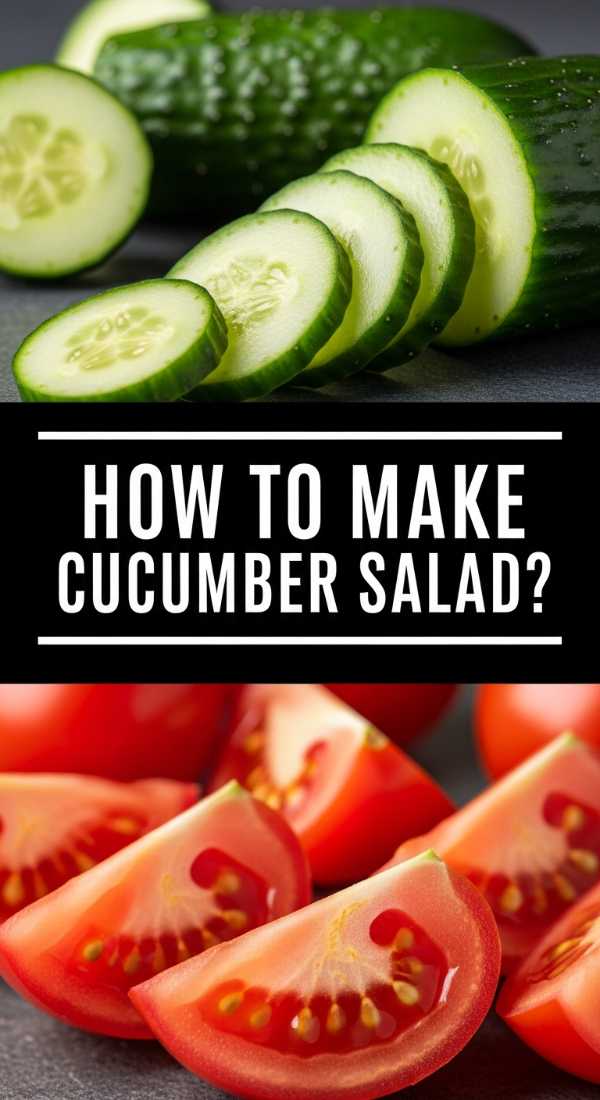
Why we love this
This salad is the ultimate palate cleanser, offering a bright, acidic snap that cuts through the richness of any food board. It’s incredibly refreshing, featuring the cool, watery crunch of thin-sliced cucumbers bathed in a tangy, slightly sweet vinaigrette. The aroma is sharp and garden-fresh, highlighted by the scent of fresh dill and red onion. It’s the kind of dish that makes you feel revitalized on a hot afternoon, providing a crisp texture and a zesty finish that keeps you reaching for one more bite.
Ingredients
- 2 large English cucumbers, thinly sliced
- 1/2 small red onion, thinly sliced into half-moons
- 1/2 cup white wine vinegar or apple cider vinegar
- 2 tablespoons granulated sugar
- 1/4 cup fresh dill, chopped
- 1 teaspoon salt and 1/2 teaspoon black pepper
How to make it
- Slice your English cucumbers as thinly as possible—using a mandoline slicer is highly recommended for achieving that translucent, professional look.
- Place the sliced cucumbers in a colander and sprinkle with salt, letting them sit for about 15 minutes to draw out excess moisture; this ensures your salad stays crunchy rather than watery.
- In a medium mixing bowl, whisk together the vinegar, sugar, salt, and pepper until the sugar has completely dissolved into a clear brine.
- Pat the cucumbers dry with a paper towel and add them to the bowl along with the thinly sliced red onions and a generous handful of chopped fresh dill.
- Toss everything together thoroughly so that every slice of cucumber is submerged or coated in the vinaigrette.
- Let the salad marinate in the refrigerator for at least 30 minutes before serving, which allows the flavors to meld and the onions to soften slightly in the acid.
How to grill fresh veggies?

Why we love this
Grilling transforms humble vegetables into something truly extraordinary by adding a layer of smoky depth and caramelizing their natural sugars. The sight of vibrant green asparagus, charred peppers, and golden zucchini with perfect grill marks is visually stunning on any food board. The texture becomes tender-crisp—soft enough to bite through easily but with a satisfying resistance. The aroma is earthy and charred, a quintessential scent of summer that brings an outdoor, rustic energy to your meal.
Ingredients
- Assorted vegetables (bell peppers, zucchini, asparagus, corn)
- 3 tablespoons olive oil
- 2 cloves garlic, minced
- 1 teaspoon dried oregano or thyme
- Salt and cracked black pepper
- Balsamic glaze for drizzling
How to make it
- Preheat your grill to medium-high heat (about 400°F) and ensure the grates are scraped clean and lightly oiled to prevent the vegetables from sticking.
- Cut your vegetables into large, flat pieces or thick spears to maximize surface area contact with the grill and to prevent smaller pieces from falling through the grates.
- In a large bowl, toss the vegetables with olive oil, minced garlic, herbs, salt, and pepper until they are evenly and lightly coated; do not over-oil, as this can cause flare-ups.
- Place the denser vegetables, like corn or carrots, on the grill first, as they take longer to cook; follow with peppers and zucchini, and save delicate items like asparagus for last.
- Grill each side for 3-5 minutes, turning only once to achieve those distinct, dark char marks that signify caramelized flavor and a professional touch.
- Remove the veggies once they are tender but still have a slight snap, and immediately drizzle with a bit of balsamic glaze or a squeeze of fresh lemon to brighten the flavors.
How to cook summer meals?

Why we love this
Summer cooking is an art form that prioritizes speed, freshness, and minimal time spent over a hot stove. We love these meals because they celebrate the bounty of the season—the heaviest produce, the brightest herbs, and the lightest proteins. There’s a certain ease to summer meals that encourages lingering at the table longer, enjoying the twilight. The flavors are usually a balance of citrus, salt, and sweetness, creating a dining experience that feels nourishing without being heavy, perfect for those humid nights when you want something vibrant and easy.
Ingredients
- Fresh seasonal produce (tomatoes, corn, peaches)
- Light proteins (shrimp, chicken, or chickpeas)
- Fresh herbs (basil, mint, cilantro)
- High-quality olive oil and citrus juices
- Quick-cooking grains like couscous or quinoa
How to make it
- Focus on “assembly” rather than “cooking”; choose ingredients that require minimal heat, such as pre-cooked proteins or vegetables that can be eaten raw or lightly blanched.
- Utilize the “one-pan” or “one-bowl” method to keep your kitchen cool; for example, toss warm pasta with raw cherry tomatoes, garlic, and plenty of olive oil to create a sauce from the residual heat.
- Prep your vinaigrettes and sauces in advance and store them in the fridge; a cold, herb-heavy chimichurri or pesto can transform a simple grilled chicken breast into a gourmet meal.
- Incorporate fruit into your savory dishes—adding sliced peaches to a burrata salad or mango to a shrimp taco adds a hit of seasonal sweetness that defines summer dining.
- Keep cooking times under 15 minutes by using high heat for short durations, such as searing scallops or stir-frying thin-cut veggies, to maintain their bright colors and crisp textures.
- Serve everything family-style on a large board or platter, allowing guests to help themselves, which reinforces the relaxed, communal vibe of the season.
How to bake strawberry pie?

Why we love this
While the refrigerator version is iconic, a truly baked strawberry pie is a masterpiece of texture and deep, concentrated fruit flavor. As the berries bake inside the oven, they release their juices, which thicken into a bubbling, jam-like nectar that is incredibly rich. The aroma is heady and intoxicating, filling the entire house with the scent of caramelized sugar and cooked fruit. The top crust, whether lattice or solid, becomes a flaky, golden-brown shield that yields to a warm, gooey interior, creating a dessert that feels sophisticated and deeply comforting.
Ingredients
- Double pie crust (top and bottom)
- 5 cups fresh strawberries, hulled and halved
- 3/4 cup granulated sugar
- 1/4 cup cornstarch
- 1 tablespoon lemon juice
- 1/2 teaspoon vanilla extract
- 1 tablespoon butter, diced into small pieces
- 1 egg (for wash) and coarse sugar for topping
How to make it
- Preheat your oven to 400°F (200°C) and place a baking sheet on the bottom rack to catch any juices that might bubble over during the baking process.
- In a large bowl, gently toss the halved strawberries with the sugar, cornstarch, lemon juice, and vanilla extract; let the mixture sit for 15 minutes to allow the berries to macerate.
- Line your pie plate with the bottom crust, then pour in the strawberry mixture, including all the juices, and dot the top of the fruit with the small pieces of butter.
- Lay the second crust over the top—either as a full sheet with vents cut in it or as a lattice pattern—then crimp the edges tightly to seal the fruit inside.
- Brush the crust with a beaten egg wash and sprinkle generously with coarse sanding sugar to give it a professional, crunchy finish.
- Bake for 45-55 minutes, or until the crust is a deep golden brown and the strawberry filling is bubbling thick through the vents; crucially, allow the pie to cool completely for at least 4 hours to let the filling set before slicing.
How to prep summer dinners?
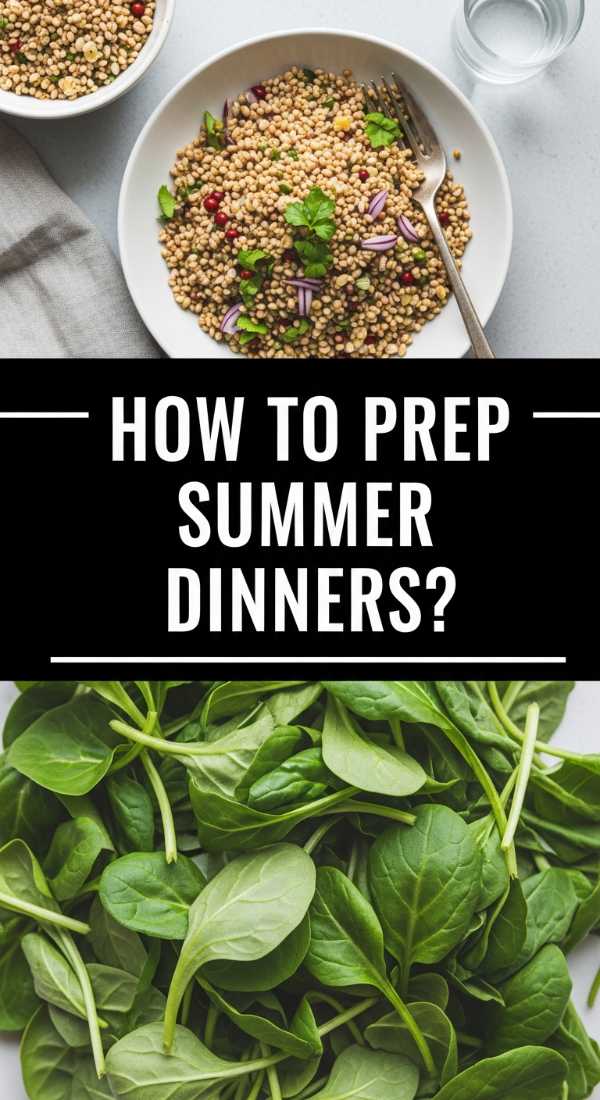
Why we love this
Summer dinner prep is all about reclaiming your evening. We love this approach because it moves the “work” to the cooler morning hours, leaving the sunset hours free for relaxation. It’s about smart organization—marinating meats while you drink your morning coffee and washing greens before the sun gets too high. This method results in dinners that feel effortless and intentional, where the flavors have had time to develop and the host is just as relaxed as the guests. It’s the secret to a stress-free, viral-worthy lifestyle.
Ingredients
- Bulk proteins (chicken thighs, flank steak)
- Glass storage containers
- Fresh citrus (lemons, limes)
- Assorted nuts and seeds for crunch
- Pre-washed salad greens
- Hard-boiled eggs or canned legumes for easy protein boosts
How to make it
- Dedicate 30 minutes in the morning to “micro-prep”: chop all your aromatics like garlic, onions, and herbs, and store them in small airtight containers.
- Create a “universal marinade” (oil, acid, salt, and aromatics) and divide it among your proteins; by the time dinner rolls around, the meat will be tenderized and deeply seasoned.
- Wash and spin-dry your salad greens immediately after buying them, then store them in a bowl with a damp paper towel on top to keep them incredibly crisp for days.
- Pre-cook a large batch of a neutral grain like farro or jasmine rice early in the week; these can be served cold in salads or quickly reheated as a base for grilled skewers.
- Set up a “garnish station” with sliced radishes, crumbled feta, toasted nuts, and fresh herbs, allowing you to add a “viral” aesthetic to any simple meal in seconds.
- Focus on the “board” presentation: instead of plating individual meals, arrange your prepped components on a large wooden board to let everyone customize their own summer plate.
The Joy of Simple Hosting
At the end of the day, the viral simple food board isn’t about perfection—it’s about presence. By choosing recipes like these that are easy to prep and even easier to love, you free yourself from the kitchen and join the conversation. Whether you’re sharing a slice of strawberry pie or dipping a chip into warm Rotel, these are the moments that stick with us. So, put down the complicated recipes, grab a big wooden board, and start filling it with the simple, delicious things that make your heart happy.