

From Blankets to Bites: How to Throw an Unforgettable Picnic This Summer
Hello, my loves! Can you feel it? That soft, golden warmth of the sun leaning against your skin, the scent of fresh-cut grass, and the long, slow hum of a summer afternoon. There is something so profoundly healing about moving our lives outside—even just for a few hours—and sharing a meal under the vast, open sky. It’s more than just food; it’s about slow living, deeper breaths, and creating memories that feel like a warm embrace.
I’ve spent so many afternoons lately dreaming up ways to make our outdoor gatherings feel just a little more magical. Whether you’re planning a quiet romantic escape or a laughter-filled afternoon with your soul-tribe, I’ve gathered all my favorite inspirations to help you transition from simple blankets to unforgettable bites. Let’s create some sunshine together!
5 Easy Steps to Style a BOHO Picnic

Why to love this Party Idea:
The Boho picnic is all about that effortless, free-spirited aesthetic. It’s where comfort meets creativity, using soft textures and earthy tones to create a space that feels like a cozy outdoor living room. It’s perfect for those who want to lounge for hours and feel grounded by nature.
Essential Items:
- Low-profile wooden pallets or thick floor rugs
- Assorted macrame cushions and fringe throw blankets
- Dried pampas grass in ceramic vases
- Rattan lanterns and woven trays
- A neutral color palette (cream, terracotta, and sage)
How to Prepare:
- Layer your base: Start with a heavy outdoor tarp, then layer multiple mismatched rugs on top for texture.
- Set the table: Use a low wooden pallet as your table surface so guests can sit comfortably on the ground.
- Scatter the softness: Place oversized floor cushions around the pallet, focusing on comfort and varied heights.
- Add the greenery: Place small vases of dried flowers or eucalyptus along the center of the pallet.
- Final touches: Drape a light macrame runner over the table and light a few citronella candles in boho holders.
Budget Range
- Woven Floor Rug ($20 – $45)
- Macrame Pillow Covers ($12 – $25)
- Dried Pampas Grass Bundle ($15 – $30)
7 Simple Ways to Build a GRAZING Board

Why to love this Party Idea:
Grazing boards are the ultimate way to cater without the stress of a formal sit-down meal. They encourage guests to nibble, chat, and explore different flavors at their own pace. It’s a visual feast that looks like art but tastes like home.
Essential Items:
- A large wooden or marble board
- Variety of hard and soft cheeses (Brie, Sharp Cheddar, Manchego)
- Cured meats (Prosciutto, Salami)
- Fresh seasonal fruits (Grapes, Berries, Figs)
- Nuts, honey, and artisanal crackers
How to Prepare:
- Anchor with bowls: Place small bowls for honey, jam, or olives on the board first to create structure.
- Place the cheeses: Spread your cheese selections across different corners of the board.
- Add the meat: Fold salami into fans or ribbons and nestle them against the cheeses.
- The carb connection: Fill the gaps with a variety of crackers and sliced baguette.
- Fruit fillers: Use large clusters of grapes and bright berries to fill any large remaining holes.
- The crunch factor: Sprinkle almonds or walnuts into the tiny spaces.
- The finishing drizzle: Add a honey dipper and small cheese knives for serving.
Budget Range
- Large Bamboo Grazing Board ($15 – $30)
- Artisanal Cheese Selection ($20 – $40)
- Reusable Bamboo Tongs/Utensils ($5 – $15)
4 Smart Tips to Style a REFRESHING Drink Station

Why to love this Party Idea:
A dedicated drink station keeps the host from playing bartender all day. It’s a focal point that looks incredibly chic while ensuring everyone stays hydrated and refreshed during those warm summer peaks. It’s about beauty in utility.
Essential Items:
- Large glass beverage dispensers
- Glass mason jars or colorful acrylic tumblers
- Decorative ice buckets
- Fresh herbs (mint, basil) and citrus slices
How to Prepare:
- Pre-chill everything: Ensure your dispensers and juices are cold before heading to the picnic site.
- Infuse for flavor: Fill dispensers with water and add cucumber/mint or strawberry/lemon an hour before serving.
- Label your elixirs: Use small chalkboard signs to identify the different drinks (e.g., “Lavender Lemonade”).
- Garnish station: Set out a small bowl of fresh berries and mint leaves so guests can customize their cups.
Budget Range
- Glass Drink Dispenser ($15 – $25)
- Set of 12 Mason Jars ($12 – $20)
- Metal Galvanized Ice Bucket ($10 – $22)
6 Creative Ideas for a VINTAGE Picnic Party

Why to love this Party Idea:
There is a nostalgic magic in the vintage picnic—it feels like stepping into a classic film. It’s romantic, whimsical, and celebrates the timeless beauty of lace, wicker, and slow conversations. It’s for the old souls at heart.
Essential Items:
- Traditional wicker picnic basket with plaid lining
- Lace or embroidered tablecloths
- Vintage polaroid camera
- Old hardcover books for decor
- Enamel plates and tea cups
How to Prepare:
- Foundations of lace: Spread a white lace tablecloth over a classic red gingham blanket.
- The basket centerpiece: Keep your open wicker basket in the center as a decorative element.
- Serve with nostalgia: Use mismatched vintage china or enamelware instead of plastic plates.
- Musical vibes: Bring a portable record player or a vintage-style Bluetooth speaker playing jazz.
- Memory making: Leave a polaroid camera out for guests to capture the day in physical film.
- Flower power: Use a simple mason jar filled with wildflowers to complete the look.
Budget Range
- Wicker Picnic Basket Set ($35 – $65)
- Vintage Lace Tablecloth ($15 – $30)
- Enamel Camping Plates ($10 – $20)
3 Easy Hacks to Plan a CHEAP Picnic
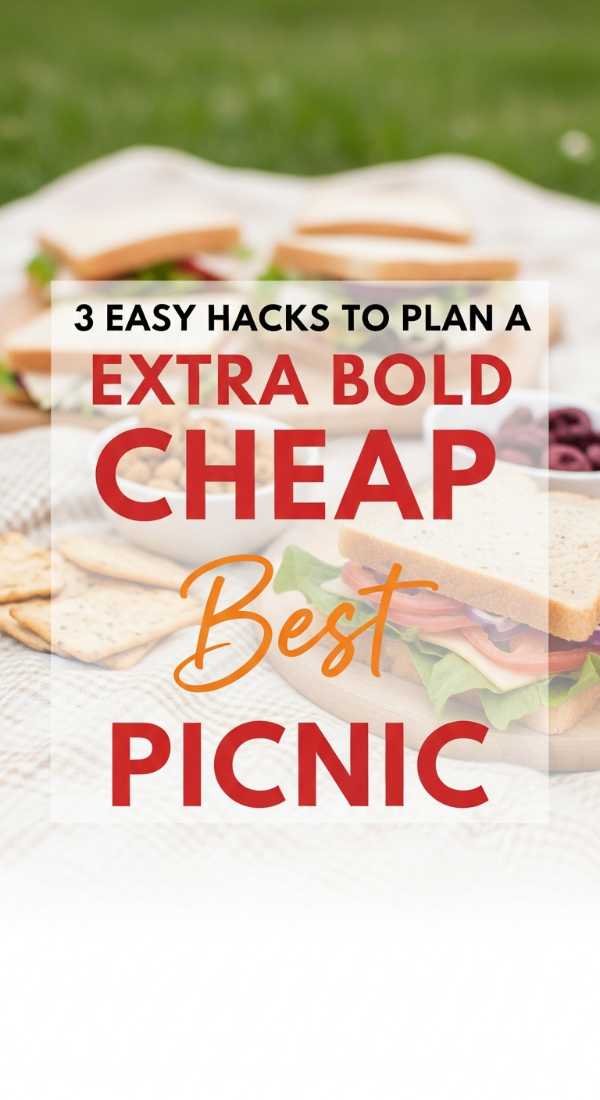
Why to love this Party Idea:
Luxury is a feeling, not a price tag. Planning a budget-friendly picnic allows you to focus on the company rather than the cost. With a little DIY spirit, you can create a Pinterest-worthy setup for the price of a standard grocery run.
Essential Items:
- Thrifted bed sheets instead of expensive blankets
- Reusable containers from home
- Simple DIY snacks like popcorn and sandwiches
How to Prepare:
- The sheet trick: Visit a thrift store for oversized cotton bedsheets in pretty patterns to use as massive, washable blankets.
- Potluck style: Invite every friend to bring one small item (one brings fruit, one brings chips) to spread the cost.
- Repurpose jars: Use empty pasta jars as drinking glasses or flower vases for a rustic, free look.
Budget Range
- Thrifted Cotton Sheets ($3 – $7)
- Bulk Popcorn Kernels ($4 – $8)
- Generic Brand Sparkling Water ($5 – $10)
8 Premium Steps for a LUXURY Garden Picnic

Why to love this Party Idea:
Sometimes, we deserve to feel pampered. A luxury picnic elevates the experience with real furniture, fine linens, and gourmet touches. It’s the perfect way to celebrate a milestone or simply treat yourself to a high-end experience under the stars.
Essential Items:
- Folding wooden garden tables
- Linen napkins and gold cutlery
- Crystal glassware
- Fresh floral arrangements from a florist
- Chilled champagne or sparkling cider
How to Prepare:
- Start with height: Use low-standing tables rather than sitting directly on the ground.
- Linens matter: Use high-quality linen tablecloths and napkins for a tactile sense of luxury.
- Real hardware: Bring your actual silverware and ceramic plates—no disposables allowed here.
- The floral touch: Invest in one large, professionally arranged bouquet as your focal point.
- Comfort is key: Provide high-quality outdoor chairs or plush, velvet floor cushions.
- The cold stuff: Keep drinks in a high-end cooler or a silver bucket filled with specialty ice.
- Personalized menus: Print small, elegant menu cards for each place setting.
- Ambience: Bring a high-quality speaker for a curated classical or lounge playlist.
Budget Range
- Portable Low Picnic Table ($40 – $120)
- Gold Cutlery Set ($25 – $50)
- Linen Napkins ($15 – $30)
5 Magical Ways to Light a NIGHT Picnic

Why to love this Party Idea:
When the sun goes down, the magic truly begins. A night picnic is intimate, mysterious, and incredibly cozy. It’s about the soft glow of lights reflecting in the eyes of the people you love.
Essential Items:
- Battery-operated fairy lights
- LED candles (safer than real ones for outdoors)
- Solar-powered lanterns
- Cozy wool blankets
How to Prepare:
- Outline the space: String fairy lights along the perimeter of your picnic blanket to define the area.
- Jar lanterns: Place LED tea lights inside mason jars and scatter them around the seating area.
- Hang the light: If you are under a tree, hang solar lanterns from the branches for overhead glow.
- The centerpiece: Group LED pillar candles of varying heights in the middle of your food display.
- Warmth check: Provide extra-thick blankets, as the temperature drops quickly after dark.
Budget Range
- String Fairy Lights ($8 – $15)
- LED Pillar Candle Set ($15 – $30)
- Outdoor Solar Lanterns ($12 – $25)
4 Fun Games to Play at Your PICNIC Party

Why to love this Party Idea:
Laughter is the best side dish! Adding games to your picnic breaks the ice and keeps the energy high. It turns a simple meal into an interactive event that guests will talk about for weeks.
Essential Items:
- Classic lawn games (Croquet or Cornhole)
- A deck of waterproof playing cards
- A frisbee or badminton set
How to Prepare:
- Set up a game zone: Keep the active games (like frisbee) a safe distance from the food.
- Keep it low-key: For smaller groups, have a deck of cards or a board game ready on the blanket.
- Group involvement: Organize a quick tournament with a small, silly prize for the winner.
- Casual play: Leave the gear out so guests can pick it up and play whenever they feel inspired.
Budget Range
- Wooden Cornhole Set ($30 – $80)
- Frisbee ($5 – $15)
- Waterproof Playing Cards ($7 – $12)
10 Genius Hacks to PACK Your Picnic Basket

Why to love this Party Idea:
There is nothing worse than a soggy sandwich or a leaked dressing. Mastering the art of the pack ensures your food arrives looking and tasting exactly as you intended. It’s the secret behind every successful picnic host.
Essential Items:
- Hard-sided cooler for perishables
- Leak-proof glass containers
- Frozen water bottles (double as ice packs)
How to Prepare:
- Heavy items first: Place heavy bottles and containers at the bottom.
- Vertical salads: Layer salads in jars (dressing on bottom) to keep greens crisp.
- Dual-purpose ice: Freeze water bottles to keep food cold; drink them as they melt.
- Wrap it up: Use beeswax wraps for sandwiches to keep them tight and fresh.
- The dry zone: Keep napkins and crackers in a separate zip-top bag to prevent moisture.
- Tool kit: Always pack a small bag with a multi-tool/bottle opener and wet wipes.
Budget Range
- Insulated Picnic Tote ($20 – $40)
- Beeswax Food Wraps ($12 – $22)
- Bento Style Leakproof Containers ($15 – $30)
6 Sweet Ideas to Build a PICNIC Dessert Bar

Why to love this Party Idea:
A dessert bar is the grand finale! It provides a sweet ending to your outdoor adventure and allows for beautiful, bite-sized treats that are easy to eat without a table. It’s pure, sugary joy.
Essential Items:
- Mason jars for individual parfaits
- Handheld pies or brownies
- Fresh fruit skewers
- Tiered serving stand (collapsible)
How to Prepare:
- Individual portions: Serve puddings or crumbles in small jars to avoid messy slicing.
- The handheld rule: Choose desserts like cookies or brownies that don’t require forks.
- Fruit focus: Skewer grapes, melon, and berries for a refreshing and beautiful option.
- Keep it cool: If serving chocolate or cream, keep the dessert tray on top of a shallow dish of ice.
- Sweet decor: Sprinkle some edible flower petals over the tray for a magical finish.
Budget Range
- Mini Mason Jars ($10 – $18)
- Bamboo Fruit Skewers ($5 – $10)
- Collapsible Dessert Stand ($15 – $25)
The Sun Sets, but the Memories Stay
As the light fades and you begin to pack up your blankets, I hope your heart feels full. Picnics are such a gentle reminder that we don’t need a lot to be happy—just some fresh air, a bit of thoughtfulness, and the company of those we love. Whether you went full luxury or kept it sweet and simple, you’ve created a moment of stillness in a busy world. Until next time, keep chasing the sunshine, my loves!