

From Classic French to Modern Sparkle: Your Complete Bridal Nail Roadmap
Hello, my lovely souls! There is something so incredibly magical about the season of ‘I Dos.’ It’s a time filled with soft whispers, the scent of fresh peonies, and that golden, hazy glow that seems to follow a bride wherever she goes. When you’re planning your big day, every tiny detail feels like a heartbeat, and your bridal nails are the softest touch of all—the hands that will hold your bouquet and slide on that forever ring.
I know how overwhelming it can be to choose just one look when your heart is full of so many inspirations. That’s why I’ve poured my heart into this guide, a warm embrace for your fingertips. Whether you are walking down a sandy aisle with the salt in your hair or dancing under a crystal chandelier, we’re going to find the perfect polish to tell your love story. Let’s dive into this roadmap together, hand in hand.
7 Simple Steps for Elegant Bride Nails

Why to love these Nails:
Elegant bridal nails are all about that timeless whisper of grace. They never shout; they simply hum a tune of sophistication that looks just as beautiful in your 50th-anniversary photos as they do today. It’s the quiet luxury of a soft pink or a milky white that complements every lace pattern and silk fold.
Essential Items:
- Fine-grit nail file
- Buffing block
- Soft peach or milky white polish
- High-shine top coat
- Cuticle oil
How to Prepare:
- Shape your nails into a soft oval or almond.
- Gently buff the surface for a smooth canvas.
- Apply a nourishing base coat.
- Paint two thin layers of your chosen elegant shade.
- Let dry for two minutes between coats.
- Seal with a mirror-like top coat.
- Massage cuticle oil for that healthy glow.
Budget Range
- Essie Ballet Slippers ($10)
- OPI Bubble Bath ($11)
- Olive & June Super Glossy Top Coat ($9)
Apply Classy Bridal Nails in 4 Minutes

Why to love these Nails:
Sometimes the morning of the wedding is a whirlwind of champagne toasts and laughter, and you need a look that keeps up with your pace. These are for the bride who wants instant perfection without the salon wait—a quick, classy transformation that looks like a million bucks in mere minutes.
Essential Items:
- High-quality press-on nails
- Alcohol prep pad
- Nail glue or adhesive tabs
- Mini file
How to Prepare:
- Wipe each nail with an alcohol pad to remove oils.
- Select the sizes that best fit your natural nail beds.
- Apply a small drop of glue or an adhesive tab to your nail.
- Press and hold the classy nail for 30 seconds to secure.
Budget Range
- Static Nails Reusable Pop-On Manicure ($16)
- Impress Press-On Manicure ($8)
- KISS Voguish Fantasy Nails ($9)
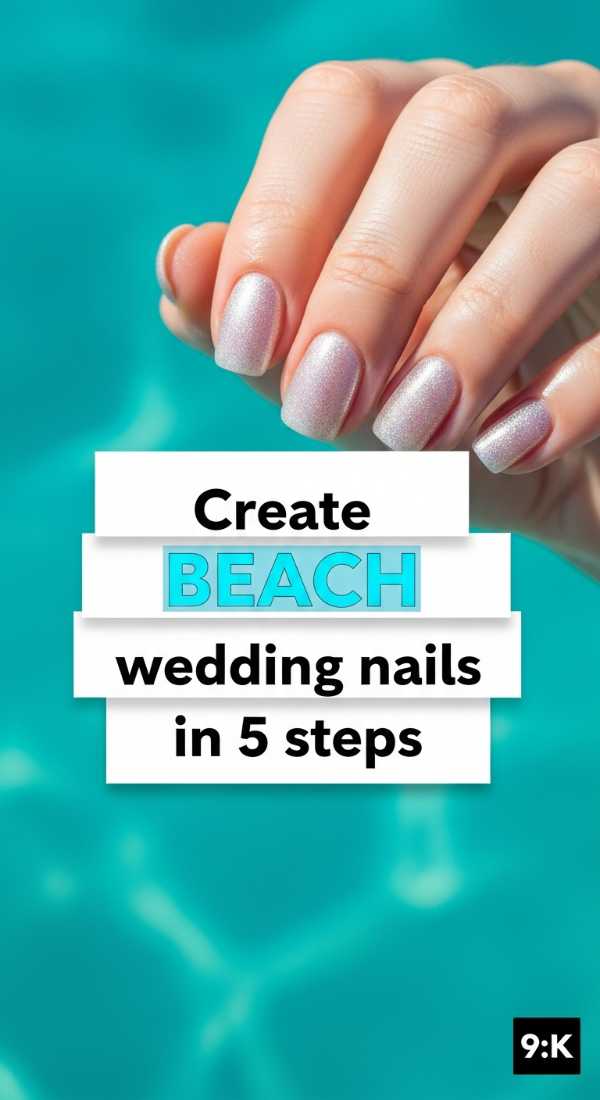
Create Beach Wedding Nails in 5 Steps
Why to love these Nails:
Imagine the sound of crashing waves and the feeling of sand between your toes. Beach wedding nails capture that iridescent, oceanic magic. They are light, airy, and have just enough shimmer to catch the sunlight reflecting off the water.
Essential Items:
- Sheer iridescent polish
- Sandy nude base color
- Seafoam or gold accent paint
- Sponge applicator
How to Prepare:
- Apply two coats of a sandy nude base.
- Sponge a bit of iridescent polish onto the tips.
- Add a tiny gold dot or seafoam swirl on the ring finger.
- Blend the edges with a clear blender polish.
- Apply a UV-protectant top coat to prevent yellowing in the sun.
Budget Range
- Zoya Leia Iridescent Topper ($12)
- ILNP Sandy Baby ($10)
- Orly Bonder Base Coat ($15)
Master French Tip Wedding Nails in 6 Steps

Why to love these Nails:
The French tip is the gold standard of bridal beauty. It’s the ultimate classic that lengthens the fingers and provides a clean, polished look. It’s for the bride who cherishes tradition and wants a look that is perfectly balanced and utterly romantic.
Essential Items:
- Sheer pink base polish
- Opaque white polish
- French tip guides or a thin brush
- Clean-up brush and acetone
How to Prepare:
- Apply your sheer pink base coat and let dry completely.
- Place your tip guides just below the free edge.
- Paint the tips with a crisp, opaque white.
- Carefully peel the guides away while the polish is still slightly tacky.
- Use a clean-up brush dipped in acetone to perfect the ‘smile’ line.
- Finish with a plump, gel-effect top coat.
Budget Range
- Orly French Manicure Kit ($18)
- Holo Taco Not Milky White ($13)
- CND Vinylux Negligee ($11)
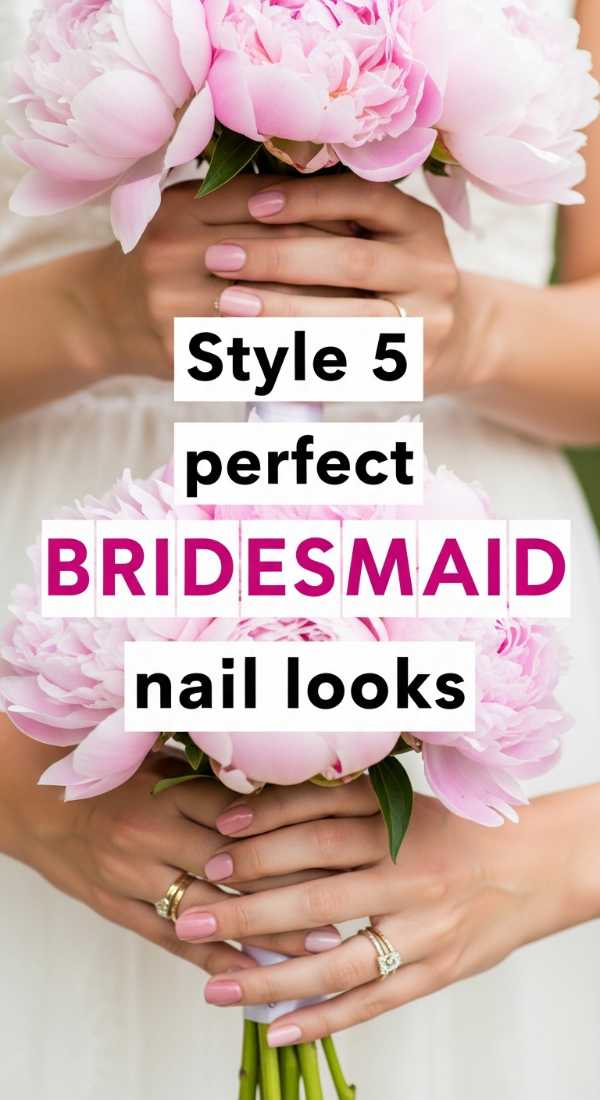
Style 5 Perfect Bridesmaid Nail Looks
Why to love these Nails:
Your bridesmaids are your heartbeat, and having a cohesive yet individual nail look for them adds such a thoughtful touch to the wedding aesthetic. These looks are designed to complement the bride while letting each girl’s personality shine through in a soft, coordinated palette.
Essential Items:
- A palette of 5 coordinating pastel polishes
- Matte and glossy top coats
- Gold foil flakes
How to Prepare:
- Look 1: A solid dusty rose for the romantic.
- Look 2: A sage green with a matte finish for the earthy soul.
- Look 3: A champagne shimmer for the girl who loves a bit of spark.
- Look 4: A mauve crème for a sophisticated touch.
- Look 5: A clear gloss with gold foil accents for the trendsetter.
Budget Range
- Sally Hansen Insta-Dri Wedding Collection ($7 each)
- Deborah Lippmann Bed of Roses Set ($36)
- Zoya Naturel Palette ($50)
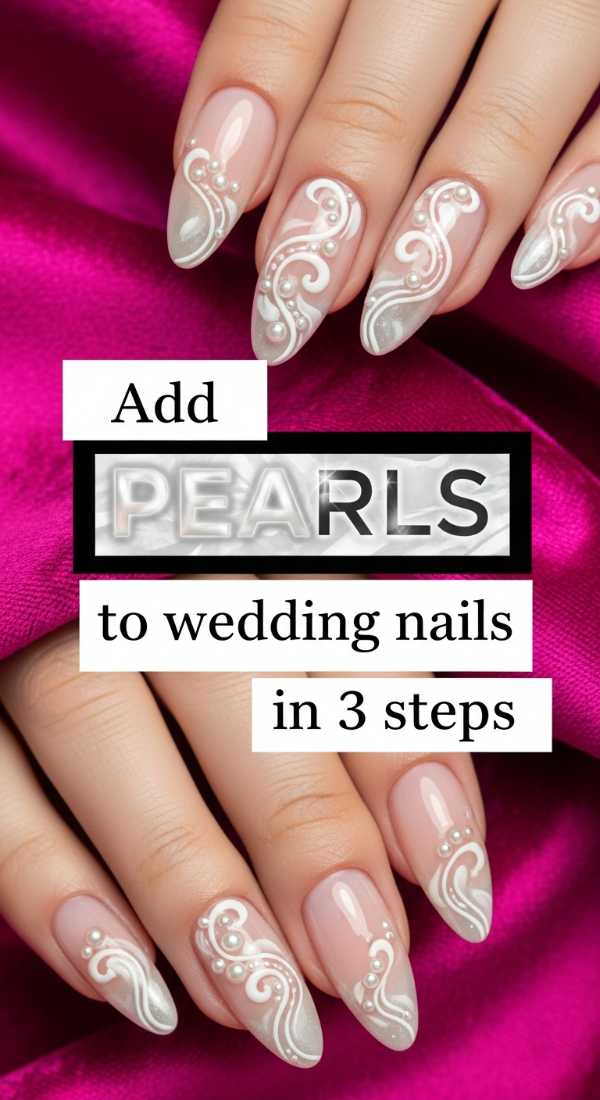
Add Pearls to Wedding Nails in 3 Steps
Why to love these Nails:
Pearls are the epitome of bridal elegance, echoing the jewelry passed down through generations. Adding them to your nails creates a 3D texture that is incredibly chic and high-fashion, turning your hands into a literal work of art.
Essential Items:
- Flat-back micro pearls
- Nail glue or a thick gel top coat
- Wax pencil or tweezers
How to Prepare:
- Apply your base color and top coat, then let dry.
- Place a tiny dot of glue where you want the pearl to sit.
- Pick up the pearl with a wax pencil and press it into the glue.
Budget Range
- Swarovski Elements Flat Back Pearls ($12)
- Makartt Rhinestone Glue Gel ($10)
- Nail Art Wax Picker Tool ($5)
Design Western Wedding Nails in 8 Steps

Why to love these Nails:
For the bride with a wild heart and a love for the rustic outdoors, western nails bring in elements of turquoise, leather tones, and silver. It’s a soulful, adventurous look that pairs perfectly with lace boots and sunset vows.
Essential Items:
- Turquoise polish
- Copper or silver metallic polish
- Tan or nude base
- Detailing brush
How to Prepare:
- Apply a warm tan base coat.
- Use a detailing brush to create a turquoise ‘stone’ effect on the thumb.
- Add silver metallic veins to the turquoise.
- Paint a small ‘fringe’ pattern on the index finger.
- Apply a copper stud to the middle nail.
- Create a matte finish on the ring finger for a leather look.
- Add a tiny silver horseshoe for luck on the pinky.
- Seal the art with a durable top coat.
Budget Range
- Sinful Colors Turquoise Rebel ($5)
- Cirque Colors Coronation ($16)
- Lights Lacquer Paper Snow ($13)
Get Neutral Wedding Nails in 5 Minutes

Why to love these Nails:
Neutral doesn’t mean boring; it means ‘quiet luxury.’ This look is for the bride who wants her natural beauty to take center stage. It’s clean, hydrated, and makes your hands look effortlessly manicured in a flash.
Essential Items:
- Sheer ‘your nails but better’ polish
- Glass nail file
- Quick-dry drops
How to Prepare:
- Quickly shape nails with a glass file to prevent peeling.
- Apply one coat of a sheer, tint-correcting polish.
- Apply a second coat for a slightly more milky finish.
- Add one drop of quick-dry solution to each nail.
- Apply cuticle oil and you’re ready to walk down the aisle!
Budget Range
- Dior Nail Glow ($30)
- Chanel Le Vernis in Ballerina ($32)
- Ella + Mila Sheer Collection ($11)
Paint Lace Wedding Nails in 10 Steps

Why to love these Nails:
Lace wedding nails are the ultimate homage to the bridal gown. They are intricate, delicate, and deeply romantic. This look mimics the fine threading of a veil, creating a soft, textured appearance that is absolutely breathtaking in close-up ring shots.
Essential Items:
- White stamping polish
- Lace pattern stamping plate
- Scraper and stamper
- Sheer base color
How to Prepare:
- Paint nails with a sheer nude base.
- Apply white polish to the lace stamping plate.
- Scrape off the excess at a 45-degree angle.
- Press the stamper onto the plate to pick up the design.
- Carefully roll the stamper over your nail.
- Clean up the skin around the nail with a brush.
- Repeat for accent nails.
- Add a tiny rhinestone in the center of a lace flower.
- Apply a matte top coat for a fabric feel.
- Add a glossy top coat over the stone for shine.
Budget Range
- Moyou London Bridal Collection Plate ($10)
- Konad Stamping Polish ($7)
- What Up Nails Stamper ($9)
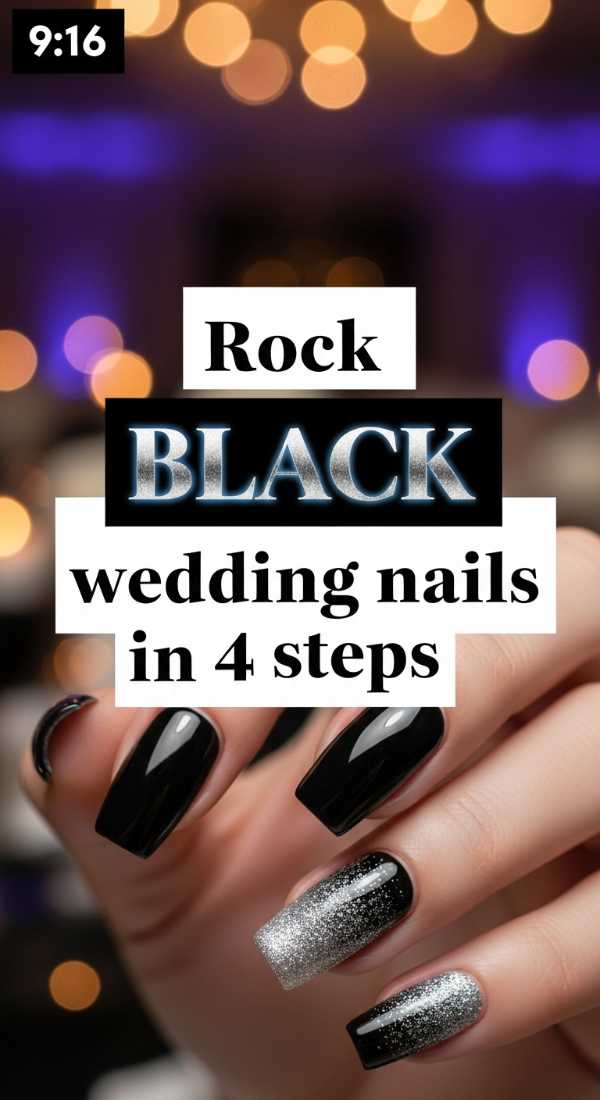
Rock Black Wedding Nails in 4 Steps
Why to love these Nails:
Who says you can’t be bold? Black wedding nails are for the modern, edgy bride who wants to break tradition in the most stylish way possible. It creates a stunning contrast against a white gown and exudes confidence and mystery.
Essential Items:
- Jet black crème polish
- Matte top coat
- Glossy top coat
How to Prepare:
- Apply two coats of deep black polish.
- Apply a matte top coat to the entire nail.
- Use a glossy top coat only on the very tips for a ‘tuxedo’ effect.
- Clean up the edges for a razor-sharp finish.
Budget Range
- Mooncat Shrike ($14)
- Lights Lacquer Tuxedo Mask ($13)
- Essie Licorice ($10)
Your Journey to the Perfect I-Do Mani
My loves, whether you choose the softest whisper of a neutral or the bold statement of a midnight black, remember that these nails are part of your story. They will be there when you sign your marriage license, when you toast to your future, and when you hold your partner’s hand for the first time as a married couple. Choose the look that makes you feel most like *you*. You are beautiful, you are loved, and your wedding day is going to be absolutely spectacular. Happy painting!