
From Sawdust to Style: Modern Heirloom Furniture You Can Build
There is something inherently magical about the scent of fresh-cut cedar and the gritty coating of sawdust on your palms at the end of a long afternoon. We live in a world of flat-packed, disposable furniture that lacks soul, but when you pick up a tool and transform a raw piece of wood into a functional work of art, you aren’t just making a table—you’re crafting a story. Building your own furniture is an act of rebellion against the temporary, a way to anchor your home with pieces that carry the weight of your own effort and creativity.
I remember the first time I sanded down a rough-hewn board to reveal the intricate, swirling grain hidden beneath the surface; it felt like uncovering a secret. This blog is a love letter to that process. Whether you are a seasoned woodworker or a complete novice with a borrowed drill, these projects are designed to bridge the gap between ‘scrappy DIY’ and ‘high-end interior design.’ Let’s dive into the world of pallet transformations and discover how to build modern heirlooms that will be the centerpiece of your home for years to come.
How to Build a Chic Pallet Table for Sustainable Living
Why we love this
This piece is the ultimate marriage of environmental consciousness and minimalist chic. We adore the way the raw, weathered texture of reclaimed oak pallets contrasts against a modern, clean-lined interior, bringing a touch of the forest floor into a sophisticated living room. There is a tactile joy in running your fingers over the smooth, waxed surface, feeling the historical divots and nail holes that tell a story of the wood’s former life. It smells faintly of beeswax and old timber, grounding your home in a way that mass-produced furniture simply cannot replicate.
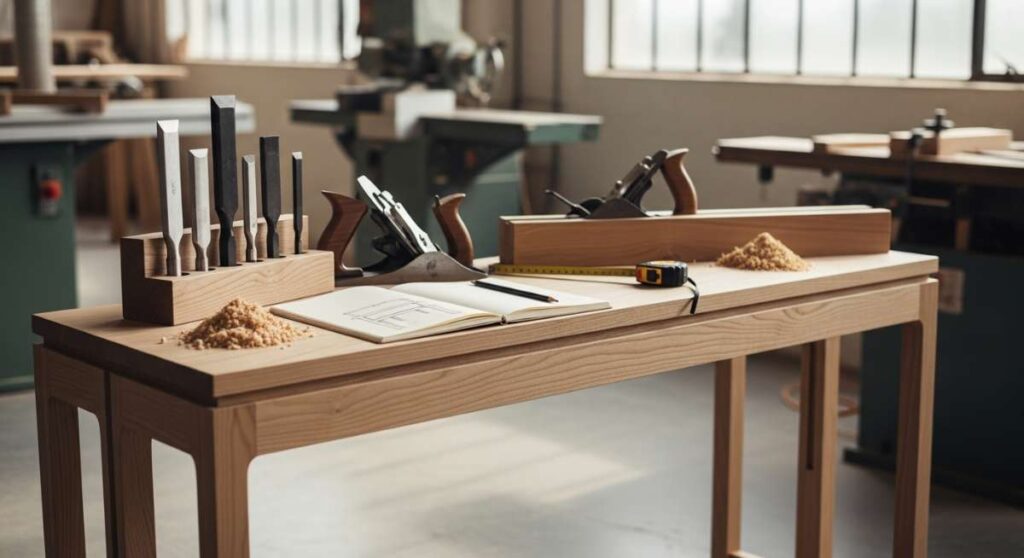
Essential Elements:
- Heat-treated (HT) reclaimed wood pallets
- Heavy-duty orbital sander
- 80, 120, and 220 grit sandpaper
- Non-toxic carnauba wax or beeswax finish
- Recycled steel hairpin legs
- Wood glue and countersunk screws
How to make it
- Carefully dismantle your pallets using a pry bar and a hammer, taking care not to split the planks. Remove all old nails and staples using pliers.
- Sort your planks by thickness and width to ensure a level tabletop. Layout the boards in a pattern that highlights the natural variations in the wood grain.
- Sand each board thoroughly, starting with 80-grit to remove the rough exterior, then progressing to 120-grit for smoothness, and finishing with 220-grit for a buttery-soft touch.
- Construct a simple rectangular frame using the sturdiest pallet stringers, then glue and screw your sanded planks onto the frame. Use a Kreg jig for hidden pocket holes if you want a seamless look.
- Apply two coats of carnauba wax using a lint-free cloth, buffing in circular motions until the wood glows with a deep, natural luster.
- Flip the table and attach the steel hairpin legs to the four corners, ensuring they are perfectly square to prevent wobbling.
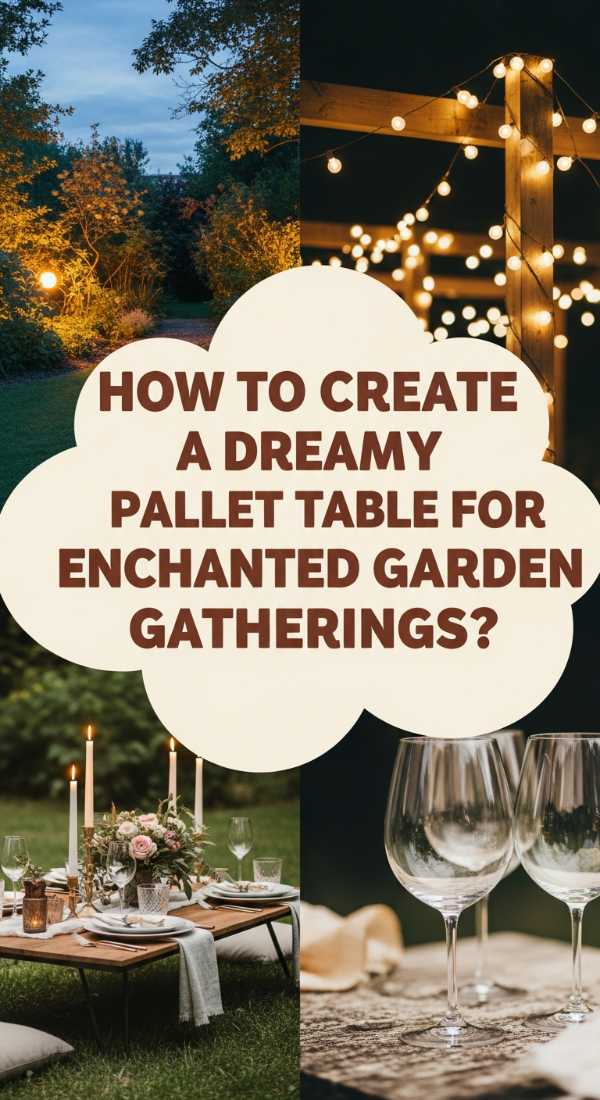
How to Create a Dreamy Pallet Table for Enchanted Garden Gatherings

Why we love this
Imagine a warm summer twilight, the air thick with the scent of jasmine, and your guests gathered around a low-profile table that seems to have grown right out of the grass. This garden table captures that whimsical, bohemian spirit perfectly. The whitewashed finish reflects the glow of string lights and candles, creating an ethereal atmosphere for long conversations and shared plates. Its low height encourages a relaxed, picnic-style dining experience that feels both intimate and wildly adventurous, turning a simple backyard into a magical escape.
Essential Elements:
- Two large, identical pallets
- Weather-resistant whitewash or diluted chalk paint
- Outdoor-rated wood sealant
- Four 4-inch heavy-duty swivel casters
- Outdoor cushions and floor poufs
- Electric drill and long carriage bolts
How to make it
- Stack two pallets on top of each other to reach the perfect ‘lounge’ height. Align the corners precisely and secure them together using long carriage bolts in each corner for maximum stability.
- Sand only the top surface and the outer edges to prevent splinters, leaving the interior nooks slightly rough to maintain that rustic garden charm.
- Apply a thin layer of whitewash, wiping it back with a damp rag while wet to allow the wood’s natural knots to peek through the pigment.
- Once dry, apply two coats of a high-quality outdoor sealant. Look for a matte finish to keep the ‘enchanted’ look without a plastic-like shine.
- Invert the table and install the swivel casters at each corner. This allows you to easily move the party from the patio to the lawn as the sun sets.
- Style the table with a linen runner and surround it with plush outdoor floor cushions for the ultimate boho dining setup.
How to Style Rustic Wood Pallet Tables for a Cozy Farmhouse Aesthetic

Why we love this
The farmhouse look is all about warmth, durability, and a sense of ‘home,’ and nothing achieves this better than a chunky, dark-stained pallet table. We love the substantial, grounding presence this piece brings to a breakfast nook or entryway. The deep walnut tones evoke images of old barns and heritage craftsmanship, while the sturdy construction promises to withstand the chaos of family life. It’s a sensory delight—the cool touch of a ceramic mug on the dark wood and the rich, earthy aroma of oil-based stains that make the house feel instantly lived-in and loved.
Essential Elements:
- High-quality pallet wood (preferably hardwood)
- 4×4 timber posts for the legs
- Dark Walnut or Espresso wood stain
- Wood filler (stainable)
- Polyurethane topcoat (satin finish)
- Miter saw and drill
How to make it
- Select the thickest, most durable planks from your pallet haul. Cut them to equal lengths using a miter saw for perfectly square ends.
- Build a robust base frame using 2x4s, then attach 4×4 timber posts as legs. Use wood glue and heavy-duty lag bolts for a structure that will never shake.
- Secure your top planks to the frame, leaving no gaps between them. Use wood filler to plug any unsightly nail holes, ensuring you use a type that accepts stain.
- Sand the entire piece to 180 grit. Wipe away all dust with a tack cloth; any leftover debris will ruin the dark finish.
- Apply the Dark Walnut stain evenly with a foam brush. Let it sit for 5-10 minutes before wiping away the excess to achieve a rich, uniform color.
- After the stain cures for 24 hours, apply three coats of satin polyurethane, sanding lightly with 320-grit sandpaper between coats for a professional, durable finish.
How to Customize Clever Pallet Table Ideas for Urban Balcony Retreats
Why we love this
Urban living often means sacrificing space, but this clever folding pallet table proves you don’t have to sacrifice style. We love the ingenuity of a piece that ‘disappears’ when not in use, clinging to a balcony rail like a secret shelf. It transforms a cramped outdoor area into a functional morning coffee nook where you can watch the city wake up. The texture of the wood adds a necessary organic element to the concrete and glass of an urban landscape, offering a soft, natural respite amidst the hustle and bustle.
Essential Elements:
- One small, lightweight pallet
- Heavy-duty folding shelf brackets
- Masonry or railing anchors
- Exterior wood paint in a bold pop of color
- Sandpaper and wire brush
How to make it
- Choose a smaller pallet or cut a standard pallet in half to fit the dimensions of your balcony. Sand it down to remove any rough spots that could snag clothing.
- Paint the pallet with a vibrant, weather-proof exterior paint—think terracotta or sage green to contrast the grey city vibes.
- Identify the studs in your balcony wall or the strongest points on your railing. If mounting to a wall, use a hammer drill and masonry anchors for a secure hold.
- Attach the folding shelf brackets to the bottom of the pallet, ensuring they are level. These brackets allow the table to drop down flat against the wall when folded.
- Mount the other side of the brackets to your wall or railing at a comfortable bar height (usually 42 inches).
- Test the weight capacity and foldability. Finish by adding a few small potted succulents to the slats of the pallet for a vertical garden effect.
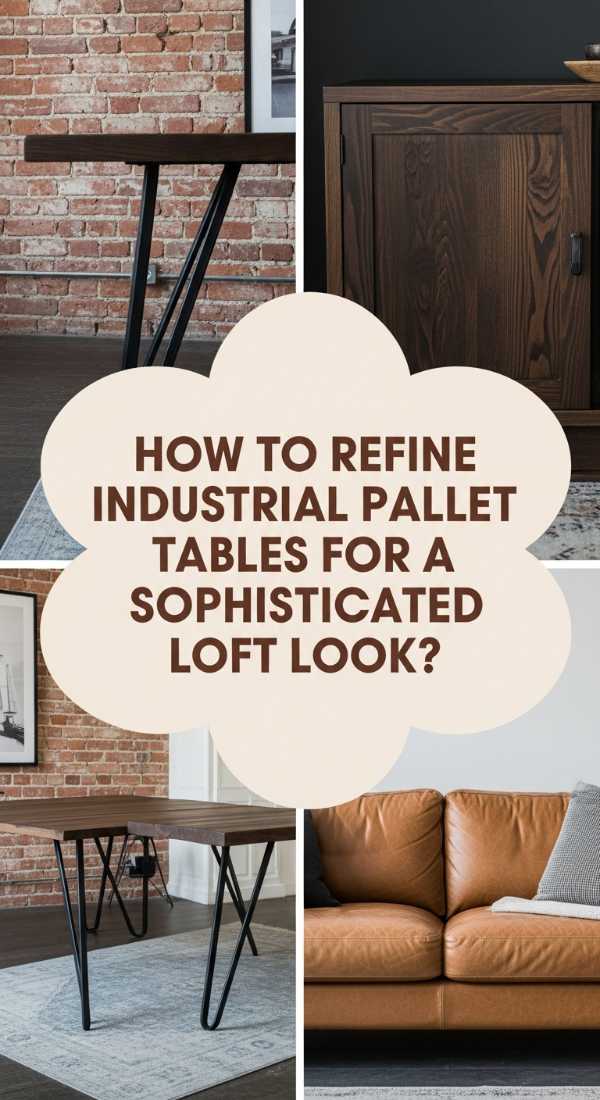
How to Refine Industrial Pallet Tables for a Sophisticated Loft Look

Why we love this
There is a raw, masculine energy to the industrial style that we find absolutely captivating. By combining the ruggedness of pallet wood with the cold, hard lines of black iron piping, you create a piece that feels both architectural and historical. It’s the perfect centerpiece for a loft, where the high ceilings and exposed brick demand furniture with a strong visual weight. The contrast of the warm wood grain against the matte black metal is visually striking and feels incredibly high-end, despite its humble origins.
Essential Elements:
- Weathered pallet planks
- 1-inch diameter black iron pipes and flanges
- Matte black spray paint for metal
- Clear matte lacquer for wood
- Power drill and metal screws
How to make it
- Clean your black iron pipes thoroughly with degreaser to remove the factory oil. Once dry, spray them with a matte black paint for a uniform, architectural finish.
- Assemble the pipe legs into an ‘H’ or ‘U’ shape using T-junctions and elbows. Ensure all joints are tightened fully with a pipe wrench so the base is rigid.
- Prepare your pallet planks by cleaning them with a wire brush to emphasize the grain, then sand lightly. Apply a clear matte lacquer to protect the wood without changing its raw color.
- Lay the planks face down and secure them together using two cross-braces of wood on the underside.
- Place your pipe flanges on the cross-braces and screw them in using heavy-duty wood screws.
- Flip the table over. The weight of the iron will keep it incredibly stable, making it a perfect statement piece for a high-traffic area.
How to Master a Pallet Table DIY for a Functional Home Workspace

Why we love this
In the era of remote work, having a workspace that inspires you is vital. We love this DIY desk because it prioritizes both ergonomics and aesthetics. The wide, flat surface provides ample room for monitors and notebooks, while the built-in ‘cubby’ holes inherent in a pallet’s design offer the perfect place to hide messy cables and hard drives. It feels organized and intentional, turning the daily grind into a more creative experience. The smell of the wood and the solid feel of the desk under your keyboard provide a grounding sense of productivity.
Essential Elements:
- Full-size pallet (clean and heat-treated)
- Sheet of 1/4 inch tempered glass or plywood topper
- Cable management clips
- White semi-gloss furniture paint
- Industrial-style desk legs (IKEA or similar)
How to make it
- Start with a pallet that is in excellent condition. Sand the top surface until it is perfectly level; use a spirit level to check multiple angles.
- Paint the entire pallet and the legs in a crisp, semi-gloss white. This gives it a clean, professional ‘studio’ look that fits into any home office.
- Attach your chosen desk legs to the four corners of the pallet. Ensure the height is ergonomically correct for your chair (usually 28-30 inches).
- Route your computer cables through the internal channels of the pallet. Use adhesive cable clips to keep everything tucked away and invisible from the side.
- Since pallet tops aren’t perfectly smooth for writing, add a custom-cut sheet of tempered glass or a thin, sanded plywood topper over the pallet.
- If using glass, use clear silicone bumpers to keep it from sliding. This creates a perfectly smooth writing surface while still showing the wood beneath.
How to Design an All Weather Pallet Table for Ultimate Outdoor Relaxation

Why we love this
This is the table for those who live for the outdoors. We love its rugged resilience and the way it encourages you to slow down and enjoy the fresh air. Designed to withstand rain, sun, and snow, this piece actually looks better as it ages and develops a natural silver patina. It’s a sensory masterpiece of durability—the heavy, solid ‘thunk’ of the wood and the way it stays cool to the touch even in the summer heat. It’s the heart of the patio, ready for spilled drinks, summer storms, and years of memories.
Essential Elements:
- Pressure-treated or naturally rot-resistant pallets
- Marine-grade spar urethane
- Stainless steel screws (to prevent rust streaks)
- Large-grit and fine-grit sandpaper
- Power washer
How to make it
- Give your pallets a deep clean using a power washer to remove years of dirt and grime. Let the wood dry completely (usually 48 hours) before working.
- When assembling the top, leave 1/8th inch gaps between the planks. This allows water to drain through rather than pooling on top and causing rot.
- Use stainless steel screws for all connections. Regular screws will corrode over time and leave ugly black streaks down the sides of your table.
- Sand the wood vigorously, ending with 120-grit. You want it smooth enough for bare skin but textured enough for the sealant to grip.
- Apply three coats of marine-grade spar urethane. This is the stuff used on boats; it contains UV blockers and expands/contracts with temperature changes.
- Let the final coat cure for a full 72 hours before placing it in the elements to ensure the protective barrier is fully hardened.
How to Finish Natural Wood Pallet Tables for an Organic Interior Feel
Why we love this
Scandinavian and Japandi styles are all about the ‘natural’ look, and this finishing technique celebrates the wood in its purest form. We love the soft, muted tones and the velvet-like texture that this process achieves. It doesn’t look like a DIY project; it looks like a high-end designer piece from a boutique furniture store. There is a quiet, calming energy to the light wood that opens up a room, making it feel airy and connected to the natural world. It’s a piece that invites you to touch it, offering a serene sensory experience.
Essential Elements:
- Light-colored pallet wood (pine or poplar)
- Pure Tung oil or Danish oil
- Fine steel wool
- 400-grit sandpaper
- Microfiber tack cloths
How to make it
- Select pallets with the lightest color possible. Sand them progressively from 80-grit all the way up to an ultra-fine 400-grit. The wood should feel like silk.
- Remove every speck of dust using a vacuum followed by a microfiber tack cloth. Any dust trapped under the oil will feel like sandpaper.
- Apply a generous coat of Tung oil using a lint-free rag. Let it soak in for 30 minutes, then wipe away any excess that hasn’t been absorbed.
- Wait 24 hours, then lightly buff the surface with fine steel wool. This ‘knocks down’ any raised grain and keeps the surface incredibly smooth.
- Repeat the oiling and buffing process 3 to 5 times. Each layer adds a subtle depth and a soft, organic glow that mimics the look of raw wood but offers protection.
- Maintain the finish by reapplying a single coat of oil once a year to keep the wood hydrated and beautiful.
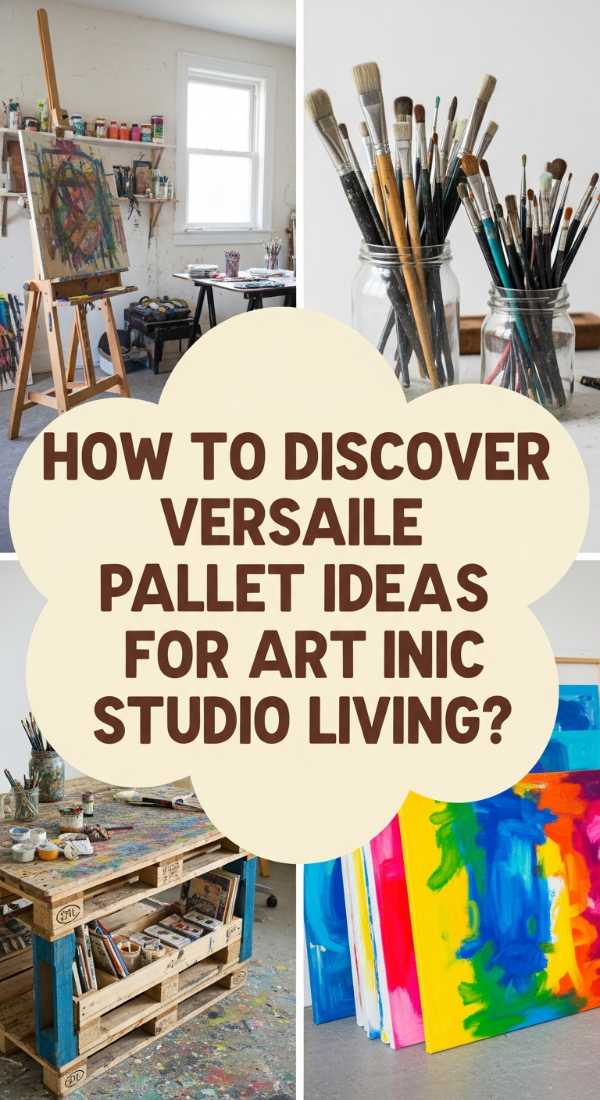
How to Discover Versatile Pallet Table Ideas for Artistic Studio Living
![]()
Why we love this
For the artists and the makers, this table is a dream come true. We love its sheer versatility—it functions as a workbench, a drafting table, and a storage unit all in one. The double-stacked design creates deep, accessible shelves for storing canvases, oversized paper, or power tools. It’s a piece that isn’t afraid to get dirty; in fact, a few paint splatters only add to its ‘creative studio’ character. It’s big, bold, and incredibly sturdy, providing the physical foundation for your most ambitious projects.
Essential Elements:
- Three large, heavy-duty pallets
- Thick plywood for internal shelving
- Locking industrial casters (5-inch)
- Clear heavy-duty floor wax
- Impact driver
How to make it
- Stack three pallets. Before securing them, measure the height of the ‘open’ spaces between the pallet layers.
- Cut sheets of plywood to fit into these spaces, creating solid shelves within the pallet structure. Secure them with small cleats or wood glue.
- Secure the three pallets together using long timber screws driven through the corner blocks. Ensure the stack is perfectly vertical.
- Apply a heavy-duty floor wax to the top and sides. This makes the wood easy to wipe down if you spill paint or ink during your creative process.
- Invert the stack and install large, 5-inch locking casters. The larger wheels make it easier to roll over cords or uneven studio floors.
- Utilize the side openings of the pallets by adding small hooks for hanging tools or bins for brushes, making every inch of the table functional.
How to Transform Basic Pallet Tables for a Glamorous Statement Piece
[IMAGE_10]
Why we love this
Who says pallets can’t be glamorous? We love the ‘high-low’ mix of this piece—it takes the roughest, most utilitarian material and elevates it with touches of gold and high-gloss finishes. It’s a conversation starter that challenges people’s perceptions of what DIY can be. The visual contrast of the rugged wood grain under a gleaming metallic accent is breathtakingly modern. It feels like ‘urban luxury,’ bringing a sophisticated, high-fashion vibe to a dining room or hallway that traditionally wouldn’t host reclaimed wood.
Essential Elements:
- One clean pallet
- Gold leaf kit or metallic gold spray paint
- High-gloss black enamel paint
- Tempered glass top (custom fit)
- Hairpin legs in a matching gold finish
How to make it
- Sand the pallet thoroughly and apply two coats of high-gloss black enamel paint. The glossier the better, as it provides a sleek, modern backdrop for the accents.
- Choose a few select areas of the wood grain—perhaps a particularly beautiful knot or a single plank—and apply gold leaf according to the kit instructions.
- Seal the gold leaf with the specialized sealer provided in the kit to prevent it from flaking or tarnishing over time.
- Attach gold-finished hairpin legs to the bottom of the pallet to continue the ‘glam’ theme from top to bottom.
- Place a custom-cut sheet of tempered glass over the top. The glass protects the delicate gold leaf and the high-gloss paint while adding a final layer of luxury.
- Style with a single, oversized crystal vase or a stack of high-end fashion books to complete the look.
Conclusion
Building your own furniture is a journey that starts with a simple idea and ends with a piece of your soul sitting in your living room. From the rugged industrial lofts to the sun-drenched enchanted gardens, the humble pallet is a canvas for your creativity. I hope these projects inspire you to pick up a sander, embrace the sawdust, and create something that you will be proud to pass down. Remember, the beauty isn’t just in the finished table; it’s in the grit, the learning, and the satisfaction of saying, ‘I built this.’