
From Swings to Fairytales: 10 Whimsical Ideas for Your Garden
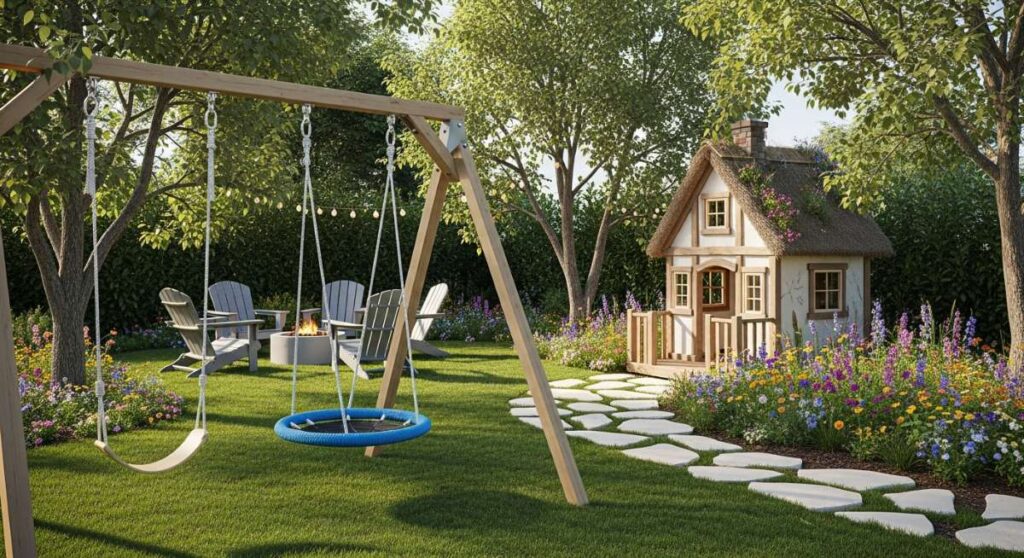
There is a specific kind of magic that lives in the backyard during the golden hour, where the long shadows of the oak trees turn into dragons and the rustle of the leaves sounds like a secret map being unfolded. As parents, we often find ourselves looking through the glass door, wishing we could gift our children a piece of that pure, unadulterated wonder we felt when the world was big and full of mysteries. A backyard isn’t just a patch of grass; it is the stage for the most important stories our children will ever write.
Creating a dreamy backyard play space is about more than just a plastic slide and a patch of dirt. It is about crafting an environment that breathes with imagination, using textures that ground them and heights that challenge them. Whether you have a sprawling estate or a cozy suburban nook, these whimsical garden ideas are designed to bridge the gap between the modern home and the wild, wonderful call of the great outdoors. Let’s transform your garden into a sanctuary where the only limit is how high they can dream.
How to Build a Natural Outdoor Playground for Pure Childhood Wonder
Why we love this
This design celebrates the raw, earthy beauty of the elements, blending seamlessly into your existing landscaping while offering a tactile feast for the senses. Imagine the scent of freshly shaved cedar mingling with the damp, sweet aroma of pine mulch underfoot as little hands grip the rough, honest texture of locust wood climbing rungs. It feels less like a structure and more like a fallen tree in an enchanted forest, grounding children in the physical world while their minds soar through the canopy. The aesthetic is timeless, aging beautifully into a silver patina that looks better with every passing season.
Essential Elements:
- Black locust or cedar logs for structural integrity.
- Hemp or manila rope for natural-looking grips.
- Smooth river stones for grounding the base.
- Engineered wood fiber or bark mulch for safety surfacing.
- Native ferns and moss-covered boulders for perimeter softening.
How to make it
- Begin by excavating the designated area to a depth of 12 inches to allow for proper drainage and a thick safety substrate. Ensure the ground is perfectly level by using a 4-foot level and a straight board to prevent structural leaning.
- Select rot-resistant timber like cedar; if using raw logs, peel the bark using a drawknife to prevent moisture retention and insect infestation. Treat the wood with a non-toxic, child-safe sealant to preserve the grain without losing the organic feel.
- Dig post holes at least 3 feet deep for main supports, ensuring they sit below the frost line to prevent shifting. Secure the posts using a dry-pour concrete method, checking for vertical plumbness repeatedly before the ‘cure’ phase begins.
- Install horizontal climbing rungs by pre-drilling holes to avoid splitting the timber. Use galvanized carriage bolts rather than screws for maximum shear strength, countersinking the heads so they sit flush with the wood surface.
- Fill the excavated area with 9 inches of certified playground mulch. The ‘doneness’ of this step is achieved when the surface feels springy and firm, providing a consistent depth across the entire play zone to meet safety standards.
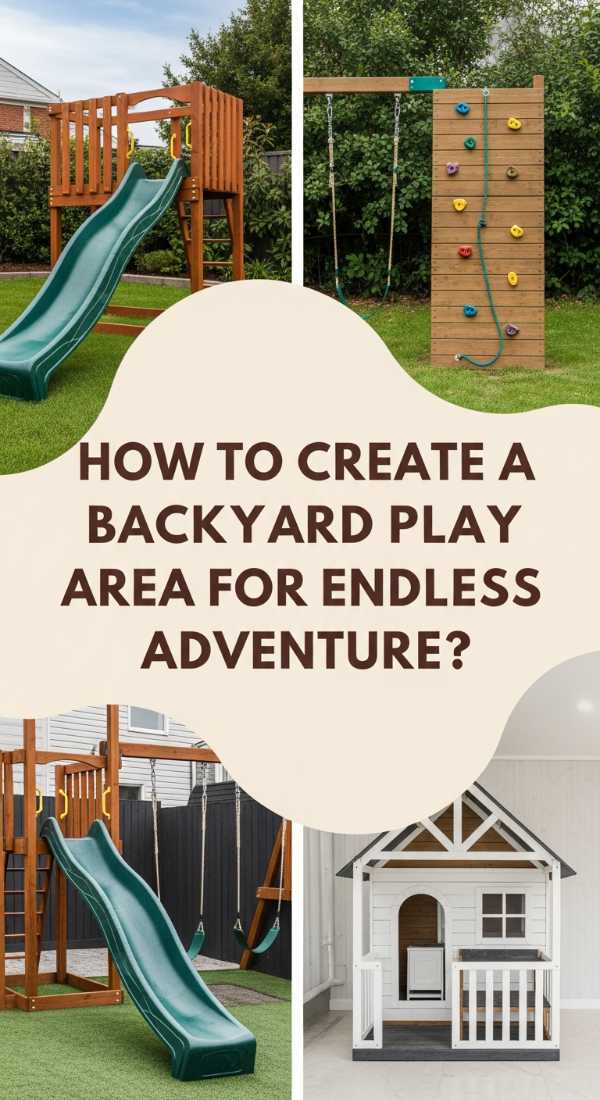
How to Create a Backyard Play Area for Kids to Spark Endless Adventure

Why we love this
An adventure-based play area is all about the thrill of the hidden and the joy of discovery, turning your backyard into a multi-level labyrinth. We love the way this setup encourages movement, from the rhythmic thud of boots on a wooden bridge to the cool, metallic zip of a hidden tunnel. There is a palpable sense of excitement in the air, smelling of sun-warmed canvas and the crisp ozone of a summer afternoon spent in high-stakes hide-and-seek. It transforms a flat lawn into a dynamic landscape of peaks and valleys that challenges a child’s physical boundaries.
Essential Elements:
- Multi-level platforms with varying heights.
- Observation deck with a mounted telescope.
- Secret crawl-through tunnels made of heavy-duty HDPE.
- Climbing nets fashioned from marine-grade poly-rope.
- A ‘lookout’ flag system for communication.
How to make it
- Map out your ‘adventure zones’ using landscaping flour, designating a high-traffic central hub and radiating paths that lead to secret ‘outposts’ or hidden nooks.
- Construct the main platform using pressure-treated 4×4 posts. Use ‘heavy-duty’ joist hangers to ensure the floor can support the dynamic weight of multiple children jumping simultaneously.
- Mount a slide or a tunnel at a 30-degree angle for the perfect balance of speed and safety. When installing tunnels, ensure the interior is sanded completely smooth and that all joints are sealed to prevent pinching.
- Create a ‘climbing wall’ side using exterior-grade plywood. Bolt on colorful resin holds in a staggered pattern, testing each hold with your full body weight to ensure no rotation or loosening occurs under pressure.
- Install ‘sensory checkpoints’ like a bell or a steering wheel. The final ‘seasoning’ of the space involves adding a weather-resistant telescope at the highest point, leveled to the horizon line for clear viewing.
How to Design an Indoor Playground for Active Rainy Day Fun
Why we love this
When the clouds roll in and the garden is soaked, an indoor playground becomes a sanctuary of movement and warmth. We love the soft, hushed acoustics of a room filled with felted wool mats and the smooth, buttery feel of Baltic birch plywood under fingertips. It smells faintly of beeswax and clean laundry, creating a cozy contrast to the gray weather outside. This space allows for the same vertical exploration as an outdoor park but within a controlled, architectural environment that feels sophisticated and intentional.
Essential Elements:
- Scandinavian-style wooden wall bars (Stall Bars).
- Suspended silk hammocks or cotton swings.
- Padded floor mats with high-density foam cores.
- Ceiling-mounted pull-up bars with safety carabiners.
- Modular soft-play blocks in muted, aesthetic tones.
How to make it
- Identify a load-bearing wall for your climbing bars. Use a stud finder to locate the vertical supports and mark them clearly; never mount heavy play equipment directly into just drywall.
- Secure the wall bars using 3-inch lag bolts directly into the studs. The ‘test of doneness’ here is a zero-tolerance wiggle test; the bars should feel like a literal extension of the home’s skeleton.
- For ceiling swings, find the ceiling joists. Drill a pilot hole and install heavy-duty eye bolts rated for at least 500 lbs to account for the G-force of swinging.
- Layer the floor with 2-inch thick gym mats. Ensure the mats have a non-slip backing or use rug grippers to prevent sliding during high-energy landings.
- Finish the space by installing a ‘quiet corner’ with soft lighting. This acts as the ‘cool down’ phase of the room, allowing children to transition from high-intensity play to restful reading.
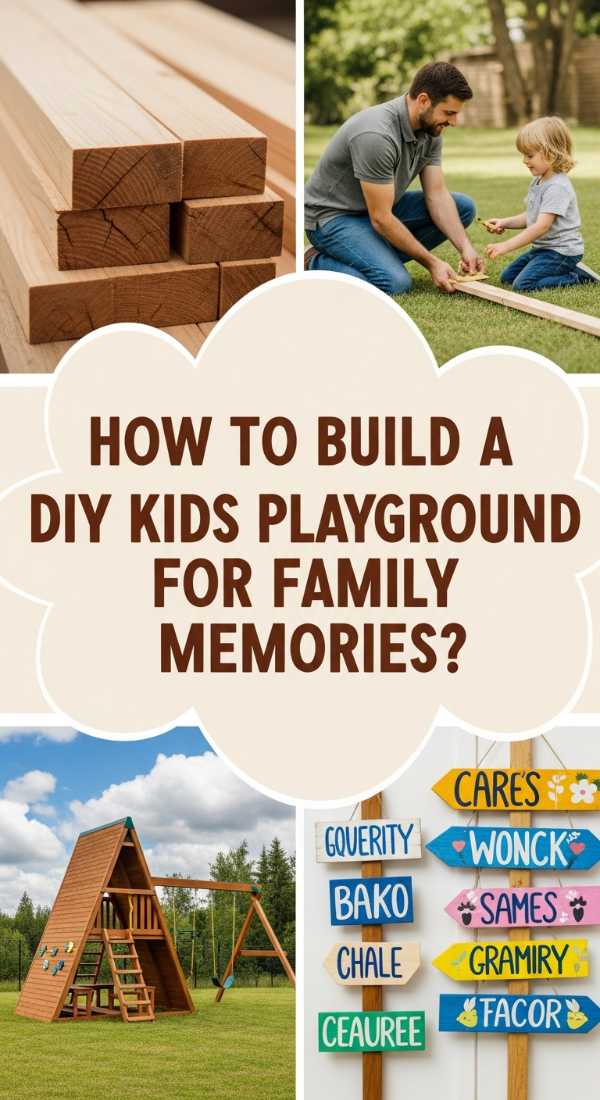
How to Build a DIY Kids Playground for Sustainable Family Memories

Why we love this
There is a profound soulfulness in building something with your own two hands using materials that respect the earth. This playground style emphasizes the use of upcycled elements, like the rugged texture of reclaimed barn wood and the vibrant, recycled rubber of old tires painted in pastel hues. It smells of sawdust and sunshine, carrying the invisible weight of the memories made during the building process itself. It’s a space that teaches children the value of stewardship and the beauty of giving old things a second, more playful life.
Essential Elements:
- Reclaimed wood planks (sanded and sealed).
- Upcycled tractor tires for climbing or swinging.
- Solar-powered fairy lights for evening ambiance.
- A garden patch for ‘kid-grown’ vegetables.
- Non-toxic milk paint for pops of color.
How to make it
- Source reclaimed wood that is free of lead paint or old chemical treatments. Sand every inch with 80-grit followed by 120-grit sandpaper until the wood feels like velvet to the touch.
- Construct a simple A-frame swing set using 4×6 beams for the top rail. Use through-bolts with washers on both sides to prevent the wood from crushing under the tension of the nuts.
- Thoroughly scrub old tires with a degreaser and power wash them before painting. Use a high-quality outdoor spray paint designed for rubber to ensure the color ‘sets’ without peeling in the heat.
- Integrate a small raised garden bed into the side of the playground. Use cedar boards for the bed to ensure it remains rot-resistant without the need for harsh chemical infusions.
- Install solar lanterns along the perimeter. The ‘visual cue’ for completion is the first nightfall when the lights automatically flicker on, turning the DIY project into a glowing sanctuary.
How to Style a Backyard Playground for a Chic Family Oasis
Why we love this
This approach proves that a play space can be a breathtaking design feature rather than an eyesore. We adore the sophisticated palette of charcoal timbers, brass hardware, and cream-colored canvas shades that flutter like sails in the wind. It smells like blooming jasmine and expensive outdoor candles, offering a serene backdrop where adults can sip tea while children play in a space that looks like a high-end boutique hotel. The texture is all about refinement—smooth powder-coated steel and manicured boxwood hedges that frame the play zone like a piece of art.
Essential Elements:
- Monochromatic color schemes (black, white, or deep forest green).
- Architectural shade sails in neutral tones.
- Designer swing seats with leather or heavy canvas.
- Poured-in-place rubber surfacing in a sleek slate grey.
- Surrounding landscape lighting with warm LED bulbs.
How to make it
- Select a primary color for the structure and apply a professional-grade exterior stain. Apply two thin coats rather than one thick one to ensure the wood grain is visible but the color is deep and uniform.
- Install a shade sail by mounting heavy-duty tensioners to your house or reinforced posts. The sail should be pulled taut enough that it doesn’t flap in the breeze, creating a sharp, geometric silhouette.
- Replace standard plastic swings with high-end versions featuring powder-coated chains. This small detail elevates the ‘texture’ of the playground significantly.
- Edge the play area with a clean metal or stone border to create a definitive ‘zone’ that keeps the mulch from spilling into the manicured lawn.
- Add ‘adult’ comforts nearby, such as a matching Adirondack chair or a minimalist bench. The ‘doneness’ is achieved when the playground looks like it was designed by an architect rather than bought from a box.
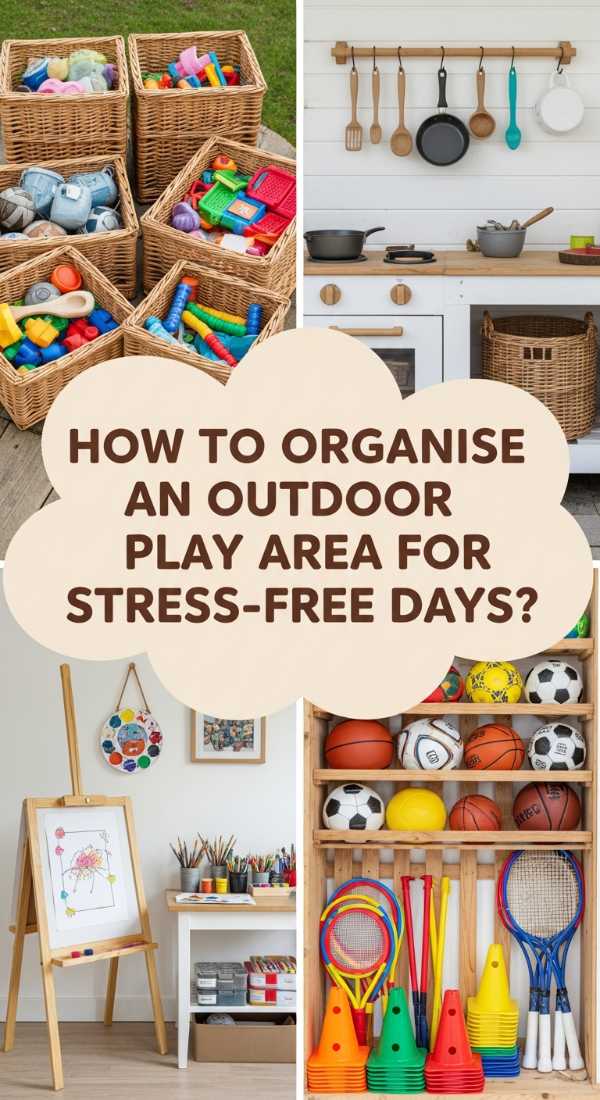
How to Organise an Outdoor Kids Play Area for Stress-Free Afternoons
Why we love this
Organization is the secret ingredient to peace, and a well-ordered play area feels like a breath of fresh air. We love the visual harmony of designated ‘stations’—a spot for trucks, a basket for balls, and a clear path for running. It smells like organized efficiency—fresh, clean, and open. The feeling is one of calm capability, where children know exactly where their treasures live and clean-up feels like a satisfying ritual rather than a chore. It’s the ultimate way to ensure the garden remains a place of relaxation for the whole family.
Essential Elements:
- Weatherproof storage bins with labels.
- A ‘parking lot’ for ride-on toys made of flat pavers.
- Hooks for jump ropes and helmets.
- Distinct ‘zones’ separated by pathways.
- A ‘lost and found’ basket for stray toys.
How to make it
- Audit all outdoor toys and discard anything broken. Categorize the remaining items by ‘play type’ (e.g., active, creative, sensory).
- Install a series of large, ventilated deck boxes. The ventilation is crucial to prevent the ‘musty’ smell that occurs when damp toys are stored in airtight containers.
- Create a ‘toy garage’ using a small garden shed or a covered rack. Use a stencil to paint ‘parking bays’ on the floor to encourage kids to return their bikes to the correct spot.
- Mount weather-resistant hooks at the child’s eye level. This ensures they can reach their own gear, fostering independence and reducing the ‘prep time’ for play.
- Establish a ‘reset’ routine. The ‘visual cue’ of an organized space is a clear lawn where the green grass is visible and all bright plastics are tucked away in their designated homes.
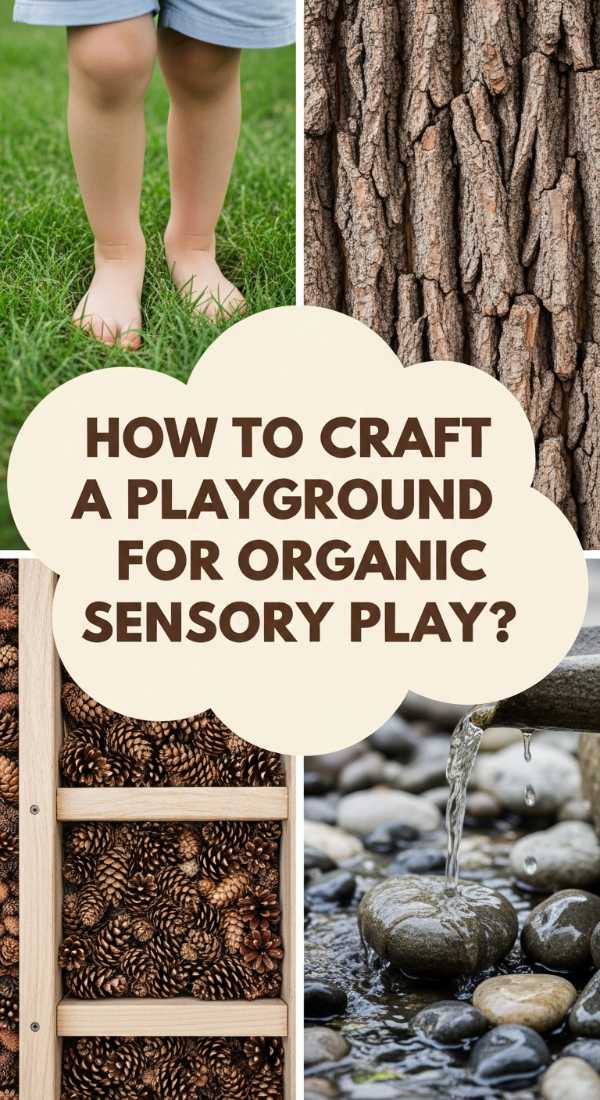
How to Craft a Natural Backyard Playground for Organic Sensory Play
Why we love this
Sensory play is the heartbeat of childhood, and this organic approach is a masterclass in texture and aroma. We love the squelch of mud in a handmade ‘kitchen,’ the grainy flow of kiln-dried sand between toes, and the fragrance of crushed mint and rosemary from a nearby herb patch. It’s a messy, glorious, tactile experience that feels deeply connected to the earth. The aesthetic is wonderfully rustic, featuring weathered wood and galvanized steel buckets that clink with the sound of busy, creative work.
Essential Elements:
- A dedicated mud kitchen with a real (but disconnected) sink.
- A large sand pit with a wooden cover.
- A ‘scent garden’ with lavender, mint, and lemon balm.
- Water play station with bamboo troughs.
- Smooth river pebbles for sorting and stacking.
How to make it
- Build the mud kitchen frame using cedar 2x4s. Countertops should be set at roughly 20-24 inches high to accommodate a range of toddler and elementary ages.
- Install a ‘prep station’ by setting a stainless steel mixing bowl into a cut-out in the wood. Ensure the edges are filed smooth to prevent any sharp burrs from catching skin.
- For the sand pit, use a permeable landscape fabric at the base to allow for drainage while preventing weeds from growing upward through the sand.
- Plant a ‘sensory border’ directly around the kitchen. Choose robust herbs like rosemary that can withstand being ‘harvested’ for mud pies and soup.
- Add a water source, like a simple rain barrel with a spigot. The ‘test of doneness’ is the first time a child successfully mixes water, dirt, and herbs into a ‘fairytale potion.’
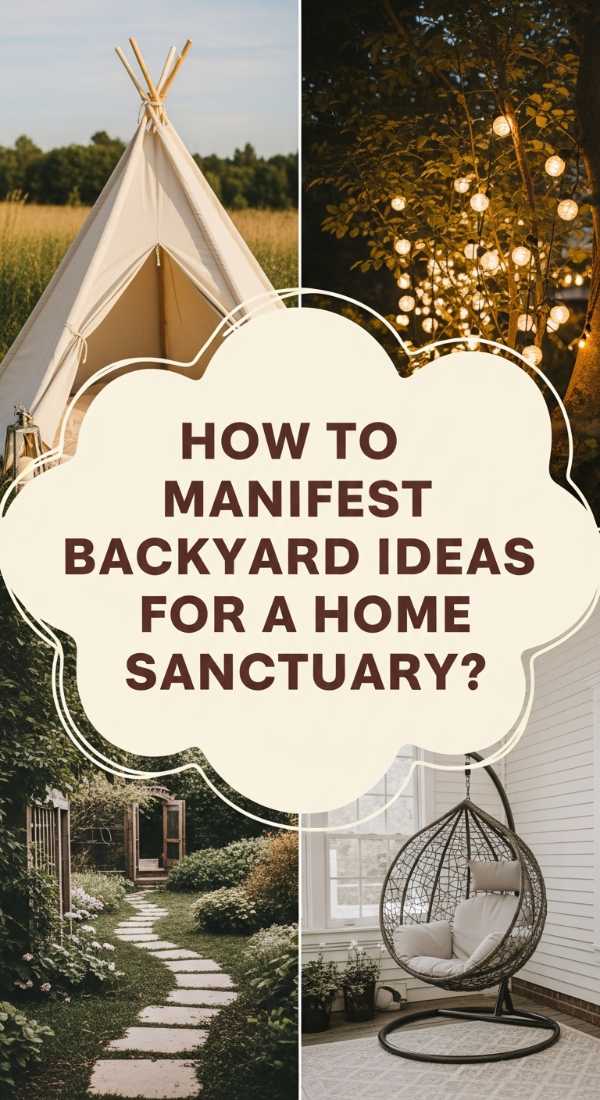
How to Manifest Kids Backyard Ideas for a Whimsical Home Sanctuary

Why we love this
This is the stuff of storybooks—a sanctuary that feels like it was whispered into existence by forest sprites. We love the ethereal glow of fairy lights woven through willow branches and the soft, velvety carpet of creeping thyme that releases a sweet scent when stepped upon. It feels like a secret garden where time slows down, and the air is thick with the magic of possibility. This design prioritizes soft edges, hidden corners, and elements that twinkle and shimmer, creating a space that feels truly sacred and secluded.
Essential Elements:
- A living willow tunnel or ‘fedge’ (fence-hedge).
- Fairy lights and copper lanterns.
- A ‘gnome home’ hidden at the base of a tree.
- Soft, trailing plants like ‘Silver Falls’ or ivy.
- A whimsical weather vane or wind chime.
How to make it
- Plant willow rods (salix) in early spring while they are dormant. Space them 6 inches apart and weave them into a lattice pattern, securing the joints with soft twine.
- Water the willow ‘structure’ heavily during the first year. The ‘visual cue’ for success is when the first green buds appear along the woven lattice, creating a living green wall.
- String copper-wire LED lights through the canopy of the trees. Use a timer so they ‘awaken’ just as the sun sets, providing a soft, magical transition into the evening.
- Create ‘fairy doors’ using scrap wood and moss. Place them at the roots of your largest trees, partially hidden by ferns to encourage the ‘discovery’ phase of play.
- Install a low-hanging bird feeder. This adds the sensory element of birdsong and movement to the sanctuary, making the garden feel ‘alive’ and full of hidden friends.
How to Assemble a DIY Playground for a Custom Outdoor Experience
Why we love this
A custom playground is a love letter to your child’s specific interests, tailored to their unique way of moving through the world. We love the way this setup can evolve, featuring interchangeable elements like a swinging tire one day and a gymnastics bar the next. It smells like fresh oil on a bicycle chain and the clean scent of sun-dried rope. There is a sense of bespoke quality here, where every bolt and beam has been chosen to provide the ultimate tailored experience for your little explorers.
Essential Elements:
- Modular mounting points for interchangeable equipment.
- Heavy-duty climbing ropes with knotted ‘steps.’
- A custom-built fort or ‘clubhouse’ with a chalkboard interior.
- A zip line with a spring-braking system.
- Personalized signage (e.g., ‘Leo’s Lookout’).
How to make it
- Design a ‘central spine’—a massive overhead beam supported by 6×6 posts. This acts as the anchor for all your custom attachments.
- Install ‘quick-release’ carabiners at 2-foot intervals along the beam. This allows you to ‘swap out’ the menu of activities—from a toddler bucket swing to a trapeze bar—in seconds.
- Build the clubhouse floor at least 4 feet off the ground for that ‘treetop’ feel. Use tongue-and-groove flooring for a ‘finished’ look that feels like a real room.
- If installing a zip line, ensure the ‘anchor tree’ or post is braced for at least 2,000 lbs of tension. Use a tensioning winch to get the cable ‘guitar-string’ tight before locking it down.
- Add a personalized touch with a hand-painted sign. The final ‘prep’ involves a safety walkthrough, checking every bolt and connection to ensure the ‘custom build’ meets professional-grade stability.
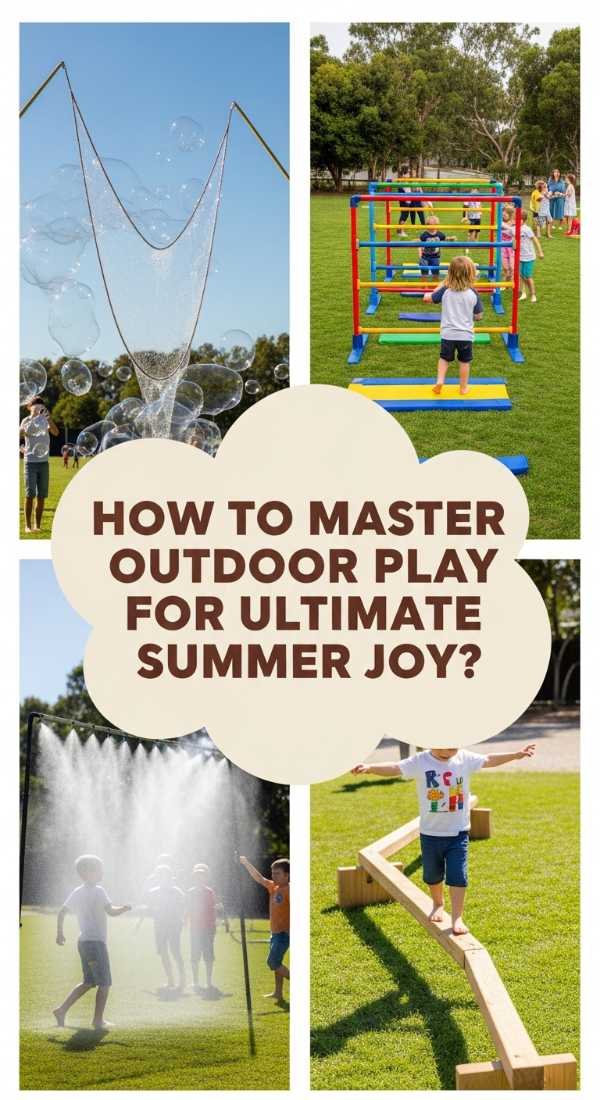
How to Master Kids Outdoor Play for the Ultimate Summer Joy
[IMAGE_10]
Why we love this
This is a celebration of the high-octane, sun-drenched peak of summer, where the air is filled with the mist of water spray and the high-pitched giggles of children at peak joy. We love the cool, slick texture of a water slide and the refreshing ‘pop’ of bubbles floating through the air. It smells like sunscreen, watermelon, and pure happiness. This setup is designed to beat the heat while maximizing energy, turning the backyard into a private water park and summer festival rolled into one.
Essential Elements:
- A misting system attached to the playground perimeter.
- A heavy-duty slip-and-slide with a padded landing zone.
- Large-scale bubble machines.
- A ‘hydration station’ with an infused water dispenser.
- Inflatable splash pools with shade umbrellas.
How to make it
- Install a misting kit along the top rail of your play structure. Connect it to a standard garden hose; the ‘perfect temp’ is a fine fog that cools the air by 10-15 degrees without soaking the equipment.
- Set up a slip-and-slide on a gentle downhill slope. Use a pool noodle at the end as a ‘bumper’ to provide a soft, safe finish to each run.
- Position a bubble machine in a ‘cross-wind’ area. This ensures the bubbles drift across the entire play area rather than clustering in one spot.
- Create a ‘shaded retreat’ using a pop-up canopy or large umbrella. Stock it with towels and a cooler. This is the ‘rest phase’ of the summer play cycle, crucial for preventing burnout.
- Ensure all grassy areas are mowed short (around 2 inches) to prevent tripping and to allow water to drain quickly. The ‘visual cue’ for the ultimate summer day is a backyard full of movement, mist, and rainbows catching in the spray.
Transforming Your Garden into a Forever Memory
As the sun finally dips below the fence line and the evening crickets begin their song, we see the true value of these spaces. It isn’t just about the timber, the ropes, or the chic aesthetics; it’s about the quiet confidence your child gains as they reach the top of the climbing wall, the creativity sparked in the mud kitchen, and the peace found in a willow tunnel. By investing time and heart into these whimsical garden ideas, you aren’t just landscaping—you’re building the backdrop for a childhood they will look back on with a heart full of wonder. So, grab your tools, find your inspiration, and start building that fairytale today.