
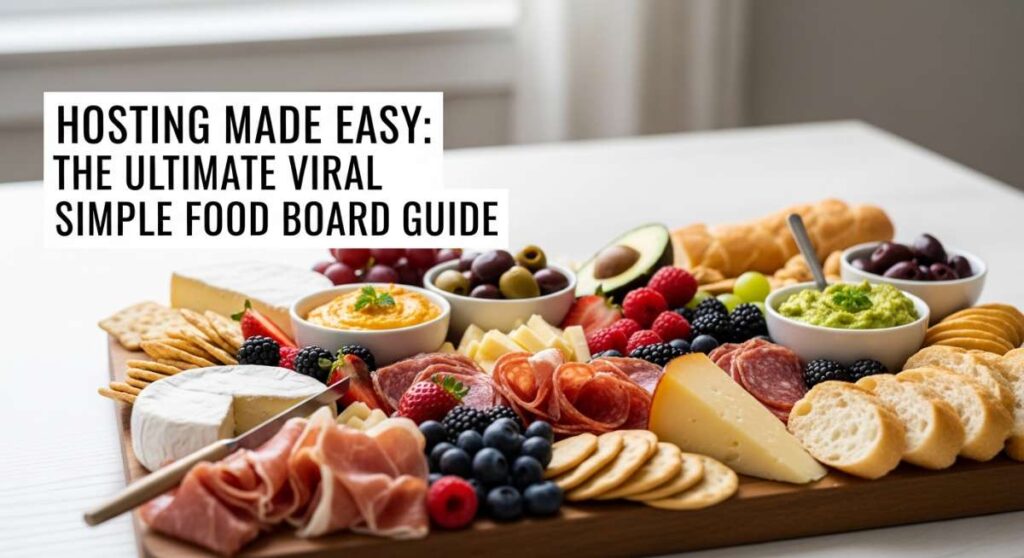
Hosting Made Easy: The Ultimate Viral Simple Food Board Guide
There is a certain magic that happens when you set a massive, colorful food board in the middle of a table. It’s more than just a meal; it’s an invitation for your friends and family to lean in, share stories, and graze at their own pace. I remember the first time I hosted a summer gathering where I ditched the formal plates for a giant spread—the atmosphere shifted instantly from polite conversation to genuine laughter and connection. It’s about creating a vibe that feels both effortless and incredibly thoughtful.
The secret to a viral-worthy food board isn’t just about how it looks, but how it tastes and feels. You want textures that pop, colors that sing, and flavors that transport your guests to a sun-drenched patio. Whether you are hosting a backyard BBQ or a cozy indoor brunch, these recipes are designed to be the stars of your spread. Let’s dive into the ultimate guide to making your next hosting event not just easy, but absolutely unforgettable.
How to Make Refreshing Watermelon Salad

Why we love this
This salad is the absolute definition of summer in a bowl. We love the way the icy, crisp crunch of the watermelon contrasts with the creamy, salty crumbles of high-quality feta cheese. As you take a bite, the fragrance of fresh-torn mint leaves hits your senses first, followed by the zesty zing of lime juice that cuts right through the sweetness. It is a sensory journey that feels like a cooling breeze on a humid afternoon, providing a hydrated and revitalized feeling that keeps guests coming back for more.
Ingredients
- 5 cups cubed seedless watermelon
- 1 cup crumbled feta cheese
- 1/2 cup thinly sliced red onion
- 1/2 cup fresh mint leaves, torn
- 2 tablespoons extra-virgin olive oil
- Zest and juice of 2 organic limes
- Flaky sea salt to taste
How to make it
- Begin by selecting a heavy, ripe watermelon; tap it to hear a hollow sound, which indicates it is full of juice. Carefully cube the fruit into 1-inch uniform pieces and place them in a large chilled glass bowl to maintain their temperature.
- Soak your thinly sliced red onions in a small bowl of ice water for 10 minutes. This professional trick removes the harsh sulfurous bite, leaving them crisp and mild.
- In a separate small whisking bowl, emulsify the lime juice, lime zest, and olive oil until the mixture is slightly thickened and cloudy.
- Drain the onions and pat them dry with a paper towel. Add them to the watermelon cubes.
- Drizzle the dressing over the fruit and gently toss using large wooden spoons to avoid smashing the watermelon.
- Just before serving, sprinkle the feta crumbles and the hand-torn mint leaves over the top. Finish with a generous pinch of flaky sea salt to enhance the natural sugars of the melon.
How to Grill Juicy Lemon Shrimp

Why we love this
Grilling shrimp brings out a natural, buttery sweetness that is perfectly complemented by the charred, smoky aroma of a hot flame. We love how the bright, acidic punch of lemon juice penetrates the tender meat, creating a profile that is both light and incredibly satisfying. The texture is the real winner here—snappy on the outside with a succulent, tender interior that melts in your mouth. It feels like a gourmet seaside dinner served right in your own backyard, filling the air with the scent of toasted garlic and citrus.
Ingredients
- 1 lb large shrimp, peeled and deveined
- 3 tablespoons olive oil
- 4 cloves garlic, minced
- 1 teaspoon smoked paprika
- 2 lemons (one juiced, one sliced into rounds)
- 1/4 cup chopped fresh parsley
- Wooden or metal skewers
How to make it
- If using wooden skewers, soak them in water for at least 30 minutes to prevent them from catching fire on the grill.
- In a medium mixing bowl, whisk together the olive oil, minced garlic, smoked paprika, and the juice of one lemon. This creates a flavor-packed marinade that will caramelize beautifully.
- Add the shrimp to the marinade and toss well. Let them sit in the refrigerator for no more than 20 minutes; any longer and the acid in the lemon will begin to “cook” the delicate seafood, changing its texture.
- Preheat your grill to medium-high heat (about 400°F). You want a high enough heat to sear the outside quickly without overcooking the center.
- Thread the shrimp onto the skewers, alternating with thin lemon rounds for extra aesthetic appeal and infused flavor.
- Place skewers on the clean, oiled grill grates. Cook for 2-3 minutes per side. Look for the visual cue of the shrimp turning from translucent grey to an opaque, vibrant pink with slight charred edges.
- Remove immediately and garnish with fresh parsley and an extra squeeze of lemon before serving warm.
How to Roast Sweet Summer Corn

Why we love this
There is nothing quite like the smell of roasting corn—a sweet, toasted aroma that instantly signals a celebration. This dish is a favorite because it transforms a simple vegetable into a decadent, caramelized treat. Each kernel pops with a burst of sugary juice, while the outside takes on a golden-brown hue and a slightly chewy texture from the high heat. Slathered in herb butter, it feels indulgent yet wholesome, capturing the essence of the harvest season with every golden bite.
Ingredients
- 6 ears of fresh sweet corn, husks removed
- 4 tablespoons unsalted butter, softened
- 1 teaspoon chili powder
- 1/2 teaspoon garlic powder
- Salt and black pepper to taste
- Fresh cilantro or chives for garnish
How to make it
- Preheat your oven to 425°F (220°C) or prepare a hot grill. High heat is essential for roasting rather than steaming the corn.
- In a small bowl, combine the softened butter with chili powder, garlic powder, salt, and pepper. Stir until you have a smooth, spiced compound butter.
- Lay each ear of corn on a piece of aluminum foil. Use a pastry brush or your fingers to generously coat every inch of the corn with the flavored butter.
- Wrap the foil tightly around each ear to trap the steam and fats, which will cook the kernels to perfect tenderness.
- Place the corn on a baking sheet or directly on the grill grates. Roast for about 20-25 minutes, rotating the ears halfway through the cooking time.
- For a charred finish, carefully open the foil for the last 5 minutes of cooking to let the direct heat caramelize the sugars in the corn.
- Remove from heat, unwrap, and garnish with fresh herbs before serving.
How to Prepare Zesty Pasta Salad
Why we love this
This pasta salad is the ultimate crowd-pleaser because it manages to be incredibly filling while remaining light and vibrant. We love the textural variety—the al dente bite of the pasta, the snap of fresh bell peppers, and the creamy richness of sliced olives all coming together in one forkful. The dressing is a zesty explosion that coats every noodle, ensuring that every bite is as flavorful as the last. It’s the kind of dish that actually tastes better as it sits, making it the perfect stress-free addition to any food board.
Ingredients
- 1 lb rotini or fusilli pasta
- 1 cup cherry tomatoes, halved
- 1 cucumber, diced
- 1/2 cup red bell pepper, chopped
- 1/4 cup red onion, finely minced
- 1/2 cup kalamata olives, sliced
- 1/2 cup Italian vinaigrette dressing
- 1/4 cup grated Parmesan cheese
How to make it
- Bring a large pot of salted water to a rolling boil. Add the pasta and cook according to the package directions, but aim for “al dente” (firm to the bite). This is crucial because the pasta will absorb the dressing later; if it’s too soft now, it will become mushy.
- Drain the pasta and immediately rinse it under cold running water. This stops the cooking process and removes excess starch, preventing the noodles from sticking together.
- While the pasta cools, chop your vegetables into uniform, bite-sized pieces so that every spoonful of salad has a bit of everything.
- In a massive mixing bowl, combine the cooled pasta, tomatoes, cucumber, peppers, onions, and olives.
- Pour the Italian vinaigrette over the top. Toss thoroughly to ensure the dressing gets into all the spirals of the pasta.
- Fold in the grated Parmesan cheese and a crack of fresh black pepper.
- Cover and refrigerate for at least 1 hour before serving. This “marinating” time allows the flavors to meld and the pasta to fully absorb the herbs and spices from the dressing.
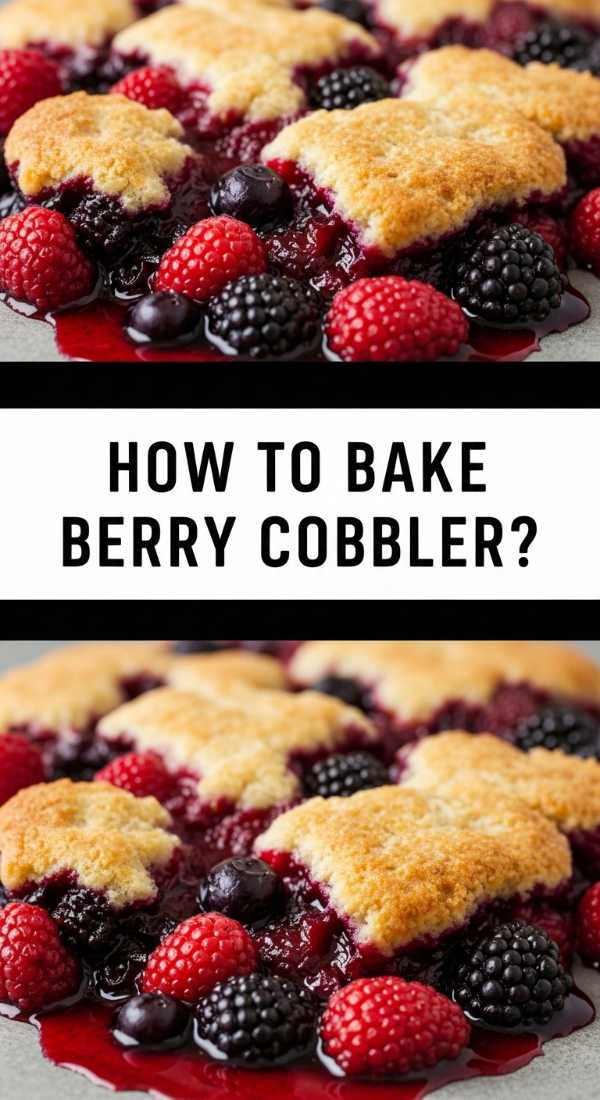
How to Bake Fresh Berry Cobbler

Why we love this
Warm berry cobbler is like a hug in a dessert bowl. We adore the way the berries break down into a thick, bubbling purple and red syrup that oozes with natural sweetness and a hint of tartness. The topping is the real star—a golden, buttery crust that is crisp on top and soft, like a biscuit, on the bottom where it meets the fruit. The aroma of baked vanilla and cinnamon wafting through the kitchen is enough to make anyone feel at home, and when topped with a scoop of melting vanilla ice cream, it is pure bliss.
Ingredients
- 4 cups mixed berries (blueberries, raspberries, blackberries)
- 1/2 cup granulated sugar (for the fruit)
- 1 tablespoon cornstarch
- 1 cup all-purpose flour
- 1 cup sugar (for the batter)
- 1 tablespoon baking powder
- 3/4 cup whole milk
- 1/2 cup unsalted butter, melted
How to make it
- Preheat your oven to 375°F (190°C). Grease a 9×9 inch baking dish with a light coating of butter or non-stick spray.
- In a bowl, toss the fresh berries with 1/2 cup of sugar and the cornstarch. The cornstarch acts as a thickening agent, ensuring your cobbler isn’t watery but has a luscious, jam-like consistency.
- In a separate bowl, whisk together the flour, the remaining cup of sugar, and the baking powder. Slowly pour in the milk and whisk until just combined—do not overmix, as this will lead to a tough crust.
- Pour the melted butter into the bottom of your prepared baking dish. Spread it evenly.
- Pour the batter directly over the butter. Do not stir it! This is a traditional “cuppa-cuppa” style cobbler where the batter rises through the fruit.
- Spoon the berry mixture evenly over the top of the batter. Again, do not stir.
- Bake for 40-45 minutes until the top is a deep golden brown and the fruit is bubbling vigorously around the edges. Let it cool for 10 minutes before serving to allow the juices to set.
How to Cook Healthy Zucchini Noodles

Why we love this
Zucchini noodles, or “zoodles,” are a refreshing and guilt-free way to enjoy a pasta-like experience. We love their vibrant green color and the way they provide a light, crisp base for savory toppings. When sautéed correctly with garlic and olive oil, they develop a tender texture that is surprisingly satisfying without the heaviness of traditional grains. The subtle, earthy flavor of the zucchini acts as a blank canvas for aromatics, making it a healthy, garden-fresh addition to any board that feels sophisticated and modern.
Ingredients
- 3 large zucchini
- 2 tablespoons olive oil
- 3 cloves garlic, thinly sliced
- 1/2 teaspoon red pepper flakes
- Salt and pepper to taste
- Freshly shaved Pecorino Romano
How to make it
- Use a spiralizer to turn the zucchini into long, noodle-like ribbons. If you don’t have a spiralizer, a julienne peeler or a mandoline works just as well to create thin strips.
- Place the raw zoodles on a layer of paper towels and sprinkle lightly with salt. Let them sit for 10 minutes; this draws out excess moisture, ensuring your final dish isn’t watery.
- Pat the zoodles dry very thoroughly before cooking.
- Heat the olive oil in a large skillet over medium-high heat. Add the sliced garlic and red pepper flakes, sautéing for about 1 minute until the garlic is fragrant and just beginning to turn golden.
- Add the zucchini noodles to the pan. Use tongs to toss them constantly. Cook for only 2-3 minutes. You want them to be “al dente”—softened but still holding their shape with a slight crunch.
- Remove from the heat immediately. Overcooking zucchini noodles is the most common mistake; they will release water and turn to mush if left on the heat too long.
- Season with pepper and top with shaved cheese before serving.
How to Make Fresh Fish Tacos

Why we love this
Fish tacos are the ultimate hand-held party food. We love the dynamic contrast between the warm, flaky white fish and the cold, crunchy cabbage slaw. There is a beautiful balance of flavors here: the smokiness of the spice rub, the creaminess of a lime-infused crema, and the sharp bite of fresh cilantro. It feels like a vacation on a plate, offering a bright and energized eating experience that is both healthy and deeply satisfying for a hungry crowd.
Ingredients
- 1 lb firm white fish (cod, tilapia, or mahi-mahi)
- 1 tablespoon taco seasoning (cumin, chili powder, garlic powder)
- 2 cups shredded red cabbage
- 1/4 cup sour cream or Greek yogurt
- Juice of 2 limes
- 8 small corn tortillas
- Sliced avocado and jalapeños for topping
How to make it
- Start by preparing the slaw. Toss the shredded cabbage with half of the lime juice and a pinch of salt. Let it sit while you cook the fish so the flavors can develop and the cabbage softens slightly.
- Pat the fish fillets dry with paper towels. Rub both sides generously with the taco seasoning and a drizzle of oil.
- Heat a non-stick skillet over medium-high heat. Place the fish in the pan and sear for 3-4 minutes per side. You are looking for a nice crust on the outside and for the fish to flake easily when pressed with a fork.
- While the fish cooks, whisk the sour cream with the remaining lime juice and a teaspoon of water to create a drizzle-able lime crema.
- Warm the corn tortillas in a dry pan or directly over a gas flame for a few seconds until they are pliable and slightly charred.
- Break the cooked fish into large chunks. To assemble, place a generous portion of fish on a tortilla, top with the cabbage slaw, avocado slices, and a heavy drizzle of lime crema.
How to Assemble Caprese Skewers

Why we love this
These skewers are the epitome of elegant simplicity. We love the classic combination of creamy fresh mozzarella, succulent cherry tomatoes, and aromatic basil leaves. It’s a timeless flavor profile that highlights the quality of the ingredients. The addition of a balsamic glaze adds a rich, sweet-and-tangy finish that ties everything together. They are perfectly bite-sized, making them the ideal mess-free appetizer for guests to grab as they mingle around the food board.
Ingredients
- 1 pint cherry tomatoes
- 1 lb fresh mozzarella pearls (bocconcini)
- 1 bunch fresh basil leaves
- 1/2 cup balsamic vinegar
- 2 tablespoons honey
- Extra-virgin olive oil for drizzling
- Wooden toothpicks
How to make it
- Make the balsamic reduction first. In a small saucepan, combine the balsamic vinegar and honey. Simmer over low heat for about 10-15 minutes until it has reduced by half and coats the back of a spoon. Let it cool completely to thicken.
- Wash and dry the cherry tomatoes and basil leaves.
- To assemble, slide a cherry tomato onto a toothpick, followed by a folded basil leaf, and finally a mozzarella pearl. The basil leaf should be “sandwiched” to keep it fresh and prevent it from wilting.
- Arrange the skewers in a circular pattern on your food board or platter.
- Just before serving, drizzle the skewers lightly with high-quality extra-virgin olive oil.
- Use a spoon or a squeeze bottle to decoratively zigzag the cooled balsamic glaze over the entire arrangement. Finish with a crack of black pepper.
How to BBQ Glazed Chicken

Why we love this
There is an undeniable nostalgia that comes with BBQ glazed chicken. We love the sticky, caramelized skin that shimmers under the sun, promising a deep, smoky sweetness. The meat underneath remains incredibly juicy and tender, infused with the heat of the grill. The aroma of burning charcoal and bubbling BBQ sauce is the quintessential scent of a summer gathering. It’s a hearty, soul-satisfying protein that anchors the food board and provides a robust contrast to the lighter salads and fruits.
Ingredients
- 2 lbs chicken thighs or drumsticks (skin-on)
- 1 cup of your favorite BBQ sauce
- 2 tablespoons apple cider vinegar
- 1 tablespoon brown sugar
- 1 teaspoon onion powder
- Salt and pepper
How to make it
- In a small bowl, whisk together the BBQ sauce, apple cider vinegar, and brown sugar. This creates a glaze that is thinner than standard sauce, allowing it to penetrate the meat and caramelize without burning too quickly.
- Season the chicken pieces generously with salt, pepper, and onion powder.
- Preheat your grill to medium heat. If the grill is too hot, the sugar in the sauce will burn before the chicken is cooked through.
- Place the chicken skin-side down on the grates. Grill for about 15-20 minutes, turning every 5 minutes. This slow process ensures the fat renders out and the skin becomes crispy.
- During the last 10 minutes of cooking, begin brushing the BBQ glaze onto the chicken every time you turn it. This builds up layers of flavor and a beautiful, sticky lacquer.
- Use a meat thermometer to ensure the internal temperature reaches 165°F (74°C).
- Remove from the grill and let the chicken rest for 5 minutes before serving to allow the juices to redistribute.
How to Bake Sweet Peach Galettes
[IMAGE_10]
Why we love this
The peach galette is the more relaxed, cooler cousin of the traditional pie. We love the rustic, “imperfect” look of the folded pastry crust—it feels artisanal and homemade. The peaches become soft and jammy in the oven, releasing their floral fragrance and bright orange juices. The crust is incredibly buttery and flaky, providing a satisfying crunch that contrasts with the tender fruit. It is a stunning visual centerpiece for a dessert board, tasting like a warm afternoon spent in an orchard.
Ingredients
- 2 large ripe peaches, sliced into wedges
- 1 refrigerated pie crust (or homemade shortcrust)
- 1/4 cup brown sugar
- 1 teaspoon cinnamon
- 1 tablespoon lemon juice
- 1 egg (for egg wash)
- Coarse sparkling sugar for dusting
How to make it
- Preheat your oven to 400°F (200°C) and line a baking sheet with parchment paper.
- In a bowl, toss the peach wedges with the brown sugar, cinnamon, and lemon juice. The lemon juice prevents browning and balances the sugar.
- Unroll your pie crust onto the parchment paper. If using homemade dough, roll it into a rough 12-inch circle.
- Arrange the peach slices in the center of the dough, leaving a 2-inch border all the way around. You can stack them in a pretty spiral or a rustic pile.
- Gently fold the edges of the dough over the peaches, pleating it as you go. The center should remain open, showing off the fruit.
- Beat the egg with a splash of water and brush the crust generously with the egg wash. This provides that professional, golden-brown shine.
- Sprinkle the coarse sparkling sugar over the crust for added crunch and sweetness.
- Bake for 25-30 minutes until the crust is golden and the peach juices are bubbling. Serve warm or at room temperature.
Conclusion
Creating a viral-worthy food board is truly about the joy of the process and the happiness of your guests. By combining these vibrant, flavorful dishes, you create a tapestry of tastes that encourages everyone to slow down and enjoy the moment. Remember, the best host is a relaxed host—so prep what you can in advance, lean into the rustic beauty of these recipes, and enjoy the laughter that follows. Your table is now ready to be the backdrop of your favorite memories!
FAQ Section
Q: Can I make these dishes in advance?
A: Most components, like the pasta salad and the balsamic reduction, can be made a day ahead. However, items like the watermelon salad and fish tacos are best assembled right before serving to maintain their crisp textures.
Q: How do I keep the food board looking fresh for hours?
A: Keep your board out of direct sunlight and use small bowls for items that might run, like the watermelon salad or peach galettes. You can also replenish the board in small batches to ensure everything stays at its optimal temperature.
Q: What if I have guests with dietary restrictions?
A: One of the perks of a food board is the variety! These recipes include gluten-free options (like the skewers and corn) and vegetarian options. You can easily swap the fish for tofu or use dairy-free cheese to accommodate everyone.