

There is something truly transformative about stepping out onto your patio and feeling like you’ve been transported to a high-end boutique resort. For years, I looked at my own concrete slab and saw nothing but missed opportunities and sun-bleached plastic chairs. But I realized that a paradise doesn’t require a massive renovation budget or a team of contractors; it just requires a little bit of weekend magic, some tactile materials, and the willingness to get your hands a little dirty.
In this guide, we are going to walk through ten incredible DIY projects that will turn your backyard into the sanctuary you deserve. From the gentle splash of a bird bath to the organized joy of a kid-friendly play zone, we’re covering every inch of your outdoor living space. Grab a cold glass of lemonade and your favorite pair of gardening gloves—it’s time to build your dream retreat right at home.
How to Create a Serene Sanctuary with a Dollar Store Bird Bath

Why we love this
There is a specific kind of peace that comes from the rhythmic, gentle sound of water trickling under a golden afternoon sun. This bird bath isn’t just a piece of decor; it is an invitation for nature to visit your doorstep, bringing with it the soft flutter of wings and the cheerful chirping of local songbirds. The cool, smooth texture of the stone-finish paint under your fingertips and the visual sparkle of sunlight dancing on the water’s surface create a meditative focal point in any corner of your garden. It’s a small, sensory escape that makes even the smallest balcony feel like a hidden woodland grove.
Essential Elements:
- Two large plastic or ceramic bowls (varying sizes)
- One sturdy plastic or glass vase for the base
- Waterproof industrial-strength adhesive (like E6000)
- Stone-textured spray paint
- Small solar-powered fountain pump
- Polished river stones
How to make it
- Begin by thoroughly cleaning all surfaces of your bowls and vase with rubbing alcohol to ensure the strongest possible adhesive bond.
- Flip your base vase upside down on a level surface and apply a thick, continuous bead of adhesive to the bottom rim.
- Carefully center the largest bowl on top of the vase, pressing down firmly to seat the glue; allow this to cure for at least 24 hours in a dry area.
- Once cured, move the structure to a well-ventilated outdoor space and apply 2-3 thin, even coats of stone-textured spray paint, allowing 30 minutes of drying time between each coat for a realistic finish.
- After the paint has dried completely for 48 hours, place the solar fountain pump in the center of the bowl and surround it with polished river stones to hide the plastic base.
- Fill with fresh water and place the unit in a sunny spot where the solar panels can catch the light and activate the gentle spray.
How to Design a Lush Front Yard Flower Bed for Instant Curb Appeal

Why we love this
Walking up to a home framed by vibrant, swaying blooms is like receiving a warm hug before you even reach the front door. The fragrance of damp earth mixed with the sweet, heady scent of petunias and lavender creates an intoxicating atmosphere that instantly boosts your mood. We love the way different textures—from the velvety leaves of dusty miller to the sharp, architectural reach of ornamental grasses—work together to create a visual symphony. It’s a living masterpiece that changes with the seasons, offering a fresh, colorful welcome every single morning.
Essential Elements:
- Marking paint or a garden hose for outlining
- High-quality organic garden soil and compost
- Hardwood mulch (dark brown or black for contrast)
- A mix of “Thriller, Filler, and Spiller” plants
- Landscape edging (stone, brick, or metal)
How to make it
- Use a garden hose to experiment with the shape of your bed, opting for soft, organic curves rather than rigid straight lines to create a professional look.
- Once you’re happy with the shape, use a sharp spade to cut into the turf along your outline and remove all existing grass and weeds within the perimeter.
- Till the existing soil to a depth of 8 inches and mix in 3-4 inches of fresh compost and organic garden soil to ensure your plants have the nutrients they need to thrive.
- Arrange your plants while they are still in their pots: place “Thrillers” (tall, dramatic plants) in the back, “Fillers” (mounding plants) in the middle, and “Spillers” (trailing plants) along the front edge.
- Dig holes twice as wide as the root balls, tease the roots gently, plant them at the same depth as they were in the pot, and firm the soil around them.
- Apply a 2-3 inch layer of mulch across the entire bed, keeping it away from the direct stems of the plants, and water deeply immediately after finishing.
How to Craft a Rustic Wood Planter Box for Your Porch Harvest

Why we love this
The smell of fresh-cut cedar is one of life’s simple luxuries, evoking memories of mountain cabins and rustic workshops. Building your own planter box allows you to bring that raw, natural aesthetic to your porch, creating a beautiful home for kitchen herbs or cascading flowers. There is a deep satisfaction in running your hand over the grain of the wood and knowing you built this sturdy vessel from scratch. When filled with aromatic rosemary or mint, it becomes a functional piece of art that engages your sense of smell and taste as much as your sight.
Essential Elements:
- Cedar or pressure-treated lumber (1×6 or 1×8 boards)
- Exterior-grade wood screws
- Power drill and 1/8-inch drill bit
- Measuring tape and miter saw
- Geotextile fabric or plastic liner
- Wood stain or exterior sealant
How to make it
- Measure and cut four side pieces (two long, two short) and one bottom piece to your desired dimensions; cedar is preferred for its natural rot resistance.
- Pre-drill pilot holes at the ends of your side boards to prevent the wood from splitting when you drive the screws.
- Assemble the rectangular frame by screwing the shorter end pieces into the ends of the longer side pieces, ensuring all corners are perfectly square.
- Flip the frame over and secure the bottom board using screws every 6 inches; if using multiple boards for the bottom, leave a 1/4-inch gap between them for drainage.
- Drill five to six 1/2-inch drainage holes through the bottom of the box to prevent root rot.
- Sand the exterior smooth, apply your chosen stain or sealant, and once dry, staple a landscape fabric liner inside the box before filling with high-quality potting mix.
How to Create a Magical Outdoor Play Area for Kids to Explore

Why we love this
Creating a dedicated space for wonder allows children to disconnect from screens and reconnect with the magic of the earth. We love this concept because it transforms a standard backyard into a realm of adventure where soft breezes rustle through fabric walls and the ground is a carpet of tactile discovery. The combination of twinkly fairy lights and the earthy scent of cedar mulch creates an enchanting atmosphere that lingers in the memory long after the sun goes down. It’s a space that encourages movement, imagination, and a lifelong love for the great outdoors.
Essential Elements:
- Outdoor-rated teepee or weather-resistant canvas
- Heavy-duty outdoor rug or foam play mats
- Solar-powered string lights
- Large smooth river rocks for “painting”
- Weatherproof storage trunk for toys
How to make it
- Select a flat, well-drained area of the yard that receives a mix of sun and shade throughout the afternoon.
- Clear the area of any debris or large stones and lay down a thick layer of playground-grade mulch or a durable outdoor rug to create a soft landing zone.
- Assemble your teepee or tent structure, securing the legs firmly into the ground with stakes to prevent tipping during windy conditions.
- Weave solar-powered string lights through the frame of the tent, ensuring the solar panel is positioned in a spot that receives at least 6 hours of direct sunlight.
- Create a “discovery zone” next to the tent by placing a low table with bins of natural materials like pinecones, smooth stones, and magnifying glasses.
- Install a weatherproof trunk nearby to store cushions and soft toys overnight, keeping the play area tidy and ready for the next day’s adventure.
How to Style a Whimsical Mud Kitchen with Playful Outdoor Accessories

Why we love this
A mud kitchen is the ultimate celebration of messy, tactile, and uninhibited play. There is a nostalgic joy in the sound of a metal whisk clinking against an old tin pot, and the sight of “mud pies” garnished with dandelion yellow and clover green is enough to make anyone smile. This space is all about the details—the vintage-style knobs, the tiny hanging herb bundles, and the weathered wood that only gets better with age. It encourages children to explore textures from gooey mud to crunchy dried leaves, all while engaging in the timeless art of make-believe.
Essential Elements:
- Old kitchen utensils (whisks, ladles, slotted spoons)
- Stainless steel or enamel bowls and pots
- Small chalkboard for the “Daily Menu”
- Magnetic strip or hooks for tool storage
- Real or faux herb plants for garnishing
How to make it
- Choose a sturdy base for your kitchen, such as a repurposed potting bench or a low wooden table, and ensure it is treated for outdoor use.
- Install a row of stainless steel hooks along the backboard to hang whisks, spoons, and measuring cups, keeping them within easy reach for little hands.
- Attach a magnetic tool strip to hold metal containers filled with “ingredients” like acorns, pebbles, and dried flower petals.
- Mount a small chalkboard at eye level so your little chefs can practice writing out their creative recipes and prices.
- Place a large, deep washbasin on the counter surface and provide a dedicated water source, like a beverage dispenser, for controlled “cooking” water.
- Style the area with small galvanized buckets for scrap materials and a few pots of hardy mint or rosemary that kids can safely pick and use in their creations.
How to Curate a Relaxing Hot Tub Area for the Ultimate Home Spa

Why we love this
Imagine the steam rising into the cool night air, the soft glow of amber lanterns reflecting off the bubbling water, and the absolute silence of a private sanctuary. Curating a hot tub area is about more than just the tub itself; it’s about creating a transition from the stresses of the day into a state of pure bliss. The contrast between the warm cedar privacy screens and the lush green foliage of nearby ferns creates a cocoon-like feeling of security and relaxation. It is the ultimate luxury, providing a therapeutic escape that rejuvenates the body and calms the mind.
Essential Elements:
- Wooden or composite privacy screens
- Weatherproof outdoor lanterns and LED candles
- Sturdy side table for drinks and towels
- Outdoor-rated aromatherapy diffusers
- Potted tropical plants (like Palms or Bird of Paradise)
How to make it
- Position your hot tub on a reinforced, level pad and plan the placement of privacy screens to block wind and neighbors’ views without closing in the space entirely.
- Install soft, dimmable lighting using solar path lights or overhead café lights on a timer to create a warm, inviting glow that isn’t too harsh on the eyes.
- Place a moisture-resistant side table within arm’s reach of the tub to hold a tray for water, tea, or snacks.
- Add a dedicated towel rack or a weather-resistant cabinet nearby to keep fluffy, dry towels and robes ready for when you exit the warm water.
- Surround the perimeter with large potted plants to soften the edges of the tub and provide a “jungle spa” aesthetic that enhances the sense of seclusion.
- Incorporate an outdoor-safe essential oil diffuser nearby with scents like eucalyptus or lavender to engage the sense of smell and deepen the relaxation.
How to Repurpose Pallets into a Charming Mud Kitchen for Little Chefs

Why we love this
There is a rugged, farmhouse charm to pallet wood that makes it the perfect material for a muddy, outdoor play station. We love the eco-friendly nature of this project—taking something discarded and turning it into a center for creativity and laughter. The rough-hewn texture of the wood, when sanded down and painted in soft pastels or left in its natural state, provides a sturdy and honest backdrop for hours of play. It feels grounded and intentional, giving kids a “grown-up” looking space that is entirely their own to mess up and explore.
Essential Elements:
- 2-3 Heat-Treated (HT) wood pallets
- Reciprocating saw or crowbar
- Orbital sander with 60 and 120 grit sandpaper
- Exterior wood glue and screws
- A stainless steel bowl (to serve as the sink)
How to make it
- Dismantle your pallets carefully, removing all old nails and selecting the straightest boards for your frame and countertop.
- Sand every single surface thoroughly, starting with 60-grit sandpaper and finishing with 120-grit to ensure there are no splinters or rough edges for small hands.
- Construct a simple rectangular frame for the base using the 2×4 interior pieces of the pallet, and then slat the front and sides with the thinner pallet boards.
- For the countertop, lay boards tightly together and use a jigsaw to cut a circular hole slightly smaller than the lip of your stainless steel bowl.
- Secure a vertical backboard made of pallet slats to the rear of the unit to serve as a place for hooks and a small shelf.
- Apply a coat of outdoor-rated clear sealant or colorful exterior paint to protect the wood from the elements and the inevitable mud splatters.
How to Construct a Fun DIY Water Table for Endless Summer Play

Why we love this
On a sweltering July afternoon, the cool splash of water against hot skin is pure joy. A water table is a sensory powerhouse, combining the fluid movement of water with the tactile fun of scoops, funnels, and floating toys. We love the way it encourages cooperative play as children learn to pour, measure, and observe the laws of physics in action. The bright colors of the toys against the clear water and the sparkling droplets that fly through the air make this the heart of summer backyard fun. It’s simple, refreshing, and endlessly engaging.
Essential Elements:
- Large, shallow plastic storage bin (under-bed style works well)
- PVC pipes and connectors (for the frame)
- PVC cement or strong waterproof adhesive
- Plastic funnels, tubes, and cups
- Battery-operated water pump (optional)
How to make it
- Build a sturdy H-shaped base using 1.5-inch PVC pipes, measuring the height so it sits comfortably at your child’s waist level.
- Dry-fit the pipes first to ensure the plastic bin sits securely on top of the frame without wobbling, then secure the joints with PVC cement.
- Drill a hole in the bottom corner of the plastic bin and install a simple plastic threaded plug so you can easily drain and clean the table after use.
- Create a “waterfall” feature by attaching a vertical PVC pole to one corner of the frame and zip-tying funnels and hoses at various heights.
- Fill the bin with clean water and add a variety of floating toys, measuring cups, and even some drops of blue food coloring for a “deep sea” effect.
- If using a pump, secure the intake at the bottom of the bin and the output at the top of the waterfall to create a continuous, recirculating stream of water.
How to Enhance Your Entrance with Vibrant Flower Bed Ideas and Planters

Why we love this
Your entrance is the first impression your home makes, and filling it with vibrant life says “welcome” in the most beautiful way possible. We love the architectural drama created by oversized planters—their heavy, cool ceramic bodies acting as anchors for the delicate, airy petals they hold. The symmetry of twin planters on either side of a door creates a sense of balance and order that is incredibly soothing to the eye. The scent of blooming jasmine or gardenias greeting you as you turn the key transforms the act of coming home into a sensory celebration.
Essential Elements:
- Two large, matching weather-resistant planters
- Potting mix specifically formulated for containers
- Slow-release fertilizer granules
- A mix of heights: a focal plant, mounding flowers, and trailing ivy
- Solar-powered uplights for nighttime visibility
How to make it
- Place your large planters in their permanent positions before filling them, as they will be extremely heavy once soil and water are added.
- Fill the bottom third of the pots with empty plastic water bottles or packing peanuts to provide drainage and reduce the overall weight of the planter.
- Fill the remaining space with premium potting soil, mixing in a handful of slow-release fertilizer to keep your blooms vibrant throughout the season.
- Plant your “Thriller” (like a Canna Lily or Dracaena) in the center, then surround it with “Fillers” (like Petunias or Geraniums), and place “Spillers” (like Sweet Potato Vine) near the edges.
- Tuck a small solar-powered spotlight into the soil, angled upward toward the focal plant, to create a dramatic silhouette after dark.
- Water the planters until you see water draining from the bottom, and repeat whenever the top inch of soil feels dry to the touch.
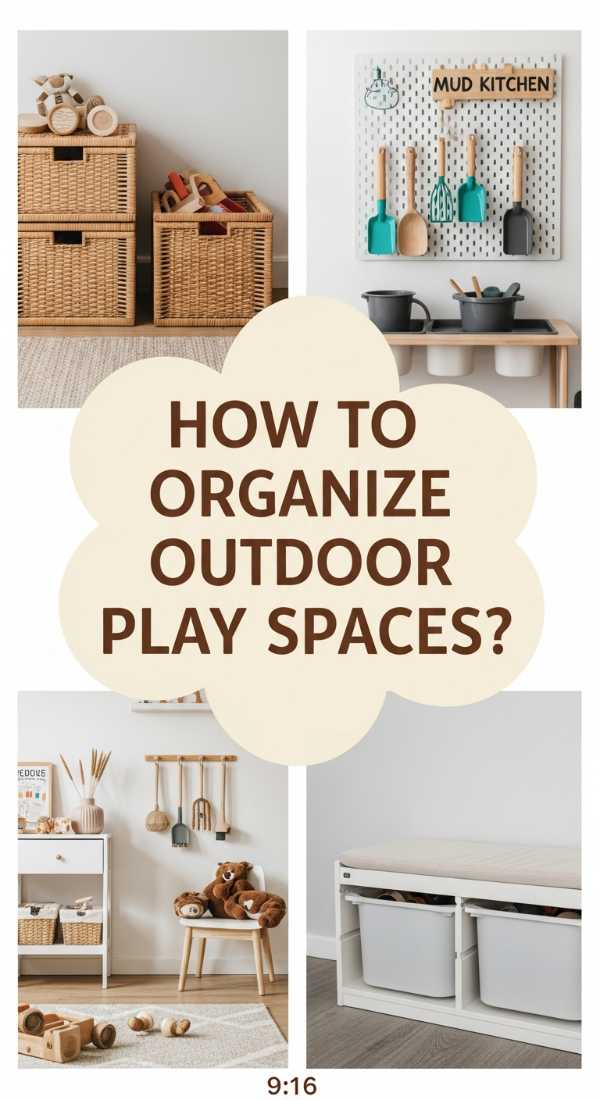
How to Organize Outdoor Play Spaces for Maximum Backyard Joy
Why we love this
An organized space is a peaceful space, and this is especially true in a backyard where toy clutter can quickly dampen the beauty of your landscape. We love the clean, intentional look of a well-organized play area because it makes cleanup feel like a natural part of the game rather than a chore. Seeing toys neatly binned and labeled in weather-resistant containers creates a visual calm that allows the natural beauty of your garden to shine through. It ensures that every item has a home, preventing the “backyard graveyard” of sun-faded plastic and making play more accessible and fun.
Essential Elements:
- Large, stackable weather-resistant bins with lids
- Wall-mounted pegboard for gardening tools or sand toys
- Large deck box for cushions and bulky items
- UV-resistant labels or paint markers
- Vertical shelving unit made of rust-proof metal
How to make it
- Start by gathering every outdoor toy and piece of equipment and sorting them into categories: sand toys, water play, sports, and imaginative play.
- Discard or donate any broken items or things your children have outgrown to ensure you are only storing what is actually used.
- Place the categorized items into heavy-duty plastic bins and use a paint marker to clearly label the outside so kids know exactly where things go.
- Install a rust-proof metal shelving unit in a shaded area of the patio to keep the bins off the ground and prevent pests from nesting underneath.
- Mount a pegboard on an exterior wall or the side of a shed to hang frequently used items like jump ropes, bubble wands, and small shovels.
- Designate a specific “parking zone” using outdoor tape or paint for larger items like tricycles and wagons to keep the walkways clear and safe.
The Final Flourish: Your Personal Patio Paradise
Building your dream outdoor space is a journey, not a sprint. By taking it one weekend at a time and focusing on these DIY projects, you aren’t just adding value to your property—you’re adding value to your life. Whether you’re watching the birds splash in your new stone bath or seeing the joy on your child’s face in their magical play area, these moments are what turn a house into a home. Now, step outside, breathe in the fresh air, and enjoy the beautiful sanctuary you’ve created.