

We have all been there: it is a slow Sunday afternoon, you are curled up on the sofa with a steaming mug of tea, and you find yourself spiraling down the rabbit hole of a ‘Simple Food’ Pinterest board. There is something so incredibly soothing about those aesthetic grids filled with vibrant salads, golden-brown crusts, and perfectly chilled drinks. They represent a lifestyle that feels both aspirational and deeply rooted in the comfort of home, making us crave the sensory joy of a well-prepared meal shared with those we love.
Lately, one specific ‘Simple Food’ board has been going absolutely viral, and I knew I had to bring those pins to life in my own kitchen. This isn’t just about feeding ourselves; it is about the ritual of creation—the way the kitchen fills with the scent of roasted garlic or the bright, zesty aroma of freshly sliced lemons. Recreating these viral favorites allows us to slow down, appreciate the textures of our ingredients, and turn an ordinary weekday into a Pinterest-worthy celebration of flavor and light.
Easy Rotel Dip Tutorial

Why we love this
There is an undeniable nostalgia that comes with a warm bowl of Rotel dip, bubbling with melted cheese and zesty green chiles. This dish is the ultimate crowd-pleaser, offering a rich, velvety texture that coats every single chip perfectly while providing a gentle heat that lingers on the palate. The aroma of browned beef mingling with creamy cheese creates an atmosphere of instant comfort and casual hospitality. It is the kind of dip that disappears in minutes, leaving everyone reaching for the very last bit of golden, cheesy goodness at the bottom of the bowl.
Ingredients
- 1 lb ground beef
- 1 block (16 oz) Velveeta or processed cheese, cubed
- 1 can (10 oz) Rotel Original Diced Tomatoes and Green Chilies
- 1 teaspoon taco seasoning
- Fresh cilantro for garnish
- Tortilla chips for serving
How to make it
- Place a large skillet over medium-high heat and add the ground beef, breaking it apart with a wooden spoon as it cooks.
- Brown the meat thoroughly for about 7-10 minutes until no pink remains, ensuring you get those slightly crispy, caramelized edges for extra flavor.
- Drain the excess fat from the skillet carefully to ensure the dip doesn’t become oily or separated later.
- Reduce the heat to low and add the cubed cheese and the entire can of Rotel (including the liquid) to the pan.
- Stir constantly with a heat-resistant spatula, allowing the cheese to melt slowly and emulsify with the juices from the tomatoes and chiles.
- Once the mixture is completely smooth and glossy, stir in the taco seasoning and let it simmer on the lowest setting for 2 minutes to meld the flavors.
- Transfer to a warm serving bowl immediately and garnish with chopped cilantro to provide a fresh pop of color against the rich cheese.
Fresh Chicken Caesar Wraps

Why we love this
A Chicken Caesar wrap is the quintessential ‘cool girl’ lunch—it is crisp, refreshing, and incredibly satisfying without being heavy. The contrast between the warm, juicy chicken and the cold, crunch of romaine lettuce creates a textural symphony that feels elevated yet simple. Every bite is packed with the savory punch of parmesan and the creamy, briny notes of a high-quality Caesar dressing, all held together by a soft, pillowy flour tortilla. It is the perfect meal for a bright afternoon when you want something that tastes like a luxury bistro salad but is portable enough for a picnic.
Ingredients
- 2 large flour tortillas
- 2 cups cooked chicken breast, sliced
- 3 cups romaine lettuce, chopped
- 1/2 cup Caesar dressing
- 1/4 cup shredded parmesan cheese
- 1/2 cup seasoned croutons, slightly crushed
- Black pepper to taste
How to make it
- Begin by preparing your romaine lettuce; wash it in cold water and use a salad spinner to ensure it is completely dry so the dressing adheres properly.
- In a large mixing bowl, toss the chopped romaine with the Caesar dressing and parmesan cheese until every leaf is evenly and thinly coated.
- Lightly warm your flour tortillas in a dry pan for 15 seconds per side; this makes them more pliable and prevents them from tearing during the folding process.
- Lay the tortillas flat and distribute the dressed lettuce across the center, followed by the sliced chicken and a sprinkle of crushed croutons for a hidden crunch.
- Fold in the sides of the tortilla first, then roll tightly from the bottom up, maintaining firm pressure to keep the filling secure.
- Slice the wrap diagonally with a sharp serrated knife to showcase the vibrant green and gold interior layers.
- Serve immediately while the chicken is still warm and the lettuce is at its peak crispness.
Classic Strawberry Pie Recipe

Why we love this
Nothing says ‘Pinterest-Perfect’ quite like a Classic Strawberry Pie, its bright crimson glaze glistening under a dollop of fresh whipped cream. This dessert captures the very essence of summer, utilizing sun-ripened berries that burst with sweetness and a hint of tartness in every bite. The texture is a delightful mix of a buttery, flaky crust and a smooth, gelatinous filling that holds the whole berries like precious gems. When you slice into it, the aroma of fresh fruit and vanilla fills the air, making it an irresistible centerpiece for any dessert table or garden party.
Ingredients
- 1 pre-baked 9-inch pie crust
- 4 cups fresh strawberries, hulled
- 1 cup granulated sugar
- 3 tablespoons cornstarch
- 1 cup water
- 1 small box (3 oz) strawberry gelatin
- Whipped cream for topping
How to make it
- Arrange the cleaned and hulled whole strawberries snugly inside your pre-baked and cooled pie crust, pointing the tips upward for a professional look.
- In a medium saucepan, whisk together the sugar, cornstarch, and water until the mixture is smooth and no lumps remain.
- Place the saucepan over medium heat and stir constantly until the mixture comes to a boil and begins to thicken into a translucent paste.
- Remove the pan from the heat and immediately whisk in the strawberry gelatin powder until it is completely dissolved and the color is a deep, vivid red.
- Allow the glaze to cool for about 10-15 minutes so it is thick enough to coat the berries rather than running straight to the bottom of the crust.
- Slowly pour the glaze over the strawberries, ensuring every berry is covered and the gaps are filled, then refrigerate for at least 4 hours to set.
- Serve with a generous swirl of homemade whipped cream right before presenting to your guests.
Refreshing Cucumber Salad

Why we love this
This Refreshing Cucumber Salad is the ultimate palate cleanser, offering a sharp, vinegary snap that cuts through any rich main course with ease. The visual of paper-thin cucumber slices floating in a light, speckled dressing is incredibly appetizing, suggesting a level of freshness that is hard to beat. There is a cooling sensation that comes with every forkful, enhanced by the subtle bite of red onion and the earthy fragrance of fresh dill or parsley. It feels like a breath of fresh air on a plate, reminding us that sometimes the simplest preparations are the most sophisticated.
Ingredients
- 2 large English cucumbers
- 1/2 small red onion, thinly sliced
- 1/2 cup white vinegar
- 2 tablespoons sugar
- 1 teaspoon salt
- 1/2 teaspoon black pepper
- 2 tablespoons fresh dill, chopped
How to make it
- Using a mandoline or a very sharp chef’s knife, slice the cucumbers into rounds that are no thicker than 1/8 inch to ensure they absorb the marinade quickly.
- Place the sliced cucumbers and the thinly slivered red onions into a large glass bowl, tossing them lightly to distribute the onions evenly.
- In a separate small jar or bowl, whisk together the white vinegar, sugar, salt, and black pepper until the sugar crystals have completely dissolved.
- Pour the vinegar mixture over the vegetables and toss thoroughly so every slice is submerged or coated.
- Cover the bowl with plastic wrap and let it marinate in the refrigerator for at least 30 minutes, though two hours is ideal for the best flavor penetration.
- Just before serving, sprinkle the fresh chopped dill over the top and give it one final toss to release the herbal oils.
- Drain slightly before plating if you prefer a less acidic bite, or serve with the juice for extra tang.
Buttery Pound Cake Tips

Why we love this
A true buttery pound cake is a marvel of baking, boasting a dense, tight crumb that manages to feel incredibly soft and melt-in-your-mouth at the same time. The exterior develops a thin, sugary crust that provides a slight crunch, contrasting beautifully with the rich, golden interior that tastes deeply of high-quality butter and vanilla. It is a humble cake that doesn’t need heavy frosting to shine; its beauty lies in its simple, honest flavor and the way it pairs perfectly with a cup of coffee. The aroma while it bakes is intoxicating, filling the entire house with a scent that feels like a warm hug.
Ingredients
- 1 cup unsalted butter, softened
- 1 cup granulated sugar
- 3 large eggs, room temperature
- 1.5 cups all-purpose flour
- 1/2 teaspoon salt
- 2 teaspoons vanilla extract
- 1/4 cup whole milk
How to make it
- Preheat your oven to 325°F (165°C) and grease a loaf pan thoroughly with butter and a dusting of flour to ensure a clean release.
- In a stand mixer, cream the softened butter and sugar on medium-high speed for at least 5 minutes until the mixture looks pale yellow and fluffy.
- Add the eggs one at a time, beating well after each addition to ensure the emulsion doesn’t break; this is the secret to a fine, even crumb.
- Whisk the flour and salt together in a separate bowl, then alternate adding the flour and the milk to the butter mixture, starting and ending with the flour.
- Fold in the vanilla extract by hand using a spatula to avoid over-working the gluten, which would make the cake tough.
- Pour the batter into the prepared pan and smooth the top, then bake for 50-60 minutes or until a toothpick inserted into the center comes out clean.
- Let the cake cool in the pan for 10 minutes before transferring to a wire rack to cool completely, which allows the structure to set perfectly.
Cool Watermelon Salad

Why we love this
The Cool Watermelon Salad is a masterclass in balance, playing with the sweet, juicy nature of the fruit against the salty, creamy punch of feta cheese. Visually, the contrast between the vibrant pink melon and the snow-white cheese, dotted with green mint leaves, is enough to stop any Pinterest scroller in their tracks. It is incredibly hydrating and refreshing, offering a burst of summer flavor that feels both sophisticated and effortless. The addition of a lime-infused dressing ties everything together, creating a dish that is as much a feast for the eyes as it is for the stomach.
Ingredients
- 6 cups watermelon, cubed and chilled
- 1/2 cup feta cheese, crumbled
- 1/4 cup fresh mint leaves, torn
- 2 tablespoons extra virgin olive oil
- 1 tablespoon lime juice
- A pinch of sea salt
How to make it
- Select a heavy, ripe watermelon and cut it into uniform 1-inch cubes, removing any large black seeds as you go for a better eating experience.
- Place the watermelon cubes into a large chilled serving bowl to keep the fruit as cold as possible during the assembly process.
- In a small bowl, whisk together the olive oil and lime juice until combined; the oil helps the lime juice cling to the slick surface of the watermelon.
- Drizzle the dressing over the watermelon and toss very gently with your hands or a large spoon to avoid bruising the fruit.
- Sprinkle the crumbled feta and the torn mint leaves over the top, allowing them to sit on the surface for a beautiful presentation.
- Add a tiny pinch of sea salt just before serving to heighten the sweetness of the melon and the savoriness of the cheese.
- Serve immediately, as the salt will eventually cause the watermelon to release its juices and lose its structural integrity.
Flavorful Grilled Chicken
Why we love this
There is nothing quite like the smoky, charred aroma of perfectly grilled chicken to signal that a great meal is on the horizon. When done right, the exterior is beautifully seared with distinct grill marks and a savory crust of herbs and spices, while the inside remains incredibly tender and dripping with juice. The flavor is a complex blend of fire-kissed caramelization and the bright, zesty notes of a well-balanced marinade. It is a versatile staple that looks stunning on a platter, surrounded by grilled lemons and fresh herbs, making it the star of any outdoor gathering.
Ingredients
- 1.5 lbs chicken thighs or breasts
- 1/4 cup olive oil
- 3 cloves garlic, minced
- 1 tablespoon fresh rosemary, chopped
- 1 teaspoon smoked paprika
- Salt and pepper to taste
- 1 lemon, halved
How to make it
- In a large resealable bag or bowl, combine the olive oil, minced garlic, rosemary, smoked paprika, salt, and pepper to create a thick marinade.
- Add the chicken to the marinade, ensuring every piece is thoroughly coated, and refrigerate for at least 2 hours (or up to 8 hours for maximum flavor).
- Preheat your grill to medium-high heat (about 400°F) and lightly oil the grates to prevent the chicken skin or meat from sticking.
- Place the chicken on the grill and leave it undisturbed for 5-7 minutes to develop deep, professional-looking grill marks.
- Flip the chicken and continue cooking until the internal temperature reaches 165°F (74°C) for breasts or 175°F (79°C) for thighs using a meat thermometer.
- During the last 3 minutes of cooking, place the lemon halves cut-side down on the grill until they are charred and juicy.
- Transfer the chicken to a plate and tent with foil for 5 minutes to allow the juices to redistribute before squeezing the grilled lemon juice over the top.
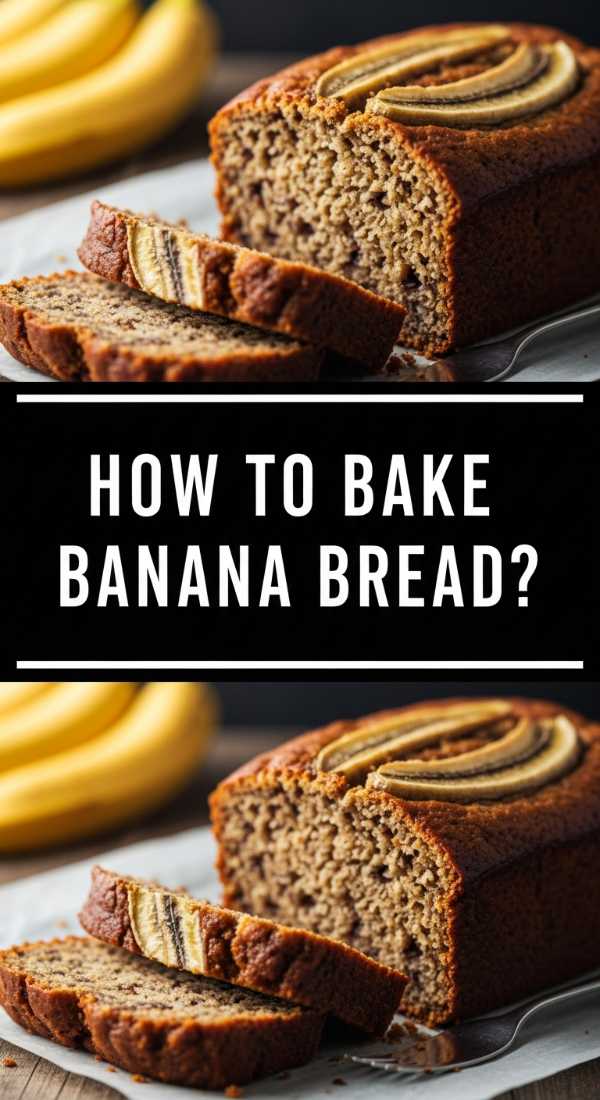
Perfect Banana Bread
Why we love this
Banana bread is the ultimate kitchen comfort, filling your home with a warm, sugary, and slightly spicy scent that is impossible to resist. This version is prized for its moist, heavy texture and the deep, caramelized flavor that only comes from using bananas that are spotted with brown and nearly overripe. It is a rustic, beautiful loaf with a cracked top and a dark golden hue that suggests a wealth of sweetness inside. Whether enjoyed warm with a smear of salted butter or toasted the next morning, it represents the very best of simple, home-baked goodness.
Ingredients
- 3 very ripe bananas, mashed
- 1/3 cup melted butter
- 3/4 cup granulated sugar
- 1 egg, beaten
- 1 teaspoon vanilla extract
- 1 teaspoon baking soda
- 1.5 cups all-purpose flour
- 1/2 teaspoon cinnamon
How to make it
- Preheat your oven to 350°F (175°C) and prepare a 4×8 inch loaf pan with parchment paper or a generous coating of non-stick spray.
- In a large mixing bowl, use a fork or potato masher to crush the bananas until they are mostly smooth with just a few small chunks for texture.
- Stir the melted butter into the mashed bananas until well combined, then mix in the sugar, beaten egg, and vanilla extract.
- Sprinkle the baking soda and cinnamon over the wet mixture and stir well to ensure the leavening agent is evenly distributed.
- Gently fold in the flour using a spatula, stopping the moment you no longer see white streaks; over-mixing will result in a rubbery loaf.
- Pour the thick batter into the pan and tap it on the counter once to release any large air bubbles that might be trapped inside.
- Bake for 50 to 60 minutes, checking with a tester at the 50-minute mark; let it cool in the pan for 10 minutes before moving it to a rack.
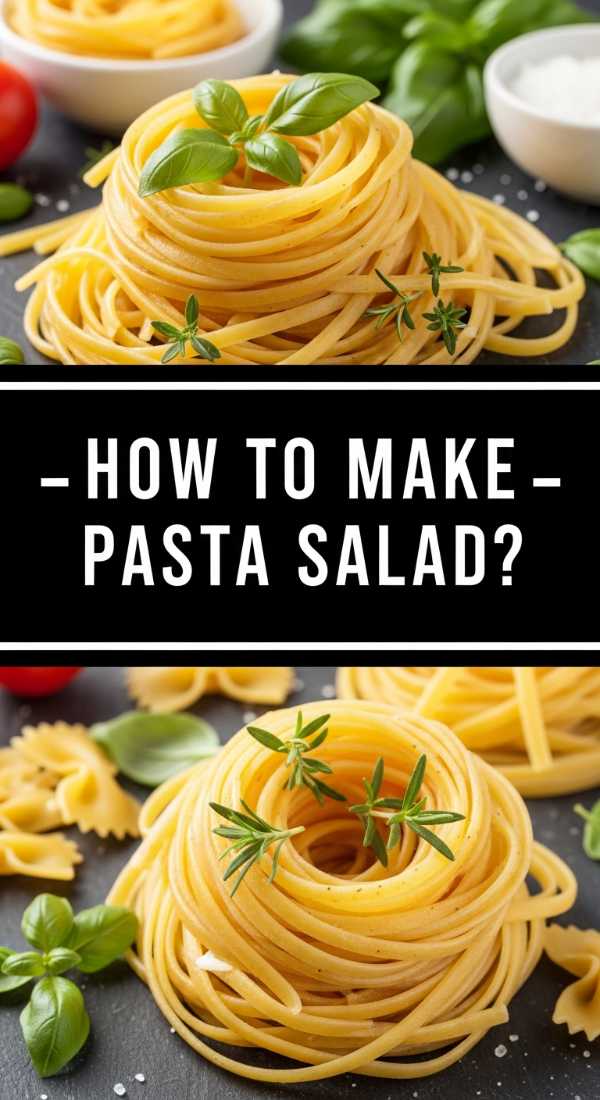
Easy Tortellini Pasta Salad

Why we love this
The Tortellini Pasta Salad is a vibrant explosion of color and flavor, making it a standout dish on any Pinterest board focused on outdoor dining. Using cheese-filled tortellini instead of standard pasta adds a layer of richness and surprise that elevates the entire salad into a full meal. The chewy pasta pairs perfectly with the crisp bite of bell peppers, the brine of olives, and the sharp tang of Italian vinaigrette. It is a dish that actually tastes better as it sits, making it the ideal candidate for meal prep or a stress-free party side that looks as professional as it tastes.
Ingredients
- 1 package (20 oz) refrigerated cheese tortellini
- 1 cup cherry tomatoes, halved
- 1/2 cup cucumber, diced
- 1/4 cup red onion, finely diced
- 1/2 cup mini pepperoni or salami
- 1/2 cup Italian dressing
- 1/4 cup fresh parsley, chopped
How to make it
- Bring a large pot of salted water to a boil and cook the tortellini according to the package directions, but aim for ‘al dente’ (usually 2-3 minutes).
- Immediately drain the pasta and rinse it under cold running water to stop the cooking process and prevent the tortellini from sticking together.
- In a large mixing bowl, combine the cooled tortellini with the cherry tomatoes, cucumber, red onion, and pepperoni.
- Pour the Italian dressing over the ingredients and toss gently with a large spoon, ensuring the dressing gets into the crevices of the pasta.
- Taste and add a pinch of salt or pepper if needed, then cover and refrigerate for at least one hour to allow the pasta to absorb the flavors.
- Just before serving, toss the salad again to redistribute the dressing that may have settled at the bottom.
- Garnish with a handful of fresh parsley for a burst of herbal aroma and a clean, bright finish.
Tropical Pina Coladas
[IMAGE_10]
Why we love this
There is a special kind of magic in a Pina Colada, a drink that instantly transports you to a sun-drenched beach with its creamy coconut base and sweet pineapple punch. The texture is like a dreamy, boozy milkshake—thick, icy, and incredibly smooth, topped with a frothy layer that holds a garnish perfectly. Its pale, milky color is the epitome of tropical luxury, making it a favorite for aesthetic photoshoots and summer parties alike. Each sip is a balance of rich creaminess and acidic brightness, offering a refreshing escape that feels like a vacation in a glass.
Ingredients
- 2 cups frozen pineapple chunks
- 1/2 cup coconut cream (canned)
- 1/2 cup pineapple juice
- 4 oz white rum (optional)
- 2 cups ice cubes
- Maraschino cherries and pineapple wedges for garnish
How to make it
- Place the frozen pineapple chunks into a high-powered blender; using frozen fruit instead of just ice ensures a more concentrated flavor and a smoother texture.
- Add the coconut cream, pineapple juice, and white rum to the blender, ensuring the liquid covers at least half of the fruit.
- Add the ice cubes and pulse the blender several times to break down the large chunks before switching to a high-speed blend.
- Blend on high for about 45-60 seconds until the mixture is completely uniform and has achieved a thick, pourable consistency.
- Taste the mixture and add a splash more pineapple juice if it is too thick, or more ice if you prefer a fluffier, frozen texture.
- Pour into tall hurricane glasses or chilled tumblers, allowing the froth to settle naturally at the top.
- Garnish with a bright red cherry and a fresh pineapple wedge to complete the classic, viral look before serving with a straw.
Conclusion
Recreating these viral pins is about more than just following a recipe; it is about bringing that sense of curated beauty and intentional living into your daily routine. Each of these dishes offers a chance to play with color, texture, and flavor, proving that ‘simple’ food can be the most rewarding of all. Whether you are hosting a summer soirée or just making a Tuesday lunch feel a bit more special, these recipes are your ticket to a Pinterest-perfect home. So, put on your favorite playlist, head to the kitchen, and start creating your own viral food moments.