
Say Goodbye to Boring Snacks: This Viral Food Board is a Game Changer
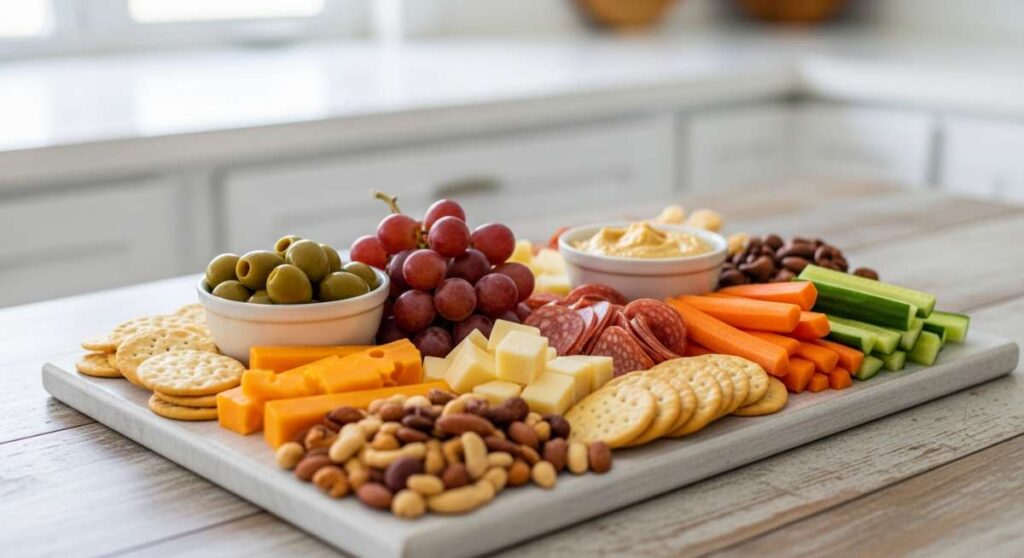
There is something magical about the way food brings us together, especially when the sun is high and the evenings are long. We’ve all been there—standing in the kitchen, staring into the pantry, and feeling completely uninspired by the same old crackers and dip. But what if I told you that snacking could be an art form? This season, we are ditching the individual bowls and embracing the ‘Viral Food Board’—a sprawling, colorful, and completely customizable canvas of flavors that turns every meal into a celebration of summer.
I remember the first time I set out a massive board for a casual backyard hangout. The gasps from my friends and the immediate reach for a perfectly charred kabob or a refreshing slice of watermelon made me realize that presentation really is everything. This post is your ultimate guide to mastering that viral board aesthetic while filling it with recipes that actually taste as good as they look. From the crunch of a fresh summer salad to the sweet nectar for your garden visitors, we’re covering it all to make your hosting duties a total breeze.
Whether you are prepping for a rowdy baseball game on the TV or a quiet afternoon by the pool, these recipes are designed to be simple, seasonal, and soul-satisfying. So, grab your largest wooden platter and let’s dive into the ten essential components that will make your next food board the talk of the town. It’s time to say goodbye to boring snacks and hello to a whole new way of eating that is as vibrant and warm as a July afternoon.
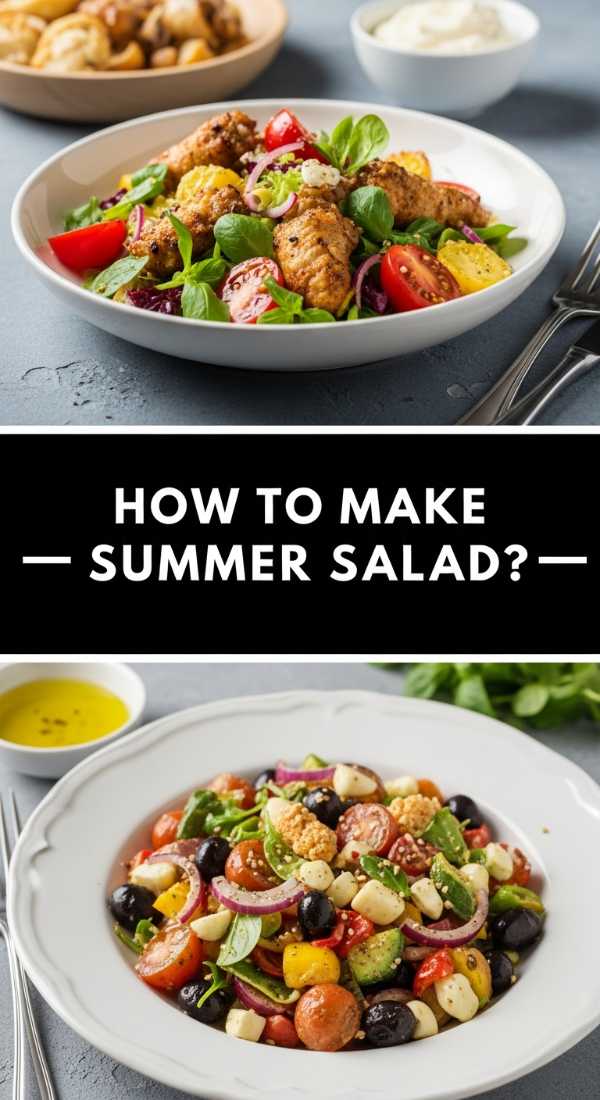
How to Make Summer Salad?
Why we love this
This summer salad is like a garden party in a bowl, offering a spectacular explosion of textures and bright, sunny flavors. We love the way the crisp, peppery arugula provides a sturdy base for the juicy sweetness of seasonal strawberries and the creamy, tangy crumble of fresh goat cheese. Every bite is a journey through different sensations—the snap of the greens, the lusciousness of the fruit, and the satisfying crunch of toasted pecans that have been lightly glazed. It is the kind of dish that feels incredibly light and refreshing on a sweltering afternoon, leaving you feeling energized rather than weighed down, and it smells absolutely divine with its hint of fresh mint and balsamic glaze.
Ingredients
- 4 cups fresh baby arugula
- 2 cups sliced strawberries
- 1/2 cup crumbled goat cheese
- 1/4 cup toasted pecans
- 1/4 cup red onion, thinly sliced
- 2 tablespoons balsamic glaze
- 1/4 cup extra virgin olive oil
- 1 tablespoon honey
- Salt and cracked black pepper to taste
How to make it
- Begin by washing your arugula in ice-cold water to ensure maximum crispness, then use a salad spinner to dry it thoroughly; damp leaves will prevent the dressing from adhering.
- In a small glass jar, whisk together the extra virgin olive oil, honey, salt, and pepper until the mixture is emulsified and slightly thickened.
- Place the dried arugula in a large wooden bowl and drizzle half of the dressing over the leaves, tossing gently with tongs to ensure every leaf is lightly coated.
- Layer the sliced strawberries and red onion over the greens, then sprinkle the crumbled goat cheese and toasted pecans evenly across the top to maintain their distinct textures.
- Just before serving, drizzle the rich balsamic glaze in a decorative zigzag pattern over the entire salad and add a final crack of black pepper for a sophisticated finish.
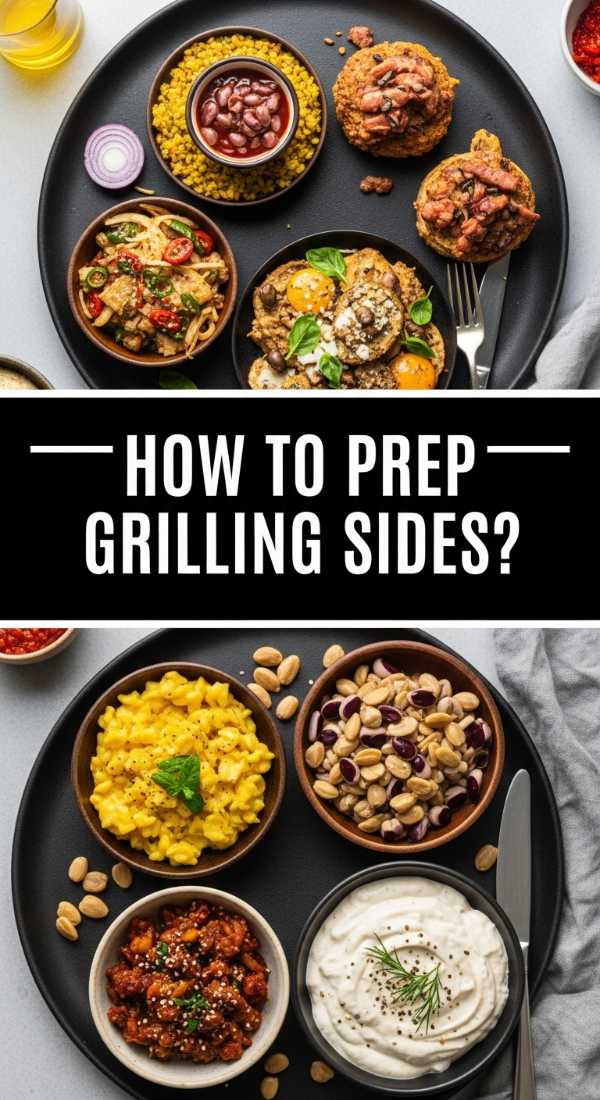
How to Prep Grilling Sides?
Why we love this
There is nothing quite like the smoky, caramelized aroma of corn on the cob hitting a hot grill to signal that summer has truly arrived. These grilling sides, specifically Mexican-style street corn, bring a creamy, spicy, and zesty profile to your board that pairs perfectly with any main dish. We adore how the charred kernels provide a sweet, smoky pop that is balanced by a rich layer of garlic aioli and a salty dusting of cotija cheese. It’s a sensory experience that starts with the heat from the grill and ends with the cooling splash of fresh lime juice, making it an addictive addition that guests will keep coming back for until the very last cob is gone.
Ingredients
- 6 ears of fresh sweet corn, husks removed
- 1/4 cup mayonnaise
- 1/4 cup sour cream
- 1/2 cup crumbled cotija cheese
- 1 teaspoon smoked paprika or Tajin
- 2 cloves garlic, minced
- 1/4 cup fresh cilantro, chopped
- 2 limes, cut into wedges
How to make it
- Preheat your grill to a medium-high heat, roughly 400°F (204°C), and ensure the grates are clean and lightly oiled to prevent sticking.
- In a small bowl, prepare the ‘elote’ sauce by combining the mayonnaise, sour cream, minced garlic, and a squeeze of lime, stirring until the mixture is smooth and creamy.
- Place the corn ears directly onto the hot grill grates and cook for approximately 10-12 minutes, turning frequently with tongs until the kernels are bright yellow and show beautiful charred brown spots on all sides.
- Remove the corn from the grill and immediately brush each ear generously with the mayonnaise mixture while the corn is still steaming hot, allowing the sauce to melt slightly into the crevices.
- Roll the coated corn in the crumbled cotija cheese, sprinkle with a dash of smoked paprika or Tajin for heat, and garnish with fresh cilantro before serving with extra lime wedges on the side.
How to Mix Summer Cocktails?

Why we love this
A great summer cocktail should be more than just a drink; it should be an effervescent escape from the midday heat. This Sparkling Cucumber Elderflower Gin Fizz is our go-to because it captures the essence of a breezy garden in a glass. The aroma is incredibly floral and light, thanks to the elderflower liqueur, while the muddled cucumber provides a clean, watery crispness that is incredibly hydrating and revitalizing. When topped with sparkling soda water, the bubbles dance on your tongue, carrying the botanical notes of the gin and the zesty brightness of fresh lemon, making it the ultimate sophisticated refreshment for any outdoor gathering.
Ingredients
- 2 oz botanical gin
- 1 oz elderflower liqueur (like St-Germain)
- 1/2 oz fresh lemon juice
- 3-4 slices of fresh cucumber
- Club soda or sparkling water to top
- Fresh mint sprigs for garnish
- Ice cubes (clear ice preferred)
How to make it
- Place the cucumber slices in the bottom of a heavy-duty cocktail shaker and use a muddler to firmly press them until they release their fragrant juices and aromatic oils.
- Add the gin, elderflower liqueur, and freshly squeezed lemon juice to the shaker, ensuring you use a jigger for precise measurements to maintain the flavor balance.
- Fill the shaker with large ice cubes and shake vigorously for at least 15-20 seconds; you’ll know it’s ready when the outside of the metal shaker becomes frosty and painfully cold to the touch.
- Double-strain the mixture through a Hawthorne strainer and a fine-mesh sieve into a tall Collins glass filled with fresh ice to ensure no cucumber pulp or ice shards make it into the drink.
- Top the glass with chilled club soda, give it a very gentle stir with a long bar spoon to integrate the layers, and garnish with a long cucumber ribbon and a slapped sprig of mint to release its scent.
How to Make Picnic Food?

Why we love this
Picnic food needs to be sturdy, portable, and absolutely packed with flavor, which is why these Prosciutto and Brie Baguette Sandwiches are a staple for any viral board. We love the contrast between the crusty, rustic exterior of a fresh baguette and the buttery, melting softness of triple-cream brie hidden inside. The salty, paper-thin slices of prosciutto provide a savory depth that is perfectly countered by a thin layer of sweet apricot jam. It’s a sophisticated take on a sandwich that feels like a Parisian getaway, offering a balance of sweet, salty, and creamy that stays delicious even if it’s been sitting in your picnic basket for an hour in the park.
Ingredients
- 1 large crusty French baguette
- 8 oz triple-cream Brie cheese, sliced
- 1/4 lb thinly sliced Prosciutto di Parma
- 1/4 cup apricot preserves or fig jam
- 2 cups fresh baby arugula
- 2 tablespoons unsalted butter, softened
- Honey for drizzling
How to make it
- Slice the baguette lengthwise, being careful not to cut all the way through if you want a ‘hinge,’ or slice it into 6-inch individual portions for easier handling.
- Spread a very thin layer of softened butter on both interior sides of the bread to create a moisture barrier, which prevents the bread from becoming soggy during transport.
- On the bottom half of the bread, spread the apricot preserves evenly, then layer the slices of Brie cheese so they cover the entire surface.
- Fold the prosciutto slices loosely to create volume and place them over the cheese, then top with a generous handful of arugula for a peppery bite.
- Drizzle a tiny bit of honey over the arugula, close the sandwich, and wrap it tightly in parchment paper or beeswax wrap to help the flavors meld together before slicing into bite-sized rounds for the board.
How to Cook Easy Dinners?

Why we love this
When the heat is on, the last thing anyone wants is to spend hours over a hot stove, which is why this Sheet Pan Lemon Garlic Salmon is the ultimate easy dinner win. We love the way the salmon stays incredibly tender and flaky under a crust of zest and herbs, while the surrounding asparagus spears become charred and snap with every bite. The aroma of roasting garlic and citrus fills the kitchen with a Mediterranean vibe that is instantly appetizing. It is a one-pan wonder that delivers a high-protein, nutrient-dense meal with almost zero cleanup, making it the perfect centerpiece for a food board that transitions from appetizers to a full meal.
Ingredients
- 4 salmon fillets (6 oz each)
- 1 lb thin asparagus, woody ends trimmed
- 3 tablespoons olive oil
- 3 cloves garlic, minced
- 1 large lemon, half sliced into rounds and half juiced
- 1 teaspoon dried oregano
- Salt and cracked black pepper
- Fresh parsley for garnish
How to make it
- Preheat your oven to 400°F (204°C) and line a large, rimmed baking sheet with parchment paper or aluminum foil for easy cleanup.
- In a small bowl, whisk together the olive oil, minced garlic, lemon juice, oregano, salt, and pepper to create a zesty marinade.
- Place the salmon fillets in the center of the baking sheet and arrange the asparagus in a single layer around the fish, ensuring the vegetables aren’t overcrowded so they roast rather than steam.
- Pour the garlic-lemon mixture over the salmon and the asparagus, using a pastry brush or your hands to make sure everything is thoroughly and evenly coated.
- Top the salmon with lemon slices and roast in the center rack of the oven for 12-15 minutes, or until the salmon reaches an internal temperature of 145°F and flakes easily with a fork, then garnish with chopped parsley.
How to Prep Baseball Snacks?

Why we love this
There’s a certain nostalgia that comes with baseball snacks, and our ‘Home Run Crunch Mix’ takes those classic stadium flavors and elevates them for the ultimate board experience. We love the addictive interplay of salty and sweet; the way the buttery popcorn catches the drizzled dark chocolate while the honey-roasted peanuts provide a deep, earthy crunch. It’s a sensory delight that keeps your hands busy during the tense moments of the game. The smell of fresh popcorn mixed with the sweet scent of caramel and chocolate is enough to make anyone feel like they’re sitting in the front row at the ballpark, even from the comfort of their own couch.
Ingredients
- 6 cups popped stovetop popcorn (salted)
- 2 cups mini pretzels
- 1 cup honey-roasted peanuts
- 1/2 cup dark chocolate chips, melted
- 1/2 cup caramel corn
- 1/4 cup candy-coated chocolate pieces (in team colors!)
- Sea salt for sprinkling
How to make it
- Line a large baking sheet with wax paper to prevent the snack mix from sticking as the chocolate set.
- Spread the popped popcorn, mini pretzels, and honey-roasted peanuts in an even, mixed layer across the prepared baking sheet.
- In a microwave-safe bowl, melt the dark chocolate chips in 30-second intervals, stirring in between until the chocolate is silky smooth and glossy.
- Use a spoon to drizzle the melted chocolate in a back-and-forth motion across the entire snack mixture, ensuring there are plenty of ‘chocolate clusters’ forming.
- While the chocolate is still wet, sprinkle the candy-coated pieces and a pinch of sea salt over the top, then let it sit in a cool spot (or the fridge) for 20 minutes until the chocolate has completely hardened before breaking it into chunks for your board.
How to Toss Summer Pasta?

Why we love this
Summer pasta should be light, vibrant, and celebrated for its simplicity, which is exactly why we love this No-Cook Tomato and Basil Pasta. Instead of a heavy, simmered sauce, this dish relies on the heat of the freshly boiled pasta to gently warm a ‘sauce’ of raw, marinated tomatoes and garlic. The result is an incredibly fresh flavor profile where you can taste the sun-ripened sweetness of every tomato. The aroma of torn basil leaves hitting the warm pasta is intoxicating, and the silky coating of high-quality olive oil makes every bite feel luxurious yet light enough for a hot evening on the patio.
Ingredients
- 1 lb Penne or Fusilli pasta
- 2 lbs ripe cherry tomatoes, halved
- 3 cloves garlic, minced
- 1/2 cup extra virgin olive oil
- 1 cup fresh basil leaves, torn by hand
- 1/2 cup freshly grated Parmesan cheese
- 1 teaspoon red pepper flakes (optional)
- Salt and pepper to taste
How to make it
- In a large glass bowl, combine the halved cherry tomatoes, minced garlic, olive oil, salt, and pepper; cover and let this mixture sit at room temperature for at least 2 hours to allow the tomatoes to release their juices.
- Bring a large pot of heavily salted water (it should taste like the sea) to a rolling boil and cook your pasta according to the package directions until it is perfectly al dente.
- Just before draining, reserve about 1/2 cup of the starchy pasta water; this is the secret ingredient for getting the sauce to cling to the noodles.
- Drain the pasta and immediately add it to the bowl with the raw tomato mixture, tossing vigorously to combine as the heat from the pasta slightly softens the tomatoes.
- Fold in the torn basil leaves and Parmesan cheese, adding a splash of the reserved pasta water if the mixture looks too dry, and serve immediately while the herb fragrance is at its peak.
How to Make Hummingbird Food?

Why we love this
While this part of the board isn’t for us, we love including it because a true summer lifestyle involves caring for the little creatures that make our gardens come alive. Making your own hummingbird nectar is incredibly rewarding because it allows you to avoid the red dyes found in store-bought versions, which can be harmful to the birds. There is a simple joy in watching these iridescent jewels dart back and forth to a feeder you’ve prepared. It adds a layer of peace and connection to nature to your outdoor dining experience, making your backyard feel like a true sanctuary for every living thing.
Ingredients
- 1 cup white granulated sugar
- 4 cups filtered water
- Note: Never use honey, brown sugar, or artificial sweeteners.
How to make it
- In a medium saucepan, combine the 4 cups of filtered water and 1 cup of white sugar, stirring occasionally to begin the dissolving process.
- Place the pan over medium-high heat and bring the mixture to a low boil; this step is crucial as it helps ensure the sugar is fully dissolved and kills any bacteria or fungi in the water.
- Boil the solution for exactly 2 minutes, then remove it from the heat immediately to prevent too much water from evaporating, which would make the nectar too concentrated.
- Allow the nectar to cool completely to room temperature on the counter; never put hot nectar into a plastic feeder as it can warp the plastic or harm the birds.
- Once cooled, fill your clean hummingbird feeder and store any extra nectar in a sealed glass jar in the refrigerator for up to one week, ensuring you clean the feeder thoroughly every few days.
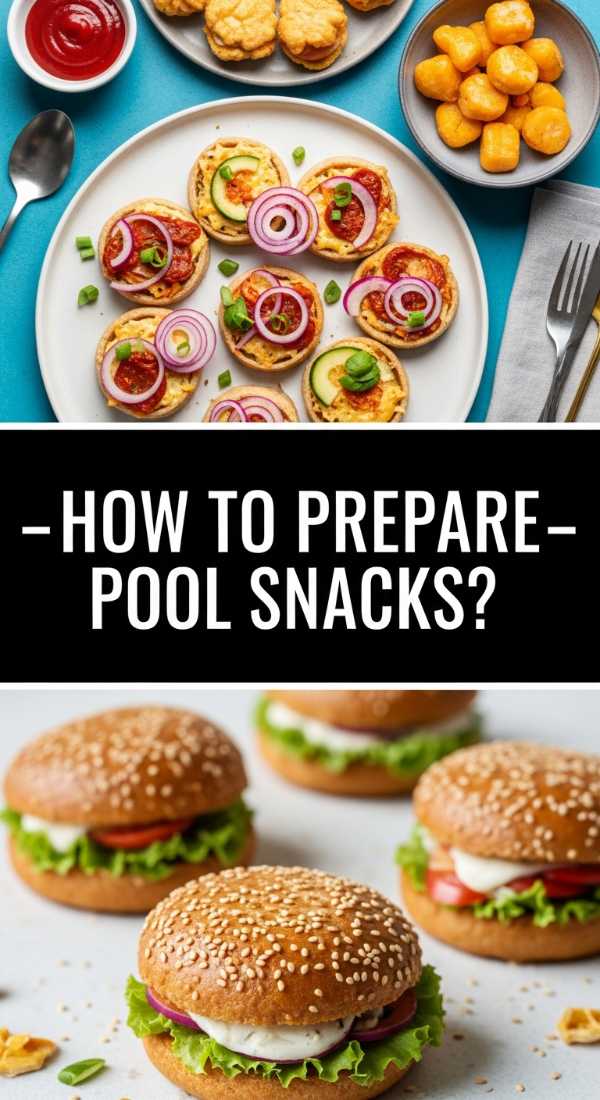
How to Prepare Pool Snacks?
Why we love this
Pool snacks need to be ultra-hydrating, easy to eat with one hand, and immune to the heat, which makes these Frozen Watermelon and Mint Skewers an absolute game changer. We love the way the watermelon becomes almost sorbet-like when partially frozen, offering a frosty crunch that is incredibly satisfying when you’re lounging by the water. The addition of fresh mint provides a cooling sensation on the palate that lingers, making the whole experience feel like a spa day. These are colorful, low-calorie, and a total hit with both kids and adults who want something sweet without the sticky mess of traditional ice cream.
Ingredients
- 1 small seedless watermelon
- 1 bunch fresh mint leaves
- 1 pint fresh blueberries
- Wooden bamboo skewers (short)
- A squeeze of fresh lime juice
How to make it
- Use a sharp knife to cut the watermelon into 1-inch thick rounds, then use a small star-shaped or circular cookie cutter to create fun, uniform shapes from the flesh.
- Thread a blueberry onto the bottom of a bamboo skewer, followed by a fresh mint leaf, and then a piece of the watermelon ‘star.’
- Repeat the pattern until the skewer is full, leaving about an inch at the bottom as a handle for easy grabbing.
- Lay the completed skewers in a single layer on a baking sheet lined with parchment paper and give them a very light spritz of lime juice to enhance the melon’s natural sweetness.
- Place the tray in the freezer for at least 45-60 minutes; you want them to be very cold and firm but not frozen solid like an ice cube, then serve them immediately on your board nested in a bowl of crushed ice.
How to Grill Perfect Kabobs?

Why we love this
Kabobs are the ultimate board food because they are essentially a complete meal on a stick, offering a charred, savory, and incredibly juicy bite every time. We love the versatility of kabobs; the way the edges of the bell peppers get that slightly bitter char while the onions become sweet and translucent. The aroma of the balsamic-herb marinade hitting the flames is enough to draw the neighbors over the fence. There is something primal and fun about eating food off a skewer, and when done right, the meat is tender and the vegetables are crisp-tender, making it a textural masterpiece that looks stunning as the ‘anchor’ of your viral food board.
Ingredients
- 1.5 lbs top sirloin or chicken breast, cut into 1.25-inch cubes
- 2 large bell peppers (red and green), cut into chunks
- 1 large red onion, cut into wedges
- 1/2 cup balsamic vinaigrette (for marinating)
- 2 tablespoons Worcestershire sauce
- 2 cloves garlic, minced
- Salt and pepper to taste
- Wooden or metal skewers
How to make it
- If using wooden skewers, submerge them in a tray of water for at least 30 minutes prior to grilling to prevent them from catching fire or splintering under the heat.
- In a large resealable bag, combine the cubed meat with the balsamic vinaigrette, Worcestershire sauce, and minced garlic; massage the bag to coat the meat and marinate in the fridge for at least 2 hours (or overnight for maximum tenderness).
- Thread the meat and vegetables onto the skewers in an alternating pattern, ensuring you don’t pack them too tightly; leaving a tiny bit of space between items allows the heat to circulate and cook everything evenly.
- Preheat your grill to medium-high (about 375°F to 400°F) and lightly oil the grates using a folded paper towel dipped in vegetable oil and held with tongs.
- Grill the kabobs for 8-10 minutes, turning a quarter-turn every 2-3 minutes, until the meat reaches your desired doneness (145°F for beef, 165°F for chicken) and the vegetables show beautiful grill marks and soft edges.
Conclusion
Building a viral-worthy food board is about more than just the ingredients; it’s about the intention of bringing people together through beautiful, accessible food. By combining these ten diverse elements—from the savory char of the grill to the refreshing frost of pool-side snacks—you create an experience that engages all the senses. So next time you’re planning a get-together, put away the individual plates, clear off your largest table, and let the food do the talking. Happy hosting!