

Simple, Stunning, and Viral: The Only Food Board Ideas You Need
There is something truly magical about gathering around a table where the food isn’t just a meal, but a centerpiece of conversation and connection. I remember the first time I set out a simple board for my friends; the way their faces lit up at the vibrant colors and the casual, help-yourself vibe changed how I host forever. It’s not about being a professional chef; it’s about the warmth of sharing and the effortless beauty of a well-curated spread.
In today’s fast-paced world, these viral food board ideas offer a way to slow down and enjoy the sensory delights of fresh ingredients and thoughtful preparation. Whether you are hosting a sun-drenched backyard party or a cozy movie night, these ideas are designed to be approachable yet impressive. Let’s dive into the flavors and techniques that will make your next gathering absolutely unforgettable.
How to make strawberry pie?

Why we love this
There is nothing quite like the scent of a fresh strawberry pie cooling on a windowsill to signal the arrival of warmer days. We love the contrast between the buttery, flaky pastry crust and the bright, ruby-red filling that bursts with the natural sweetness of sun-ripened berries. Every bite offers a harmonious blend of textures—from the slight crunch of the golden crust to the jammy, luscious consistency of the fruit—evoking nostalgic memories of summer picnics and family celebrations under the shade of old oak trees.
Ingredients
- 2 cups all-purpose flour
- 1 teaspoon salt
- 2/3 cup cold unsalted butter, cubed
- 4-6 tablespoons ice water
- 5 cups fresh strawberries, hulled and sliced
- 3/4 cup granulated sugar
- 3 tablespoons cornstarch
- 1 tablespoon lemon juice
- 1 egg (for egg wash)
How to make it
- Begin by preparing your pie crust. Combine flour and salt in a large bowl, then cut in the cold butter using a pastry cutter until the mixture resembles coarse crumbs. Gradually add ice water, one tablespoon at a time, until the dough just holds together. Divide into two discs, wrap in plastic, and refrigerate for at least one hour to allow the gluten to relax.
- Preheat your oven to 400°F (200°C). Roll out one disc of dough on a floured surface and fit it into a 9-inch pie plate. Trim the edges, leaving a small overhang.
- In a large mixing bowl, toss the sliced strawberries with sugar, cornstarch, and lemon juice. The cornstarch is vital as it reacts with the heat to thicken the berry juices, preventing a soggy bottom. Let the mixture sit for 10 minutes to allow the juices to begin macerating.
- Pour the strawberry mixture into the prepared bottom crust. Roll out the second dough disc and place it over the top, either as a solid sheet with steam vents or as a decorative lattice. Crimp the edges tightly to seal in the goodness.
- Brush the top crust with a beaten egg wash for a professional, glossy golden finish. Bake for 45-50 minutes until the crust is deeply golden and the filling is bubbling thick. Allow the pie to cool completely for at least 3 hours before slicing; this patience ensures the filling sets perfectly.
How to make rotel dip?
Why we love this
Rotel dip is the ultimate crowd-pleaser that brings a sense of comfort and celebration to any gathering. We love it for its velvety, molten texture and the spicy, savory kick that comes from the perfect blend of melted cheese, seasoned meat, and zesty tomatoes. The aroma of simmering green chilies and savory sausage filling the kitchen is enough to draw everyone to the counter with a bag of chips in hand, creating an instant hub of social energy and shared enjoyment that lasts all evening long.
Ingredients
- 1 lb ground sausage or lean ground beef
- 1 block (32 oz) Velveeta or processed cheese, cubed
- 2 cans (10 oz each) Ro-Tel Diced Tomatoes and Green Chilies
- 1/2 teaspoon garlic powder
- 1/4 cup fresh cilantro, chopped (optional)
- Tortilla chips for serving
How to make it
- Start by browning your chosen meat in a large skillet or Dutch oven over medium-high heat. Use a wooden spoon to break the meat into small, uniform crumbles. Cook until no pink remains and the meat has developed a slight sear, which adds a deep savory flavor. Drain any excess fat thoroughly to ensure the dip isn’t greasy.
- Reduce the heat to low. Add the cubed cheese to the skillet. It is crucial to use low heat here; high heat can cause the cheese to break or become grainy. Stir frequently as the cheese begins to melt into a smooth, liquid gold consistency.
- Open the cans of Ro-Tel. For a thicker dip, drain one can and keep the liquid in the other. Pour both into the melted cheese mixture. The acidity of the tomatoes balances the richness of the cheese perfectly.
- Add the garlic powder and stir continuously for about 5-7 minutes until the mixture is completely homogenous and steaming hot. If the dip feels too thick, you can stir in a splash of milk to reach your desired consistency.
- Once fully melted and combined, transfer the dip to a slow cooker set to the “warm” setting to maintain that perfect dippable texture throughout your party. Garnish with fresh cilantro just before serving for a pop of color and freshness.
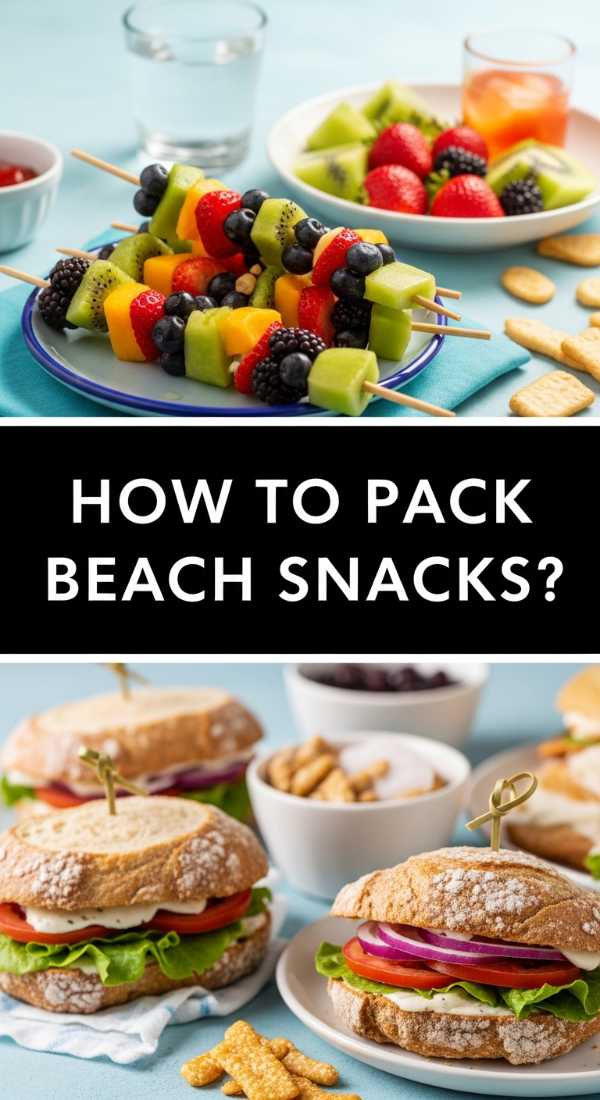
How to pack beach snacks?

Why we love this
Packing the perfect beach snack board is an art form that transforms a simple day by the ocean into a luxury picnic experience. We love the feeling of opening a chilled cooler to find a colorful array of hydrating fruits, salty nuts, and crisp crackers that hold up against the summer heat. There is a specific joy in biting into a cold, juicy grape or a crunchy carrot stick while the salt air breezes past, providing a refreshing contrast to the warm sun and sand underfoot.
Ingredients
- Assorted hard cheeses (Cheddar, Manchego)
- Pre-cut firm fruits (Grapes, Melon, Pineapple)
- Crunchy vegetables (Carrot sticks, Bell peppers)
- Salty nuts (Almonds, Cashews)
- Sturdy crackers or pita chips
- Individual hummus or dip cups
- Frozen water bottles (to serve as ice packs)
How to make it
- The key to successful beach snacks is preparation and temperature control. Start by washing and cutting all fruits and vegetables into bite-sized pieces the night before. Ensure they are dried thoroughly before packing to prevent sogginess.
- Use airtight, rigid containers rather than plastic bags to prevent your snacks from being crushed in the cooler. For a “board” feel, use a bento-style container with compartments to keep flavors separate and organized.
- Place your hard cheeses and dips at the very bottom of the cooler, closest to the ice source. Avoid soft cheeses like Brie, which can become unappealingly oily in the sun. Layer your containers strategically: heaviest items on the bottom, lighter items like crackers on top.
- Utilize frozen water bottles as your cooling agent. Not only do they keep the food cold without creating a pool of melted ice water, but they also provide ice-cold drinking water as they thaw throughout the day.
- Pack a small, light wooden board or a flat tray in your beach bag. When you’re ready to eat, simply arrange your pre-chilled containers onto the board for an instant, beautiful beachside charcuterie spread that stays sand-free and spectacular.
How to make butter boards?

Why we love this
Butter boards have taken the world by storm because they turn a humble staple into a decadent, interactive masterpiece. We love the silky, indulgent mouthfeel of high-quality softened butter swirled onto a wooden surface and topped with an explosion of sweet and savory garnishes. It invites guests to engage with their food, using warm, crusty bread to swipe through layers of flaky sea salt, aromatic herbs, and honey, making every bite a customizable explosion of flavor that feels both rustic and incredibly sophisticated.
Ingredients
- 2 sticks high-quality unsalted butter, softened to room temperature
- Flaky sea salt (Maldon is a favorite)
- Fresh lemon zest
- Red pepper flakes or chili crisp
- Honey or hot honey
- Fresh herbs (Thyme, Rosemary, or Basil)
- Edible flowers (optional, for aesthetics)
- Warm baguette or sourdough slices
How to make it
- Ensure your butter is at the perfect “spreadable” room temperature. It should be soft enough to swirl with a spoon but not so warm that it is melting or oily. Use a high-fat, European-style butter for the best flavor profile.
- Take a clean wooden board or marble slab. Using the back of a spoon or a small offset spatula, create decorative swooshes and swirls of butter across the surface. Aim for varying depths to create pockets that will hold your toppings.
- Season the base layer. Sprinkle a generous amount of flaky sea salt and lemon zest over the butter. This provides the foundational bright and salty notes that elevate the fat of the butter.
- Add your flavor accents. Drizzle honey in a zig-zag pattern, then sprinkle red pepper flakes and your finely chopped fresh herbs. Think about the balance of color; the green of the herbs against the gold of the honey makes the board look professionally styled.
- Serve immediately with a side of warm, toasted bread. Instruct guests to “scoop” rather than spread, ensuring they get a bit of every topping in each mouthful. If the room is warm, keep the board in the fridge until 10 minutes before serving to maintain the structure.
How to prep camping meals?

Why we love this
Camping meals are all about the magic of outdoor cooking without the stress of complicated cleanup. We love the smoky, charred aroma of food cooked over an open flame and the rugged simplicity of eating under the stars. By prepping ahead, you turn a potentially chaotic campsite kitchen into an effortless experience, allowing you to spend more time hiking or relaxing by the fire and less time chopping vegetables on a shaky picnic table.
Ingredients
- Pre-marinated proteins (Chicken thighs, Steak tips)
- Chopped hardy vegetables (Potatoes, Corn, Onions, Zucchini)
- Heavy-duty aluminum foil
- Pre-mixed spice blends in small jars
- Oil or butter pats
- Pre-cooked grains (Quinoa or Rice) in bags
How to make it
- Three days before your trip, plan your menu and do all the “wet” prep. Slice your proteins and place them in heavy-duty gallon freezer bags with their respective marinades. Freezing these bags allows them to act as additional ice in your cooler and ensures the meat is perfectly tenderized by the time you’re ready to cook.
- Chop all vegetables and store them in dry, airtight containers. For foil-pack meals, you can even pre-assemble the vegetable and starch components. Toss potatoes and onions with oil and spices, then wrap them tightly in double layers of heavy-duty foil.
- Organize your cooler using the “last in, first out” rule. Put the meals for your final day at the bottom and the first night’s dinner on top. This minimizes the time the cooler lid is open, preserving the internal temperature.
- When you arrive at camp, build a fire and let it burn down until you have a thick bed of glowing red coals. This provides a much more even and controllable heat source than active flames. Place your pre-prepped foil packs directly on the grate or the edge of the coals.
- Cook the packs for 20-30 minutes, turning halfway through. The steam trapped inside the foil will cook the vegetables to tender perfection while the high heat sears the meat. Use tongs to carefully open the packs—watch out for the steam!—and eat directly from the foil for zero-dish cleanup.
How to make tomato salad?

Why we love this
A fresh tomato salad is the epitome of summer on a plate. We love the vibrant spectrum of colors—from deep purples to bright yellows—and the incredible juiciness that only comes from peak-season heirloom tomatoes. The way the acidic tomato juice mingles with high-quality olive oil and fragrant basil creates a natural “sauce” that begs to be mopped up with bread. It’s a dish that celebrates simplicity, proving that when ingredients are this good, they need very little intervention to shine.
Ingredients
- 3 lbs assorted heirloom tomatoes
- 1/2 red onion, very thinly sliced
- 1/4 cup extra virgin olive oil
- 2 tablespoons balsamic glaze or high-quality vinegar
- 1 cup fresh basil leaves, torn
- 1 teaspoon flaky sea salt
- 1/2 teaspoon cracked black pepper
- Optional: Fresh mozzarella pearls or burrata
How to make it
- Select a variety of tomatoes in different shapes, sizes, and colors for the best visual impact and flavor complexity. Slice the larger tomatoes into thick rounds or wedges, and halve the smaller cherry tomatoes. Variety in texture is key to a viral-worthy salad.
- Place the sliced red onions in a small bowl of cold water for 10 minutes. This “shocks” them, removing the harsh bite and leaving them crisp and sweet. Drain and pat dry before adding to the salad.
- Arrange the tomatoes and onions on a large, shallow platter rather than a deep bowl. This prevents the tomatoes on the bottom from being crushed and allows the dressing to coat every piece evenly.
- Drizzle the extra virgin olive oil and balsamic glaze over the top in a slow, rhythmic motion. Season generously with flaky salt and pepper. The salt is essential as it draws out the moisture from the tomatoes, creating that delicious juice at the bottom of the plate.
- Just before serving, scatter the torn basil leaves and optional cheese over the top. Tearing the basil instead of chopping it prevents the edges from bruising and browning, keeping the aroma potent and the color bright. Let it sit for 5 minutes at room temperature so the flavors can marry before diving in.
How to grill fresh veggies?

Why we love this
Grilling vegetables transforms them into something smoky, sweet, and incredibly satisfying. We love the distinct char marks that add a layer of complexity to the natural earthiness of peppers, asparagus, and eggplant. The high heat of the grill caramelizes the natural sugars within the vegetables, resulting in a tender-crisp texture that feels substantial enough to be a main course. It’s a healthy, vibrant way to enjoy the season’s bounty while soaking up the sun by the grill.
Ingredients
- Assorted vegetables (Bell peppers, Zucchini, Asparagus, Portobello mushrooms)
- 3 tablespoons avocado oil or grapeseed oil (high smoke point)
- 2 cloves garlic, minced
- 1 tablespoon dried oregano
- Salt and pepper to taste
- Fresh lemon wedges for finishing
How to make it
- Preparation is vital for even cooking. Slice zucchini and eggplant into long, 1/2-inch thick planks to prevent them from falling through the grates. Keep asparagus spears whole, and cut peppers into large flat panels.
- In a large bowl, whisk together the oil, minced garlic, and oregano. Avocado oil is preferred over olive oil for grilling because it can handle the high heat without smoking or developing a bitter taste. Toss the vegetables in the oil mixture until every surface is lightly coated.
- Preheat your grill to medium-high heat (about 400°F). Ensure the grates are clean and lightly oiled. Place the denser vegetables like peppers and mushrooms on the grill first, as they take longer to soften.
- Grill the vegetables for 3-5 minutes per side. Look for clear, dark grill marks before flipping. Avoid moving them around too much; patience is required to get that perfect sear. Asparagus and thin zucchini slices will only need about 2 minutes per side.
- Remove the vegetables to a platter as they finish. Squeeze fresh lemon juice over the top while they are still hot to brighten the smoky flavors. Serve warm or at room temperature as part of a large grilled feast board.
How to cook summer meals?

Why we love this
Summer cooking is all about embracing a lighter, more relaxed approach to the kitchen. We love the transition away from heavy stews and long oven times toward quick, fresh, and often “no-cook” assemblies that keep the house cool. It’s a season of vibrant salads, chilled soups, and quick-seared proteins that highlight the quality of the produce, allowing us to spend less time standing over a stove and more time enjoying the long, golden evening hours with friends and family.
Ingredients
- Light proteins (Shrimp, Scallops, or Tofu)
- Fresh leafy greens (Arugula, Spinach)
- Seasonal fruit (Peaches, Berries)
- Fresh herbs and citrus
- Quick-cooking grains (Couscous or Orzo)
How to make it
- The philosophy of summer cooking is “minimal heat, maximum flavor.” Start by choosing proteins that cook in under 10 minutes. Shrimp, for example, only needs 2 minutes per side in a hot pan or on the grill to become pink and tender.
- Incorporate fruit into your savory dishes. A peach and arugula salad with a light vinaigrette provides a refreshing sweetness that balances salty proteins like prosciutto or grilled halloumi.
- Utilize quick-prep grains like couscous. Simply pour boiling water over the grains, cover for 5 minutes, and fluff with a fork. This avoids the long boiling times of pasta or rice which can steam up your kitchen.
- Focus on “assembly” meals. A large Mediterranean board with store-bought hummus, fresh cucumbers, olives, and some quickly seared lamb or chickpeas is a complete, satisfying meal that requires very little active cooking time.
- Always finish with something cold. Keep a stash of herb-infused simple syrups in the fridge to add to sparkling water or iced tea, ensuring every meal feels like a special, cooling occasion.
How to make summer dinners?

Why we love this
Summer dinners represent the pinnacle of alfresco dining, where the meal itself is an event. We love the ease of one-pan recipes and bowl-style meals that are packed with contrasting temperatures and textures—think hot grilled chicken over a bed of cold, crisp greens. There is a specific kind of joy in serving dinner on a large communal board or platter in the middle of the table, encouraging everyone to reach in and help themselves as the sun slowly sets.
Ingredients
- Grilled chicken breast or salmon fillets
- Fresh corn on the cob
- Cherry tomatoes and cucumber
- Feta cheese or goat cheese
- Homemade pesto or chimichurri sauce
- Toasted nuts or seeds for crunch
How to make it
- Plan your dinner around a central protein and a variety of raw and cooked sides. Start by grilling your corn and meat simultaneously. The corn should be charred until the kernels are bright yellow and slightly blackened in spots, which takes about 10-12 minutes.
- While the protein rests (essential for keeping juices inside), prepare a “base” for your dinner board. This could be a large pile of dressed greens or a bed of chilled orzo pasta tossed with lemon and herbs.
- Slice the grilled protein into strips and cut the corn kernels off the cob. Arrange these warm elements over the cool base. The contrast in temperatures is a hallmark of a great summer dinner.
- Add your “pops” of flavor: halved cherry tomatoes, crumbled feta, and sliced cucumbers. These provide the crunch and acidity needed to cut through the richness of the grilled meat.
- Drizzle a vibrant green sauce like pesto or chimichurri over the entire spread. The herbs provide a fresh, aromatic finish that ties all the disparate elements together into a cohesive, stunning meal.
How to serve rotel dip?
[IMAGE_10]
Why we love this
Serving rotel dip is as much about the presentation as it is about the taste. We love how this humble dip can be elevated into a stunning viral food board by surrounding it with an array of colorful and thoughtful dippers. It’s the ultimate party starter because it’s approachable and nostalgic, but when served with flair, it becomes a sophisticated centerpiece that guests will be snapping photos of before they even take their first bite.
Ingredients
- Prepared Rotel Dip (warm)
- Large sturdy tortilla chips
- Toasted baguette slices
- Celery stalks and mini bell peppers
- Pickled jalapeños for topping
- Sour cream and green onions for garnish
How to make it
- Choose a large, flat wooden board and place your bowl of hot Rotel dip slightly off-center. Using a colorful bowl (like a deep blue or terracotta) makes the yellow of the cheese pop.
- Create “rivers” of dippers around the bowl. Start with the largest items, like the tortilla chips, and fan them out in a curved pattern. Fill in the gaps with the baguette slices and vegetable sticks.
- Texture variety is key for a great serving board. Include both salty, crunchy chips and fresh, hydrating vegetables like bell peppers. This gives guests options based on their dietary preferences and keeps the palate refreshed.
- Add the final garnishes to the dip itself. A dollop of cool sour cream in the center, followed by a sprinkle of sliced green onions and a few pickled jalapeños, adds professional layers of color and flavor.
- Keep a small stack of napkins and a few small plates nearby. Because Rotel dip can be messy, providing guests with an easy way to manage their portions makes the experience much more enjoyable. If the party is long, remember to stir the dip occasionally to keep it smooth.
The Joy of the Viral Board
Creating these boards is more than just a culinary trend; it is a way to celebrate the abundance of the season and the people we love. Each idea we’ve explored—from the sweetness of a strawberry pie to the savory depth of a Rotel dip—is designed to be shared. By focusing on fresh ingredients and thoughtful presentation, you turn a simple meal into a memorable event. So grab a board, gather your favorite people, and let the flavors of summer do the rest. Happy hosting!