
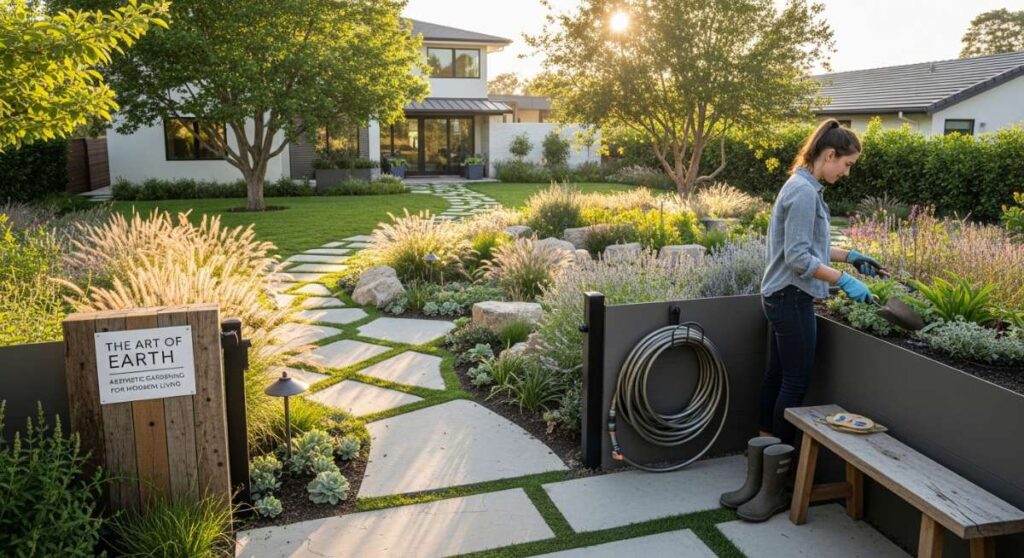
Have you ever noticed how the world feels a little quieter when your hands are deep in the dirt? There is a profound, almost ancient magic in the act of gardening—a slow-living ritual that invites us to disconnect from the digital hum and reconnect with the heartbeat of the Earth. Aesthetic gardening isn’t just about growing plants; it’s about curated beauty, intentional living, and creating a sanctuary that nourishes the soul as much as the soil.
For the modern dreamer, the garden has become an extension of the home, a canvas where colors, textures, and aromas blend into a living masterpiece. Whether you have a sprawling backyard or a sun-drenched balcony, there is a unique joy in watching a tiny seed transform into a vibrant bloom. It’s about the morning light hitting the dew on a rose petal and the earthy scent of rain on dry ground—these are the moments that turn a simple hobby into a lifestyle.
How to Foster Childhood Wonder Through Garden Play

Why we love this
There is nothing quite like seeing a garden through the eyes of a child, where every leaf is a hiding spot for a fairy and every worm is a tiny adventurer. This approach to gardening focuses on the tactile and the whimsical, creating a sensory playground that encourages curiosity and a deep love for nature. We love the smell of crushed mint between small fingers, the fuzzy texture of lamb’s ear leaves, and the bright, cheery faces of sunflowers that tower overhead like giants. It transforms the backyard into a living storybook where learning happens naturally through exploration and play.
Essential Elements:
- Sensory plants (Mint, Lamb’s Ear, Snapdragons)
- A designated ‘digging zone’ with kid-friendly shovels
- Fairy house materials (twigs, moss, smooth stones)
- Magnifying glasses and bug jars
- Sunflowers or tall corn for natural ‘forts’
How to make it
- Select a safe, sunny corner of the garden that is easily accessible for small feet and hands, ensuring no toxic plants are within reach.
- Create a ‘Sensory Trail’ by planting a variety of textures: soft Lamb’s Ear for touch, fragrant Lavender for smell, and ‘Popping’ Balsam for sound when the seed pods burst.
- Set up a ‘Mud Kitchen’ using an old wooden crate or low table, providing metal bowls, wooden spoons, and a source of water for hours of tactile experimentation.
- Build a ‘Living Teepee’ by securing six-foot bamboo poles in a circle, tying them at the top, and planting runner beans or morning glories at the base to climb the structure.
- Incorporate ‘Tiny Worlds’ by placing a weather-resistant fairy house or dinosaur cave among the ferns, encouraging imaginative play amidst the greenery.
How to Design Floral Container Displays for Instant Curb Appeal

Why we love this
A well-placed container display is like a warm embrace for your home’s exterior, offering a burst of curated color that instantly elevates your mood. We are obsessed with the ‘Thriller, Filler, Spiller’ method because it creates a professional, multi-dimensional look that feels lush and abundant. Imagine the scent of sweet alyssum wafting toward your front door and the visual drama of deep purple petunias cascading over the rim of a classic terracotta pot. It’s an easy, high-impact way to show off your personal style and welcome guests with a touch of botanical elegance.
Essential Elements:
- High-quality ceramic or stone containers
- A ‘Thriller’ plant (Purple Fountain Grass or Canna Lily)
- ‘Filler’ plants (Geraniums, Zinnias, or Marigolds)
- ‘Spiller’ plants (Sweet Potato Vine or Creeping Jenny)
- Slow-release organic fertilizer
How to make it
- Choose a container with adequate drainage holes; if it lacks them, carefully drill three to four small holes in the bottom to prevent root rot.
- Fill the container two-thirds full with a premium, well-draining potting mix that includes perlite for aeration and moisture retention.
- Place your ‘Thriller’ (the tallest plant) in the center if the pot is viewed from all sides, or at the back if it will sit against a wall.
- Surround the ‘Thriller’ with your ‘Fillers,’ spacing them about 3-4 inches apart to allow for growth while ensuring the pot looks full immediately.
- Plant your ‘Spillers’ along the very edge of the pot, angling them slightly outward so they are encouraged to drape over the sides as they grow.
- Water thoroughly until water drains from the bottom, and top with a thin layer of decorative mulch or moss to finish the aesthetic.
How to Style the Perfect Gardening Outfit for All Day Comfort
Why we love this
Gardening is an athletic endeavor, and the right outfit makes the transition from ‘digging in the dirt’ to ‘sipping tea on the porch’ seamless and stylish. We love the feeling of breathable linen against the skin on a warm afternoon and the practical luxury of a well-fitted gardening apron with pockets for everything. There’s a certain aesthetic satisfaction in a wide-brimmed straw hat that protects your face while making you look like you’ve stepped out of a classic countryside editorial. It’s about merging utility with beauty, ensuring you feel confident and comfortable as you tend to your blooms.
Essential Elements:
- Breathable linen or cotton overalls/jumpsuit
- A wide-brimmed straw hat with a chin strap
- Durable, water-resistant gardening clogs
- Leather or reinforced canvas work gloves
- A heavy-duty canvas tool apron
How to make it
- Start with a base layer of moisture-wicking natural fibers like linen; these allow air to circulate around your body, preventing overheating during midday sun.
- Select overalls or trousers with reinforced knees; this provides extra durability for the frequent kneeling required when weeding or planting.
- Choose footwear with a thick, non-slip sole and a waterproof exterior—clogs are ideal as they can be easily slipped off at the back door to keep your home clean.
- Add a high-quality apron with deep, reinforced pockets; position your most-used tools (pruners, twine, seed packets) in the pockets for easy access.
- Finish the look with a wide-brimmed hat that offers UPF protection; ensure it has a drawstring to keep it secure even on breezy afternoons in the garden.
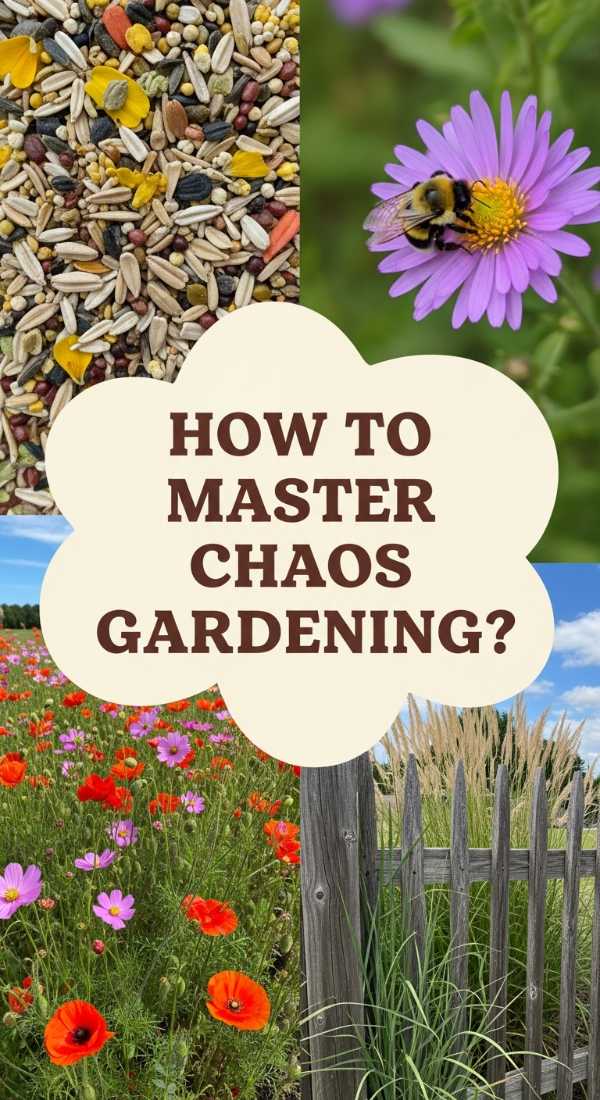
How to Master Chaos Gardening for a Wildflower Sanctuary

Why we love this
Chaos gardening is the ultimate rebellion against the rigid, manicured lawns of the past, celebrating the wild, untamed beauty of nature. We love the effortless charm of a meadow filled with swaying poppies, cornflowers, and cosmos that seem to have planted themselves. This style is incredibly rewarding because it supports local pollinators, creating a buzzing, humming sanctuary right in your backyard. The aroma is a heady mix of nectar and sun-warmed earth, and the visual effect is a soft, Impressionist painting come to life, where every breeze creates a new ripple of color.
Essential Elements:
- A diverse mix of native wildflower seeds
- Coarse sand (for even seed distribution)
- Organic compost
- A sunny, cleared patch of earth
- A gentle sprinkler or misting nozzle
How to make it
- Prepare your site by removing all existing grass and weeds; for a truly ‘chaos’ feel, don’t worry about perfect leveling—natural contours add character.
- Lightly rake the surface of the soil to create small grooves, which will help the seeds settle and find good contact with the earth.
- Mix your wildflower seeds in a bucket with a 3:1 ratio of dry sand; this ensures that tiny seeds aren’t clumped together and helps you see where you’ve already ‘sown.’
- Broadcast the seed-sand mix by hand using a wide, sweeping motion, walking across the area in two directions (north-to-south and east-to-west) for full coverage.
- Walk over the entire area or use a light roller to press the seeds into the soil; do not bury them, as many wildflowers need light to germinate.
- Keep the area consistently moist but not waterlogged for the first 3 weeks until seedlings are established, then step back and let nature take the lead.
How to Build a Greenhouse Oasis for Year Round Growth

Why we love this
Stepping into a greenhouse is like entering another world—one where the air is warm, humid, and heavy with the scent of damp moss and growing things. We love the architectural beauty of glass panes reflecting the sky and the ability to nurture tropical plants and delicate seedlings even when it’s frosting outside. It’s the ultimate hobbyist’s sanctuary, a place to potter around with pots and soil while the rain drums on the roof. A greenhouse oasis allows you to extend the seasons, starting your spring garden in the depths of winter and keeping the summer vibes alive all year long.
Essential Elements:
- A glass or polycarbonate greenhouse structure
- Sturdy wooden or metal potting benches
- Hanging hooks for trailing plants
- Automatic vent openers for temperature control
- A cozy chair or small bistro set
How to make it
- Choose a location with maximum southern exposure to capture the most sunlight throughout the day, ensuring the site is level and has good drainage.
- Assemble your structure according to the manufacturer’s specs, ensuring all seals are tight to maintain humidity and heat during colder months.
- Install tiered shelving or benches at waist height; this ergonomics-focused setup prevents back strain and allows for ‘under-bench’ storage for pots and soil.
- Set up a simple ventilation system; automatic wax-filled vent openers are fantastic as they expand with heat to open the windows without needing electricity.
- Create a ‘humidity zone’ by placing a layer of gravel on the floor or under benches and keeping it wet; this is essential for tropical plants like ferns and orchids.
- Add a personal touch with a comfortable chair and a small table, transforming the functional space into a peaceful retreat for morning coffee.
How to Grow Fresh Container Vegetables for Home Harvests

Why we love this
There is no flavor more intense or satisfying than a tomato still warm from the sun, plucked directly from your own patio. We love container vegetable gardening because it makes fresh produce accessible to everyone, regardless of yard size. The sight of vibrant red chili peppers, curly kale, and fragrant basil growing in chic pots right outside the kitchen door is both beautiful and practical. It turns the act of cooking into a ‘farm-to-table’ experience every single day, filling your home with the wholesome, peppery aroma of homegrown greens.
Essential Elements:
- Large pots (at least 5-10 gallons for most veggies)
- High-nitrogen organic potting soil
- Compact or ‘patio’ vegetable varieties
- Sturdy tomato cages or trellises
- Water-soluble organic fertilizer
How to make it
- Select ‘determinate’ or ‘dwarf’ varieties of vegetables, such as ‘Patio Choice’ tomatoes or ‘Little Finger’ carrots, which are specifically bred for container life.
- Ensure each container has excellent drainage; vegetables hate ‘wet feet’ and will succumb to root rot if water sits at the bottom of the pot.
- Fill containers with a high-quality mix; never use garden soil in pots as it is too heavy and may contain pests or diseases that thrive in confined spaces.
- Insert your support structures (cages or stakes) at the time of planting; doing this later can damage the delicate root systems of your developing plants.
- Fertilize every two weeks with a diluted organic liquid fertilizer, as nutrients wash out of containers more quickly than they do from the ground.
- Harvest frequently; many vegetables, like beans and peppers, will produce more fruit the more often you pick them, ensuring a long and bountiful season.
How to Curate Essential Gardening Tools for Effortless Maintenance

Why we love this
The right tool is a bridge between the gardener and the earth, turning a chore into a rhythmic, meditative task. We love the weight of a well-balanced hori-hori knife and the satisfying ‘snip’ of high-carbon steel bypass pruners. There is something deeply satisfying about a curated collection of tools that are as beautiful as they are functional—wooden handles worn smooth by use and copper trowels that gleam in the sun. Having a dedicated kit means you can tackle maintenance with ease, spending less time struggling with equipment and more time enjoying the beauty you’ve created.
Essential Elements:
- A Hori-Hori (Japanese weeding knife)
- High-quality bypass pruners (like Felco)
- A long-handled diamond hoe
- A galvanized steel watering can with a brass rose
- A sharp, high-carbon steel trowel
How to make it
- Invest in quality over quantity; start with a pair of bypass pruners that can be disassembled for sharpening and parts replacement, ensuring they last a lifetime.
- Acquire a Hori-Hori knife; this multipurpose tool can dig, saw, measure depth, and weed, making it the most versatile item in your garden bag.
- Choose tools with ergonomic handles made of ash or hickory wood; these absorb shock better than plastic and develop a beautiful patina over time.
- Set up a maintenance station in your shed or garage with a bucket of sand mixed with a little mineral oil; dipping your tools in after use cleans and coats them to prevent rust.
- Keep a whetstone or sharpening file handy; a sharp tool requires less force, which protects your wrists and makes cleaner cuts on your plants for faster healing.
How to Apply Clever Gardening Hacks for Lush Soil Health

Why we love this
Soil is the ‘soul’ of the garden, and there is a quiet, scientific joy in nurturing the microscopic world beneath our feet. We love these ‘kitchen-to-garden’ hacks because they turn waste into gold, creating a rich, dark, and crumbly soil that smells of pure life. It’s incredibly satisfying to see a garden thrive because of the simple addition of eggshells or banana peels, knowing you’re participating in a natural cycle of renewal. These methods are sustainable, affordable, and result in plants that are visibly more vibrant, resilient, and lush.
Essential Elements:
- Dried and crushed eggshells (for calcium)
- Chopped banana peels (for potassium)
- Used coffee grounds (for nitrogen and texture)
- Cardboard for ‘no-dig’ mulching
- Compost tea or liquid seaweed
How to make it
- Collect eggshells, dry them in a low oven, and pulse them in a blender to a fine powder; sprinkle this around the base of tomatoes to prevent blossom end rot.
- Bury chopped banana peels 2-3 inches deep near your rose bushes; as they decompose, they provide a slow-release boost of potassium for bigger, more frequent blooms.
- Mix used coffee grounds into your compost pile or lightly scratch them into the surface of the soil around acid-loving plants like blueberries and hydrangeas.
- Implement the ‘No-Dig’ method by laying down plain brown cardboard over a weedy area, watering it heavily, and topping it with 4 inches of compost to kill weeds naturally and build soil.
- Create ‘Compost Tea’ by soaking a shovel-full of finished compost in a 5-gallon bucket of water for 24 hours; use the strained liquid to give your plants a probiotic-rich foliar feed.
How to Create Unique Container Gardening Ideas for Tiny Spaces

Why we love this
Limited space should never mean limited imagination, and we love the creative challenge of turning a small balcony or tiny patio into a lush urban jungle. Vertical gardening is a game-changer, allowing you to grow ‘up’ when you can’t grow ‘out,’ creating a living wall of green that provides privacy and serenity. The aroma of a vertical herb garden—basil, thyme, and rosemary all stacked within reach—is intoxicating. It’s about maximizing every square inch with clever, aesthetic solutions that prove you can have a soulful connection to nature even in the heart of the city.
Essential Elements:
- Wall-mounted pocket planters
- Hanging macrame plant holders
- Tiered wooden plant stands
- Magnetic herb tins for metal railings
- Rail-over planters
How to make it
- Utilize your vertical space by installing a trellis or a series of floating shelves; this creates a ‘green wall’ effect that draws the eye upward and saves floor space.
- Use ‘S-hooks’ to hang lightweight pots from balcony railings or existing pipes, alternating heights to create a more organic, layered look.
- Choose multi-functional furniture, such as a bench with built-in planters on the sides, to combine seating with greenery in a compact footprint.
- Group pots of varying sizes in odd numbers (3, 5, or 7); this ‘cluster’ technique creates the illusion of a fuller garden and helps maintain humidity between the plants.
- Incorporate mirrors on back walls or fences to reflect the greenery and light, making a small courtyard or balcony feel twice as large and significantly brighter.
How to Discover Meaningful Gardening Quotes for Soulful Connection
[IMAGE_10]
Why we love this
Words have the power to root our experiences in meaning, and gardening quotes often capture the spiritual essence of tending the earth. We love the way a simple sentence can shift our perspective, reminding us that ‘to plant a garden is to believe in tomorrow.’ These snippets of wisdom act as a bridge between the physical act of digging and the emotional growth we experience alongside our plants. Reading these quotes feels like a warm conversation with gardeners across history, grounding us in the timeless truth that we are not just growing flowers, we are growing ourselves.
Essential Elements:
- A dedicated garden journal
- Calligraphy pens or beautiful markers
- Hand-painted garden stones
- Small wooden plaques for signage
- A collection of nature poetry books
How to make it
- Begin a ‘Garden Gratitude’ journal where you record not just what you planted, but how the garden made you feel that day, paired with a quote that resonates.
- Create ‘Inspiration Stakes’ by painting short, powerful quotes onto flat river stones or wooden lath strips and placing them subtly among your favorite plants.
- Incorporate a ‘Reading Nook’ in your garden—a simple bench or hammock where you keep a weatherproof box filled with your favorite botanical quotes and poems.
- Share the wisdom by writing a favorite quote on the back of seed packets you gift to friends, connecting your community through shared words and future blooms.
- Practice ‘Mindful Weeding’ by choosing one quote to meditate on as you work, letting the rhythm of the garden and the meaning of the words settle into your spirit.
Cultivating Your Own Living Sanctuary
Gardening is a journey without a final destination, a continuous cycle of growth, rest, and rebirth. By embracing the aesthetic and the practical, you turn your outdoor space into a reflection of your inner world—full of wonder, resilience, and beauty. Whether you are building a grand greenhouse or tending to a single pot of herbs, remember that every hand in the soil is a step toward a more grounded and intentional life. Happy gardening, and may your sanctuary always be in bloom.