

The Art of Slow Living: Curating a Home You Love
In a world that feels like it’s constantly spinning at a thousand miles per hour, our homes have become more than just a place to sleep—they are our sanctuaries, our soft landing pads, and the canvases of our lives. Slow living isn’t about doing everything at a snail’s pace; it’s about doing everything at the right pace, finding joy in the intentional details, and curating a space that reflects the quiet beauty of your soul. Whether you’re tending to a garden or organizing a corner of your office, every small act of curation is a love letter to your future self.
Creating a home you love is a sensory journey. It’s the way the light filters through a sheer curtain in the afternoon, the scent of fresh eucalyptus hanging in the shower, and the tactile comfort of a well-worn linen throw. As we dive into these ten ways to elevate your lifestyle, I invite you to breathe deeply and imagine how each change can bring a sense of groundedness to your daily routine. Let’s transform the mundane into the magical, one intentional choice at a time.
How to Design Simple Landscaping Front Yard for Instant Curb Appeal

Why we love this
There is nothing quite like the grounding aroma of damp cedar mulch and the sight of vibrant, healthy greenery to welcome you home after a long day. Simple landscaping allows the natural architecture of your home to shine while providing a textured, multi-dimensional frame that feels both organized and wild. We love how a few well-placed perennials can create a rhythmic dance of color that changes with the seasons, offering a visual feast of velvety petals and crisp, emerald leaves that make your entrance feel like a private estate.
Essential Elements:
- Hardwood or cedar mulch for texture and moisture retention
- A mix of evergreen shrubs (like Boxwoods) for year-round structure
- Perennial flowering plants (like Lavender or Salvia)
- Natural stone or metal edging for clean lines
- Solar-powered pathway lighting for evening warmth
How to make it
- Begin by sketching a basic map of your front yard, identifying ‘anchor’ spots near the entryway and under windows where height is needed.
- Clear the area by removing all weeds and old grass; use a sharp spade to cut a clean, 3-inch deep edge along the perimeter of your new garden beds to prevent grass encroachment.
- Improve your soil quality by mixing in 2-4 inches of organic compost, ensuring the earth is loamy and well-drained for optimal root health.
- Arrange your plants while they are still in their pots to test the spacing; place larger evergreens at the back and shorter, colorful perennials toward the front.
- Dig holes twice as wide as the root ball, settle the plants in, and backfill with soil, pressing firmly to remove air pockets.
- Apply a thick, 3-inch layer of mulch across the entire bed, keeping it a few inches away from the base of the plant stems to prevent rot.
- Water deeply immediately after planting and install your solar lights at 3-foot intervals along the path to highlight your hard work.
How to Organize Office Desk Setup Ideas Work Cubicle for Daily Focus
Why we love this
A curated desk setup is the ultimate catalyst for deep work, transforming a stressful cubicle into a cockpit of productivity and peace. We love the tactile satisfaction of a smooth, vegan leather desk mat beneath our wrists and the subtle, energizing scent of a citrus-infused candle or essential oil diffuser nearby. When your eyes rest on organized, beautiful tools rather than a mountain of tangled cords, your brain finds the quiet frequency it needs to innovate and create without the weight of visual clutter.
Essential Elements:
- Ergonomic laptop stand or monitor riser
- A high-quality desk mat (felt or leather)
- Cable management clips and sleeves
- A small, low-maintenance plant (like a Pothos or Snake Plant)
- Dedicated ‘input’ and ‘output’ trays
How to make it
- Strip your desk entirely of all items and wipe down the surface with a microfiber cloth to create a pristine, dust-free starting point.
- Position your primary monitor or laptop directly in front of you at eye level using a riser to ensure your spine remains neutral throughout the day.
- Lay down your desk mat to define your ‘action zone’ and provide a soft, tactile surface for your keyboard and mouse.
- Group your cables behind the monitor and secure them using adhesive clips or a cable sleeve, ensuring no wires are visible from your seated position.
- Assign a specific ‘home’ for small essentials like pens and paperclips in a drawer organizer or a minimalist desktop tray to prevent them from migrating.
- Incorporate a ‘living’ element, such as a small potted plant, to boost air quality and provide a refreshing visual break from the screen.
- Finish by setting up a small ‘daily focus’ card where you write your top three priorities each morning, placing it in a prominent, uncluttered spot.
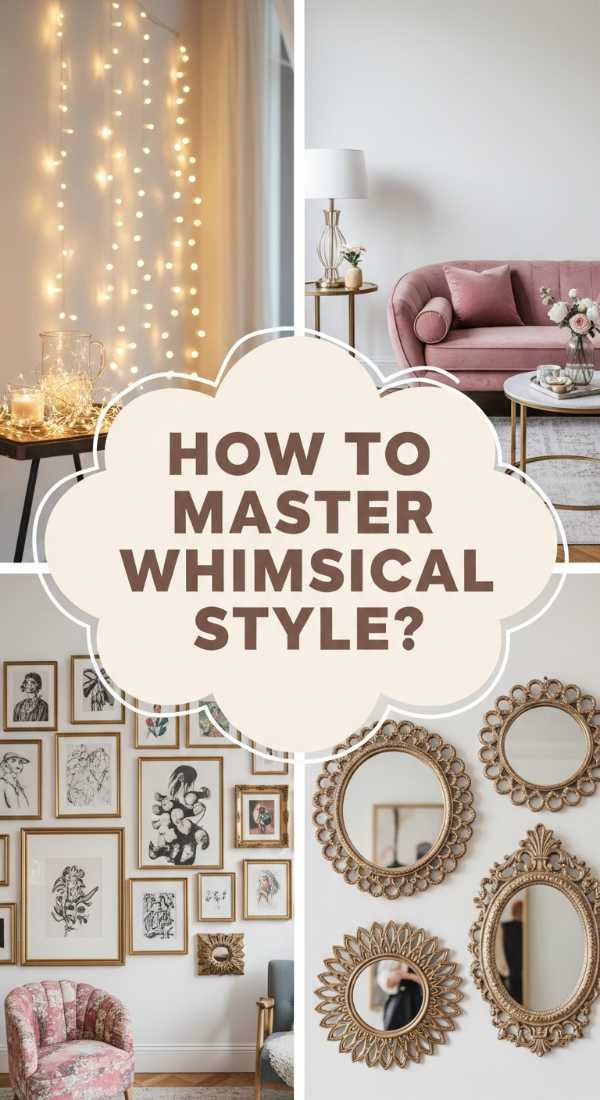
How to Style Whimsical Apartment Aesthetic for a Fairytale Home

Why we love this
Stepping into a whimsical home feels like walking into a storybook, where every corner holds a touch of magic and a whisper of nostalgia. We love the ethereal glow of warm fairy lights draped over vintage mirrors and the soft, cloud-like feeling of oversized pastel floor cushions scattered on a plush rug. This aesthetic celebrates the romantic and the unexpected, using delicate textures like lace and velvet to create a space that feels curated yet lived-in, like a secret garden hidden within city walls.
Essential Elements:
- String lights or ‘fairy’ lights with warm-toned LEDs
- Eclectic vintage frames and gilded mirrors
- Soft pastel color palette (mint, blush, lavender)
- Botanical prints and dried flower bouquets
- Sheer, flowy window treatments
How to make it
- Choose a base color palette of soft, muted tones to keep the space feeling light and airy even when filled with many decorative elements.
- Layer your lighting by adding fairy lights behind sheer curtains and using vintage-style lamps with warm bulbs to avoid any harsh overhead glare.
- Create a gallery wall using a mix of ornate, thrifted frames filled with botanical illustrations or whimsical sketches, ensuring they are spaced organically rather than in a rigid grid.
- Incorporate nature by hanging dried lavender bundles from door frames or placing large jars of eucalyptus in corners to add both texture and a soothing scent.
- Swap out modern hardware for vintage porcelain or brass knobs on cabinets and drawers to add small, enchanting details.
- Introduce soft textiles like a faux-fur throw or a lace tablecloth to add depth and a sense of ‘old-world’ coziness to modern furniture.
- Arrange a ‘curiosity shelf’ featuring crystals, old books, and small ceramic creatures to serve as a focal point for your fairytale theme.
How to Enhance Cheap Pool Deck Ideas for a Luxury Feel

Why we love this
You don’t need a five-star resort budget to enjoy the shimmering allure of a luxury poolside retreat. We love the feeling of warm, weather-resistant outdoor rugs underfoot and the rhythmic clinking of ice in a glass as the sun sets over a beautifully styled deck. By focusing on high-impact visual details like oversized potted palms and sophisticated lighting, you can create a high-end atmosphere that feels expensive, private, and perfectly curated for long, lazy summer afternoons.
Essential Elements:
- Large outdoor area rugs with geometric or natural patterns
- Over-sized terracotta or ceramic planters
- Tropical plants (like Majesty Palms or Bird of Paradise)
- Solar-powered deck post lights or string Edison bulbs
- High-quality outdoor cushions and throw pillows
How to make it
- Power wash your existing deck or patio surface to remove all grime and mildew, providing a clean canvas for your luxury upgrades.
- Define distinct ‘zones’ for lounging and dining by placing large, stylish outdoor rugs that anchor the furniture and hide any imperfections in the deck surface.
- Invest in two or three oversized planters and fill them with tall, lush tropical plants to create a ‘green wall’ that provides both shade and privacy.
- Upgrade your existing patio furniture by replacing worn-out cushions with thick, high-density foam pillows in neutral, expensive-looking tones like sand or charcoal.
- String high-quality Edison bulbs across the space, ensuring they are draped with enough slack to create a sophisticated ‘cove’ of light.
- Add a DIY outdoor ‘bar’ area using a simple wooden console table styled with a beautiful beverage dispenser and a tray of fresh citrus for a resort vibe.
- Incorporate a small water feature, like a plug-in tabletop fountain, to add the soothing sound of moving water, which instantly elevates the luxury feel.
How to Install Vinyl Lattice Panels for Garden Privacy

Why we love this
There is a unique sense of security and intimacy that comes with a well-screened garden, turning your outdoor space into a private sanctuary. We love the crisp, clean look of white or wood-grain vinyl lattice, which provides a classic architectural backdrop for climbing roses or ivy to weave through. The way the sunlight filters through the diamond pattern creates a beautiful play of shadows on the grass, making your garden feel like a secluded English courtyard where the rest of the world simply fades away.
Essential Elements:
- High-quality vinyl lattice panels (UV-resistant)
- Pressure-treated wooden posts or existing fence structure
- Vinyl U-channel molding for a finished edge
- Stainless steel screws to prevent rusting
- Climbing plants like Jasmine or Clematis
How to make it
- Measure the area where you want to add privacy and purchase lattice panels, keeping in mind that vinyl expands and contracts slightly with temperature changes.
- Install vertical support posts if you don’t have an existing structure, ensuring they are anchored at least 2 feet deep in the ground for stability.
- Cut your vinyl U-channel molding to the size of your panels and slide it onto the edges to give the lattice a professional, framed appearance.
- Pre-drill holes in the lattice that are slightly larger than your screws; this allows the material to ‘breathe’ without cracking during heat waves.
- Secure the panels to your posts using stainless steel screws, leaving a small 1/4-inch gap within the U-channel for expansion.
- Once installed, plant climbing vines at the base of the lattice, gently weaving the first few tendrils through the holes to encourage upward growth.
- Wipe down the panels with a damp cloth to remove any construction dust, revealing a bright, clean privacy screen that requires zero painting or staining.
How to Arrange Summer Table Centerpieces for Outdoor Entertaining

Why we love this
A summer table is a celebration of abundance, filled with the zesty aroma of sliced lemons and the wild, untamed beauty of garden-fresh blooms. We love how a thoughtful centerpiece acts as the heartbeat of a dinner party, drawing guests in with its vibrant colors and layered textures. There’s something so refreshing about seeing sunlight hit a glass vase filled with citrus and eucalyptus—it feels effortless, chic, and perfectly in tune with the golden magic of an outdoor evening.
Essential Elements:
- A low-profile wooden or woven tray as a base
- Glass hurricane vases or Mason jars
- Fresh citrus fruits (lemons, limes, or oranges)
- Seasonal greenery (Eucalyptus or Fern fronds)
- Unscented pillar candles or tea lights
How to make it
- Start with a neutral table runner or a bare wooden table to let the colors of your centerpiece pop without competition.
- Place your central tray in the middle of the table; this allows you to easily move the entire arrangement if more space is needed for serving dishes.
- Fill glass vases halfway with water and add sliced citrus rounds (lemons work best) along the inside walls of the glass for a bright, professional look.
- Nestle your flowers and greenery into the center of the citrus-filled vases, ensuring the heights vary to create a natural, ‘just-picked’ aesthetic.
- Position pillar candles of varying heights between the vases, using unscented wax so the smell of the food remains the star of the show.
- Scatter a few loose citrus fruits and sprigs of herbs directly onto the tray or runner to break up the lines and add organic texture.
- Light the candles just as the sun begins to dip, creating a warm, flickering glow that mirrors the stars above.
How to Curate Vintage Grandma House Aesthetic for Nostalgic Comfort

Why we love this
This aesthetic, often called ‘Grandmacore,’ is a warm hug in interior form, celebrating the cozy, the cluttered, and the deeply personal. We love the tactile richness of hand-crocheted blankets draped over plump velvet sofas and the sweet, nostalgic scent of vanilla and old books that seems to permeate these spaces. It’s about honoring the past and finding beauty in the mismatched, where a chipped floral teacup holds as much value as a modern masterpiece because it tells a story of comfort and home.
Essential Elements:
- Floral wallpaper or peel-and-stick murals
- Crocheted or knitted throw blankets
- Mismatched vintage china and glassware
- Antique wooden furniture with character (scratches welcome!)
- Dried flower arrangements in brass vases
How to make it
- Start by layering your textiles; place a lace doily under a lamp or drape a heavy, patterned quilt over the back of a neutral sofa to add immediate warmth.
- Scour thrift stores for ‘brown furniture’—think sturdy oak end tables or mahogany hutches—and leave the original finish to preserve its history.
- Create a tea station using a mismatched set of floral teacups and a vintage teapot, displayed openly on a kitchen counter or bar cart.
- Introduce soft, nostalgic lighting using pleated lampshades and warm-toned bulbs that cast a gentle, diffused glow across the room.
- Incorporate botanical elements through framed cross-stitch art or vintage-style floral wallpaper in small areas like a bathroom or reading nook.
- Add ‘clutter with purpose’ by displaying collections of old tins, glass bottles, or postcards in a way that feels curated rather than messy.
- Finish the atmosphere by simmering a pot of water with cinnamon sticks and apple slices on the stove to fill the house with a ‘freshly-baked’ aroma.
How to Plan Aquarium Setup Ideas for a Tranquil Living Space

Why we love this
An aquarium is more than just a pet habitat; it is a living, breathing piece of art that brings the serene energy of the underwater world into your living room. We love the hypnotic rhythm of swaying aquatic plants and the soft, blue-tinted light that dances across the walls in the evening. The gentle hum of the filter and the sight of colorful fish gliding through a miniature forest of driftwood and stone provide a meditative focus that lowers stress and grounds the entire room in tranquility.
Essential Elements:
- A rimless glass tank for a modern, clean look
- Natural substrate (sand or fine gravel)
- Live aquatic plants (Anubias, Java Fern, or Amazon Swords)
- Dragon stone or Spider wood for hardscaping
- High-quality LED lighting with a ‘moonlight’ setting
How to make it
- Select a sturdy, level surface away from direct sunlight to prevent algae growth and ensure the safety of the heavy tank.
- Rinse your substrate thoroughly and layer it at the bottom of the tank, sloping it slightly higher toward the back to create a sense of depth and perspective.
- Arrange your ‘hardscape’ (rocks and wood) first, following the ‘rule of thirds’ to create a focal point that looks natural and balanced.
- Fill the tank halfway with dechlorinated water, pouring it over a small plate to avoid disturbing your substrate and hardscape arrangement.
- Trim the roots of your live plants and gently tuck them into the substrate or tie them to driftwood using clear fishing line, ensuring they have room to grow.
- Top off the water, install your filter and heater, and let the tank ‘cycle’ for at least two weeks to establish beneficial bacteria before adding any fish.
- Set your LED lights on a timer to mimic a natural day-night cycle, providing 8 hours of bright light for the plants and a soft ‘blue’ glow for your evening viewing.
How to Decorate Patriotic Front Porch for Seasonal Celebrations

Why we love this
A patriotic porch is a classic slice of Americana that feels both celebratory and deeply welcoming. We love the crisp contrast of vibrant red geraniums against a white porch railing and the nostalgic sight of a full-sized American flag snapping gently in the summer breeze. It’s a look that evokes memories of neighborhood parades and backyard fireworks, using bold primary colors and traditional textiles to create an outdoor space that feels proud, festive, and timelessly charming.
Essential Elements:
- A high-quality tea-stained or traditional American flag
- Red, white, and blue bunting for railings
- Potted red geraniums or blue hydrangeas
- Stars-and-stripes outdoor throw pillows
- A natural fiber coir doormat
How to make it
- Mount a flag bracket at a 45-degree angle near your front door, ensuring the flag has enough clearance to fly freely without hitting trees or the roof.
- Secure pleated fans or bunting along the porch railing using zip ties hidden behind the fabric for a clean, professional finish.
- Flank your front door with symmetrical planters filled with bright red flowers (like geraniums) and ‘spiller’ plants like white sweet alyssum for a lush look.
- Update your seating area by adding navy blue cushions and a few accent pillows featuring subtle star patterns or red stripes.
- Hang a wreath made of burlap or painted stars on the front door to pull the theme together at eye level.
- Incorporate some ‘vintage’ patriotic touches, like an old galvanized bucket used as a planter or a rustic wooden ‘USA’ sign leaning against the wall.
- Add a few lanterns with battery-operated candles to provide a safe, warm glow that highlights your decorations during evening festivities.
How to Host Fall Baby Shower Themes for a Memorable Celebration
[IMAGE_10]
Why we love this
Fall is the season of nesting, making it the perfect time to celebrate a new arrival with a cozy, harvest-inspired gathering. We love the aroma of spiced apple cider simmering on the stove and the rich, earthy color palette of burnt orange, sage green, and creamy white. Hosting a fall baby shower allows you to lean into textures like chunky knit blankets and velvet pumpkins, creating an atmosphere that feels like a warm embrace for the mom-to-be and a joyful celebration of new beginnings.
Essential Elements:
- A ‘Little Pumpkin’ or ‘A Little Forest Friend’ theme
- Velvet and heirloom pumpkins in various sizes
- A hot cocoa or spiced cider bar
- Natural wood serving platters and tiered stands
- Warm-toned floral arrangements with dried wheat stalks
How to make it
- Select a theme that leans into the season, such as ‘Our Little Pumpkin is Turning Into a Big Deal’ or a woodland theme with foxes and owls.
- Set the scene with a large welcome sign framed by hay bales and a variety of pumpkins in muted shades like ‘fairytale’ blue and white.
- Create a focal point with a dessert table featuring a simple naked cake adorned with tiny gold-painted pumpkins and sprigs of rosemary.
- Build a DIY ‘Cider Bar’ where guests can customize their drinks with cinnamon sticks, caramel sauce, and whipped cream, keeping it warm in a slow cooker.
- Use natural elements for place cards, such as small white pumpkins with names written in elegant gold calligraphy.
- Offer ‘cozy’ favors like small jars of local honey or mini-bottles of maple syrup tied with a piece of plaid ribbon.
- Plan a low-stress activity like ‘Decorate a Diaper’ or a ‘Wishes for Baby’ station, set up in a comfortable corner with plenty of soft pillows and blankets.
Conclusion: Embracing the Slow Curation
Curating a home you love isn’t a task to be checked off a list; it is an ongoing practice of mindfulness and gratitude. By taking the time to design your landscaping, organize your workspace, or host a seasonal celebration, you are honoring the life that happens within these walls. Remember that the most beautiful homes aren’t those that look like a showroom, but those that feel like a sanctuary—where every object tells a story and every corner invites you to slow down, breathe, and simply be. Start small, be intentional, and watch as your home transforms into a true reflection of your most inspired self.
Frequently Asked Questions
Find answers to common questions about curating a lifestyle and home you truly love.