

The Jetsetter’s Mani: Long-Lasting Nail Looks for Your Next Vacation
Hi there, my sweetest loves! There is something so magical about that moment you finally zip up your suitcase, isn’t there? It’s a soft sigh of relief, a promise of salt air and sun-drenched afternoons. But before we step onto that plane and let the world melt away, we need to talk about that one little detail that makes every vacation photo feel like a dream: the perfect, long-lasting mani.
I’ve spent so many summers watching my polish chip by day two of island hopping, and I finally realized that our nails deserve as much care and curation as our travel itinerary. Whether you’re tucking your toes into warm sand or sipping a spritz at a cobblestone cafe, your nails are the tiny canvases that reflect your vacation glow. Today, I’m sharing my favorite heart-centered designs to keep your hands looking like a cloud-soft embrace all trip long.
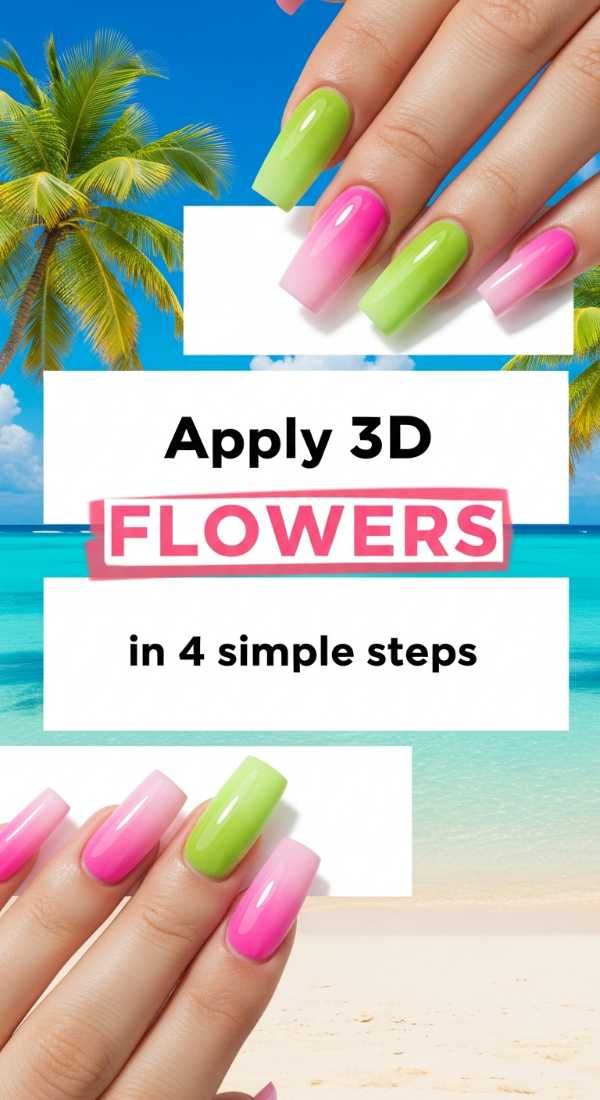
Apply 3D flowers in 4 simple steps
Why to love this Design:
There is nothing quite as romantic as carrying a little blooming garden right on your fingertips. These 3D flowers add a touch of whimsical texture that catches the light beautifully during those golden hour dinners by the shore.
Essential Elements:
- Solid builder gel base
- 3D sculpture gel or thick top coat
- Dotting tool
- Tiny pearl centers
How to Prepare:
- Apply your base color and cure completely.
- Place five small beads of sculpture gel in a circle.
- Use a silicone tool to gently press the center of each bead toward the middle.
- Add a tiny pearl to the center and cure under your UV lamp.
Budget Range
- Savvy: Beetles Builder Gel – $8.99
- Splurge: Aprés Nail Sculpture Gel – $24.00
- Detail: Rhinestone/Pearl Kit – $12.00
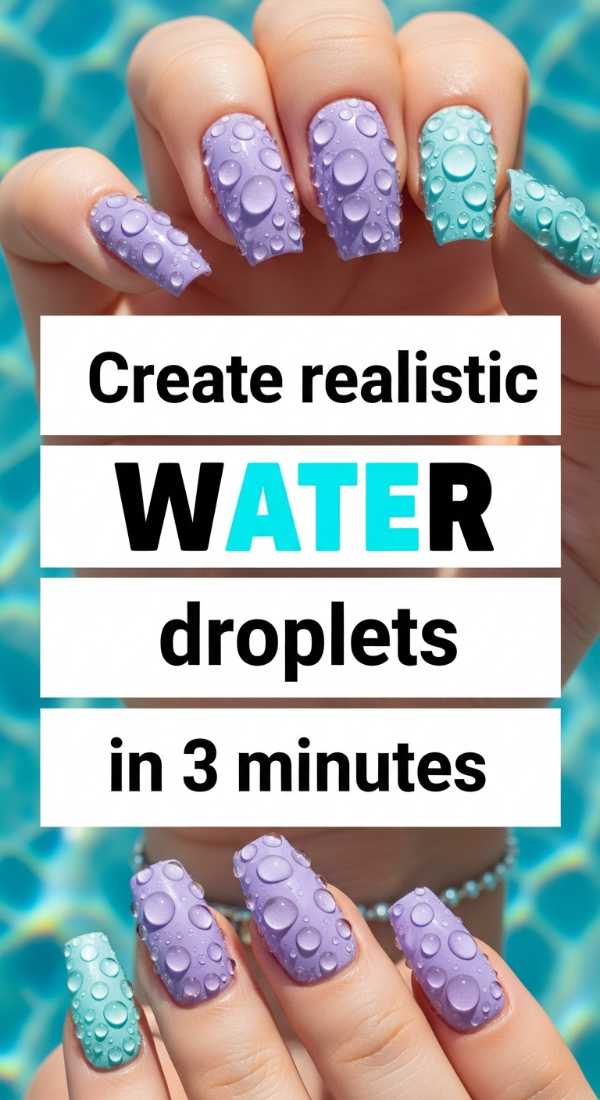
Create realistic water droplets in 3 minutes
Why to love this Design:
This look is pure magic, loves. It looks like you’ve just emerged from a refreshing dip in a hidden Mediterranean cove, with tiny crystalline dew drops clinging to your nails even when they’re perfectly dry.
Essential Elements:
- No-wipe top coat
- High-viscosity gel (Hard gel)
- Dotting tool
How to Prepare:
- Finish your base color and apply a matte top coat for contrast.
- Use a dotting tool to pick up a thick bead of clear hard gel.
- Lightly touch the nail to leave a raised ‘droplet’ of various sizes.
Budget Range
- Savvy: Modelones Hard Gel – $7.99
- Splurge: IBD Hard Gel LED/UV – $18.50
- Matte Finish: Essie Matte About You – $11.50
Blend summer ombres in 5 easy steps

Why to love this Design:
Ombres are the softest way to wear color; they remind me of the way the sky transitions from a soft peach to a deep lavender at dusk. It’s a seamless, sophisticated look that matches every outfit in your suitcase.
Essential Elements:
- Two coordinating gel colors
- Makeup sponge or ombre brush
- Liquid latex (optional for cleanup)
How to Prepare:
- Apply your lighter base color and cure.
- Apply the two colors side-by-side on a makeup sponge.
- Gently dab the sponge onto the nail where the colors meet.
- Repeat for opacity, curing between layers.
- Finish with a glossy top coat to smooth the gradient.
Budget Range
- Savvy: Gellen Gel Polish Set – $15.99
- Splurge: Gelish Dynamic Duo – $26.00
- Tools: Wedge Makeup Sponges – $5.00
Add gold seashell charms in 2 quick steps

Why to love this Design:
For my luxury-loving jetsetters, these tiny gold charms act like jewelry for your nails. They feel expensive and curated, instantly elevating a simple nude mani into something worthy of a yacht deck.
Essential Elements:
- Gold alloy seashell charms
- Nail charm glue or thick base gel
- Tweezers
How to Prepare:
- Apply a small bead of strong nail glue to your cured color.
- Use tweezers to place the gold shell and hold for 10 seconds before sealing the edges with top coat.
Budget Range
- Savvy: 100pcs Mixed Shell Charms – $6.99
- Splurge: Daily Charme Swarovski/Gold Accents – $15.00
- Adhesive: Makartt Rhinestone Glue – $9.99
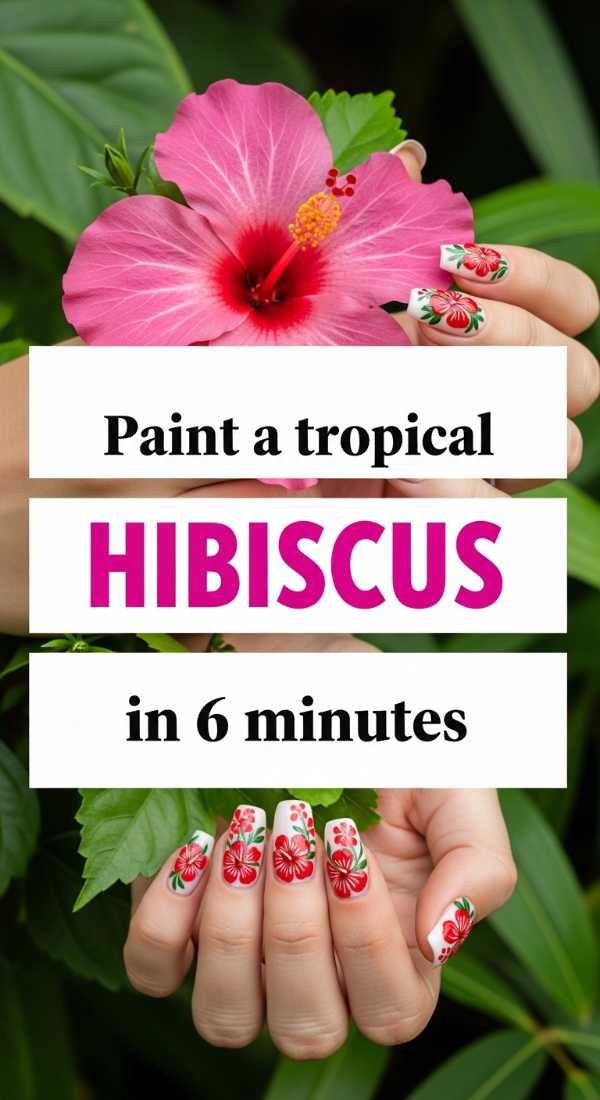
Paint a tropical hibiscus in 6 minutes
Why to love this Design:
Wearing a hibiscus on your nails is like a permanent ‘out of office’ reply. It’s vibrant, joyful, and reminds you to breathe in the floral scents of the tropics with every glance at your hands.
Essential Elements:
- Bright pink or orange gel
- Fine detail liner brush
- White and yellow gel for accents
How to Prepare:
- Paint five teardrop shapes meeting at a center point.
- Cure briefly.
- Add thin white lines for petal texture.
- Draw a long yellow stamen coming from the center.
- Add tiny yellow dots at the tip of the stamen.
- Seal with top coat.
Budget Range
- Savvy: Vishine Gel Polish – $6.50
- Splurge: OPI GelColor – $19.00
- Detail: Winstonia Nail Art Brushes – $10.00
Shape your summer duck nails in 4 steps

Why to love this Design:
This Y2K-inspired flare shape is for the bold souls! It provides a wider canvas for art and has such a fun, retro energy that feels so right for a playful beach club vibe.
Essential Elements:
- Duck-shaped nail tips
- Nail glue
- Heavy-duty file (100/180 grit)
How to Prepare:
- Size the duck tips to your natural nail beds.
- Apply glue and press the tips firmly.
- File the side walls to ensure the ‘flare’ is symmetrical.
- Buffer the surface to prep for color.
Budget Range
- Savvy: 500pcs Duck Tips – $9.99
- Splurge: Kiara Sky Gelly Tips – $29.99
- File: Flowery Professional Files – $4.00
Master tropical tiger print in 5 minutes

Why to love this Design:
Unleash your inner island goddess! Tiger print in tropical colors—think turquoise or sunset orange—is fierce yet incredibly stylish for a destination with a bit of wild beauty.
Essential Elements:
- Neon base color
- Black gel paint
- Long striper brush
How to Prepare:
- Apply your neon base and cure.
- Load your striper brush with black gel.
- Draw thin, slightly wiggly lines from the edges toward the center.
- Vary the thickness of the lines for a natural look.
- Cure and top coat.
Budget Range
- Savvy: Saviland Spider Gel/Paint – $12.00
- Splurge: Madam Glam Gel – $19.95
- Brush: Beetles Liner Brush Set – $8.00
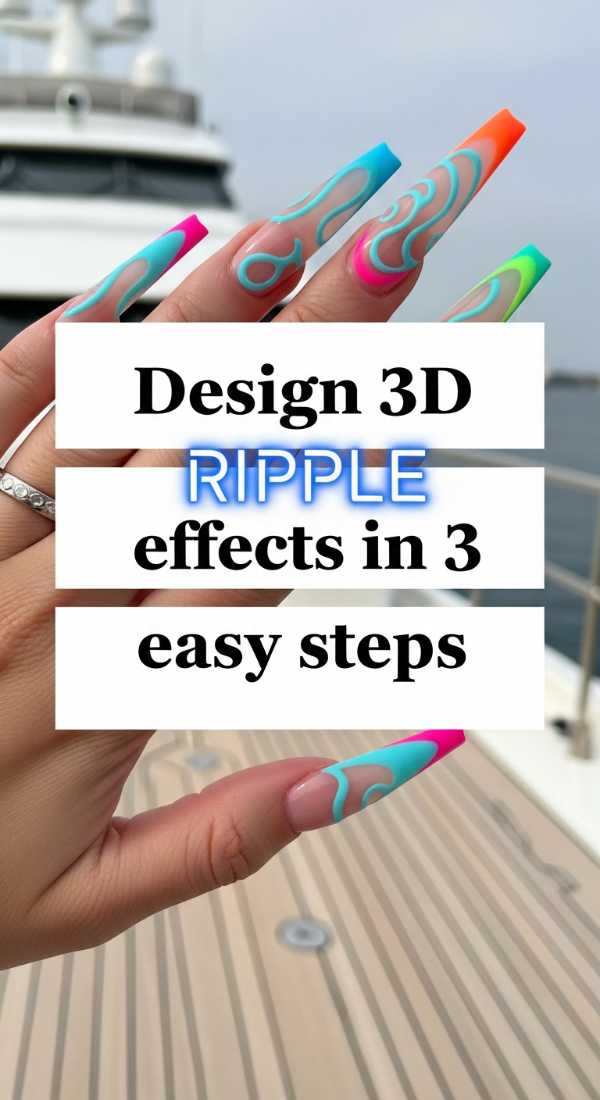
Design 3D ripple effects in 3 easy steps
Why to love this Design:
This design mimics the way the tide leaves patterns in the sand. It’s tactile and soothing, perfect for the minimalist traveler who wants something unique but still understated.
Essential Elements:
- Chrome powder
- No-wipe top coat
- Detail brush
How to Prepare:
- Apply chrome powder over a cured base.
- Use a detail brush and thick top coat to draw wavy ‘ripple’ lines.
- Cure, then wipe away the excess chrome from the non-raised areas.
Budget Range
- Savvy: Artdone Chrome Powder – $7.99
- Splurge: Wildflowers Chrome – $18.00
- Wipes: Lint-free pads – $6.00
Prep your vacation nails in 7 simple steps

Why to love this Design:
Preparation isn’t just a step, it’s a ritual of self-love. Taking the time to prep ensures your nails stay flawless through sun, sand, and saltwater, so you never have to worry about a snag.
Essential Elements:
- Cuticle pusher
- Dehydrator
- Primer
- Base coat
How to Prepare:
- Gently push back cuticles.
- Buff the nail plate to remove shine.
- Cleanse with alcohol.
- Apply dehydrator.
- Apply acid-free primer.
- Apply a thin layer of base gel.
- Cure for the full recommended time.
Budget Range
- Savvy: Mia Secret Prep Set – $10.50
- Splurge: Young Nails Protein Bond – $14.50
- Tools: Tweezerman Cuticle Pusher – $18.00
Apply neon summer accents in 4 minutes

Why to love this Design:
Sometimes all you need is a pop of brightness to match your energy! Neon accents are like a shot of espresso for your manicure—quick, energizing, and so incredibly fun under the sun.
Essential Elements:
- Neon gel liners
- Nude base polish
How to Prepare:
- Apply a clean nude or sheer base.
- Pick one neon color (lime, pink, or orange).
- Draw a single diagonal line or a tiny heart on the ring finger.
- Cure and seal with a high-gloss top coat.
Budget Range
- Savvy: Rarjsm Neon Liners – $13.99
- Splurge: Bio Seaweed Gel Neon – $18.00
- Top Coat: Seche Vive – $10.00
Wishing You the Sweetest Travels
I hope these designs inspire you to take a little moment for yourself before your big adventure, my darlings. Remember, your vacation starts the second you decide to treat yourself with kindness—and a beautiful set of nails is just the beginning. Travel safe, laugh loudly, and let your light shine as bright as your new mani. I can’t wait to hear all about your trips!