

The Lazy Host’s Guide to the Ultimate Viral Food Board
We’ve all been there: scrolling through social media at midnight, mesmerized by those perfectly curated food boards that look like they belong in a high-end gallery rather than on a kitchen table. The secret to those viral moments isn’t about spending twelve hours in the kitchen or having a culinary degree; it’s about the art of the assembly. There is a profound, quiet joy in watching your friends’ eyes light up as they approach a table overflowing with color, texture, and the promise of a shared memory, and I want to show you how to capture that magic without the stress.
In this guide, we are going to walk through the essential components of a versatile lifestyle board that transitions perfectly from a graduation celebration to a cozy family brunch. From the tart, nostalgic punch of seasonal rhubarb to the sophisticated zests of an Italian-inspired evening, these elements are designed to be visually stunning and incredibly delicious. Let’s dive into the recipes and techniques that will turn your next gathering into the talk of the town, all while keeping you the most relaxed host in the room.
How to decorate graduation cakes?

Why we love this
A graduation cake is more than just a dessert; it is a centerpiece of achievement that demands both elegance and personal flair. We love this because it combines the silky smoothness of a perfectly leveled buttercream with the celebratory glint of metallic sprinkles and customized toppers. Imagine the soft, sweet aroma of vanilla bean wafting through the air as you slice into a moist, multi-layered sponge that holds its shape with structural integrity, providing a satisfyingly dense yet airy mouthfeel that makes every guest reach for a second helping.
Ingredients
- Triple-layered vanilla or chocolate cake
- 4 cups silky Swiss Meringue Buttercream
- Gel food coloring (school colors)
- Edible gold leaf or metallic sprinkles
- Acrylic or cardboard ‘Class of 2024’ topper
- Fresh flowers (pesticide-free)
- Piping bags and assorted tips (1M and 2D)
How to make it
- Begin by chilling your cake layers thoroughly; a cold cake is much easier to trim and level without crumbling. Use a serrated bread knife to gently saw off any domed tops so each layer is perfectly flat.
- Apply a small dollop of buttercream to your cake board to act as glue, then place your first layer down. Spread a generous, even layer of frosting using an offset spatula, ensuring it reaches just past the edges.
- Stack your remaining layers, then apply a very thin ‘crumb coat’ of frosting over the entire exterior. This seals in the crumbs. Refrigerate for 30 minutes until the coat is firm to the touch.
- Apply the final layer of buttercream. For a smooth finish, hold a bench scraper at a 45-degree angle against the side of the cake and spin your turntable in one continuous motion.
- Divide your remaining frosting and tint it with gel colors. Pipe a ‘shell’ border around the base and decorative rosettes on top using the 1M tip. Finish by carefully placing your topper in the center and scattering metallic sprinkles for a high-end, viral-ready look.
How to make rhubarb jam?

Why we love this
Rhubarb jam is like capturing springtime in a glass jar, offering a brilliant, jewel-toned hue that looks stunning on any breakfast board. We love the way the aggressive tartness of the stalks mellows out into a sophisticated sweetness when simmered with sugar, creating a thick, spreadable consistency that is both rustic and refined. There is a deep, earthy aroma that fills the kitchen as it bubbles—a scent of home and tradition—and the texture is perfectly jammy with just enough fruit fiber to remind you of its fresh, garden-origin roots.
Ingredients
- 2 lbs fresh rhubarb stalks, chopped into 1/2 inch pieces
- 3 cups granulated sugar
- 1/4 cup fresh lemon juice
- 1 teaspoon lemon zest
- 1/2 teaspoon pure vanilla bean paste
- A pinch of sea salt
How to make it
- In a large, heavy-bottomed non-reactive pot (stainless steel is best), toss the chopped rhubarb with the sugar and lemon juice. Let this mixture sit for at least 2 hours, or overnight in the fridge, to allow the juices to macerate and draw out.
- Place the pot over medium-high heat and bring the mixture to a rolling boil, stirring frequently with a wooden spoon to prevent the sugar from scorching on the bottom.
- Once the rhubarb begins to break down and the liquid thickens, add your lemon zest, vanilla paste, and salt. Reduce the heat to medium-low to maintain a steady simmer.
- Skim off any foam that rises to the top with a metal spoon to ensure your jam remains clear and vibrant. Continue cooking for about 15-20 minutes.
- Test for ‘set’ by placing a small spoonful of jam on a plate that has been in the freezer. Let it sit for a minute, then push it with your finger; if it wrinkles, it is ready. Pour into sterilized jars and let cool completely before sealing.
How to bake graduation cupcakes?
Why we love this
Cupcakes are the ultimate host’s secret weapon because they offer built-in portion control and endless opportunities for creative decoration. We love the sight of a tiered display of these little gems, featuring a golden-brown dome that yields to a tender, buttery crumb when bitten. The tactile satisfaction of the fluffy frosting swirling against the palate, paired with the festive crunch of graduation-themed decorations, makes these an irresistible addition to any party board that guests can grab and enjoy while mingling.
Ingredients
- 2 1/4 cups all-purpose flour
- 1 1/2 cups granulated sugar
- 3/4 cup unsalted butter, softened
- 3 large eggs, room temperature
- 1 cup whole milk
- 2 teaspoons baking powder
- 1 tablespoon vanilla extract
- Miniature chocolate graduation caps
How to make it
- Preheat your oven to 350°F (175°C) and line two standard muffin tins with high-quality paper liners. In a medium bowl, whisk together the flour and baking powder.
- In a large stand mixer bowl, cream the softened butter and sugar together on medium-high speed for about 5 minutes until the mixture is pale, light, and incredibly fluffy.
- Add the eggs one at a time, beating well after each addition to ensure the emulsion doesn’t break. Stir in the vanilla extract.
- Reduce the mixer speed to low. Alternately add the dry ingredients and the milk in three batches, beginning and ending with the flour. Do not overmix; stop as soon as no flour streaks remain to keep the cake light.
- Fill each cupcake liner about two-thirds full using an ice cream scoop for uniformity. Bake for 18-22 minutes, or until a toothpick inserted in the center comes out clean. Transfer to a wire rack to cool completely before frosting with school-colored swirls and topping with mini chocolate caps.
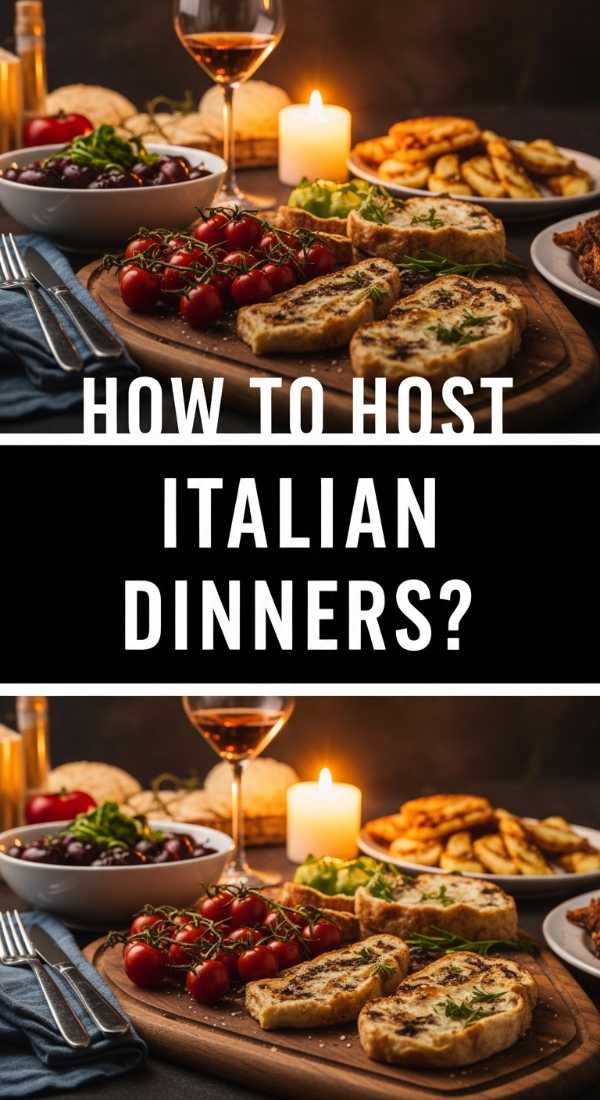
How to host italian dinners?

Why we love this
Hosting an Italian dinner is about more than the food; it’s about creating an atmosphere of warmth, leisure, and ‘la dolce vita.’ We love the ritual of the long table, the clinking of wine glasses, and the heavy, intoxicating scent of slow-cooked garlic and fresh basil permeating the room. It’s an experience that values quality over quantity—where the texture of a hand-stretched focaccia meets the richness of a cold-pressed olive oil, leading to a sensory journey that encourages guests to slow down and savor every single bite and conversation.
Ingredients
- Selection of cured meats (Prosciutto, Salami, Soppressata)
- Artisanal cheeses (Parmigiano-Reggiano, Burrata, Gorgonzola)
- Freshly baked ciabatta or focaccia
- Extra virgin olive oil and balsamic glaze
- Roasted red peppers and marinated artichokes
- Fresh basil leaves and vine-ripened tomatoes
- A crisp Italian white or bold red wine
How to make it
- Start with the ‘Aperitivo’ phase. Set out small bowls of olives and nuts along with a light drink like a Spritz to welcome guests as they arrive.
- Create an ‘Antipasto Board’ as your centerpiece. Arrange the cured meats in soft folds and place the Burrata in the center, drizzling it with olive oil and cracked black pepper. Surround these with the marinated vegetables and sliced bread.
- For the ‘Primo’ or ‘Secondo’ course, focus on one high-quality dish rather than five mediocre ones. A simple pasta with a 4-hour slow-cooked tomato sauce is often more impressive than a complex recipe.
- Keep the lighting low and use plenty of tapered candles. Avoid overhead lights; you want a warm, golden glow that makes everyone look and feel relaxed.
- Serve everything family-style in large ceramic bowls. This encourages passing, sharing, and the organic flow of conversation that defines a true Italian gathering.
How to bake rhubarb pie?

Why we love this
A rhubarb pie is the ultimate rustic dessert, boasting a striking contrast between the shatteringly crisp, buttery crust and the gooey, ruby-red filling that puddles beautifully on the plate. We love the way the steam rises from a freshly sliced pie, carrying the scent of toasted pastry and caramelized sugar. The flavor profile is a masterful balance—a sharp, mouth-watering tartness that is immediately softened by the richness of the dough, creating a complex dessert that feels sophisticated yet profoundly comforting.
Ingredients
- Double pie crust (homemade or high-quality store-bought)
- 5 cups rhubarb, cut into 1/2 inch pieces
- 1 1/4 cups granulated sugar
- 1/4 cup cornstarch (to thicken the juices)
- 1 teaspoon ground cinnamon
- 1 tablespoon cold butter, cubed
- 1 egg (for egg wash)
- Turbinado sugar for topping
How to make it
- Roll out your bottom crust and fit it into a 9-inch pie plate. Chill it in the refrigerator while you prepare the filling; a cold crust is the secret to maximum flakiness.
- In a large bowl, toss the rhubarb with the sugar, cornstarch, and cinnamon. Let it sit for 10 minutes so the sugar begins to draw out the juice and the cornstarch can start to dissolve.
- Pour the filling into the chilled bottom crust and dot the top with the small cubes of cold butter. This adds a velvety richness to the sauce as it bakes.
- Roll out the top crust and place it over the filling. You can do a solid top with vents or a lattice pattern for a more viral, aesthetic look. Crimp the edges tightly to seal.
- Brush the entire top with a beaten egg wash and sprinkle generously with turbinado sugar. Bake at 400°F (200°C) for 20 minutes, then reduce to 350°F (175°C) and bake for another 35-45 minutes until the crust is deep golden and the filling is bubbling thick juices.
How to make coffee drinks?

Why we love this
Mastering the art of coffee drinks at home transforms a simple caffeine fix into a daily luxury that anchors your food board. We love the visual gradient of a perfectly layered iced latte, where the dark, intense espresso slowly marbles into cold, creamy milk. The tactile sensation of holding a warm mug or the clink of ice cubes against glass provides a grounding moment, while the rich, roasted aroma of freshly ground beans acts as a welcoming invitation to sit down and stay a while.
Ingredients
- High-quality espresso beans or dark roast coffee
- Whole milk or oat milk (for best frothing)
- Simple syrup or flavored syrups (vanilla, lavender)
- Ice cubes (clear ice preferred for photos)
- Cinnamon or cocoa powder for dusting
How to make it
- For an Iced Latte, start by brewing two shots of espresso. If you don’t have an espresso machine, use a Moka pot or very strong French press coffee.
- Fill a tall glass to the brim with large ice cubes. Pour 8-10 ounces of your milk of choice over the ice, leaving about an inch of space at the top.
- Slowly pour the hot espresso over the back of a spoon onto the milk. This technique creates those beautiful, ‘viral’ layers instead of mixing the drink immediately.
- If making a hot drink, use a milk frother to create microfoam. Aim for a temperature of about 150°F (65°C); if it’s too hot, the milk loses its natural sweetness and the foam collapses.
- Finish with a light dusting of cinnamon through a stencil or a drizzle of caramel. Serve immediately while the temperatures and textures are at their peak contrast.
How to decorate graduation cookies?

Why we love this
Graduation cookies are the perfect edible favors, offering a crisp, buttery snap followed by the smooth, sweet melt of royal icing. We love the precision and clean lines that come with modern cookie decorating—turning a simple sugar cookie into a miniature work of art. The ability to customize colors and add names makes these feel incredibly personal, and their flat surface provides the perfect canvas for creative piped designs that look stunning when photographed and shared online.
Ingredients
- Batch of firm sugar cookies (cut into caps, diplomas, and gowns)
- Royal icing (stiff and flooding consistencies)
- Gel food colors
- Edible gold luster dust
- Food-safe fine-tip markers
- Small paintbrushes
How to make it
- Ensure your cookies are completely flat and stone-cold before you begin. Any residual heat will melt the royal icing.
- Using ‘outline consistency’ icing (thick like toothpaste), pipe a border around the edge of the cookie. Let this dry for about 10 minutes to create a dam.
- Fill in the center with ‘flood consistency’ icing (runny like honey). Use a toothpick or scribe tool to pop any air bubbles and push the icing into the corners for a seamless finish.
- Allow the base coat to dry completely—this usually takes 8-12 hours in a dry environment. Do not rush this step or your details will sink into the base.
- Once dry, use the stiff icing to pipe details like the tassel on the cap or the ribbon on the diploma. For an extra viral touch, mix gold luster dust with a drop of vodka and paint it onto the tassels for a metallic shine.
How to cook rhubarb crumble?

Why we love this
Rhubarb crumble is the unpretentious, cozy cousin of the pie, and we love it for its irresistible textural interplay. The bottom layer is a soft, tangy compote that melts in your mouth, topped with a thick, golden layer of buttery oats and brown sugar that provides a satisfyingly crunchy counterpoint. It’s the kind of dish that begs for a melting scoop of vanilla bean ice cream, creating a warm-and-cold sensation that is the ultimate comfort food for a casual garden party or a lazy Sunday afternoon.
Ingredients
- 6 cups sliced rhubarb (1-inch pieces)
- 1/2 cup granulated sugar
- 1 tablespoon lemon juice
- 1 cup all-purpose flour
- 1 cup rolled oats
- 1 cup packed brown sugar
- 1/2 cup cold unsalted butter, cubed
- 1 teaspoon cinnamon
How to make it
- Preheat your oven to 375°F (190°C) and lightly grease a 9×9 inch baking dish. In a large bowl, toss the rhubarb with the granulated sugar and lemon juice until well coated.
- Spread the rhubarb evenly into the prepared dish. If the rhubarb is very juicy, you can sprinkle a tablespoon of flour over it to help thicken the sauce.
- In another bowl, combine the flour, oats, brown sugar, and cinnamon. Add the cold, cubed butter. Use your fingers or a pastry cutter to work the butter into the dry ingredients.
- Continue working the mixture until it resembles coarse crumbs with some pea-sized lumps of butter remaining. This unevenness is what creates the best ‘crumble’ texture.
- Sprinkle the topping evenly over the rhubarb. Bake for 35-40 minutes until the fruit is bubbling and the topping is a deep, toasted golden brown. Let it stand for 10 minutes before serving to allow the juices to set.
How to prepare toddler lunches?

Why we love this
Preparing toddler lunches in a ‘board’ or ‘bento’ style is a game-changer for parents and hosts alike. We love the vibrant, rainbow-like presentation of bite-sized pieces that encourage exploration and independence in little eaters. By focusing on varied textures—from the crunch of a cucumber slice to the soft give of a mild cheese—you turn a stressful mealtime into a playful sensory activity. It’s a visually appealing way to ensure a balanced meal that looks as good as it tastes, making even the pickiest eaters curious about the colors on their plate.
Ingredients
- Miniature whole-wheat sandwiches or wraps
- Brightly colored fruits (berries, melon, grapes)
- Steamed or raw vegetables (carrots, peppers)
- Mild cheese cubes or string cheese
- Hard-boiled eggs or rolled deli meat
- Hummus or yogurt for dipping
- Fun-shaped cookie cutters
How to make it
- The secret to a viral toddler lunch is variety and ‘finger-food’ sizing. Start by using small cookie cutters to turn standard sandwiches into stars, hearts, or dinosaurs.
- Group items by color to create a rainbow effect across the plate or board. This makes the meal visually stimulating and more likely to be eaten.
- Ensure all items are safely prepared: slice grapes vertically into quarters, peel tough skins off cucumbers, and cut cheese into manageable batons or small cubes.
- Incorporate a ‘dip’ station in the center of the board using a small, colorful silicone cup. Toddlers love the interactive element of dipping their veggies or crackers.
- Keep the portions small but diverse. Instead of one large sandwich, offer two mini-shapes and a handful of different fruits and proteins to keep their interest high and their bellies full.
How to make lemon pesto?
[IMAGE_10]
Why we love this
Lemon pesto is a bright, citrusy twist on the classic Genovese version, offering a zesty punch that cuts through the richness of pasta or roasted meats. We love the vibrant, neon-green color that pops on any plate and the way the aromatic scent of fresh basil is amplified by the high notes of lemon zest. The texture is a beautiful emulsion—slightly coarse from the toasted pine nuts and Parmigiano, but silky from the olive oil—making it a versatile sauce that feels like a concentrated burst of sunshine in every spoonful.
Ingredients
- 2 cups fresh basil leaves, packed
- 1/2 cup freshly grated Parmigiano-Reggiano
- 1/3 cup pine nuts, lightly toasted
- 2 cloves garlic, minced
- 1/2 cup extra-virgin olive oil
- Zest of 2 large organic lemons
- 2 tablespoons fresh lemon juice
- Salt and black pepper to taste
How to make it
- Begin by toasting your pine nuts in a dry pan over medium heat for 2-3 minutes until they are golden and fragrant. Do not walk away; they burn quickly. Let them cool completely.
- Place the basil, toasted pine nuts, and garlic into a food processor. Pulse several times until the ingredients are coarsely chopped and well combined.
- Add the lemon zest and Parmigiano-Reggiano. With the processor running on low, slowly drizzle in the extra-virgin olive oil in a steady stream to create a stable emulsion.
- Once the desired consistency is reached (it should be thick but pourable), add the lemon juice and pulse one last time. Adding the juice at the end prevents the acid from dulling the bright green color of the basil too quickly.
- Taste and season with salt and pepper. Use it immediately for the best flavor, or store it in a jar with a thin layer of olive oil on top to prevent oxidation.
Conclusion: The Art of the Effortless Gathering
Hosting doesn’t have to be a performance; it’s a gift you give to your loved ones and yourself. By focusing on high-impact, visually stunning components like these viral-worthy recipes, you can create a board that is as much a feast for the eyes as it is for the palate. Remember, the best host is the one who is present, so take these tips, prep what you can in advance, and don’t be afraid to let the ingredients speak for themselves. Here’s to many beautiful, stress-free gatherings ahead!
Frequently Asked Questions
Q: How do I keep my food board looking fresh for hours?
A: The trick is to keep wet ingredients like dips and cut fruits in separate small bowls, and to add ‘living’ elements like fresh herbs or edible flowers at the very last second. For meats and cheeses, keep them chilled until 15 minutes before serving.
Q: Can I make the rhubarb recipes in advance?
A: Absolutely! Rhubarb jam lasts for weeks in the fridge, and the rhubarb crumble can be assembled the day before and baked fresh. Rhubarb pie is actually better when it has had a few hours to set so the juices don’t run.
Q: What is the best way to transport decorated cookies and cakes?
A: Use airtight containers for cookies, placing parchment paper between layers. For cakes, use a professional cake box and place it on a flat surface like the floor of your car (never the seat) to prevent sliding.