

The Stylish Sandbox: Blending Contemporary Design with Outdoor Fun
There is a specific kind of magic that happens when the golden hour hits a well-loved backyard. I remember the days when my outdoor space was just a patch of patchy grass and a few plastic toys scattered like colorful confetti. It felt like I had to choose between a home that looked like a grown-up sanctuary and a space where my kids could actually be kids. But then it clicked: design and play don’t have to be enemies. In fact, when they lean into each other, you create a living, breathing landscape that nourishes both your aesthetic soul and your family’s wild imagination.
Today, I’m sharing how to bridge that gap. We’re talking about turning your garden into an extension of your interior design—where sleek lines meet the soft texture of flower petals, and where a child’s mud kitchen looks more like a high-end bistro than a DIY project. It’s about creating a ‘stylish sandbox’ where every corner serves a purpose, whether that’s a moment of zen by a bird bath or a splashy afternoon at a custom water table. Let’s dive into how you can elevate your outdoor living to something truly extraordinary.
How to Craft a Budget Bird Bath for a Serene Garden Oasis

Why we love this
There is something deeply meditative about the sound of a gentle splash and the sight of local songbirds visiting your garden for a morning dip. This bird bath isn’t just a utility; it’s a focal point that brings life and movement to a quiet corner. The cool, smooth surface of the ceramic reflects the shifting sky, while the faint scent of damp stone and garden herbs surrounds the area, creating a pocket of tranquility that feels miles away from the hustle of daily life. It’s a sensory delight that grounds your garden in nature’s simple rhythms.
Essential Elements:
- Two large terracotta pots (one slightly smaller than the other)
- A wide, shallow terracotta saucer
- Waterproof outdoor adhesive or epoxy
- Exterior masonry paint or matte sealant
- River stones or glass pebbles
- Clean water
How to make it
- Clean your terracotta pieces thoroughly with a stiff brush to remove any dust or debris, ensuring the adhesive bonds perfectly to the surface.
- Invert the largest pot on a flat surface to serve as the base; then, apply a thick, even bead of waterproof adhesive to the bottom (now the top) rim.
- Press the second pot—either upright or inverted depending on your height preference—firmly onto the adhesive, checking with a level to ensure the structure is perfectly straight.
- Apply a generous ring of epoxy to the top rim of the second pot and center the shallow saucer on top, pressing down firmly and allowing it to cure for a full 24 hours in a dry area.
- Once cured, paint the exterior with a matte, weather-resistant finish to match your garden palette, let dry, and then fill the saucer with a layer of river stones to give birds a safe place to perch while they bathe.
How to Design Front Yard Flower Beds for Instant Curb Appeal

Why we love this
A well-designed flower bed is like a warm embrace for your home’s facade. Walking up a path lined with velvety petals and architectural greenery changes your entire mood before you even reach the front door. We love the layering of textures—from the waxy sheen of evergreen shrubs to the delicate, airy bounce of perennial wisps. The aroma of damp mulch mixed with the sweet, honeyed scent of blooming jasmine creates an olfactory welcome that signals you are finally, blissfully home.
Essential Elements:
- Steel or stone landscape edging
- Quality topsoil and organic compost
- A mix of ‘thriller, filler, and spiller’ plants
- Natural wood mulch
- Slow-release organic fertilizer
- Garden trowel and spade
How to make it
- Mark out your bed boundaries using a garden hose or spray paint, opting for gentle curves rather than harsh lines to create a more organic, contemporary flow.
- Remove all grass and weeds from the marked area using a sharp spade, digging down at least 4 inches to ensure you’ve cleared out the root systems of invasive turf.
- Incorporate a 3-inch layer of organic compost into your existing soil, using a garden fork to turn the earth and improve aeration and drainage for your new plants.
- Arrange your plants while still in their nursery pots to visualize the heights; place taller ‘thrillers’ at the back, mounding ‘fillers’ in the middle, and trailing ‘spillers’ near the edge.
- Dig holes twice as wide as the root balls, set the plants so the top of the root flare is level with the soil, backfill firmly to remove air pockets, and finish with a 2-inch layer of mulch, leaving space around the stems to prevent rot.
How to Build Custom Wood Planter Boxes for a Modern Porch Refresh

Why we love this
Nothing says ‘modern chic’ like the warm, linear aesthetic of custom cedar planters. These boxes provide a structural contrast to the organic shapes of the plants they house, offering a clean silhouette that anchors your porch. The scent of freshly cut cedar is intoxicating, and the smooth, sanded finish of the wood under your fingertips feels like a luxury upgrade. It’s the perfect way to frame an entryway with a touch of architectural intentionality and natural warmth.
Essential Elements:
- Cedar or redwood 1×4 boards
- Exterior-grade wood screws
- Wood glue (waterproof)
- Power drill and miter saw
- Plastic pond liner or landscape fabric
- High-quality exterior wood stain or sealer
How to make it
- Measure and cut four identical side panels and a bottom base from your cedar boards, ensuring all edges are square for a tight, professional-looking fit.
- Apply a thin line of waterproof wood glue to the vertical edges and join the side panels into a box shape, securing them with pre-drilled pilot holes and exterior screws to prevent the wood from splitting.
- Fit the base board inside the bottom of the box, securing it with screws from the sides, and drill several half-inch drainage holes through the bottom to prevent waterlogged soil.
- Sand the entire exterior with 120-grit sandpaper followed by 220-grit for a buttery-smooth finish, then apply a UV-resistant sealer to protect the wood’s natural honey hue from graying.
- Line the interior with landscape fabric to keep the soil in place while allowing water to escape, then fill with a premium potting mix and your favorite architectural greens.
How to Create a Magical Outdoor Play Area for Endless Childhood Joy

Why we love this
This isn’t your average playground; it’s a whimsical sanctuary where modern design meets pure, unadulterated wonder. Imagine a space filled with soft pea gravel that crunches underfoot, a canvas teepee that glows with the warmth of fairy lights as the sun sets, and the earthy smell of cedar chips. It’s a place where children can lose themselves in a world of make-believe, surrounded by natural materials that look beautiful in your yard while fostering deep, creative play. It’s where the best childhood memories are etched into the landscape.
Essential Elements:
- Natural play surface (pea gravel or bark mulch)
- Weatherproof canvas bell tent or teepee
- Solar-powered bistro string lights
- Large smooth boulders for climbing
- Log rounds for stepping stones
- Outdoor-safe floor cushions
How to make it
- Define the play zone by excavating a shallow area and installing a flexible border to keep play materials contained and separated from the lawn.
- Lay down a heavy-duty weed barrier to prevent growth, then fill the area with at least 3 inches of certified play-grade mulch or rounded pea gravel for a safe, soft landing.
- Assemble your canvas structure in a central location, securing it with heavy-duty stakes and adding a waterproof base layer to keep the interior dry during morning dew.
- Drape solar-powered lights through the surrounding trees or along the top of the play structure, ensuring wires are tucked away safely and the solar panel gets direct midday sun.
- Scatter log rounds at varying intervals to create a balance beam or path, and finish the space with weather-resistant cushions that invite quiet reading or imaginative lounging.
How to Style Aesthetic Mud Kitchen Accessories for Creative Backyard Play

Why we love this
The beauty of a mud kitchen lies in the details—those little touches that turn a messy corner into a curated culinary studio for kids. We adore the juxtaposition of rugged, natural mud and sand against the gleam of vintage-inspired copper pots and wooden spoons. The air is filled with the scent of crushed mint and dried lavender, as children ‘cook’ with botanical treasures. It’s a tactile paradise that encourages fine motor skills while looking stunningly organized on your patio or in your garden nook.
Essential Elements:
- Stainless steel or copper bowls and pots
- Wooden spoons and spatulas
- Wicker baskets for storage
- Glass jars filled with dried petals and pinecones
- A set of small chalkboard labels
- Natural herb bundles (rosemary, mint, lavender)
How to make it
- Select a color palette for your accessories—metallics and woods work best for a contemporary look—and gather high-quality, durable items that can withstand the elements.
- Install a series of small brass hooks on the backsplash of your mud kitchen to hang spoons and sieves, keeping them organized and visually appealing when not in use.
- Fill clear jars with ‘ingredients’ found in the garden, like dried acorns, colorful stones, and flower petals, arranging them on a shelf to mimic a real pantry.
- Tie small bundles of hardy herbs with twine and hang them nearby; these provide an incredible sensory experience as kids crumble the leaves into their ‘soups.’
- Designate specific baskets for different types of natural loose parts (sticks, shells, bark) to teach children the art of organization while keeping the play area looking like a curated vignette.
How to Curate a Luxurious Hot Tub Sanctuary for Ultimate Evening Relaxation

Why we love this
As the day winds down, there is no greater luxury than stepping into a private, steaming sanctuary right in your own backyard. The contrast of the cool night air against the swirling, warm water creates an immediate sense of release. We love the glow of recessed deck lighting and the soft rustle of ornamental grasses providing a natural privacy screen. It’s a space that feels like a boutique spa, where the steam carries the faint scent of cedar and the gentle hum of the jets lulls you into a state of total, blissful serenity.
Essential Elements:
- Hot tub or cedar soaking tub
- Wood slat privacy screens
- Outdoor waterproof speakers
- Warm-toned LED strip lighting
- Plush oversized towels and a weather-resistant rack
- Potted tall grasses (like Miscanthus) for screening
How to make it
- Place your tub on a reinforced, level concrete pad or a structural deck designed to handle the significant weight of the water and occupants.
- Install vertical wood slat screens on at least two sides of the tub to create a sense of enclosure and privacy without blocking all airflow or light.
- Integrate low-voltage LED lighting around the perimeter of the base and under the lips of any steps, choosing a warm 2700K temperature to create a cozy, high-end atmosphere.
- Position large planters filled with tall, swaying ornamental grasses around the sanctuary to soften the hard edges of the tub and provide a ‘living fence’ that moves beautifully in the wind.
- Set up a dedicated station nearby with a waterproof basket for dry towels and a small side table for beverages, ensuring everything you need for relaxation is within arm’s reach.
How to Assemble a Rustic Pallet Mud Kitchen for Sustainable Outdoor Fun

Why we love this
Sustainability meets style in this pallet mud kitchen. There’s a rugged, honest beauty in repurposed wood that has been sanded down to reveal its unique grain and history. This piece becomes the heart of the garden, where the rough texture of the wood meets the cool, smooth surface of a stainless steel sink. It smells like sawdust and sunshine, providing a sturdy, earth-friendly stage for hours of messy, joyful exploration. It’s a testament to the idea that you don’t need to spend a fortune to create something truly beautiful.
Essential Elements:
- Two heat-treated (HT) wooden pallets
- A small stainless steel sink or plastic basin
- Cordless circular saw and drill
- Outdoor wood screws and ‘L’ brackets
- Sandpaper (multiple grits)
- Non-toxic outdoor wood finish
How to make it
- Dismantle one pallet to harvest the individual slats, which will be used for the countertop and shelving, and leave the second pallet intact to serve as the main back frame.
- Build a sturdy rectangular base frame using 2x4s to the height of your child’s waist, then secure the intact pallet to the back of this frame using heavy-duty L-brackets and screws.
- Lay the harvested slats across the top of the base frame to create a countertop, leaving a precise cutout for your sink basin by measuring the sink’s lip and cutting with a jigsaw.
- Sand every square inch of the wood with 80-grit then 150-grit sandpaper, focusing particularly on edges and corners to ensure there are no splinters for little hands.
- Apply a coat of butcher block oil or a child-safe outdoor sealant to protect the wood from water and mud, then drop the sink into place and add a few hooks for accessories.
How to Construct a Custom Water Table for Cool Summer Sensory Exploration
![]()
Why we love this
When the summer heat peaks, a custom water table is a literal oasis. We love the clean, modern look of a minimalist wooden frame holding a shimmering basin of water. The sound of trickling water and the sight of sunlight dancing off the surface create a refreshing atmosphere that beckons everyone to come and play. The cool touch of the water against the warm wood is a sensory delight, making this the ultimate backyard accessory for keeping cool while engaging in deep, focused sensory exploration.
Essential Elements:
- Pressure-treated lumber (2x4s)
- Large, deep plastic storage bin with a lip
- Waterproof wood sealant
- Galvanized screws
- Battery-operated water pump (optional for fountains)
- Measuring tape and miter saw
How to make it
- Construct a rectangular frame from the 2×4 lumber that is slightly smaller than the outer lip of your plastic bin, so the bin can ‘hang’ securely within the frame.
- Attach four sturdy legs to the corners of the frame, ensuring the height is ergonomic for your children; add cross-braces between the legs for maximum stability during heavy water play.
- Seal the entire wooden structure with a high-quality, clear waterproof deck sealer, paying extra attention to the end grain of the wood where moisture is most likely to seep in.
- Place the plastic bin into the frame, ensuring it sits level, and fill it with fresh water and sensory items like floating corks, scoops, or even a few drops of blue food coloring.
- For an advanced touch, install a small battery-operated pump to create a recirculating waterfall feature, providing constant movement and a soothing soundscape.
How to Arrange Vibrant Garden Blooms for a Lush Landscape Transformation
Why we love this
There is nothing quite like the visual impact of a masterfully arranged garden bed in full bloom. It’s a riot of color that manages to feel intentional and sophisticated. We love the heady fragrance of roses and lavender wafting through the air, and the way the different heights and shapes create a sense of depth and mystery. The soft, velvety textures of the petals contrast beautifully with the sharp, clean lines of a modern home, creating a living masterpiece that changes with every season.
Essential Elements:
- A variety of perennials and annuals in a cohesive color palette
- Quality potting soil and bone meal for root health
- Hand pruners for deadheading
- Drip irrigation or a high-quality soaker hose
- Decorative garden markers
- Organic mulch
How to make it
- Select a color story (such as cool blues and purples or fiery reds and oranges) to ensure your garden feels like a curated collection rather than a random assortment.
- Group plants in odd numbers (3, 5, or 7) to create a more natural, drift-like appearance that mimics how flowers grow in the wild while maintaining a professional design edge.
- Plant in ‘drifts’ or waves, placing shorter groundcovers at the front and progressively taller species toward the back to ensure every bloom has its moment in the sun.
- Dig each hole twice the size of the root ball and mix in a handful of bone meal to encourage strong root development, then water each plant deeply immediately after planting.
- Maintain the ‘lush’ look by deadheading spent blooms weekly, which encourages the plants to put energy into new flowers rather than seed production, keeping your garden vibrant all summer.
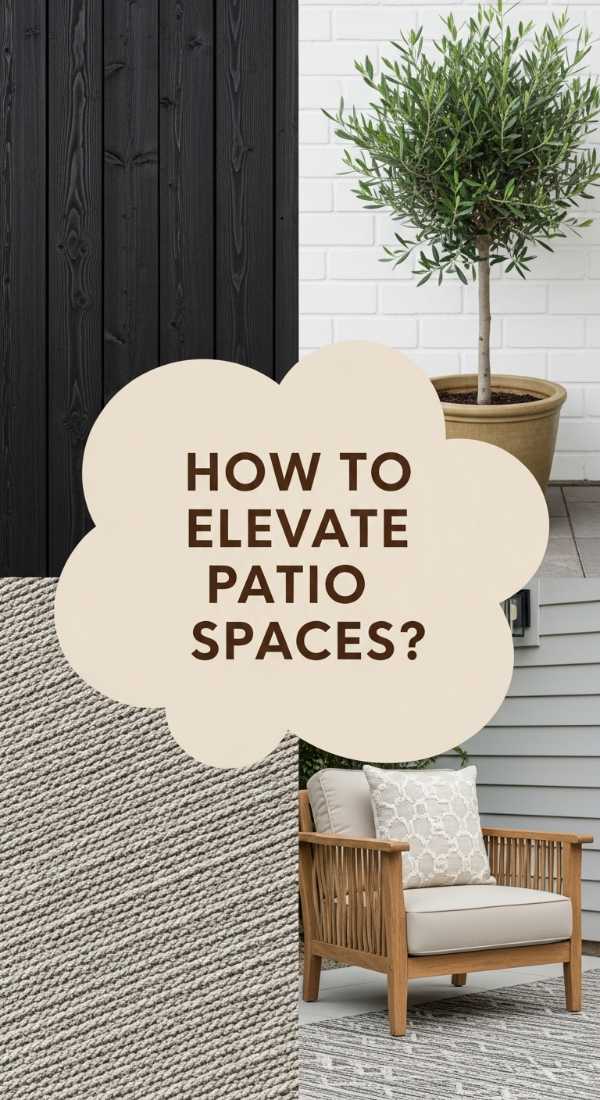
How to Elevate Patio Spaces with Handcrafted Wood Planters
[IMAGE_10]
Why we love this
Handcrafted wood planters are the ultimate bridge between nature and architecture. They bring a touch of the forest to your stone or concrete patio, softening the environment with their organic grain and warm tones. We love the substantial, weighted feel of a well-built planter and the way it can be used to define ‘rooms’ within an outdoor space. The earthy scent of the wood and the vibrant green of the foliage it holds create a sophisticated, high-end look that makes your patio feel like a luxury resort lounge.
Essential Elements:
- 1×6 or 2×6 Cedar boards for a chunky, modern look
- Corner trim pieces (optional for a finished look)
- Heavy-duty landscape fabric
- Potting soil mixed with perlite
- Self-watering reservoir inserts (optional)
- Decking screws and wood glue
How to make it
- Design your planters to be oversized; larger volumes of soil stay moist longer and provide a more dramatic architectural impact on a large patio.
- Build the main box using thick cedar boards, securing them from the inside with corner blocks and glue to hide the screw heads for a sleek, fastener-free exterior look.
- Install the bottom base with a slight gap between the slats to allow for drainage, and add small ‘feet’ to the bottom to lift the planter off the patio surface, preventing staining and rot.
- Stain the wood with a rich, dark espresso or a warm teak oil to enhance the grain and provide a high-contrast backdrop for bright green foliage.
- Line the box with landscape fabric, fill with a high-quality, lightweight potting mix, and plant a mix of upright grasses and trailing vines for a professional ‘designed’ appearance.
Conclusion
Transforming your outdoor space into a stylish sanctuary doesn’t require a professional landscape architect or a bottomless budget. It simply requires a bit of intentionality and a willingness to blend the needs of the family with the aesthetics of a modern home. By using natural materials like cedar and stone, and focusing on sensory-rich elements like water and blooms, you create an environment that is as beautiful to look at as it is fun to live in. Whether you’re watching the birds visit your new bath or enjoying a glass of wine by your custom planters while the kids play in their mud kitchen, your backyard can—and should—be your favorite room of the house.