

Remember the way the grass felt between your toes when you were six? That primal, sweet scent of sun-warmed clover and the way the afternoon sun felt like a warm hug on your shoulders? As parents, we often find ourselves yearning to give our children those same visceral, screen-free memories—the kind that are built on imagination, scraped knees, and pure, unadulterated outdoor magic. There is something profoundly healing about watching our little ones trade the glow of a tablet for the golden hue of a backyard sunset, transforming a simple patch of lawn into a kingdom of their own making.
Building a backyard sanctuary isn’t just about the physical structures; it’s about creating a canvas for their development and a backdrop for your family’s most precious stories. Whether you have a sprawling estate or a cozy urban nook, these DIY projects are designed to harmonize with your lifestyle while sparking a lifetime of creative play. Let’s roll up our sleeves and turn that backyard dream into a reality that smells like fresh cedar and sounds like endless laughter.
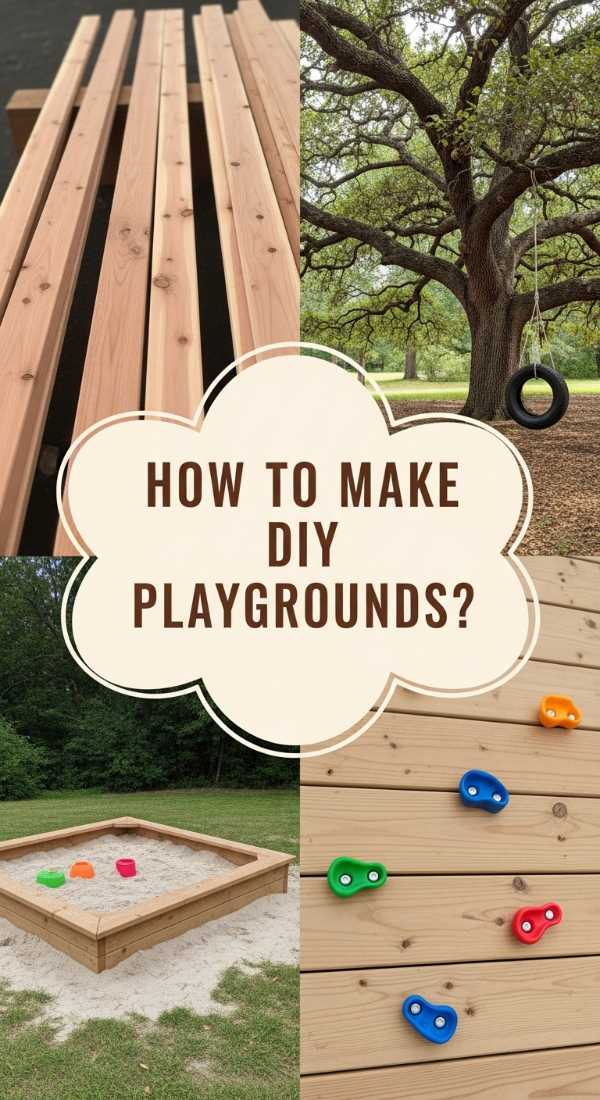
How to Build a Natural Outdoor Playground for Organic Childhood Memories

Why we love this
There is an undeniable soulfulness in a playground crafted from the earth itself, where the scent of damp moss and raw cedar fills the air. This space invites children to touch the rough, honest texture of tree bark and balance on the smooth, cool surfaces of river stones, grounding them in the rhythms of nature. It’s a sensory masterpiece that changes with the seasons, feeling cool and shaded in the height of summer and crisp and invigorating in the autumn. We love how it blends seamlessly into the landscape, looking less like a plastic eyesore and more like a secret woodland grotto where time slows down.
Essential Elements:
- Untreated cedar logs and stumps
- Smooth river boulders
- Engineered wood fiber or organic mulch
- Native non-toxic shrubs (like blueberry or lilac)
- Large flat stepping stones
How to make it
- Begin by mapping out a 15×15 foot area in a semi-shaded part of your yard, ensuring you are away from any underground utility lines. Use flour or a garden hose to mark the organic, curved perimeter of your natural play zone.
- Excavate the area to a depth of 8 inches to allow for proper drainage and safety surfacing; remove all grass and weeds, then level the soil using a heavy-duty garden rake.
- Install a heavy-grade landscape fabric across the base to prevent weed growth, securing it with landscape staples every 12 inches to ensure a smooth foundation.
- Arrange your large logs and boulders in a ‘scramble’ formation; bury the bottom third of each boulder and log into the ground to ensure they are rock-solid and won’t shift when jumped upon.
- Sand any rough spots on the cedar logs using 80-grit sandpaper followed by 120-grit for a buttery-smooth finish that prevents splinters while retaining the wood’s natural character.
- Fill the entire excavated area with 6 inches of certified playground-grade wood chips, which provide a soft, aromatic landing zone that meets safety standards for falls.
How to Design an Indoor Playground for Endless Rainy Day Adventure
Why we love this
When the clouds roll in and the rain begins its rhythmic pitter-patter against the windowpane, having a dedicated indoor sanctuary transforms a gloomy afternoon into a high-energy adventure. This space is a tactile delight, featuring the soft, velvety touch of high-quality foam mats and the cool, sturdy grip of sanded birch plywood. It smells faintly of clean laundry and warm wood, creating a cozy atmosphere where kids can burn off energy without the chill of the wind. It’s the ultimate parental win—a stylish, controlled environment that keeps the spirit of exploration alive even when the weather refuses to cooperate.
Essential Elements:
- Wall-mounted Swedish ladder or stalls
- Thick, non-toxic EVA foam floor tiles
- Cotton canvas indoor swing or hammock
- Plywood climbing wall with resin holds
- Soft play modular foam blocks
How to make it
- Select a wall in your playroom or basement that is a load-bearing wall; use a high-quality stud finder to locate and mark the vertical wooden beams where your equipment will be anchored.
- Install the Swedish ladder by drilling pilot holes into the studs and securing the unit with 3-inch heavy-duty lag bolts, ensuring the structure is perfectly level to prevent uneven stress on the frame.
- For the climbing wall, cut a sheet of 3/4-inch furniture-grade birch plywood to size, then drill holes in a grid pattern to install T-nuts on the back side before mounting the board to the wall studs.
- Screw the resin climbing holds into the T-nuts, varying the colors and rotations to create different ‘routes’ for your child to navigate as they build strength.
- Lay down 2-inch thick interlocking foam mats across the entire fall zone, extending at least 4 feet out from the wall in all directions to provide a plush, shock-absorbent landing.
- Mount a heavy-duty ceiling hook into a ceiling joist for the canvas swing, using a swivel attachment to prevent the rope from fraying during intense spinning sessions.
How to Construct a DIY Kids Playground for Limitless Backyard Exploration

Why we love this
There is a magnificent sense of pride in standing back to look at a sturdy, hand-built playground that smells of fresh pine and adventure. This project is the heartbeat of the backyard, offering a multi-level experience where the wind whistles through the high deck and the ground-level sandbox offers a cool, gritty sanctuary for building towers. We love the rhythmic ‘creak-clack’ of the swings and the way the sun glints off a bright yellow slide, signaling a space that is custom-built for your family’s specific needs. It’s a legacy piece, a structure that ages gracefully alongside your children while fostering their courage and curiosity.
Essential Elements:
- Pressure-treated 4×4 posts and 2×6 framing lumber
- Heavy-duty swing hangers and chains
- A 10-foot wave slide
- Galvanized carriage bolts and deck screws
- Ground anchors for stability
How to make it
- Design your blueprint to include a 4×4 foot raised deck at a height of 5 feet; this serves as the central ‘hub’ for the slide and climbing access.
- Dig four post holes to a depth of 24 inches (or below your local frost line), fill the bottom with 3 inches of gravel for drainage, and set your 4×4 vertical posts in quick-set concrete, using a level to ensure they are perfectly vertical.
- Frame the deck using 2×6 joists secured with joist hangers and 3-inch exterior screws, then install 5/4-inch deck boards with 1/8-inch gaps between them to allow for wood expansion and water runoff.
- Attach the swing beam to the main structure using a heavy-duty A-frame bracket on the opposite end, ensuring the beam is level and bolted with 1/2-inch carriage bolts for maximum load capacity.
- Install the wave slide using the manufacturer-provided hardware, ensuring the transition from the deck to the slide is flush and free of any gaps that could catch clothing.
- Apply a high-quality, transparent exterior stain to the entire structure to protect against UV rays and moisture while highlighting the beautiful grain of the wood.
How to Arrange Backyard Ideas for Kids for Ultimate Summer Joy

Why we love this
This layout is the architectural equivalent of a deep breath and a cold glass of lemonade on a scorching July day. It’s about the sensory symphony of summer: the refreshing mist from a hidden sprinkler, the scent of crushed mint in the garden, and the vibrant colors of oversized outdoor cushions. We love how this arrangement prioritizes flow, creating ‘cool zones’ where kids can escape the heat and ‘splash zones’ where water and joy overflow. It turns a standard lawn into a resort-style playground where every corner holds a different sensory delight, from the tickle of tall ornamental grasses to the smooth surface of a picnic table ready for watermelon slices.
Essential Elements:
- Pop-up sun sails or cantilever umbrellas
- Inflatable or permanent splash pad
- Low-profile wooden picnic table
- Outdoor storage bins for water toys
- Water-resistant bean bag chairs
How to make it
- Identify the sun path in your yard and install three-point sun sails over the main play areas to provide UV protection during the peak hours of 10 AM to 2 PM.
- Create a ‘Wet Zone’ by leveling a circular area of the lawn and installing a durable, non-slip splash pad connected to your garden hose via a pressure regulator to ensure consistent water height.
- Arrange a ‘Snack and Craft Station’ in a shaded nook using a weather-sealed cedar picnic table; place it on a bed of pea gravel to keep the area mud-free even after water play.
- Install a series of low-voltage LED path lights around the perimeter of the play zone to transition the space from daytime high-energy play to cozy evening relaxation.
- Set up a designated ‘Dry Zone’ with water-resistant bean bags and an outdoor rug, creating a tactilely soft space for kids to rest and hydrate between activities.
How to Personalize Outdoor Play Areas for Unique Creative Expression

Why we love this
A personalized play area feels like an outdoor art gallery where the exhibits are constantly changing and the artists are always inspired. It’s the dusty smell of sidewalk chalk on a giant vertical board and the bright, glossy finish of hand-painted fence pickets that reflect your child’s favorite colors. We love how this project encourages kids to literally leave their mark on their world, turning a generic backyard into a curated expression of their personality. It’s a space where creativity isn’t messy—it’s celebrated—and the vibrant visual landscape serves as a constant invitation to imagine, draw, and build.
Essential Elements:
- Weatherproof outdoor chalkboard paint
- Large 4×8 sheet of cement board (for the chalkboard)
- Outdoor-rated acrylic paints in primary colors
- Galvanized buckets for art supplies
- Hanging herb planters or flower boxes
How to make it
- Mount a sheet of cement board (which resists rot better than plywood) to your backyard fence or a dedicated frame; prime it with an exterior-grade primer before applying three coats of specialized outdoor chalkboard paint.
- Build a simple ‘Art Easel’ frame using scrap 2x4s, allowing for a roll of craft paper to be mounted at the top for endless painting sessions in the breeze.
- Invite your children to choose a ‘signature color’ and let them help paint the trim of the playhouse or the legs of the sandbox using child-safe, low-VOC exterior paint.
- Install a ‘Music Wall’ by securely mounting old pots, pans, and metallic pipes to a wooden pallet; provide wooden spoons and mallets for a percussive sensory experience.
- Attach personalized nameplates or hand-carved signs to each section of the play area, using a wood burner for a rustic, permanent touch of ownership.
How to Master a DIY Playground for a Sustainable Family Lifestyle

Why we love this
Sustainability in the backyard feels like a warm connection to the earth, characterized by the silver-grey patina of reclaimed wood and the lush, green texture of native groundcovers. This approach is about the beauty of the recycled—the history in a repurposed tire or the character of a pallet transformed into a mud kitchen. We love the earthy, clean aroma of organic hemp ropes and the peace of mind that comes from using non-toxic, eco-friendly sealants. It’s a playground with a story, teaching our children that play doesn’t have to come at the expense of the planet, all while looking effortlessly chic and rustic.
Essential Elements:
- Heat-treated (HT) reclaimed pallets
- Natural sisal or hemp rope
- Organic soy-based wood stain
- Recycled rubber mulch or clover groundcover
- Solar-powered fairy lights
How to make it
- Source pallets marked with ‘HT’ (Heat Treated) rather than chemical treatments; break them down using a reciprocating saw and remove all old nails to ensure the wood is safe for play.
- Build a ‘Mud Kitchen’ by stacking two pallets for the base and one for the backsplash; install a stainless steel bowl as a ‘sink’ by cutting a circular hole in the top pallet with a jigsaw.
- Seal all wood surfaces with a non-toxic, plant-based sealer that protects against rot without leaching chemicals into the soil where your children play.
- Replace traditional plastic swings with seats made from reclaimed wood planks, suspended by heavy-duty natural fiber ropes for a high-texture, organic aesthetic.
- Surround the area with a ‘living fence’ of willow branches or tall native grasses, which provides privacy and habitat for local pollinators while creating a natural boundary.
How to Curate Kids Outdoor Play Area Ideas for Aesthetic Backyard Living
Why we love this
Who says a kids’ area can’t be Pinterest-perfect? This approach is a masterclass in ‘Kid-core’ meets ‘Minimalist Chic,’ featuring a palette of muted terracotta, sage green, and creamy canvas that complements your home’s architecture. We love the soft rustle of a high-quality cotton teepee in the wind and the sophisticated look of black hardware against light-stained wood. It’s a space that feels curated and intentional, proving that play equipment can be a beautiful addition to your landscaping rather than something to be hidden. It’s the perfect backdrop for golden hour photos and quiet Sunday mornings with a coffee in hand.
Essential Elements:
- Canvas bell tent or teepee
- Neutral-toned powder-coated metal accents
- Pea gravel or white marble chips (for drainage and aesthetics)
- Designer outdoor rugs in geometric patterns
- Potted architectural plants (like agave or boxwoods)
How to make it
- Define the play zone with a crisp border of Belgian block or steel edging to create a clean, modern line between the play area and the manicured lawn.
- Fill the designated area with 4 inches of washed pea gravel, which provides a sophisticated, high-end look while offering excellent drainage and a satisfying tactile crunch underfoot.
- Set up a permanent canvas teepee using weather-treated wooden poles; secure the base with stakes and add an indoor/outdoor rug inside for a plush, boutique feel.
- Choose play equipment with a unified color story; spray paint any mismatched plastic elements with a matte ‘Fusion’ paint in a sophisticated charcoal or sand tone.
- Integrate the play area into your existing landscaping by planting a border of white hydrangeas or lavender, which adds a heavenly scent and a soft visual frame to the structure.
How to Develop a Playground Backyard for Maximum Physical Development

Why we love this
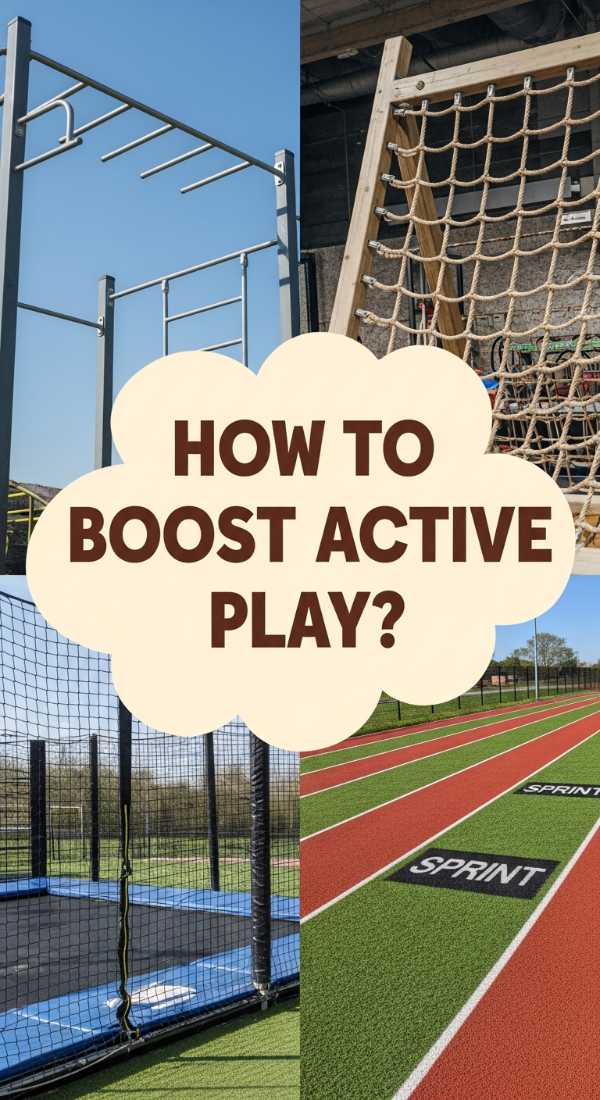
This is the arena of champions, where the air is filled with the sound of deep breathing and the triumphant ‘I did it!’ after conquering a difficult climb. We love the grippy, rubberized texture of the cargo nets and the way the balance beams require total focus and poise. It’s a space designed for movement—where the smell of fresh-cut grass meets the sweat of healthy exertion. This project focuses on the ‘work’ of childhood, building core strength and coordination in a way that feels like a thrilling challenge rather than a chore. It’s a dynamic, ever-changing course that grows in difficulty as your child grows in confidence.
Essential Elements:
- Braided nylon cargo nets
- Fixed monkey bars at varying heights
- Low-profile wooden balance beams
- Agility rings and hanging trapeze bars
- Start/Finish line markers
How to make it
- Construct a ‘Ninja Course’ frame using 4×4 pressure-treated posts spaced 8 feet apart, connected by 2×6 crossbeams that are double-bolted for maximum weight capacity.
- Install a heavy-duty cargo net by weaving it through eye-bolts spaced every 6 inches along the top and bottom beams, ensuring the net is taut enough to support a climbing child without excessive sagging.
- Build a balance beam by securing a 4×4 beam to three low-profile ‘feet’ made from 2×4 scraps, keeping the beam only 6 inches off the ground to focus on balance rather than height.
- Mount monkey bars using 1-inch galvanized steel pipes; drill holes into the wooden frame, insert the pipes, and secure them with flange fittings to prevent them from spinning or sliding.
- Create an ‘Agility Path’ using flat rubber discs or log slices set into the ground at varying distances to encourage jumping, hopping, and spatial awareness.
How to Imagine Kids Backyard Ideas for Magical Afternoon Playtime

Why we love this
As the sun begins to dip low, this play area transforms into a kingdom of shadows and light, where the air feels thick with possibility. We love the ethereal glow of solar-powered lanterns hanging from branches and the way a simple willow tunnel feels like a portal to another world. The textures here are soft and inviting—think velvet pillows in a hidden nook and the gentle sway of a macramé swing. It’s a space that prioritizes the ‘quiet’ side of play: reading, whispering secrets, and watching the fireflies emerge. It’s pure whimsy, captured in a corner of your yard that smells of jasmine and dreams.
Essential Elements:
- Living willow whips (for weaving tunnels)
- Solar-powered fairy lights and lanterns
- Macramé or rope pod swings
- Weatherproof floor cushions
- A ‘Fairytale’ mailbox for secret notes
How to make it
- Plant living willow whips in two parallel rows in early spring; arch the tops toward each other and tie them with twine to create a natural, growing tunnel that leaves will eventually cover.
- Hang multiple strands of warm-white solar fairy lights through the branches of nearby trees or along the fence line, ensuring the solar panels are positioned for maximum daily sun exposure.
- Construct a ‘Secret Reading Nook’ by hanging a circular hoop canopy from a sturdy branch; line the ground beneath it with an outdoor rug and several oversized, plush cushions.
- Install a ‘Fairy Garden’ base using a large terracotta pot filled with moss, miniature succulents, and tiny stone paths to encourage small-scale imaginative play.
- Build a low-to-the-ground ‘Stage’ using a 4×4 foot wooden platform, perfect for afternoon puppet shows or impromptu living room performances in the fresh air.
How to Enhance Kids Outdoor Play for Healthy Movement Habits
[IMAGE_10]
Why we love this
This is the high-energy heart of the home, characterized by the rhythmic ‘thump’ of a basketball and the bright, energetic colors of a mini-sports court. We love the feeling of the sun on our backs during a friendly family match and the crisp, clean lines of a freshly painted hopscotch grid. This space is about making movement the default setting for the day, where the equipment is so inviting and accessible that exercise happens naturally through play. It’s a vibrant, active zone that smells of sunblock and victory, fostering a lifelong love for being active and outdoors.
Essential Elements:
- Adjustable-height basketball hoop
- All-weather mini soccer goals
- Permanent hopscotch tiles or painted pavers
- Storage rack for balls and rackets
- Elastic ‘rebounder’ net for solo practice
How to make it
- Identify a flat, paved area or install a 10×10 foot concrete pad to serve as a ‘Multi-Sport Court’; ensure the surface is finished with a non-slip broom texture.
- Mount a high-quality basketball hoop to a dedicated pole or an existing wall, choosing an adjustable model that can ‘grow’ from 5 feet to 10 feet as your child’s skills develop.
- Paint a custom ‘Game Grid’ onto the concrete using heavy-duty porch and floor enamel; include a hopscotch board, a four-square court, and a ‘long jump’ measurement line.
- Install a vertical ball storage rack using PVC pipes or a wooden frame with bungee cords to keep sports equipment organized and easily accessible for little hands.
- Define the ‘Goal Zone’ by installing two mini-soccer nets at opposite ends of a flat grassy area, using U-shaped ground stakes to ensure they stay upright during even the most intense scoring attempts.
Creating a Legacy of Play
Transforming your backyard is more than a home improvement project; it is a profound investment in the magic of your children’s formative years. By blending natural elements, physical challenges, and creative outlets, you are providing them with the tools to build resilience, imagination, and a deep-seated love for the world around them. As the wood grains weather and the plants grow taller, these spaces will become the backdrop for the stories they tell when they are grown. So, pick a project, grab a hammer, and start building the memories that will last a lifetime.