

There is a specific kind of magic that happens when we stop seeing our homes as just a collection of rooms and start seeing them as the backdrop for our children’s wildest adventures. I remember the first time I set up a tiny, lopsided teepee in the corner of our living room; suddenly, that mundane space wasn’t just a floor—it was a sanctuary for tea parties with bears and deep-sea explorations. It’s in these dedicated play spaces where the world slows down, and imagination takes the driver’s seat.
Creating a dreamy playroom isn’t just about the latest aesthetic toys or expensive climbing structures; it’s about heart. It’s about crafting a container for memories that will last long after the toys are outgrown. Whether you have a sprawling backyard or a sun-drenched corner in an apartment, you have the power to curate an environment that whispers ‘anything is possible.’ Let’s dive into how we can turn our homes into the ultimate landscape for wonder.
How to Create Outdoor Play Areas for Endless Summer Joy

Why we love this
There is nothing quite like the scent of freshly cut grass mingled with the earthy aroma of cedarwood play structures on a warm July afternoon. We love this because it pulls the children into the sunshine, where the air is sweet and the possibilities are as vast as the blue sky above. Imagine the sound of rhythmic swinging, the cool touch of a metal slide under shaded trees, and the soft crunch of mulch beneath tiny feet as they race toward the next big adventure. It transforms your backyard into a living, breathing summer camp that feels like a permanent vacation.
Essential Elements:
- Pressure-treated or cedar wood frame
- Heavy-duty rubber swing seats
- UV-resistant climbing rope
- Recycled rubber mulch or wood chips for safety surfacing
- Canvas canopy for sun protection
How to make it
- Ground Preparation: Start by marking a 15×15 foot perimeter using stakes and string. Excavate the area to a depth of 4 inches to remove grass and roots, ensuring the ground is perfectly level using a 4-foot carpenter’s level; this prevents the structure from leaning or becoming unstable over time.
- Foundation Setting: Dig post holes 24 inches deep at the corner points. Fill the bottom with 2 inches of gravel for drainage, then set your vertical support beams, checking for vertical alignment with a plumb bob before pouring quick-set concrete.
- Framework Assembly: Once the concrete has cured for 24 hours, bolt the horizontal headers to the posts using 1/2-inch galvanized carriage bolts. Ensure the joints are tight and flush to prevent any gaps that could catch clothing or skin.
- Equipment Installation: Attach swing hangers and climbing holds. When installing the slide, ensure the exit height is no more than 12 inches from the ground to prevent impact injuries. Tighten all hardware until the lock washers are fully compressed.
- Safety Surfacing: Lay down a weed-barrier fabric across the entire base. Fill the area with 3-4 inches of engineered wood fiber or rubber mulch, raking it smooth to provide a soft, cushioned landing zone for every jump and tumble.
How to Design an Indoor Playground for Ultimate Rainy Day Fun
Why we love this
When the rain starts drumming against the windowpane, there’s a unique comfort in knowing the ‘park’ is just down the hallway. We love indoor playgrounds because they utilize soft, tactile materials like velvet-wrapped foam and smooth birch plywood that feel wonderful against the skin even in the chill of winter. The air feels cozy and filtered, filled with the faint, clean scent of essential oils and the soft thud of landing on a plush mat. It’s a sensory-rich retreat that keeps the energy high and the spirits bright when the weather turns grey.
Essential Elements:
- Wall-mounted Swedish ladder or monkey bars
- Thick gymnastic crash mats
- Soft foam climbing blocks
- Cotton canvas sensory swing
- Birch plywood indoor slide
How to make it
- Structural Assessment: Locate the wall studs using a high-quality electronic stud finder. Mark the centers of the studs where the climbing equipment will be mounted to ensure the weight load is properly supported by the home’s framing.
- Wall Mounting: Pre-drill holes into the studs to prevent wood splitting. Use 3-inch lag bolts to secure the Swedish ladder, ensuring it is perfectly vertical. A tip for precision: use a laser level to keep everything aligned across the wall.
- Flooring Prep: Clean the floor surface thoroughly to remove any grit. Place high-density EVA foam tiles as a base layer, then top with a 4-inch thick folding crash mat. Ensure the mats extend at least 3 feet beyond any climbing equipment in all directions.
- Suspension Setup: If installing a swing, find a ceiling joist and install a heavy-duty swivel eye bolt. Test the weight capacity by applying 1.5 times the expected weight before allowing a child to use it.
- Final Safety Buffing: Run your hand over every wooden surface. If you find any rough spots, use 220-grit sandpaper to buff them until they are buttery smooth, then wipe down with a damp microfiber cloth to remove dust.
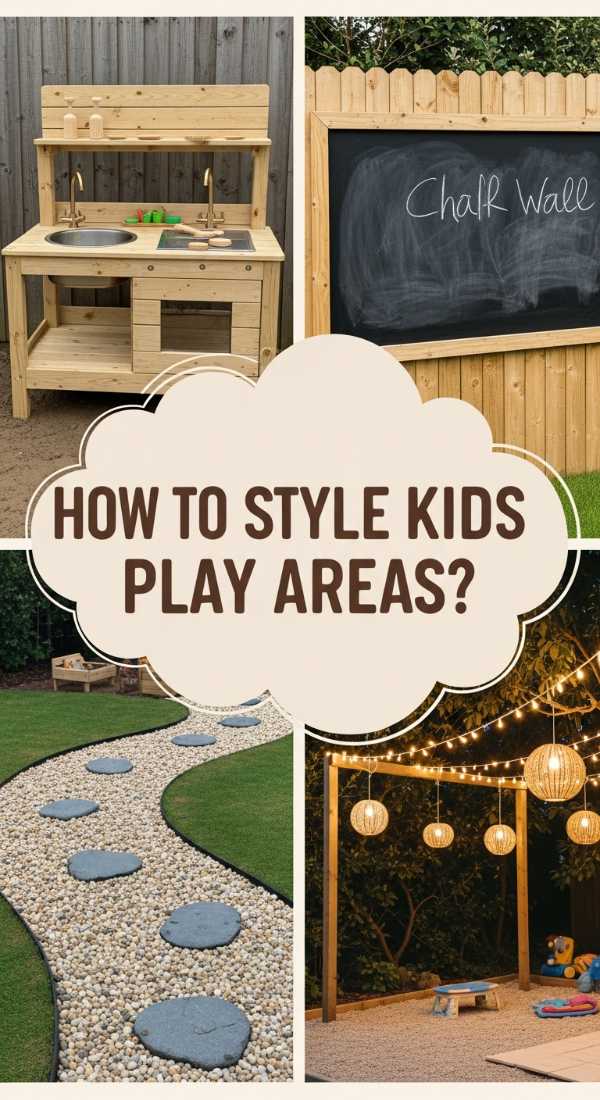
How to Style Kids Outdoor Play Area Ideas for a Magical Vibe

Why we love this
Style meets soul in a magically themed play area where every detail feels like it was plucked from a fairy tale. We love the way string lights cast a warm, golden glow over a miniature cottage as dusk settles, making the space feel enchanted. The visual harmony of muted sage greens, creamy linens, and natural rattan creates an atmosphere that is calming yet creatively stimulating. It’s about the soft rustle of bunting in the breeze and the sight of a tiny table set for an imaginary feast that makes the heart swell with nostalgia.
Essential Elements:
- Weatherproof solar-powered fairy lights
- Neutral-toned outdoor rugs
- Woven rattan storage baskets
- Pastel-colored wooden play kitchen
- Linen bunting and outdoor throw pillows
How to make it
- Color Palette Selection: Choose a base of three harmonious colors—for example, dusty rose, sage, and oatmeal. Use an outdoor-rated matte paint to refresh any existing plastic or wood structures to bring them into your cohesive theme.
- Lighting Installation: String Edison-style solar lights along the rooflines of playhouses or between fence posts. Ensure the solar panel is positioned to receive at least 6 hours of direct sunlight daily for a bright evening glow.
- Textile Layering: Lay down a durable outdoor rug made of recycled PET bottles; it’s soft but can be hosed off. Add weather-resistant cushions in various textures like bouclé or heavy linen to create cozy reading nooks.
- Accessorizing: Set up ‘vignettes’ like a potting station with small terracotta pots and wooden spoons. Use galvanized metal buckets to hold sand or water toys to maintain a rustic, sophisticated aesthetic.
- Maintenance Prep: Apply a UV-protectant spray to all fabrics to prevent fading in the sun. This ensures the colors stay vibrant and the ‘magical’ look remains intact through the seasons.
How to Secure an Outdoor Kids Play Area for Total Peace of Mind

Why we love this
Peace of mind is the ultimate luxury for a parent, and a well-secured play area provides exactly that. We love the feeling of relaxation that comes when you know the boundaries are firm and the environment is vetted for every possible tumble. There is a clean, orderly scent to a well-maintained yard where every bolt is tight and every gate clicks shut with authority. It allows us to step back and watch the play unfold from a distance, knowing our little ones are encased in a bubble of thoughtfully designed safety.
Essential Elements:
- Self-closing pool-style gate latches
- Non-toxic wood sealant
- Rounded corner guards
- Soft-fall rubber tiles or deep mulch
- Protective netting for elevated platforms
How to make it
- Perimeter Check: Install a fence that is at least 4 feet high with slats no more than 3 inches apart to prevent climbing or squeezing through. Install a self-closing, self-latching gate with the latch positioned out of reach of small children.
- Equipment Inspection: Inspect all play structures for ‘S’ hooks or open gaps between 3.5 and 9 inches, as these are entrapment hazards. Use pliers to close ‘S’ hooks until the gap is smaller than a dime.
- Surface Treatment: Sand down all wooden edges to a 1/2-inch radius to prevent sharp-impact injuries. Apply a non-toxic, water-based sealant to prevent splintering; allow it to dry for 48 hours in dry weather before use.
- Bolting and Anchoring: Use earth anchors on all four corners of swings or slides to prevent tipping during vigorous play. Drive the anchors into the ground at a 45-degree angle for maximum resistance.
- Toxicity Audit: Survey the surrounding plants. Remove any species that are toxic if ingested, such as Oleander or Foxglove, and replace them with child-safe herbs like rosemary or lavender.
How to Encourage Kids Outdoor Play for Healthy Active Habits
Why we love this
There is a vibrant energy that radiates from a child who has spent the morning running through the grass and climbing toward the clouds. We love this focus on activity because it fosters a physical connection to the world—the feeling of heartbeats thumping in chests, the cool sensation of wind on flushed cheeks, and the grounding grip of hands on bark. It’s the scent of pine needles and the sound of deep, belly-deep breaths that signify a body in motion and a mind that is fully engaged and healthy.
Essential Elements:
- Visual activity prompts (like a chalkboard ‘daily challenge’)
- Varied terrain (slopes, flat grass, stepping stones)
- Loose parts for building (sticks, stones, boards)
- Sports equipment (balls, hoops, ribbons)
- Comfortable seating for ‘base camp’
How to make it
- Zone Creation: Divide the yard into high-energy and low-energy zones. Use a winding path made of tree stumps to encourage balance and coordination as children move between areas.
- Loose Parts Setup: Provide a ‘Construction Corner’ with sanded 2×4 boards, heavy-duty buckets, and smooth river stones. This encourages ‘heavy work,’ which is excellent for sensory regulation and muscle development.
- Challenge Installation: Create a simple obstacle course using hula hoops for jumping and a low-set balance beam. Rotate the configuration every Sunday evening to keep the ‘novelty’ factor high for the coming week.
- Engagement Strategy: Use a large outdoor chalkboard to write a ‘Mission of the Day,’ such as ‘Find 5 different leaves’ or ‘Complete the course 3 times.’ This provides a structured entry point into unstructured play.
- Hydration Station: Set up a dedicated water dispenser outside with durable stainless steel cups. Ensuring water is accessible prevents breaks in play and keeps the energy levels consistent throughout the morning.
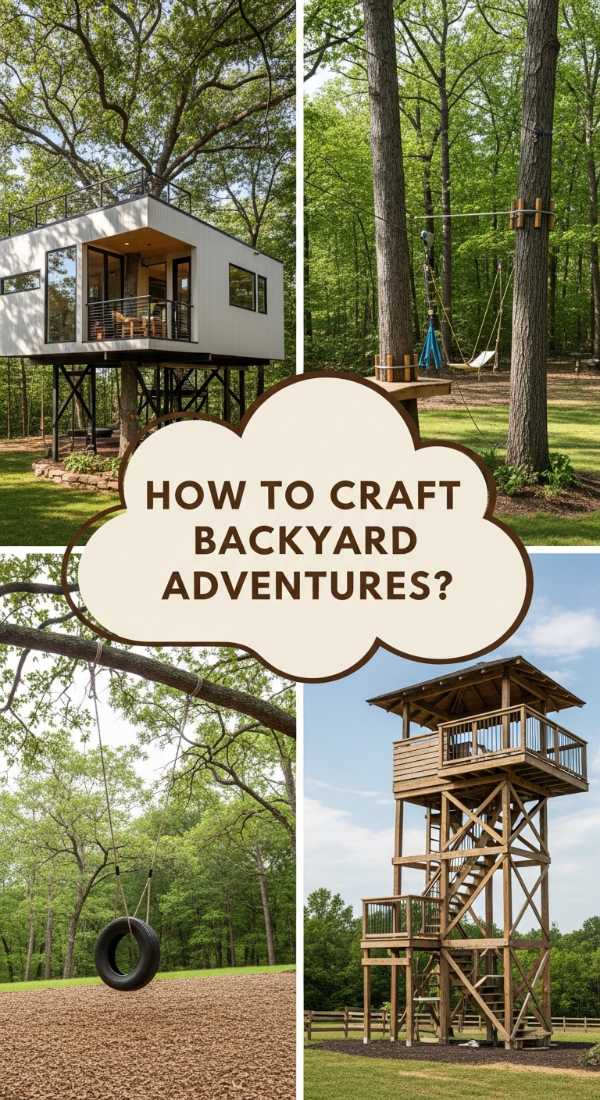
How to Craft Kids Backyard Ideas for the Ultimate Adventure Zone

Why we love this
An adventure zone is where the backyard ends and the jungle, the moon, or a pirate ship begins. We love the raw, rugged textures of thick manila ropes, the mysterious shadows inside a willow-woven tunnel, and the cool touch of smooth river rocks in a dry creek bed. It’s an immersive experience where the scent of damp earth and the rustle of leaves create a cinematic backdrop for play. This isn’t just a yard; it’s a launchpad for the soul, where every corner holds a secret waiting to be discovered.
Essential Elements:
- Willow or bamboo ‘living’ tunnels
- Large boulders for climbing
- A ‘mud kitchen’ with stainless steel bowls
- Telescopes and periscopes mounted to platforms
- A pulley system with a wooden bucket
How to make it
- Earthmoving: Create a small mound or ‘hill’ using clean fill dirt, then sod it over. This adds verticality to a flat yard, providing a ‘peak’ for kids to conquer.
- Mud Kitchen Prep: Build a simple table frame using cedar. Sink a plastic washbasin into the top and attach hooks for old pots and pans. Position this near a water source, but in a spot where the ‘mud’ won’t track directly into the house.
- Pulley System: Attach a heavy-duty pulley to a high tree limb or play deck. Thread a 1/2-inch nylon rope through it and secure a bucket to one end. Ensure the ‘drop’ area is clear of obstacles.
- Navigation Station: Mount a weather-resistant compass and telescope to the highest point of the play structure. Use stainless steel hardware to prevent rust and ensure the telescope can pivot 360 degrees.
- Secret Pathing: Plant tall ornamental grasses or sunflowers in a circular pattern to create ‘secret’ hiding spots. Use wood chips for the interior floor to keep it dry and cozy.
How to Implement Backyard Ideas for Kids for Seamless Family Living

Why we love this
The dream is a home where the kids can be kids and the adults can be adults, without the two worlds clashing in a mess of primary-colored plastic. We love this approach because it uses natural materials and clever landscaping to blend play zones into the overall garden design. Imagine a sleek wooden deck that transitions into a sandpit covered by a minimalist lid, or a vegetable garden where the kids have their own ‘tiny crops.’ It smells like blooming jasmine and woodsmoke—a sophisticated, shared sanctuary for the whole family.
Essential Elements:
- Built-in seating with hidden toy storage
- In-ground trampolines with flush covers
- Aesthetic perimeter fencing (horizontal slats)
- Multi-use turf areas
- Kid-friendly raised garden beds
How to make it
- Layout Planning: Use ‘zoning’ to keep active play away from dining areas. Create a visual barrier using mid-height shrubs like boxwoods to hide the play equipment while still allowing for a clear line of sight.
- Multi-Functional Furniture: Build a bench along the patio that features a flip-top lid. Use marine-grade plywood for the interior to keep outdoor toys dry and organized when not in use.
- Sunken Play: If installing a trampoline, opt for an in-ground version. Excavate a pit slightly larger than the trampoline, install a retaining wall of treated lumber, and ensure there is a drainage pipe at the bottom to prevent water pooling.
- Green Integration: Dedicate two raised beds for the children. Use ‘no-dig’ gardening techniques by layering cardboard, compost, and mulch. Plant fast-growing, tactile plants like sugar snap peas or ‘lambs ear’ for sensory appeal.
- Material Matching: Match the stain of the kids’ playhouse to the stain of your main deck or fence. This small detail creates a high-end, intentional look that makes the play structure feel like an architectural addition rather than an afterthought.
How to Plan Kids Outdoor Play for Screen Free Weekends

Why we love this
There is a profound silence that descends when the tablets are put away and the only ‘notifications’ are the chirping of birds and the clatter of building blocks. We love screen-free planning because it reconnects us to the slow rhythm of the natural world. The tactile sensation of painting on large rolls of paper spread across the grass, or the focused quiet of a child observing a ladybug, is deeply restorative. It’s the scent of fresh air and the feeling of the sun’s warmth on our backs that remind us we don’t need a screen to be entertained.
Essential Elements:
- Large outdoor easel or plexiglass painting wall
- Magnifying glasses and bug jars
- Bird feeders and identification books
- Picnic blankets and a ‘snack hamper’
- Low-impact lawn games (cornhole or croquet)
How to make it
- The ‘Invitation’ Setup: On Saturday morning, set out a ‘nature tray’ with clay, pinecones, and leaves. Seeing the materials ready and waiting ‘primes’ the brain for creative engagement without the need for a screen.
- Art Station Construction: Attach a large sheet of plexiglass to a fence at kid-height. Provide washable tempera paints and spray bottles of water. The transparency makes it a fascinating sensory experience for the kids.
- Wildlife Station: Hang three different types of bird feeders at varying heights. Keep a field guide and a pair of kid-sized binoculars nearby to encourage ‘citizen science’ observations.
- Dining Transition: Move all meals outside. Use a heavy-duty picnic blanket and a low table. This change of scenery breaks the habit of wanting to watch TV while eating and makes the meal itself an event.
- Evening Wind-Down: Instead of a movie, set up a fire pit (safety first!). Teach children how to roast marshmallows and tell ‘finish the story’ tales where each person adds a sentence. This fosters verbal creativity and connection.
How to Refine Outdoor Play Areas for an Aesthetic Home Look
Why we love this
For those of us who love a ‘Pinterest-perfect’ home, refining a play area is an exercise in curated joy. We love the use of high-quality materials like black powder-coated steel, natural jute, and smooth slate. The visual clutter of neon plastic is replaced with the calming sight of organized wooden blocks and neutral-toned swings. It smells of expensive wood wax and gardenia, creating an outdoor space that feels like a boutique hotel courtyard that just happens to be incredibly fun for a five-year-old.
Essential Elements:
- Powder-coated metal swing frames
- Black or navy accents for a modern look
- Natural stone or pea gravel surfacing
- Minimalist Scandinavian-style playhouses
- Architectural plants like agave or tall grasses
How to make it
- Color Edits: Remove all primary-colored plastic items. If you must have plastic, choose items in ‘muted’ tones like terracotta, mustard, or charcoal. Spray paint any mismatched hardware with a uniform matte black finish.
- Grounding with Stone: Replace messy wood chips with smooth pea gravel or river stones. Use a heavy-duty landscape fabric underneath and a steel edge-border to keep the stones perfectly contained for a clean, architectural line.
- Plant Curation: Use large ‘structural’ planters around the play area. Choose plants with interesting shapes but no thorns, like ‘Blue Glow’ Agave or ornamental grasses, to soften the edges of play equipment without sacrificing the modern look.
- Furniture Upgrades: Swap out plastic picnic tables for a mini version of a designer dining table, perhaps in teak or white-washed oak. This creates a cohesive look with your adult outdoor furniture.
- Hidden Lighting: Install low-voltage ‘wash’ lighting at the base of trees and play structures. This highlights the architecture of the space at night, making it look like a professional landscape design rather than a playground.
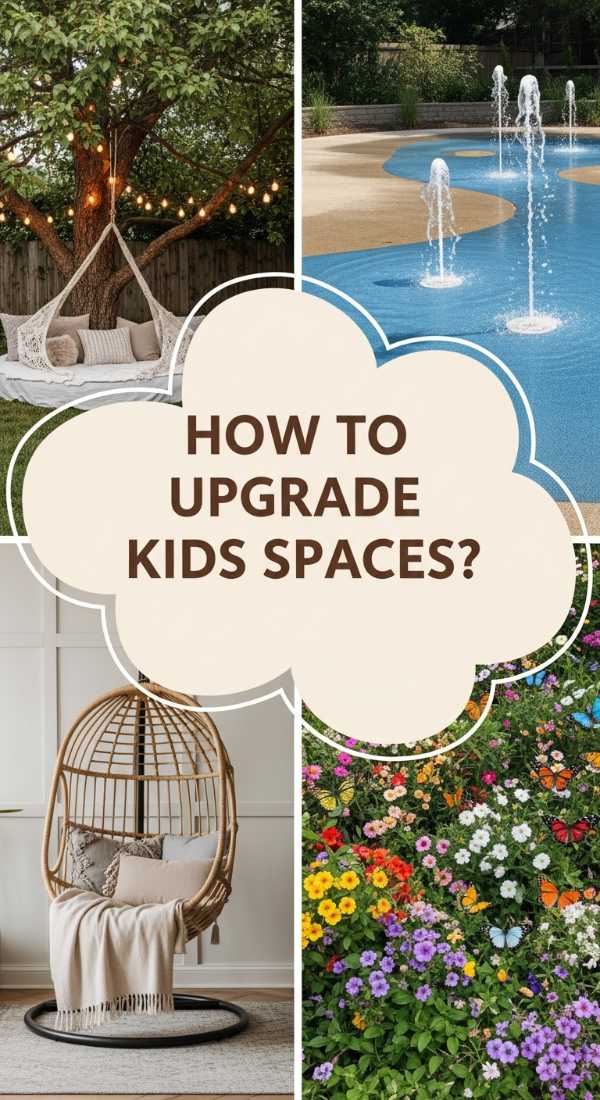
How to Upgrade Backyard Ideas for Kids into a Relaxation Oasis
[IMAGE_10]
Why we love this
The ultimate goal is a space that breathes—a place where the chaos of play is balanced by the serenity of a retreat. We love this because it acknowledges that parents need a place to recharge while the children play nearby. The sound of a bubbling water feature masks the noise of the street, the scent of lavender calms the nervous system, and the feel of a high-quality hammock cradling your body is pure bliss. It’s a holistic approach to home design where everyone’s needs are met with grace and style.
Essential Elements:
- Solar-powered water fountains
- Large hammocks or hanging chairs
- Aromatic herb gardens (mint, lavender, lemon balm)
- Outdoor speakers for ambient sound
- Weatherproof floor poufs for lounging
How to make it
- Acoustic Layering: Install a simple recirculating water fountain near the adult seating area. The sound of trickling water provides a ‘white noise’ effect that makes the space feel private and serene, even during loud play.
- Sensory Planting: Create a ‘Scent Border’ around the perimeter of the play and lounge zones. Plant English Lavender and Jasmine; as the kids run past, the plants release their calming oils into the air.
- Lounge Setup: Hang a double-sized macramé hammock from a sturdy stand or between two trees. Use heavy-duty carabiners and ‘tree saver’ straps to ensure it is secure and won’t damage the bark.
- Atmosphere Control: Install a high-quality outdoor Bluetooth speaker hidden among the foliage. Play ‘lo-fi’ beats or nature sounds at a low volume to set a consistent, relaxed ‘vibe’ for the afternoon.
- The Finishing Touch: Keep a basket of lightweight cotton throws nearby. As the sun dips and the temperature drops, the play area transitions effortlessly into a cozy spot for family stargazing.
Conclusion: Crafting a Legacy of Play
In the end, the ‘perfect’ play space isn’t measured by its price tag or the precision of its design—it’s measured by the laughter that rings through it and the quiet moments of discovery that happen within its walls. Whether you choose to build a grand outdoor adventure zone or a tiny, aesthetic indoor nook, you are doing something far more important than decorating; you are building a stage for your child’s development. By focusing on sensory details, safety, and a touch of magic, you create a home where imagination truly lives. So, grab a hammer, pick a corner, and start building that dream today. Your kids (and your future self) will thank you.
Dreamy Playroom FAQ
How can I make a small space feel like a big play area? Use vertical space! Wall-mounted climbing walls, hanging swings, and tall bookshelves with baskets can maximize every square inch without cluttering the floor.
What is the best flooring for an indoor playroom? High-density EVA foam tiles are great for safety, but if you want something more aesthetic, a low-pile wool rug with a thick felt pad underneath offers both comfort and style.
How do I keep an outdoor play area from looking messy? The key is ‘contained zones.’ Use clear borders like timber edging or stone paths to define where the toys belong, and invest in weather-resistant storage benches to hide the clutter when play is done.
Is it worth investing in wooden toys over plastic? Yes! Wooden toys are not only more durable and environmentally friendly, but they also offer a superior tactile experience and a timeless aesthetic that won’t clash with your home decor.