

Why This Viral Simple Food Board Is the Ultimate Hosting Hack
There is something inherently magical about gathering friends around a table, but let’s be honest: the stress of timing a multi-course meal can often drain the joy out of the evening. That is exactly why the viral food board trend has completely transformed my hosting game. Instead of hiding in the kitchen while your guests mingle, imagine placing a massive, rustic board in the center of the table, overflowing with various preparations of perfectly cooked chicken, charred lemons, and dipping sauces.
The secret to a truly viral-worthy food board isn’t just about the aesthetics; it’s about the versatility and the soul-satisfying textures of the food itself. By focusing on the humble chicken thigh—the unsung hero of the poultry world—you can create a variety of flavors and finishes that cater to everyone’s palate. From the shatteringly crisp skin of a high-heat roast to the melt-in-your-mouth tenderness of a slow-cooked preparation, this board is a masterclass in variety and ease.
Today, I’m walking you through every technique you need to build the ultimate chicken-centric food board. Whether you are a seasoned home cook or a total beginner, these methods will ensure your protein is the star of the show. Get ready to elevate your next gathering with these foolproof hacks for succulent, flavorful, and absolutely stunning chicken.
HOW TO BAKE CHICKEN THIGHS?

Why we love this
Baking is the reliable backbone of any great hosting board, offering a consistent and effortless way to achieve a deep, savory flavor profile. There is a certain comfort in the aroma that fills the house as the heat gently coaxes the juices out of the meat, creating a natural jus that glitters under the kitchen lights. When you pull them out, the meat is consistently moist, pulling away from the bone with the slightest nudge of a fork, while the edges of the seasoning caramelize into sweet and salty bits of heaven.
Ingredients
- 4-6 Bone-in, skin-on chicken thighs
- 2 tbsp Olive oil
- 1 tsp Garlic powder
- 1 tsp Smoked paprika
- Salt and cracked black pepper to taste
How to make it
- Preheat your oven to 400°F (200°C). High heat is essential for preventing the chicken from steaming rather than baking.
- Pat the thighs completely dry with paper towels; any residual moisture will prevent the seasoning from adhering and the skin from browning properly.
- In a small bowl, whisk together the olive oil, garlic powder, paprika, salt, and pepper until it forms a loose paste.
- Rub the paste thoroughly over every inch of the chicken, ensuring you get some under the skin for maximum flavor penetration.
- Arrange the thighs on a parchment-lined baking sheet, leaving at least two inches of space between each piece to allow for proper air circulation.
- Bake for 35 to 45 minutes. You are looking for an internal temperature of 165°F (74°C) and a skin that is beginning to bubble and turn a beautiful golden amber.
- Let the chicken rest for 5 minutes before transferring it to your board to allow the juices to redistribute through the fibers.
HOW TO COOK CHICKEN THIGHS?

Why we love this
When we talk about ‘cooking’ in a general sense, we are often referring to that perfect stovetop-to-oven transition that professional chefs adore. This method provides an incredible sensory experience, starting with the aggressive sizzle as the skin hits the hot cast iron and ending with a pan sauce that smells of deglazed wine and herbs. The result is a sophisticated, restaurant-quality piece of meat that has a complex depth of flavor and a texture that is both crisp and extraordinarily succulent.
Ingredients
- 4 Boneless or bone-in chicken thighs
- 1 tbsp Grapeseed oil (high smoke point)
- 2 tbsp Unsalted butter
- 3 sprigs Fresh thyme
- 2 cloves Garlic, smashed
How to make it
- Season your chicken generously with salt at least 15 minutes before cooking to allow it to penetrate the muscle.
- Heat a heavy-bottomed skillet (preferably cast iron) over medium-high heat until the oil is shimmering and just starting to wisps of smoke appear.
- Place the chicken skin-side down in the pan. Press down firmly with a spatula to ensure even contact with the heat; you should hear a loud, consistent searing sound.
- Cook undisturbed for 6-8 minutes. Resist the urge to flip them early; the skin needs time to render its fat and naturally release from the pan surface.
- Once the skin is deep golden brown, flip the thighs over. Reduce the heat to medium and add the butter, smashed garlic, and thyme sprigs to the pan.
- As the butter foams, tilt the pan and use a large spoon to continuously baste the chicken with the aromatic butter for another 4-5 minutes.
- Check the internal temperature; once it hits 165°F, remove from heat and let it rest on a warm plate to retain its moisture.
HOW TO ROAST CHICKEN LEGS?

Why we love this
Roasting chicken legs brings a dramatic, rustic flair to your food board that is impossible to ignore. There is something deeply satisfying about the way the dark meat on the bone stays incredibly tender while the high heat of the oven transforms the skin into a taut, mahogany-colored crust. The scent of roasting fat and poultry is the ultimate invitation to the table, evoking memories of Sunday dinners and holiday feasts, making your guests feel immediately at home and pampered.
Ingredients
- 4-6 Whole chicken legs (thigh and drumstick attached)
- 3 tbsp Melted butter
- 1 tsp Dried oregano
- 1/2 tsp Onion powder
- Lemon wedges for serving
How to make it
- Preheat your oven to a slightly higher temperature of 425°F (220°C). The higher heat is key for roasting larger cuts like whole legs to ensure the skin crisps before the meat dries out.
- Place the chicken legs in a large bowl and toss with the melted butter, oregano, onion powder, salt, and pepper until evenly coated.
- Line a roasting pan with a wire rack. Placing the chicken on a rack allows the hot air to circulate underneath the legs, ensuring the bottoms don’t get soggy.
- Lay the legs out flat on the rack. If they are touching, they will steam, so give them plenty of room.
- Roast for 40-50 minutes. Halfway through, rotate the pan in the oven to account for any hot spots.
- Look for the juices to run clear when the thickest part of the thigh is pierced. The skin should be tight and make a slight ‘clinking’ sound when tapped with a knife.
- Squeeze fresh lemon juice over the hot legs immediately after removing them from the oven to brighten the heavy, savory flavors.
HOW TO MAKE JUICY CHICKEN?

Why we love this
The hallmark of a host who truly cares is chicken that is so juicy it practically melts away with every bite. Achieving that perfect level of hydration within the meat creates a luxurious mouthfeel that balances the salty seasonings and crisp exterior perfectly. It is all about that initial burst of flavor and moisture that greets you, making the dish feel fresh and expertly prepared rather than heavy or dry, leaving your guests asking for your secret every single time.
Ingredients
- 6 Chicken thighs
- 4 cups Cold water
- 1/4 cup Kosher salt
- 1/4 cup Sugar
- 1 tbsp Black peppercorns
- 2 Bay leaves
How to make it
- Start with a simple brine: Combine the water, salt, sugar, peppercorns, and bay leaves in a pot. Heat slightly just to dissolve the salt and sugar, then let it cool completely to room temperature.
- Submerge the chicken thighs in the cooled brine. Cover and refrigerate for at least 1 hour, but no more than 4 hours (over-brining can make the texture mushy).
- Remove the chicken from the brine and rinse under cold water to remove excess surface salt.
- Pat the meat extremely dry with paper towels. This step is non-negotiable for getting color after a brine.
- Cook the chicken using your preferred method (baking or pan-searing), but reduce the added salt in your seasoning rub, as the brine has already seasoned the meat from within.
- Use a meat thermometer to pull the chicken exactly at 160°F, as carry-over cooking will bring it to the safe 165°F mark while keeping all the juices trapped inside.
- Always allow a full 10-minute rest before slicing to ensure the internal pressure stabilizes and the juices stay in the meat.
HOW TO SLOW COOK CHICKEN?

Why we love this
Slow-cooked chicken is the ultimate ‘set it and forget it’ luxury for a busy host. As the hours pass, the connective tissues in the chicken thighs break down into rich gelatin, creating a texture that is impossibly silky and tender enough to be shredded with a spoon. The deep, concentrated flavors of the braising liquid infuse every fiber of the meat, creating a warm, hearty component for your food board that pairs beautifully with crusty bread or soft polenta.
Ingredients
- 8 Boneless chicken thighs
- 1 cup Chicken bone broth
- 1/2 cup Soy sauce
- 1/4 cup Honey
- 1 inch Fresh ginger, sliced
- 3 cloves Garlic, minced
How to make it
- Place the chicken thighs in the bottom of your slow cooker in a single layer if possible.
- In a medium bowl, whisk together the broth, soy sauce, honey, ginger, and garlic to create a savory-sweet braising liquid.
- Pour the liquid over the chicken until the pieces are at least half-submerged.
- Set the slow cooker to ‘Low’ for 6 to 7 hours or ‘High’ for 3 to 4 hours. Low and slow is always preferred for the most tender results.
- Avoid opening the lid during the cooking process; every time the lid is lifted, heat and moisture escape, which can add significant time to the process.
- Once finished, the chicken should be easily shredded. For a viral presentation, remove the chicken and simmer the remaining liquid in a saucepan until it reduces into a thick, glossy glaze.
- Pour the glaze back over the chicken before arranging it on your serving board for a stunning, high-shine finish.
HOW TO SEASON CHICKEN THIGHS?

Why we love this
Seasoning is where you find the soul of your dish, and for a food board, it’s the bridge between all your different components. A well-seasoned thigh offers an explosion of aromatics—the earthiness of cumin, the heat of chili, or the floral notes of dried herbs—that dance on the palate long after the first bite. The visual appeal of a vibrant red spice rub or a flecked green herb crust makes the board look professionally curated and tantalizingly flavorful.
Ingredients
- 6 Chicken thighs
- 1 tbsp Smoked paprika
- 1 tsp Cumin
- 1 tsp Chili powder
- 1 tsp Dried thyme
- 1 tsp Brown sugar (for caramelization)
- 2 tsp Kosher salt
How to make it
- Begin by mixing all your dry spices in a small bowl to ensure an even distribution of flavor. The brown sugar is a ‘pro tip’ that helps the chicken develop a dark, crusty exterior.
- Generously coat the chicken thighs in a thin layer of oil; this acts as the ‘glue’ for your spice rub.
- Sprinkle the seasoning from about 6 inches above the meat to ensure an even, light dusting rather than clumps of spice.
- Use your hands to massage the spices into every crevice of the meat. If using skin-on thighs, be sure to season the underside as well.
- For the best flavor, let the seasoned chicken sit at room temperature for 20-30 minutes before cooking. This allows the salt to start drawing out proteins that will form a better crust.
- During cooking, avoid moving the chicken too much so the spice layer can sear into the meat rather than falling off into the pan.
- Finish with a sprinkle of flaky sea salt right before serving to provide a textural crunch and a final pop of flavor.
HOW TO CRISP CHICKEN SKIN?

Why we love this
There is no sound more satisfying in a kitchen than the audible ‘crunch’ of perfectly crisped chicken skin. It provides the essential textural contrast to the soft, juicy meat underneath, acting like a savory, built-in cracker. When done correctly, the skin is rendered of all its flabby fat, leaving behind a thin, golden, and translucent layer that tastes like the most decadent snack imaginable, making it the most coveted piece on the entire hosting board.
Ingredients
- 4 Skin-on chicken thighs
- 1 tsp Baking powder (the secret ingredient)
- 1 tsp Salt
- 1 tbsp Neutral oil
How to make it
- The absolute key to crispy skin is dryness. Remove the chicken from its packaging and leave it uncovered in the fridge for 4-24 hours to air-dry the skin.
- Mix the baking powder with your salt. The alkalinity of the baking powder breaks down the peptide bonds in the skin, allowing it to crisp up more efficiently.
- Lightly dust the skin-side only with the baking powder mixture. Do not use too much, or it will taste metallic.
- Start the chicken in a cold pan if using the stovetop. Place the skin-side down in a cold skillet, then turn the heat to medium. This slow ramp-up allows the fat to render out completely.
- If using an oven, bake at 425°F on a wire rack to ensure the skin isn’t sitting in its own moisture.
- Never cover the chicken with foil after cooking; the steam will immediately turn your crispy skin soggy.
- If the skin isn’t quite there yet, a quick 2-minute blast under the broiler at the very end will finish the job—just watch it like a hawk to prevent burning.
HOW TO PREP CHICKEN THIGHS?
Why we love this
Proper preparation is the foundation of culinary success, and taking the time to prep your chicken thighs correctly ensures that every bite is enjoyable and free of unwanted gristle or bone fragments. It’s about the care you put into the process before the heat even touches the pan. A well-prepped thigh cooks more evenly, looks more beautiful on the plate, and demonstrates a level of detail that your guests will notice in the consistency and quality of the final dish.
Ingredients
- 1 kg Chicken thighs (bone-in or boneless)
- Sharp chef’s knife or kitchen shears
- Paper towels
- Cutting board (dedicated to poultry)
How to make it
- Start by cleaning your workspace and ensuring your knife is sharp; a dull knife is more dangerous and will tear the delicate meat.
- Trim away any excess hanging fat or loose skin. While fat is flavor, too much ‘flap’ will prevent the chicken from cooking evenly and can cause flare-ups or greasy results.
- For boneless thighs, check the underside for any remaining small cartilage or bone fragments and remove them with kitchen shears.
- If you want even cooking for boneless thighs, lay them flat and lightly pound the thickest part with a meat mallet so the entire piece is a uniform thickness.
- Pat the meat dry multiple times. I use a fresh paper towel for the final pat-down right before the chicken hits the pan to ensure zero surface moisture.
- Let the chicken sit out for about 15-20 minutes to take the chill off. Cooking ice-cold meat causes the muscles to tighten up, leading to a tougher result.
- Organize your prepped chicken on a clean tray so you can move efficiently to the seasoning and cooking stages without cross-contamination.
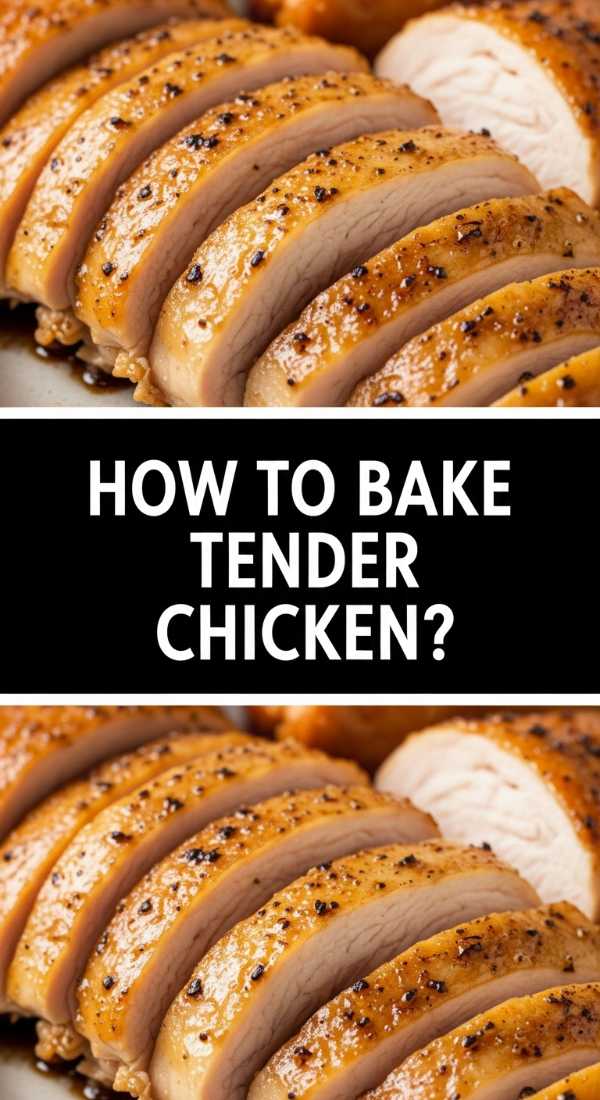
HOW TO BAKE TENDER CHICKEN?

Why we love this
Tender chicken is the result of patience and a gentle touch, creating a dish that feels incredibly light and refined. This method focuses on maintaining the integrity of the meat’s fibers, ensuring they stay relaxed and full of moisture. The sensation of a truly tender piece of chicken is like a warm hug; it’s comforting, easy to eat, and pairs beautifully with the brighter, crunchier elements of a food board, providing a necessary ‘soft’ element to the spread.
Ingredients
- 6 Chicken thighs
- 1/2 cup Greek yogurt (natural tenderizer)
- 1 tbsp Lemon juice
- 2 cloves Garlic, minced
- Salt and white pepper
How to make it
- Preheat your oven to a lower, gentler temperature of 350°F (175°C). Lower temperatures prevent the proteins from contracting too quickly.
- Coat the chicken in a mixture of Greek yogurt and lemon juice. The lactic acid in the yogurt and the citric acid in the lemon break down tough fibers without making the meat mushy.
- Let the chicken marinate in this mixture for at least 30 minutes.
- Place the chicken in a baking dish where they fit snugly together. This ‘crowding’ actually helps keep the moisture in as they bake.
- Cover the dish tightly with aluminum foil for the first 20 minutes of baking. This creates a small steam chamber that keeps the meat exceptionally tender.
- Remove the foil for the final 15 minutes to allow the top to set and develop a light color.
- Check for an internal temperature of 165°F. Because you are cooking at a lower temp, the window of perfection is wider, making it harder to overcook.
- Rest the chicken in the baking dish for 10 minutes, allowing it to soak back up any juices that escaped during the process.
HOW TO MARINATE CHICKEN THIGHS?
[IMAGE_10]
Why we love this
Marinating is the ultimate hack for infusing chicken with layers of complex flavor that go far beyond the surface. It’s a process of transformation where oils, acids, and aromatics work together to permeate the meat, ensuring that every single bite is as flavorful as the last. The beautiful sheen of a marinated thigh and the way the herbs cling to the surface make for a visually stunning addition to your viral food board, promising a taste experience that is deep, vibrant, and unforgettable.
Ingredients
- 6 Chicken thighs
- 1/4 cup Olive oil
- 3 tbsp Balsamic vinegar
- 1 tbsp Dijon mustard
- 2 tbsp Fresh rosemary, chopped
- 1 tbsp Honey
How to make it
- Combine your oil (the carrier), your vinegar (the tenderizer), and your aromatics (the flavor) in a large glass bowl or a heavy-duty zip-top bag.
- Whisk the marinade until it is emulsified. The Dijon mustard acts as an emulsifier to keep the oil and vinegar from separating.
- Add the chicken thighs, ensuring every piece is fully coated. If using a bag, squeeze out as much air as possible so the liquid is in constant contact with the meat.
- Refrigerate for at least 4 hours, or ideally overnight (up to 24 hours). The longer it sits, the deeper the flavor will go.
- Before cooking, remove the chicken from the fridge and let it sit for 30 minutes. Cold meat doesn’t sear well.
- Discard the used marinade; never use it as a sauce unless you boil it vigorously first to kill any bacteria.
- Cook the chicken on a grill or in a hot pan. The sugars in the balsamic and honey will caramelize quickly, so watch the heat to ensure it browns without burning.
The Ultimate Hosting Success
Building a viral simple food board is about more than just the food; it’s about creating an atmosphere of abundance and relaxation. By mastering these different ways to prepare chicken thighs, you offer your guests a variety of textures and flavors that keep the meal exciting. The beauty of the board is that it invites people to dig in, try a bit of everything, and stay at the table just a little bit longer. So, the next time you find yourself planning a get-together, put away the formal plates, grab your largest wooden board, and let the chicken be the star of the show. Happy hosting!