

Your Complete 2024 Guide to Seasonal Nail Art: From Pastel Spring to Moody Winter
Hello my loves! I am so incredibly happy you’re here. Grab a warm cup of matcha or your favorite cozy tea, and let’s just take a deep breath together. There is something so profoundly healing about taking a moment for ourselves, isn’t there? I always say that our hands tell the story of our lives—the hugs we give, the letters we write, and the ways we care for the people we adore. Giving your nails a little extra love is like a soft whisper to your soul that you matter.
This year, 2024 is all about expressing your truest self through color and texture. Whether you’re feeling the vibrant energy of a blooming garden or the quiet strength of a summer sunset, I’ve gathered some of my favorite trending tutorials to help you feel polished and beautiful from the inside out. Let’s dive into these little moments of art together, shall we?
Get funky spring nails in 4 easy steps

Why to love this Design:
There is something so liberating about breaking the rules of traditional manicures. These funky spring nails are all about celebrating your unique rhythm with mismatched patterns and joyful colors that feel like a party at your fingertips.
Essential Elements:
- Neon pastel polish set
- Fine-line detailing brush
- Matte top coat
- Tiny star decals
How to Prepare:
- Apply a clear base coat to protect your natural nails.
- Paint each nail a different pastel shade as your canvas.
- Use a detailing brush to add abstract ‘squiggles’ or dots in contrasting colors.
- Seal with a matte top coat for a modern, velvety finish.
Budget Range
- Essie ‘Sway in Red’ – $10
- Beetles Gel Liner Set – $15
- Sally Hansen Matte Top Coat – $7
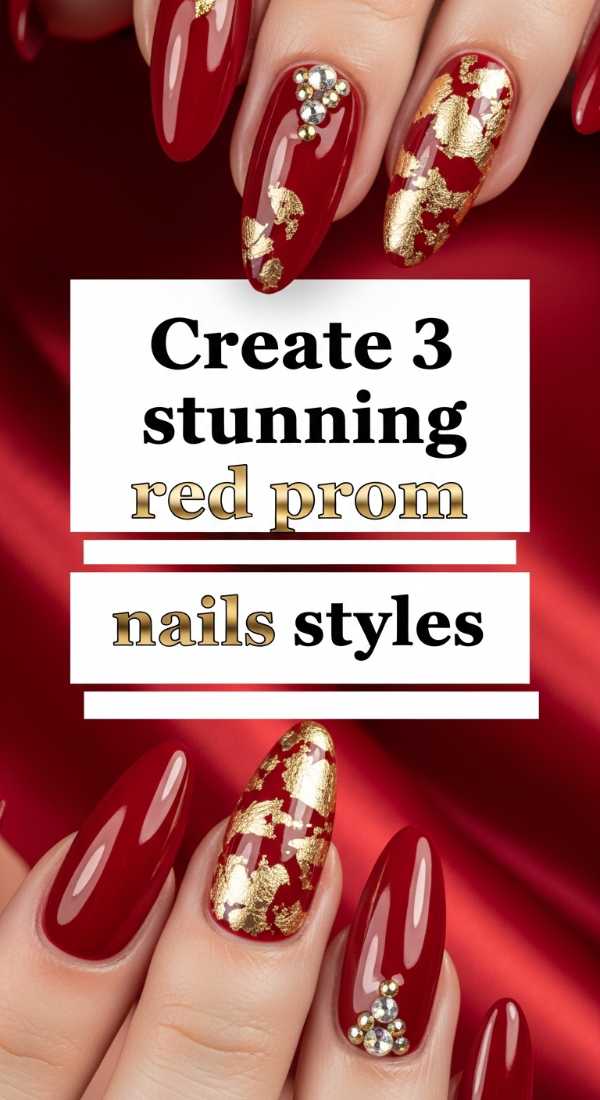
Create 3 stunning red prom nails styles
Why to love this Design:
Prom is such a magical milestone, and red is the color of pure confidence. Whether you want to feel like a classic Hollywood starlet or a modern-day princess, these three styles offer a perfect blend of elegance and fire.
Essential Elements:
- Deep crimson lacquer
- Silver holographic glitter
- Red rhinestone accents
How to Prepare:
- Style 1 (The Classic): Apply two coats of solid crimson for a high-gloss, timeless look.
- Style 2 (The Ombre): Sponge silver glitter onto the tips of a red base for a gradient effect.
- Style 3 (The Royal): Place a single red rhinestone at the base of your ring finger nail for a subtle ‘crown’ effect.
Budget Range
- OPI ‘Big Apple Red’ – $11
- Holo Taco Silver Flake – $14
- Nail Art Rhinestone Kit – $8
Choose 5 perfect nail colors for spring

Why to love this Design:
Spring is a season of rebirth, and your nails should reflect that soft awakening. These five colors are curated to match the gentle transition from the frost of winter to the warmth of the first sunbeams.
Essential Elements:
- Lavender Mist
- Buttercup Yellow
- Matcha Green
- Peach Fuzz (Color of the Year!)
- Sky Blue
How to Prepare:
- Cleanse nails with alcohol to ensure a smooth surface.
- Apply one thin coat of your chosen spring pastel.
- Wait 2 minutes, then apply a second coat for full opacity.
- Finish with a high-shine top coat to mimic a morning dew glow.
Budget Range
- Zoya ‘Abby’ (Lavender) – $12
- Olive & June ‘KMC’ (Green) – $9
- Revlon ‘Candid’ Top Coat – $6
Paint sunflower nail art using 3 simple tools

Why to love this Design:
Sunflowers are the ultimate symbol of looking toward the light. This design feels like carrying a little piece of a sunny meadow with you wherever you go, and it’s surprisingly therapeutic to paint.
Essential Elements:
- A wooden toothpick
- A bobby pin (for larger dots)
- A small piece of a kitchen sponge
How to Prepare:
- Dab a brown center using the bobby pin in the corner of the nail.
- Use the toothpick to pull yellow ‘petals’ outward from the brown center.
- Lightly sponge a bit of green at the base of the nail to represent leaves.
Budget Range
- Orly ‘Golden Afternoon’ – $15
- Wet n Wild ‘Brown’ – $2
- Common household bobby pins – $1
Master 4 simple funky nails at home

Why to love this Design:
You don’t need a professional studio to create high-fashion art. These four ‘funky’ styles use negative space and geometric shapes to create a look that is sophisticated yet wonderfully playful.
Essential Elements:
- Washi tape or scotch tape
- Nude base polish
- Primary color set (Red, Blue, Yellow)
- Glossy top coat
How to Prepare:
- Look 1 (Half & Half): Tape off half the nail and paint one side a bright primary color.
- Look 2 (The Dot): Use the end of a makeup brush to place one large dot in the center of a nude nail.
- Look 3 (The Frame): Paint a thin border around the edge of the nail in a contrasting neon.
- Look 4 (The Stripe): Place a single vertical tape strip and paint over it; peel to reveal a ‘window’ of natural nail.
Budget Range
- Sinful Colors ‘Black on Black’ – $3
- Washi Tape Multi-pack – $5
- Essie ‘Sugar Daddy’ Nude – $10
Achieve hot coral nails in 5 minutes

Why to love this Design:
When the sun is out, hot coral is the absolute queen of colors. It’s vibrant, energetic, and looks incredible against a summer glow. This is the perfect ‘last-minute’ look for a beach day.
Essential Elements:
- High-pigment coral cream polish
- Quick-dry drops
- Cuticle oil
How to Prepare:
- Quickly buff the nail surface for maximum adhesion.
- Apply one thick (but even) coat of hot coral polish.
- Add two quick-dry drops to each nail immediately.
- Apply cuticle oil to the surrounding skin for that ‘just-left-the-salon’ shine.
Budget Range
- China Glaze ‘Flip Flop Fantasy’ – $8
- Nicole by OPI Drying Drops – $12
- Cuccio Milk & Honey Oil – $10
Design 6 almond nail inspo spring looks

Why to love this Design:
Almond nails are so incredibly flattering—they elongate the fingers and provide the perfect elegant canvas for spring florals. These six looks celebrate femininity in all its forms.
Essential Elements:
- Almond-shaped nail tips or file
- Dried pressed flowers
- Gold leaf flakes
How to Prepare:
- Look 1: Tiny daisies painted on the tips.
- Look 2: Encapsulated dried flowers in clear gel.
- Look 3: Gold leaf accents on a sage green base.
- Look 4: Soft pink ombre.
- Look 5: White lace stamping patterns.
- Look 6: Lavender marble swirls.
Budget Range
- Modelones Almond Tips Kit – $20
- Born Pretty Gold Leaf – $4
- Real Dried Nail Flowers – $7
Craft 3 baseball nails designs for moms

Why to love this Design:
To all my sports moms out there—I see you! These designs are a sweet way to show your team spirit while keeping your look chic and polished during those long weekend tournaments.
Essential Elements:
- White base polish
- Red striper pen (for stitching)
- Your team’s primary color
How to Prepare:
- Design 1 (The Classic): Paint the nail white and draw two curved red lines with ‘V’ stitches.
- Design 2 (The Jersey): Paint your child’s jersey number on the accent nail.
- Design 3 (The Fan): A solid coat of team color with one ‘baseball’ accent nail.
Budget Range
- Sally Hansen Insta-Dri White – $6
- Red Nail Art Pen – $5
- Team Color Polish – $9
Follow 7 steps for stunning summer nail designs

Why to love this Design:
Summer is all about endurance—sand, salt water, and sun! These seven steps ensure your art stays stunning and chip-free through every pool party and sunset hike.
Essential Elements:
- Dehydrator/Primer
- UV/LED Lamp (if using gel)
- Summer fruit decals (lemons/cherries)
How to Prepare:
- Push back cuticles and remove all invisible skin.
- Dehydrate the nail plate with an alcohol wipe.
- Apply a high-quality base bond.
- Paint your summer ‘fruit’ or ‘ocean’ theme art.
- Apply decals while the second coat is slightly tacky.
- Apply two layers of top coat, sealing the free edge (the tip).
- Cure or air-dry for double the recommended time to ensure a hard set.
Budget Range
- Gelish Basix Kit – $35
- Summer Fruit Nail Decals – $6
- SunUV LED Lamp – $25
Apply butter yellow nails chrome in 4 steps

Why to love this Design:
This is the ‘it’ look of 2024. It’s like a soft pat of butter meets a futuristic glow. It’s sophisticated, trendy, and makes your hands look absolutely ethereal in the light.
Essential Elements:
- Butter yellow polish
- Pearl or yellow chrome powder
- Sponge applicator
- No-wipe top coat
How to Prepare:
- Apply two coats of butter yellow and dry/cure completely.
- Apply a no-wipe top coat and cure for only 30 seconds (it needs to be slightly ‘grabby’).
- Burnish the chrome powder into the nail using the sponge applicator until it shines.
- Seal with a final layer of top coat for a mirror-like finish.
Budget Range
- OPI ‘Blindfold Me’ – $11
- Artdone Chrome Powder – $8
- Kupa No-Wipe Top Coat – $15
Closing Thoughts
Oh, my loves, I hope these ideas bring a little spark of joy to your week. Remember, it’s never just about the polish—it’s about the ten minutes of peace you give yourself while you’re painting. It’s about looking down at your hands while you’re typing or driving and feeling a little surge of ‘yes, I am worth this beauty.’ Go forth and shine, you beautiful souls!