

10 Minutes to the Perfect Viral Snack Board
There is something undeniably magical about the moment you set a sprawling, colorful snack board in the center of a room. It’s more than just food; it’s an invitation to linger, to share stories, and to indulge in a little bit of everything. I remember the first time I put together a dessert-themed board for a girls’ night—the gasps of delight and the immediate reach for the camera phones reminded me that we eat with our eyes first, and our hearts second.
This ‘Viral Simple Food Board’ is all about bringing that high-end bakery aesthetic into your home without the stress. Whether you’re hosting a holiday party, a cozy movie night, or just want to treat your family to a weekend surprise, these ten baked elements are the building blocks of a truly legendary spread. Each component is designed to be the ‘best version’ of itself, ensuring that your board isn’t just a viral hit on social media, but a delicious memory for everyone at the table.
How to bake soft cookies?

Why we love this
There is nothing quite like the scent of vanilla and browned butter wafting through the kitchen as a fresh batch of soft cookies nears completion. We love these because they offer a gentle, pillowy resistance when you bite into them, revealing a center that is just barely set and infinitely comforting. The way the edges remain pale and tender while the bottom develops a whisper of golden caramelization makes them the ultimate comfort food for any snack board. It’s a sensory experience that combines the warmth of home with a professional, melt-in-your-mouth texture that keeps everyone reaching for just one more.
Ingredients
- 2 1/4 cups all-purpose flour
- 1 teaspoon baking soda
- 1/2 teaspoon salt
- 1 cup unsalted butter, softened to room temperature
- 3/4 cup granulated sugar
- 3/4 cup packed brown sugar
- 1 teaspoon vanilla extract
- 2 large eggs
- 2 cups semi-sweet chocolate chips
How to make it
- Begin by preheating your oven to 350°F (175°C) and lining two large baking sheets with parchment paper or silicone mats to ensure even heat distribution and prevent sticking.
- In a medium bowl, whisk together the flour, baking soda, and salt. This aeration step is crucial for a uniform rise and to avoid salty pockets in your cookies.
- Using a stand mixer or hand mixer, cream the softened butter with both sugars on medium-high speed for about 3-4 minutes until the mixture is pale, light, and fluffy; this incorporates air which leads to that soft, cake-like texture.
- Add the eggs one at a time, beating well after each addition, and then stir in the vanilla extract until fully incorporated.
- Turn the mixer to low and gradually add the dry ingredients, mixing only until just combined—overmixing at this stage develops gluten and will make the cookies tough instead of soft.
- Fold in the chocolate chips by hand with a spatula to ensure they are evenly distributed without overworking the dough.
- Scoop rounded tablespoons of dough onto the prepared sheets, spacing them 2 inches apart, and bake for 9 to 11 minutes; the key is to remove them when the edges are just set but the centers still look slightly underbaked and soft.
How to make fudgy brownies?
Why we love this
A truly fudgy brownie is a decadent masterpiece, characterized by a dense, almost truffle-like interior and a delicate, tissue-thin crackly top that shimmers under the light. We love the deep, intense cocoa aroma that fills the room, promising a rich chocolate experience that balances sweetness with a hint of sophisticated bitterness. The texture is heavy and satisfying, clinging to the roof of your mouth in the most delightful way, making it a standout star on any viral snack board. It’s the kind of indulgence that feels like a warm hug, perfect for pairing with a cold glass of milk or a tart berry garnish.
Ingredients
- 1 cup unsalted butter, melted and slightly cooled
- 2 cups granulated sugar
- 4 large eggs, room temperature
- 1 tablespoon vanilla extract
- 1 cup unsweetened cocoa powder
- 1 cup all-purpose flour
- 1/2 teaspoon salt
- 1 cup dark chocolate chunks
How to make it
- Preheat your oven to 325°F (165°C) and grease an 8×8 inch square baking pan, lining it with parchment paper so that the edges overhang for easy removal later.
- In a large mixing bowl, combine the melted butter and sugar, whisking vigorously by hand for 1-2 minutes; this helps create that signature shiny, crackly top as the sugar partially dissolves.
- Add the eggs one at a time, whisking thoroughly after each to build structure, then stir in the vanilla extract for aromatic depth.
- Sift the cocoa powder, flour, and salt directly into the wet ingredients to remove any lumps and ensure a silky batter.
- Using a rubber spatula, fold the dry ingredients into the wet until no streaks of flour remain, being careful not to over-aerate the batter, which would make them cakey rather than fudgy.
- Gently fold in the dark chocolate chunks for extra pockets of melted chocolate goodness.
- Spread the batter evenly into the pan and bake for 35-40 minutes, or until a toothpick inserted into the center comes out with a few moist crumbs attached—do not wait for it to come out clean, or the brownies will be overcooked and dry.
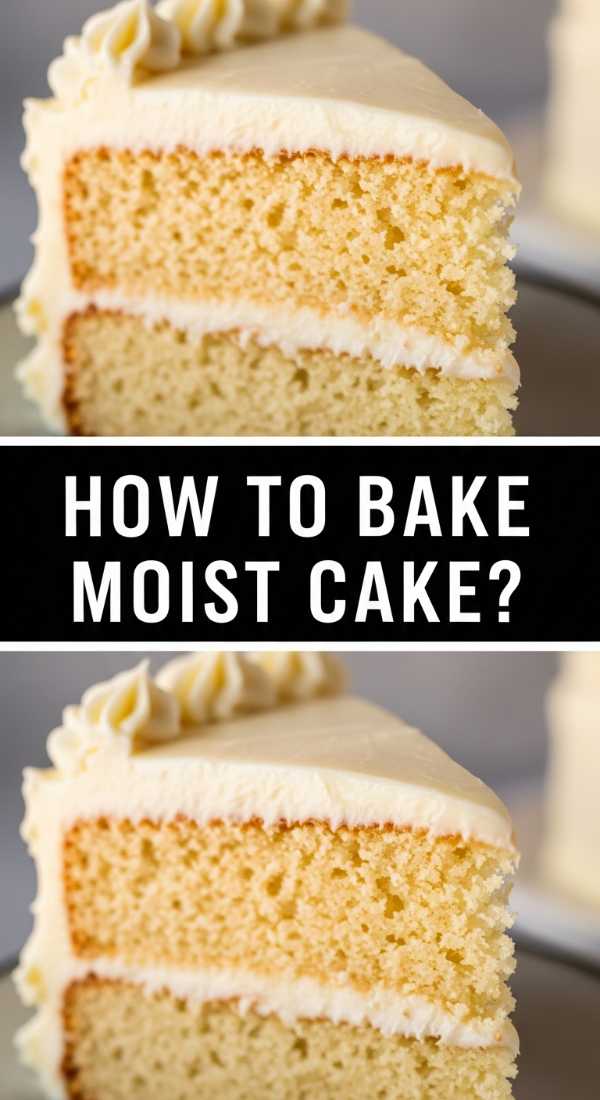
How to bake moist cake?
Why we love this
The hallmark of a perfect cake is a crumb so tender and moist that it practically dissolves upon contact, leaving behind a trail of sweet, buttery bliss. We love the structural integrity that allows it to hold its shape on a board, while the interior remains incredibly succulent and light. The subtle fragrance of vanilla combined with a moist, velvety mouthfeel creates a canvas that pairs beautifully with any frosting or fruit topping. It’s the ultimate centerpiece that feels celebratory and homemade, offering a reliable, classic flavor profile that appeals to every palate at the gathering.
Ingredients
- 1 1/2 cups all-purpose flour
- 1 cup granulated sugar
- 1 1/2 teaspoons baking powder
- 1/2 teaspoon salt
- 1/2 cup unsalted butter, softened
- 1/2 cup whole milk, room temperature
- 1 large egg, room temperature
- 2 teaspoons vanilla extract
How to make it
- Preheat your oven to 350°F (175°C) and thoroughly grease and flour a 9-inch round cake pan to ensure a clean release after baking.
- In a large bowl, whisk together the flour, sugar, baking powder, and salt to distribute the leavening agents evenly.
- Add the softened butter and half of the milk, mixing on low speed until the dry ingredients are moistened, then increase the speed to medium and beat for 2 minutes to develop the cake’s structure.
- In a separate small bowl, whisk the remaining milk, the egg, and the vanilla extract together.
- Add the egg mixture to the batter in two stages, beating for 30 seconds after each addition until the batter is smooth and pale.
- Pour the batter into the prepared pan, smoothing the top with a spatula, and tap the pan firmly on the counter once to release any large air bubbles.
- Bake for 30-35 minutes or until the cake is golden brown and a toothpick inserted in the center comes out clean; let it cool in the pan for 10 minutes before transferring to a wire rack to prevent the steam from making the bottom soggy.
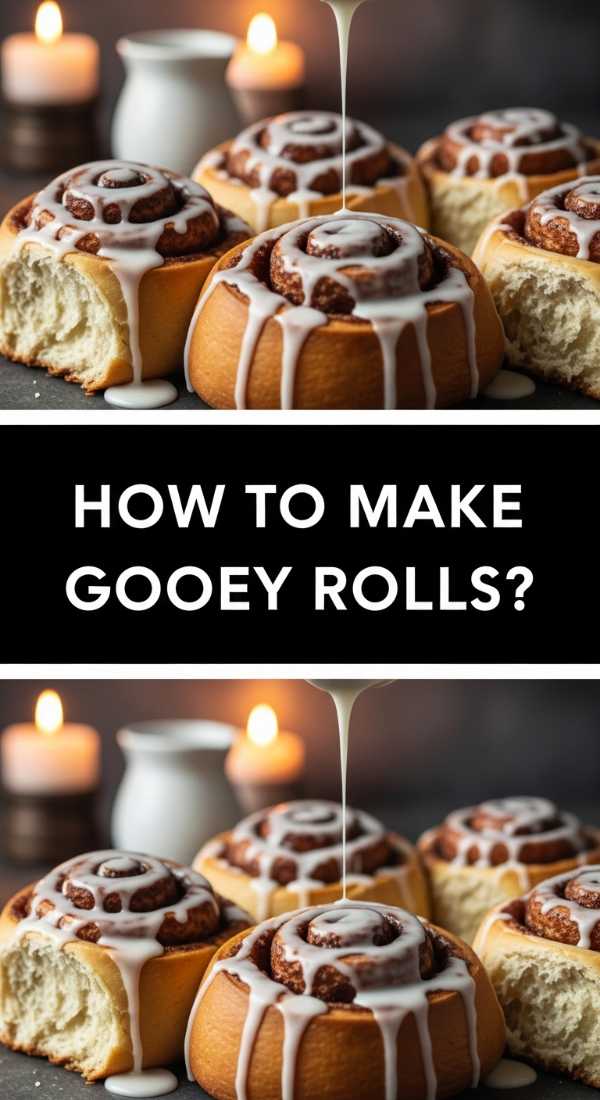
How to make gooey rolls?

Why we love this
Gooey rolls are the epitome of breakfast decadence, with their spiraled layers of soft, yeasty dough drenched in a cinnamon-sugar glaze that pools at the bottom. We love the tactile joy of pulling apart the warm layers, feeling the sticky sweetness on our fingertips and inhaling the intoxicating spice of cinnamon. The contrast between the slightly golden, toasted tops and the soft, almost underbaked center creates a multi-dimensional eating experience that is both comforting and exhilarating. They bring a cozy, brunch-like atmosphere to any snack board, acting as the perfect sweet anchor for a morning or midday spread.
Ingredients
- 1 cup warm milk (110°F)
- 1 packet active dry yeast
- 1/2 cup granulated sugar
- 1/3 cup melted butter
- 1 egg, room temperature
- 4 cups all-purpose flour
- 1 cup brown sugar
- 2 tablespoons ground cinnamon
- 1/2 cup softened butter (for filling)
How to make it
- Dissolve the yeast and 1 tablespoon of sugar in the warm milk and let it sit for about 5-10 minutes until it becomes foamy, which indicates the yeast is active and ready to work.
- In a large bowl, mix the yeast mixture with the remaining granulated sugar, melted butter, egg, and salt until well combined.
- Gradually add the flour, mixing until a soft dough forms, then knead by hand or with a dough hook for 5-7 minutes until the dough is smooth, elastic, and slightly tacky but not sticking to your fingers.
- Place the dough in a greased bowl, cover with a damp cloth, and let it rise in a warm, draft-free spot for 1 hour or until doubled in size.
- Punch down the dough and roll it out on a floured surface into a large rectangle about 1/4 inch thick.
- Spread the softened butter over the dough and sprinkle generously with a mixture of brown sugar and cinnamon.
- Roll the dough tightly into a log, slice into 12 even pieces using unflavored dental floss or a sharp knife, place in a greased 9×13 pan, let rise for another 30 minutes, and then bake at 350°F (175°C) for 20-25 minutes until lightly golden.
How to bake fluffy muffins?

Why we love this
A perfect muffin should be tall, proud, and incredibly light, with a domed top that offers a slight crunch before giving way to a cloud-like interior. We love the versatility of muffins—whether bursting with tart blueberries or rich chocolate chips, they provide a focused burst of flavor in every bite. The texture is delicate yet substantial, making them an ideal hand-held snack that doesn’t feel overly heavy. There’s a rustic charm to a pile of fluffy muffins on a board, evoking memories of country kitchens and slow Sunday mornings where the only rush is to get them while they’re still warm.
Ingredients
- 2 cups all-purpose flour
- 1/2 cup granulated sugar
- 1 tablespoon baking powder
- 1/2 teaspoon salt
- 1 cup whole milk
- 1/2 cup vegetable oil
- 1 large egg
- 1 teaspoon vanilla extract
How to make it
- Preheat your oven to 400°F (200°C), a high temperature is essential for that initial steam burst that creates a high, fluffy muffin dome.
- Line a standard muffin tin with paper liners or grease the cups thoroughly with non-stick spray.
- In a large bowl, whisk together the flour, sugar, baking powder, and salt; ensure there are no large clumps so the muffins rise evenly.
- In a separate jug, whisk the milk, oil, egg, and vanilla together until the egg is completely broken down and the mixture is uniform.
- Make a well in the center of the dry ingredients and pour in the liquid mixture, then use a large metal spoon to fold the ingredients together using only about 10-12 strokes.
- Crucial Tip: Stop mixing while you still see a few streaks of flour; overmixing will cause ‘tunneling’ and make the muffins rubbery and tough rather than fluffy.
- Spoon the batter into the muffin cups, filling them nearly to the top, and bake for 18-20 minutes until the tops spring back when lightly touched and a toothpick comes out clean.
How to bake flaky biscuits?

Why we love this
Flaky biscuits are a masterclass in texture, featuring dozens of paper-thin layers that peel apart with a satisfying hiss of steam. We love the rich, buttery flavor that defines each bite, and the way the exterior shatters slightly into golden crumbs while the inside remains soft and tender. They serve as the perfect vessel for both sweet honey and savory jams, making them an incredibly versatile addition to any food board. The visual of those tall, laminated layers is an instant indicator of quality and care, turning a simple bread item into the most sought-after treat on the platter.
Ingredients
- 2 cups all-purpose flour
- 1 tablespoon baking powder
- 1/2 teaspoon baking soda
- 1 teaspoon salt
- 1/2 cup cold unsalted butter, cubed
- 3/4 cup cold buttermilk
- 1 tablespoon melted butter (for brushing)
How to make it
- Preheat your oven to 425°F (220°C) and line a baking sheet with parchment paper; the high heat is necessary to turn the water in the butter into steam, which creates the layers.
- Whisk the flour, baking powder, baking soda, and salt in a large bowl.
- Add the cold, cubed butter to the flour and use a pastry cutter or your fingertips to work it in until the mixture resembles coarse meal with some pea-sized chunks of butter remaining.
- Make a well in the center, pour in the cold buttermilk, and stir with a fork just until a shaggy dough forms—do not overwork it.
- Turn the dough onto a floured surface and gently pat it into a rectangle, then fold it in thirds like a letter; repeat this folding process 3-4 times to create the internal layers.
- Pat the dough down to 1-inch thickness and cut out circles using a sharp biscuit cutter, pressing straight down without twisting (twisting seals the edges and prevents rising).
- Place the biscuits close together on the sheet so they help each other rise upward, brush the tops with melted butter, and bake for 12-15 minutes until golden brown.
How to bake banana bread?
Why we love this
Banana bread is the ultimate ‘nostalgia’ bake, filling the entire house with a sweet, caramelized aroma that is synonymous with comfort. We love the dense, moist crumb that comes from perfectly overripe bananas, and the way the crust develops a dark, chewy sweetness that contrasts with the soft interior. It’s a hearty, reliable snack that feels substantial and wholesome, especially when served in thick, buttered slices. The deep golden hue and the visible flecks of fruit make it a beautiful, rustic addition to a viral board, promising a flavor that is both deeply familiar and universally loved.
Ingredients
- 3 very ripe bananas, mashed
- 1/3 cup melted butter
- 3/4 cup sugar
- 1 egg, beaten
- 1 teaspoon vanilla extract
- 1 teaspoon baking soda
- Pinch of salt
- 1 1/2 cups all-purpose flour
How to make it
- Preheat your oven to 350°F (175°C) and butter a 4×8 inch loaf pan, ensuring the corners are well-coated to prevent sticking.
- In a large mixing bowl, mash the ripe bananas with a fork until they are mostly smooth with just a few small chunks for texture.
- Stir the melted butter into the mashed bananas until fully combined, followed by the sugar, beaten egg, and vanilla extract.
- Sprinkle the baking soda and salt over the mixture and stir well to ensure the leavening agent is distributed throughout the wet base.
- Add the flour last, folding it in gently with a spatula only until the white streaks disappear; overmixing at this point will make the bread tough and rubbery.
- Pour the batter into the prepared loaf pan and smooth the top, perhaps adding a sprinkle of sugar or a split banana on top for visual flair.
- Bake for 50 to 60 minutes, checking at the 50-minute mark; the loaf is done when a tester inserted into the center comes out clean and the top is a deep, rich golden brown.
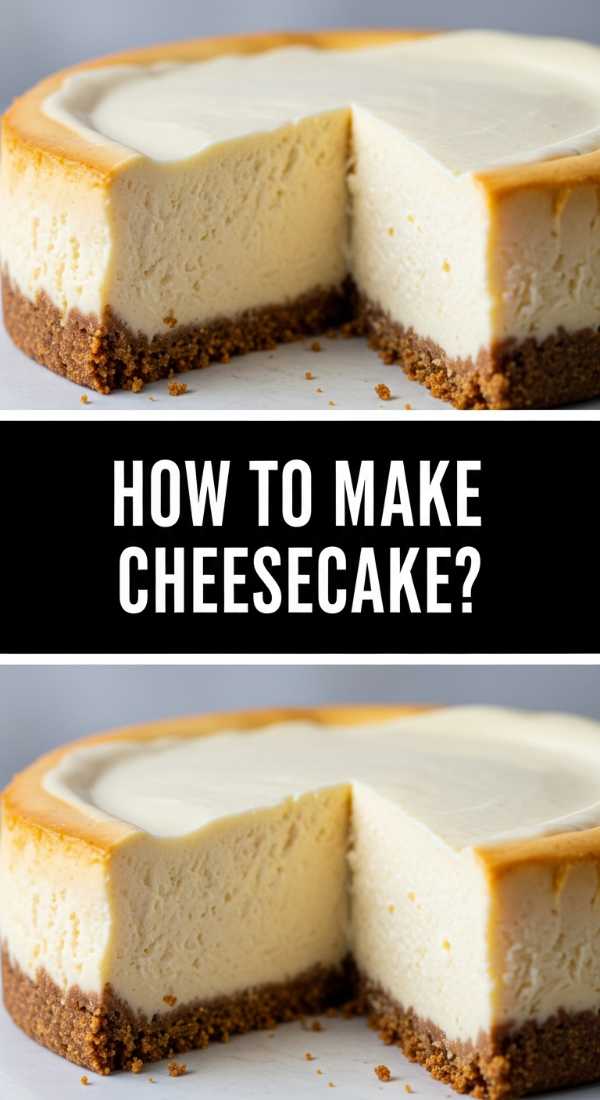
How to make creamy cheesecake?

Why we love this
A truly creamy cheesecake is the height of dessert sophistication, offering a silky, dense, and velvety texture that feels incredibly luxurious on the tongue. We love the sharp, tangy contrast of the cream cheese against the buttery, slightly salty crunch of a graham cracker crust. It’s a decadent experience that manages to be both rich and refreshing, especially when paired with fresh fruit or a tart coulis on a snack board. The pristine, ivory surface of a well-baked cheesecake is a visual delight, signaling a level of craft and patience that elevates the entire food presentation to a gourmet level.
Ingredients
- 1 1/2 cups graham cracker crumbs
- 1/4 cup melted butter
- 24 oz cream cheese, room temperature
- 1 cup granulated sugar
- 1 cup sour cream, room temperature
- 1 tablespoon vanilla extract
- 3 large eggs, room temperature
How to make it
- Preheat your oven to 325°F (165°C) and wrap the outside of a 9-inch springform pan with two layers of heavy-duty aluminum foil to prevent water from seeping in during the water bath.
- Mix the graham cracker crumbs and melted butter, press firmly into the bottom of the pan, and bake for 10 minutes to set the crust.
- In a large bowl, beat the room-temperature cream cheese and sugar on medium speed until completely smooth and lump-free—this is the most critical step for a creamy texture.
- Add the sour cream and vanilla, mixing until just combined, then add the eggs one at a time on low speed, mixing only until the yellow disappears to avoid incorporating too much air.
- Pour the batter over the crust and place the springform pan inside a larger roasting pan; fill the roasting pan with hot water until it reaches halfway up the sides of the cheesecake pan.
- Bake for 60-70 minutes until the edges are set but the center still has a slight jiggle like gelatin.
- Turn off the oven and crack the door open, letting the cheesecake cool inside for one hour before moving it to the fridge for at least 6 hours; this slow cooling prevents the top from cracking.
How to bake golden cornbread?

Why we love this
Golden cornbread is a celebration of texture and rustic charm, boasting a beautiful crumbly interior and a crisp, buttery edge that sings of home cooking. We love the balance of savory corn flavor with a hint of honeyed sweetness, and the way the vibrant yellow hue brightens up any food arrangement. It feels hearty and honest, providing a wonderful textural counterpoint to softer items on the board. When sliced into neat squares or rustic wedges, it invites you to crumble a piece off and enjoy the grainy, satisfying mouthfeel that only high-quality cornmeal can provide.
Ingredients
- 1 cup all-purpose flour
- 1 cup yellow cornmeal
- 1/4 cup granulated sugar
- 1 tablespoon baking powder
- 1/2 teaspoon salt
- 1 cup buttermilk
- 1/3 cup melted butter
- 1 large egg
How to make it
- Preheat your oven to 400°F (200°C) and grease an 8-inch square baking pan or a cast-iron skillet for the best crispy edges.
- In a large bowl, whisk together the flour, cornmeal, sugar, baking powder, and salt until there are no clumps of flour visible.
- In another bowl, whisk the buttermilk, melted butter, and egg until the mixture is a uniform pale yellow.
- Pour the wet ingredients into the dry ingredients and stir with a large spoon until just combined; the batter should be slightly thick and lumpy.
- For a pro tip: if using a cast-iron skillet, place the greased skillet in the oven for 5 minutes before pouring the batter in; the sizzle creates a superior golden crust.
- Pour the batter into the pan, spreading it to the corners, and bake for 20-25 minutes.
- The cornbread is finished when the top is golden brown and a toothpick inserted in the center comes out clean; let it rest for 5 minutes before slicing to allow the structure to set.
How to bake crispy focaccia?
[IMAGE_10]
Why we love this
Focaccia is the ultimate sensory bread, defined by its deep dimples filled with pools of golden olive oil and a generous sprinkling of flaky sea salt. We love the incredible contrast between the bottom—fried to a golden crisp in the pan—and the airy, bubbly interior that is light as a feather. The aroma of rosemary and olive oil is intoxicating, drawing everyone to the board before the meal even begins. It’s a social bread, designed to be torn by hand and shared, making it the perfect interactive element for a viral board that prizes both beauty and communal eating.
Ingredients
- 4 cups all-purpose flour
- 2 teaspoons salt
- 2 1/4 teaspoons instant yeast
- 2 cups warm water
- 1/2 cup extra virgin olive oil, divided
- Fresh rosemary and flaky sea salt for topping
How to make it
- In a large bowl, whisk the flour, salt, and instant yeast together.
- Add the warm water and stir with a sturdy spoon until a sticky, shaggy dough forms; no kneading is required, but ensure all flour is hydrated.
- Pour 2 tablespoons of olive oil into a clean bowl, transfer the dough to it, cover tightly, and refrigerate for 12 to 24 hours—this slow fermentation is what creates those iconic bubbles.
- Grease a 9×13 inch baking pan with 2 tablespoons of olive oil, move the cold dough to the pan, and let it rise in a warm spot for 2-3 hours until it fills the pan and looks puffy.
- Preheat your oven to 425°F (220°C).
- Drizzle the remaining olive oil over the dough and, using oiled fingertips, press straight down into the dough to create deep dimples all over the surface.
- Sprinkle with fresh rosemary and sea salt, then bake for 20-25 minutes until the top is deeply golden and the bottom is crisp when lifted with a spatula.
Conclusion: Your Board, Your Rules
Building the perfect viral snack board is about more than just following recipes; it’s about the joy of assembly and the thrill of seeing people enjoy your creations. By mastering these ten baking essentials, you have a toolkit that allows you to mix and match textures, flavors, and colors. Remember to fill the gaps with fresh fruits, nuts, and perhaps a few sprigs of mint to bring that professional ‘viral’ look to life. Now, go forth and bake—your perfect board is only a few steps away!