

Beyond the Surface: Master the Art of Vibrant 3D Nail Designs
Hello, my loves. Welcome back to our cozy little corner of the internet. Today, I want you to take a deep breath, let your shoulders drop, and imagine your hands as a canvas for the beautiful, vibrant soul you carry inside. There is something so deeply meditative about the rhythmic stroke of a brush and the way a tiny gemstone can catch the light, reminding us that we deserve to sparkle in every little detail of our lives.
I’ve spent the last few afternoons experimenting with textures that literally pop off the nail—3D designs that feel like tiny sculptures you get to carry with you. Whether you’re sipping a latte or typing away at your desk, these designs are a soft whisper of joy to your day. Let’s dive into these tutorials together, heart-first, and discover the magic you can create right at your vanity.
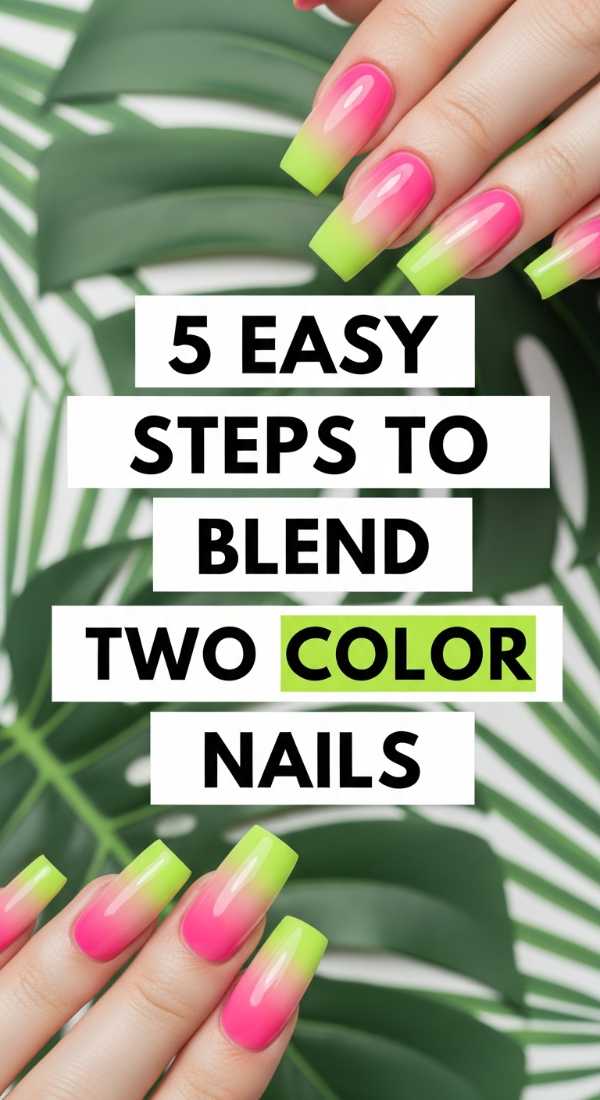
5 Easy Steps to Blend Two Color Nails
Why to love this recipe:
This is like a soft sunset caught on your fingertips. Blending two colors is the ultimate way to show the harmony between different parts of your personality. It’s gentle, dream-like, and incredibly forgiving for beginners.
Essential Ingredients:
- Two contrasting gel polishes
- A makeup wedge sponge
- Liquid latex or cuticle guard
- High-shine top coat
How to Prepare:
- Apply a base coat and your lighter color as the foundation.
- Apply liquid latex around your cuticles to keep things tidy.
- Paint stripes of both colors directly onto the makeup sponge.
- Dab the sponge onto the nail repeatedly until the colors melt together.
- Seal with a top coat while still slightly tacky for a seamless finish.
Budget Range
- Wet n Wild Spoiled Polish ($2.00)
- Generic Makeup Sponges ($1.50)
Apply Your Color Street Nails in 4 Quick Stages

Why to love this recipe:
Sweethearts, we all have those weeks where time feels like sand through our fingers. These dry-strip wonders give you that salon-perfect 3D look without the wait time. It’s self-care for the woman on the move.
Essential Ingredients:
- Color Street nail strips
- Alcohol prep pads
- Glass nail file
- Rubber cuticle pusher
How to Prepare:
- Cleanse your nails thoroughly with alcohol to remove any natural oils.
- Peel the clear cover and the polish strip from the backing.
- Center the strip on your nail and press firmly from the center outward.
- Gently fold the excess over the tip and file downward to remove.
Budget Range
- Color Street Mainline Sets ($12.00 – $14.00)
Create 3 Stunning Styles of Nails Colorful Art

Why to love this recipe:
This is where we let our inner child play! Using different textures like matte, gloss, and 3D gems creates a tactile experience that is just so satisfying. It’s a celebration of variety and joy.
Essential Ingredients:
- Multi-colored rhinestone kit
- Matte top coat
- Gold leaf flakes
- Pointed tweezers
How to Prepare:
- Apply your base colors; try a different hue on every other finger.
- Apply matte top coat to your thumb and ring finger for contrast.
- Place tiny 3D rhinestones near the cuticle using a dab of top coat as glue.
- Add gold leaf flakes to the glossy nails for a touch of luxury.
Budget Range
- Amazon Nail Art Rhinestone Box ($8.99)
- Essie Matte About You ($10.00)
Design 6 Vibrant Multicolor Nails for Summer

Why to love this recipe:
Summer is a state of mind, my darlings. These vibrant looks are like a cool splash of water on a hot day. They are bold, uninhibited, and ready for adventure.
Essential Ingredients:
- Neon polish set (Pink, Orange, Yellow, Green, Blue, Purple)
- Fine liner brush
- White stamping polish
How to Prepare:
- Paint each nail a different neon shade to create a rainbow effect.
- Use the liner brush to create 3D ‘drip’ effects using a thicker builder gel.
- Cure the gel and paint over the raised areas with matching neon.
- Add white accents to make the colors pop.
- Finish with a UV-protective top coat.
- Repeat for all 6 summer variations (dots, swirls, stripes).
Budget Range
- Beetles Neon Gel Set ($15.99)
- Modelones Liner Brushes ($6.00)
Try 5 Genius Colorful Nail Inspo Ideas

Why to love this recipe:
Sometimes we just need a little spark to light the fire of creativity. These ideas combine negative space with 3D elements, creating a look that is sophisticated yet whimsical.
Essential Ingredients:
- Clear builder gel
- Pastel polish collection
- Dotting tools
- Striping tape
How to Prepare:
- Leave a ‘window’ of clear nail and frame it with striping tape.
- Fill the frame with a soft pastel shade.
- Use builder gel to create small 3D ‘bubbles’ over the clear section.
- Cure until hard and wipe with alcohol.
- Experiment with different geometric shapes for the remaining 4 ideas.
Budget Range
- Zoya Pastel Collection ($12.00 per bottle)
- Nail Art Dotting Tool Set ($4.50)
Sculpt 4 Bold Colourful Acrylic Nails at Home

Why to love this recipe:
There is such power in building something from scratch. Sculpting your own acrylics allows you to control the shape and the depth of the 3D art embedded within the nail.
Essential Ingredients:
- Acrylic liquid (monomer) and powder (polymer)
- Nail forms
- Dappen dish
- Kolinsky acrylic brush
How to Prepare:
- Prep the natural nail and secure the nail form underneath.
- Dip your brush into the monomer then the powder to create a bead.
- Press and pat the bead onto the form to create your desired length.
- Embed dried flowers or glitter into the wet acrylic for a 3D effect.
Budget Range
- Mia Secret Acrylic Starter Kit ($25.00)
- Saviland Acrylic Powder Set ($18.00)
Style 3 Exotic Colorful Stiletto Nails Today

Why to love this recipe:
Stiletto nails are for the days when you feel fierce and unstoppable. Adding exotic 3D patterns like snake scales or tropical blooms makes them a true statement piece.
Essential Ingredients:
- Extra-long stiletto nail tips
- 3D flower charms
- Chrome powder
- Strong nail glue
How to Prepare:
- Apply the stiletto tips and blend the seam.
- Apply a base of deep emerald or sunset orange.
- Buff chrome powder over the surface for a metallic sheen.
- Glue a large 3D flower charm at the base of the accent nail.
Budget Range
- Una Gella Stiletto Tips ($9.99)
- Born Pretty Chrome Powder ($7.00)
Finish 5 Artistic Two Color Nails Designs

Why to love this recipe:
Art doesn’t have to be complicated to be moving. These two-color designs focus on symmetry and balance, bringing a sense of peace to your aesthetic.
Essential Ingredients:
- High-pigment cream polishes
- Detailing brush
- Matte and Glossy top coats
How to Prepare:
- Divide the nail vertically with a thin line of the second color.
- Fill in one side completely.
- On the other side, add 3D dots using the first color.
- Top one half with matte and the other with gloss.
- Repeat variations using horizontal and diagonal splits.
Budget Range
- Holo Taco Crème Polishes ($11.00)
Master 4 Techniques for Multicolor Nails

Why to love this recipe:
Learning a new skill is a gift to yourself. These techniques—from marble to stamping—expand your creative horizon and keep your nail game fresh and exciting.
Essential Ingredients:
- Water marble container
- Stamping plate
- Scraper card
- Silicone stamper
How to Prepare:
- Drop polish into room-temp water and swirl for a marble effect.
- Use the stamping plate for intricate 3D-looking lace patterns.
- Try ‘blooming gel’ for a watercolor 3D appearance.
- Layer sheer ‘jelly’ polishes for a stained-glass look.
Budget Range
- What Up Nails Stamping Plate ($8.00)
- Clear Jelly Stamper ($10.00)
Prepare 7 Trendy Colorful Stiletto Nails Looks

Why to love this recipe:
Being ‘on trend’ is just another way of connecting with the world around us. These stiletto looks are the talk of the town, blending high-fashion with cozy, wearable art.
Essential Ingredients:
- Iridescent flakes
- Gel paint
- UV LED Lamp
- Buffer block
How to Prepare:
- Shape the nails into sharp stilettos and buff the surface.
- Apply a ‘cat eye’ magnetic polish for shifting 3D depth.
- Use a magnet to create a crisp line of light.
- Apply iridescent flakes near the tips for a ‘crushed ice’ effect.
- Seal with two layers of top coat for ultimate durability.
Budget Range
- SUNUV LED Nail Lamp ($23.00)
- Mizhse Cat Eye Gel ($12.99)
Your Journey to Radiant Hands
My loves, I hope these tutorials inspire you to take a little time for yourself this weekend. Remember, nail art isn’t just about the finished look—it’s about the quiet moments of creation and the joy of expressing who you are. Your hands do so much for the world; let them be beautiful. Go forth and shine, you radiant souls!