

Mastering the Chaos: Your Guide to the Colorful Junk Nail Trend
Hello, my loves! Pull up a chair and let me pour you a virtual cup of chamomile. Today, we are talking about something that has been making my heart skip a beat lately: the beautiful, chaotic, and utterly joyful world of junk nails. It’s like a party on your fingertips, isn’t it? I know life can feel a bit messy sometimes, but what if we leaned into that mess and turned it into something vibrant and wearable? That is exactly what this trend is about—embracing the beautiful clutter of our own creativity.
I used to think my nails had to be perfectly uniform, but honestly, there is so much freedom in the ‘junk’ aesthetic. It’s about charms, textures, and colors that shouldn’t work together but somehow create a masterpiece of personality. Whether you are a minimalist trying to break free or a maximalist ready to soar, I am here to hold your hand through this ultimate masterclass. Let’s create something that makes you smile every time you look down at your keyboard or reach for your morning coffee.
The 7 Steps to Create Multi-Colored Nails

Why to love this recipe:
This process is like a gentle meditation. By focusing on each individual nail as its own canvas, you allow yourself to play with a spectrum of emotions. It’s the perfect way to use up those half-empty bottles at the back of your drawer and give them a new, sparkling life.
Essential Ingredients:
- 5-10 different gel or regular polish shades
- Nail dehydrator
- Base coat
- Fine detail brush
- Glossy top coat
- Cuticle oil
- Patience and a playlist that makes you feel happy
How to Prepare:
- Cleanse each nail with a dehydrator to ensure a smooth, lasting bond.
- Apply a thin, even layer of base coat and cure if using gel.
- Pick your first shade and paint your thumb; don’t worry about the others yet!
- Select a contrasting or complementary shade for your index finger.
- Repeat for each finger, alternating colors or even mixing two on one nail.
- Apply a second coat to each to ensure the pigments are rich and deep.
- Seal the rainbow with a high-shine top coat to lock in the magic.
Budget Range
- OPI Infinite Shine Polishes ($13.00)
- Essie Expressie Quick-Dry ($10.00)
- Holo Taco Rainbow Bundle ($70.00)
Design 5 Viral Colorful Nail Designs

Why to love this recipe:
These designs are the ones currently taking over my explore feed, and for good reason! They represent the peak of junk nail culture—bold, unapologetic, and completely unique to the person wearing them. It’s about storytelling through tiny charms and swirls.
Essential Ingredients:
- 3D Nail charms (bows, gummy bears, hearts)
- Chrome powder
- Dotting tool
- Nail glue or thick builder gel
- Matte and glossy top coats
How to Prepare:
- The Mismatched Aura: Use a sponge to dab a bright center color over a different base.
- The Charm Bomb: Apply a thick bead of builder gel and nestle in 3-4 different charms per nail.
- The Checkerboard Remix: Use a dotting tool to create a colorful grid on just two accent nails.
- The Chrome Drip: Paint a solid color and use a detail brush to paint silver chrome ‘drips’ from the cuticle.
- The Fruit Salad: Use tiny clay fruit slices embedded in clear gel for a 90s nostalgia vibe.
Budget Range
- Amazon Nail Charm Bulk Pack ($8.99)
- Daily Charme Chrome Powder ($15.00)
- Makartt Rhinestone Glue ($9.99)
Mix Different Color Nails in 4 Steps
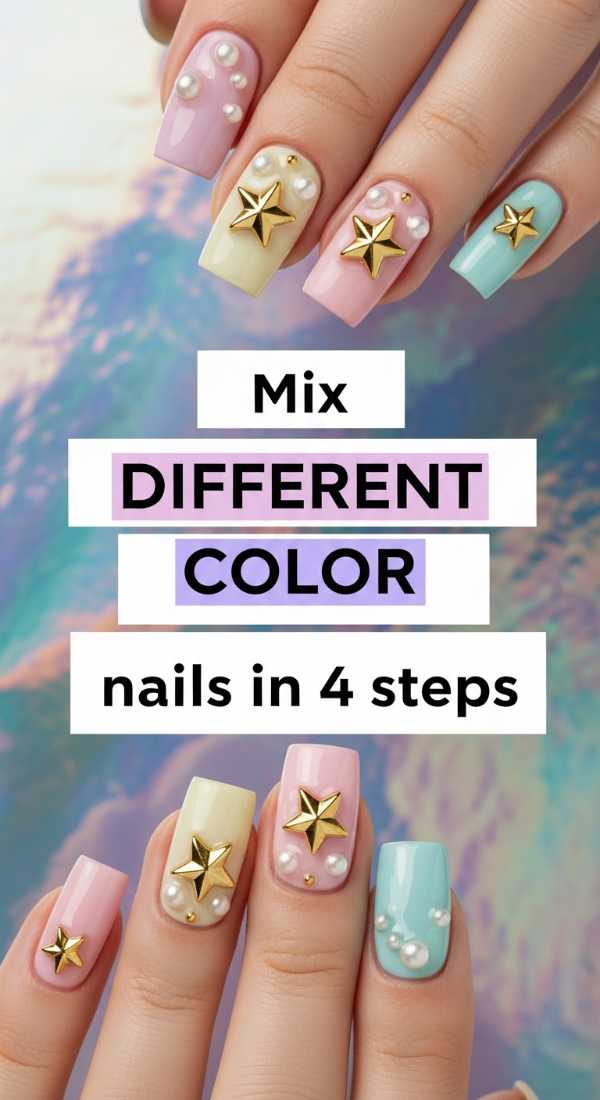
Why to love this recipe:
Sometimes the hardest part of the junk nail trend is knowing which colors ‘go’ together. This method takes the stress out of the decision-making process, allowing you to create a harmonious palette that still feels wonderfully wild.
Essential Ingredients:
- Color wheel (or a quick Google search)
- Primary color polishes
- Mixing palette
- Lint-free wipes
How to Prepare:
- Identify your ‘anchor’ color—the one you are vibing with most today.
- Find its neighbors (analogous) or its opposite (complementary) on the color wheel.
- Test the combination on a piece of clear plastic or a mixing palette first.
- Apply the chosen mix across your hand, ensuring at least one color repeats twice to anchor the look.
Budget Range
- Artistic Color Gloss Polishes ($15.00)
- Sally Hansen Insta-Dri ($7.00)
- Modelones Gel Polish Set ($20.00)
Assemble Colorful Junk Nails in 8 Minutes

Why to love this recipe:
This is for my busy loves who want the high-fashion look without spending four hours in a chair. It’s the ‘fast food’ of nail art but looks like a five-course meal. It’s efficient, effective, and oh-so-fun.
Essential Ingredients:
- Pre-painted press-on nails
- Fast-setting nail glue
- Assorted ‘junk’ (beads, sequins, stickers)
- Tweezers
How to Prepare:
- Lay out all 10 press-ons on your table.
- Apply stickers or decals rapidly to each nail in a random pattern.
- Place a small dot of glue on three key spots per nail.
- Drop charms onto the glue with tweezers, pressing down for 5 seconds.
- Apply a quick-dry top coat over everything but the 3D charms.
- Press the finished nails onto your natural beds—done!
Budget Range
- KISS Voguish Manicure Press-ons ($8.00)
- Beetles Nail Glue ($7.00)
- Decal Sticker Sheets ($5.00)
Get Perfect Color Nails in 5 Stages

Why to love this recipe:
The secret to the junk nail trend isn’t just the ‘junk’—it’s the ‘perfect’ base underneath. This stages-of-perfection approach ensures that your nails look professional and clean, even when they are covered in colorful chaos.
Essential Ingredients:
- Glass nail file
- Cuticle remover
- Buffing block
- High-pigment polish
- Precision cleanup brush
- Acetone
How to Prepare:
- Stage 1 (Prep): Shape with a glass file and push back cuticles gently.
- Stage 2 (Prime): Buff the surface to remove shine and apply a sticky base coat.
- Stage 3 (Color): Apply polish in three strokes (middle, side, side) for a streak-free finish.
- Stage 4 (Cleanse): Dip a brush in acetone to clean up any edges around the skin.
- Stage 5 (Seal): Wrap the tip of the nail with top coat to prevent chipping.
Budget Range
- Germanikure Glass File ($12.00)
- Blue Cross Cuticle Remover ($6.00)
- Zoya Professional Polish ($12.00)
Ombre Two Color Nails in 3 Steps

Why to love this recipe:
Ombre is the softest way to transition between colors. It adds a dreamy, airbrushed quality to your junk nails that balances out the chunky charms. It’s like a sunset on your fingers.
Essential Ingredients:
- Makeup sponge (wedge)
- Two coordinating polish colors
- Liquid latex or tape (optional)
How to Prepare:
- Paint your base color (the lighter of the two) and let it dry completely.
- Paint two horizontal stripes of the colors directly onto the makeup sponge.
- Dab the sponge repeatedly onto the nail, moving it slightly up and down to blur the line.
Budget Range
- Wedge Makeup Sponges ($3.00)
- Pueen Liquid Latex ($9.00)
- Cirque Colors Creme Polishes ($12.50)
Apply Color Street Nails in 60 Seconds

Why to love this recipe:
For the soul who wants color but has a shaky hand, Color Street is a gift. These real nail polish strips allow you to get intricate patterns and bold colors instantly. It’s the ultimate shortcut to a vibrant base.
Essential Ingredients:
- Color Street strip pack
- Prep pad (alcohol)
- Your own fingernails!
How to Prepare:
- Wipe nails with the prep pad to remove oils.
- Peel the strip and align the rounded end with your cuticle.
- Press down firmly and fold the excess over the tip, using your thumbnail to ‘cut’ the strip away.
Budget Range
- Color Street Solids/Glitters ($11.00 – $14.00)
Keep Nails Colorful with 4 Easy Hacks
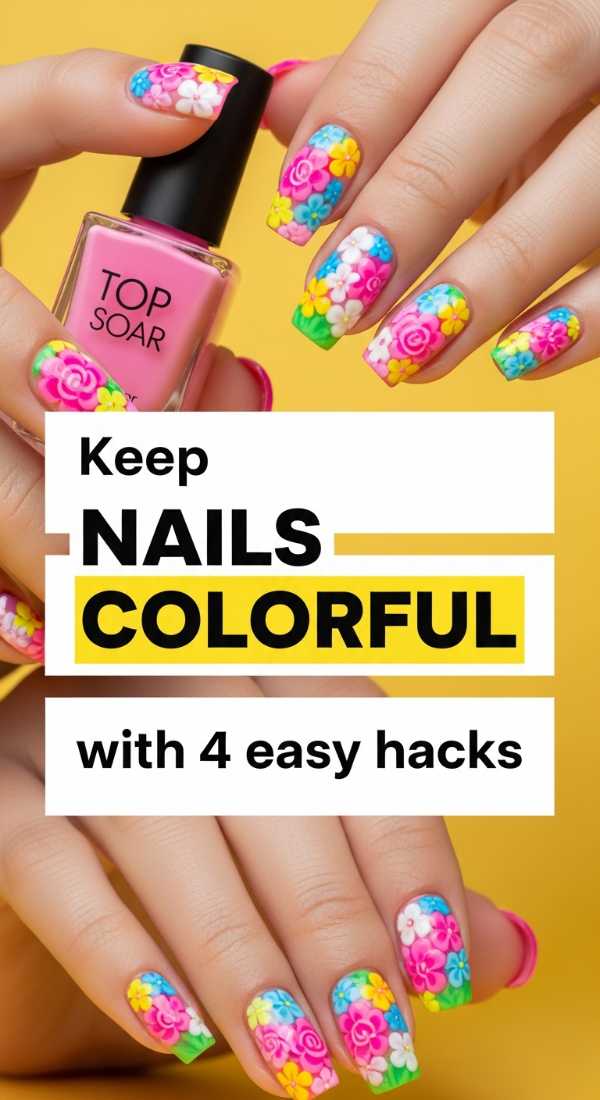
Why to love this recipe:
There is nothing more heartbreaking than a beautiful set losing its spark. These hacks are the gentle care your nails deserve to stay as bright as the day you painted them. It’s self-care in its simplest form.
Essential Ingredients:
- UV-protective top coat
- Rubber gloves
- Vitamin E oil
- Sunscreen for hands
How to Prepare:
- Re-apply a thin top coat every 3 days to refresh the shine.
- Always wear gloves when washing dishes—hot water is the enemy of color!
- Massage oil into your cuticles every night to keep the surrounding skin soft and healthy.
- Apply sunscreen to your hands to prevent the sun from fading your vibrant pigments.
Budget Range
- Seche Vite Dry Fast Top Coat ($9.00)
- SolarOil Cuticle Oil ($12.00)
- CeraVe Hand Cream with SPF ($14.00)
Layer Multicolor Nails in 6 Simple Steps

Why to love this recipe:
Layering creates depth. When you look closely at a junk nail, you should see layers of color and texture. This technique builds a 3D story that looks incredibly expensive and high-end.
Essential Ingredients:
- Sheer ‘jelly’ polishes
- Glitter toppers
- Iridescent flakes
- Clear builder gel
How to Prepare:
- Apply a sheer base color.
- Add a scattered layer of iridescent flakes while the polish is tacky.
- Paint another layer of sheer polish over the flakes (sandwiching them).
- Add a touch of glitter only at the tips.
- Apply a final clear gel layer to create a ‘glass’ effect.
- Cure or dry thoroughly for a multi-dimensional finish.
Budget Range
- Cirque Colors Jelly Collection ($12.50 each)
- KBShimmer Flake Toppers ($11.00)
- Orly Builder in a Bottle ($20.00)
Sculpt Colourful Acrylic Nails in 10 Steps

Why to love this recipe:
This is for the brave hearts! Sculpting allows you to control the shape and length, providing the perfect sturdy platform for the heaviest ‘junk’ charms. It’s true artistry in action.
Essential Ingredients:
- Acrylic powder (colored)
- Monomer
- Acrylic brush (Kolinsky)
- Nail forms
- Dappen dish
How to Prepare:
- Sanitize and prep the natural nail surface.
- Apply a nail form snugly under the free edge.
- Dip brush into monomer, then into colored powder to create a bead.
- Place the bead at the junction of the nail and form to create the length.
- Apply a second bead near the cuticle to create the ‘apex’ (strength).
- Shape the sidewalls while the acrylic is still slightly pliable.
- Wait for the acrylic to ‘click’ (dry).
- File into your desired shape (coffin or almond works best for junk nails).
- Buff to a smooth finish.
- Apply a glossy gel top coat and cure.
Budget Range
- Young Nails Acrylic Kit ($45.00)
- Mia Secret Colored Acrylic Powder ($8.00)
- Pana Acrylic Brush ($15.00)
Embrace Your Inner Artist
My dears, I hope you feel inspired to go forth and create something wonderfully chaotic. Remember, in the world of junk nails, there are no mistakes—only ‘accidental additions.’ Your hands do so much for you every day; why not reward them with a little bit of wearable art? Whether you go for the full 3D charm experience or a soft ombre, let it be a reflection of your beautiful, colorful soul. Stay bright, stay messy, and most importantly, stay true to you.
Frequently Asked Questions
Find answers to common questions about the junk nail trend below.