

Have you ever found yourself scrolling through those glossy architectural magazines, sighing at the sight of a sprawling, multi-million dollar estate and thinking, ‘If only I had that budget’? I’ve been there, sipping my lukewarm coffee while staring at my slightly overgrown backyard, dreaming of a sanctuary that feels like a five-star resort. But here is the secret I’ve learned after years of trial, error, and a lot of sawdust: luxury isn’t about the price tag; it’s about the intention, the textures, and the little details that make a space feel curated.
Today, we are rolling up our sleeves to bridge that gap. We’re taking those high-end design principles—symmetry, natural materials, and sensory layers—and bringing them to your own doorstep. Whether you have a sprawling lawn or a cozy urban patio, these DIY projects are designed to elevate your exterior into a sophisticated retreat that looks like you hired a professional landscaping firm (even if you just spent the weekend in your gardening gloves).
How to Create a Chic Garden Sanctuary for Serene Wildlife Watching

Why we love this
There is something deeply grounding about starting your morning with the soft chirp of a goldfinch or the gentle hum of a pollinator among the blooms. This sanctuary isn’t just a garden; it’s a living tapestry of colors and sounds that brings the rhythm of nature right to your window. Imagine the scent of damp earth and blooming jasmine mingling as you watch butterflies dance across purple salvia, creating a serene, meditative pocket of peace that feels miles away from the chaos of daily life.
Essential Elements:
- Native flowering plants (Coneflowers, Milkweed, Bee Balm)
- A multi-tiered stone water feature or birdbath
- A comfortable, weather-resistant teak or wicker armchair
- Strategic bird feeders with squirrel guards
- Natural cedar mulch for a clean, forest-floor aesthetic
How to make it
- Begin by selecting a quiet corner of your yard that receives at least 6 hours of sunlight. Clear the area of weeds and grass, ensuring you have a clean slate of nutrient-rich soil.
- Install your water feature first, as this serves as the anchor for the sanctuary. If using a solar-powered fountain, ensure the panel is placed in direct light. The sound of trickling water is vital for attracting birds.
- Plant your native flora in ‘drifts’ rather than single spots. Grouping 3-5 of the same plant together creates a high-end, intentional look and makes it easier for pollinators to find them.
- Place your seating at least five feet away from the main feeding and watering area. This provides enough distance so you don’t startle the wildlife, but close enough to appreciate the fine details of their feathers and wings.
- Top the soil with a thick, 3-inch layer of dark cedar mulch. This suppresses weeds, retains moisture, and provides that crisp, professional finish seen in luxury estates.
How to Design a Dreamy Front Entrance for Instant Curb Appeal

Why we love this
Your front entrance is your home’s first impression, and it should feel like a warm, sophisticated hug every time you arrive. By layering textures like matte black metal against organic greenery and warm wood, you create a visual transition from the public world to your private sanctuary. The combination of symmetrical planters and glowing warm light creates an atmosphere of organized elegance that instantly signals a well-loved and high-value home.
Essential Elements:
- Oversized black or stone planters
- Coordinating door hardware in a modern finish
- High-quality, thick fiber doormat with a minimalist design
- Symmetrical boxwoods or architectural grasses
- Statement house numbers with a clean font
How to make it
- Start by deep-cleaning your entryway. Power wash the porch and steps, and give your front door a fresh coat of paint in a classic, high-contrast color like Charcoal, Navy, or Sage Green.
- Swap out dated hardware. Install a heavy-duty, modern handle set and matching deadbolt. The weight and feel of the hardware are subtle cues for quality and luxury.
- Place two identical, oversized planters on either side of the door. Scale is key here; most people choose planters that are too small. Aim for at least 24 inches in height for a dramatic, high-end impact.
- Fill the planters with evergreen shrubs like Boxwood or Skimmia for year-round structure, then layer in seasonal white flowers for a crisp, clean palette.
- Mount new house numbers horizontally or vertically, ensuring they are perfectly level. Use a spacer kit to give them a ‘floating’ effect, which adds a sophisticated shadow line against your home’s exterior.
How to Build Modern Cedar Planters for a Luxury Patio Vibe

Why we love this
Cedar is the gold standard for outdoor DIY because of its natural resistance to rot and its stunning, warm grain that ages into a graceful silver patina. These modern, clean-lined planters offer a structural element to your patio, acting as architectural ‘jewelry’ for your plants. The aroma of fresh-cut cedar combined with the crisp, vertical lines of the slats creates a high-end designer aesthetic that rivals furniture found in luxury boutiques.
Essential Elements:
- Weather-resistant Western Red Cedar boards (1×2 and 1×4)
- Exterior grade wood glue and stainless steel finish nails
- Landscape fabric for lining
- Heavy-duty casters (optional for mobility)
- Transparent UV-protectant sealer
How to make it
- Cut four 2×2 cedar posts to your desired height (24 inches is standard for a medium planter). These will serve as your internal corner supports.
- Measure and cut your 1×4 slats. For a square planter, ensure all slats are equal in length. For a modern look, leave a 1/4-inch gap between each horizontal slat as you nail them to the corner posts.
- Use a spacer block during assembly to ensure the gaps between slats are perfectly consistent; this precision is what separates a DIY project from a professional piece.
- Assemble the base using 1×4 boards, ensuring you drill drainage holes every 4 inches to prevent root rot.
- Line the interior with landscape fabric, stapling it to the top inner edge. Finish the exterior with a transparent sealer to maintain the cedar’s warm orange-red hue, or leave it natural to silver over time.
How to Arrange a Safe Outdoor Play Zone for Endless Family Fun

Why we love this
A luxury play zone is one that blends seamlessly into the landscape rather than cluttering it with primary-colored plastic. We love this approach because it treats play as an aesthetic experience, using natural textures like smooth wood and soft rubber mulch to create a destination for imagination. The sound of children’s laughter against a backdrop of organized, beautiful equipment makes your backyard feel like a private park designed for both joy and style.
Essential Elements:
- Natural wood play structure or swing set
- Premium rubber mulch in a neutral ‘earth’ tone
- Timber or stone border to contain the zone
- Shade sail in a modern cream or sand color
- Soft outdoor lighting for twilight play
How to make it
- Define the perimeter of the play zone using pressure-treated 4×4 timbers or decorative landscape stones. Excavate the area to a depth of 4 inches to allow for proper cushioning.
- Lay down a heavy-duty weed barrier fabric, securing it with landscape staples to ensure no grass pokes through your clean play surface.
- Fill the area with high-quality rubber mulch. Choose a ‘bark’ color to mimic the look of natural wood chips while providing a much higher safety rating for falls.
- Install your play equipment, ensuring all anchors are buried deep and leveled. If using a pre-made wooden set, apply a high-end wood stain to match your home’s trim or deck.
- Add a UV-rated shade sail overhead, anchoring it to sturdy posts or the side of your home. This not only protects from the sun but adds a sophisticated geometric layer to the yard.
How to Source Charming Play Kitchen Details for Magical Toddler Mornings

Why we love this
There is nothing more enchanting than watching a toddler ‘cook’ a mud pie seasoned with fallen leaves and sunshine. This project is all about the tactile joy of miniature living—tiny brass hooks clinking, the feel of smooth wooden spoons, and the smell of fresh mint picked from a nearby pot. It transforms a simple play area into a whimsical, high-design vignette that encourages sensory play and looks absolutely adorable in family photos.
Essential Elements:
- Vintage-style brass hooks and pulls
- Stainless steel or wooden ‘cookware’
- A small, weather-safe wooden bench or table
- Miniature herb garden (Mint, Rosemary)
- Outdoor-rated chalkboard for ‘menus’
How to make it
- Repurpose an old wooden nightstand or build a simple frame using scrap cedar. Sand all edges until they are buttery smooth to protect little hands.
- Install high-quality hardware. Instead of plastic, use real brass or matte black hooks for hanging spoons and pans. This ‘real-life’ weight makes the experience more engaging for children.
- Mount a small chalkboard on the back splash area. Use a high-quality chalk marker to write a ‘Daily Menu’ of mud-inspired delicacies.
- Attach a small window box or several small pots to the side of the kitchen. Fill them with hardy herbs like rosemary and mint, which can withstand ‘harvesting’ by curious toddlers.
- Place the kitchen on a flat, stable surface like a deck or a paved area to ensure it doesn’t wobble during enthusiastic ‘whisking’ sessions.
How to Style a Backyard Spa Oasis for Total Weekend Relaxation
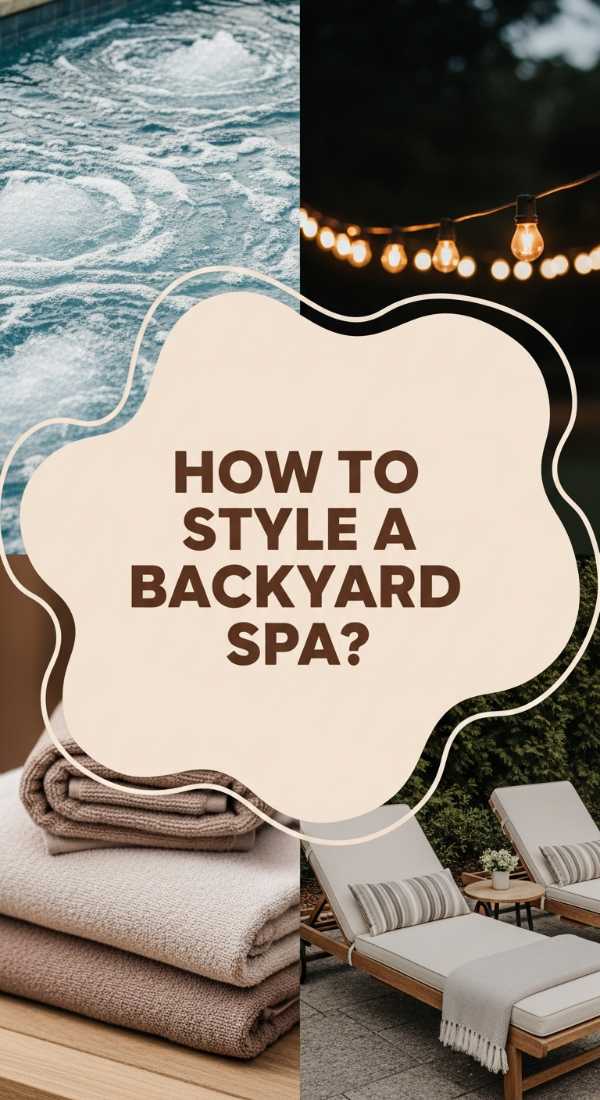
Why we love this
Imagine the steam rising into the cool evening air while the scent of eucalyptus surrounds you—this is the ultimate in backyard luxury. Creating a spa oasis is about closing off the rest of the world and indulging in total relaxation. The contrast of warm water, soft textiles, and ambient lighting creates a sensory experience that lowers the heart rate and makes every weekend feel like a high-end retreat in the mountains.
Essential Elements:
- Portable or built-in hot tub
- Cedar privacy screens or tall potted bamboos
- Outdoor towel rack with plush, white oversized towels
- Waterproof Bluetooth speakers for ambient soundscapes
- Waterproof floor cushions and a low teak table
How to make it
- Position your spa in a corner of the yard that offers the most privacy. If you don’t have natural cover, build three-sided cedar slat screens to create an ‘outdoor room’ feel.
- Create a ‘dry zone’ immediately next to the tub using oversized pavers or a small deck. This prevents mud from being tracked into the water and provides a clean surface for bare feet.
- Install a sturdy outdoor towel rack or a series of large hooks. Always keep a stack of fresh, white rolled towels nearby; the ‘spa white’ color is a classic luxury trope.
- Add a small teak table nearby for holding essential oils, a carafe of cucumber water, or a book.
- Layer your lighting. Use dimmable, warm-white LED strips tucked under the lip of the hot tub or along the base of the privacy screens to create a soft, indirect glow.
How to Reclaim Rustic Wood for a Whimsical Play Space

Why we love this
Reclaimed wood carries a history and a texture that new lumber simply cannot replicate. Using these weathered materials for a play space creates a ‘storybook’ vibe that feels like it’s been part of the garden for decades. We love the silver-grey tones of aged oak or pine against the vibrant green of the lawn; it creates a whimsical, organic look that feels more like a forest hideaway than a standard backyard play set.
Essential Elements:
- Sourced pallet wood or barn wood (heat-treated only)
- Heavy-duty sanding equipment
- Eco-friendly, non-toxic wood sealer
- Cotton canvas for a ‘roof’ or curtains
- Manila rope for rustic accents
How to make it
- Source your wood carefully. Look for ‘HT’ (Heat Treated) stamps on pallets to ensure they haven’t been treated with harmful chemicals. Old barn wood is also excellent but check for lead paint.
- The most critical step is sanding. Use a 60-grit sandpaper to remove splinters and rough patches, followed by a 120-grit for a smooth finish. This ensures the rustic look is safe for skin.
- Build a simple A-frame or ‘lean-to’ structure. Use the reclaimed planks as the floor and side walls, leaving gaps for ‘windows’ to let the light filter through.
- Seal the wood with a clear, matte outdoor sealer. This preserves the weathered color while preventing further rot or graying from moisture.
- Drape a piece of heavy cream canvas over the top of the frame, securing it with thick manila rope. This adds a soft, ‘glamping’ aesthetic to the rustic wood.
How to Assemble a Creative Sensory Station for Splashing Summer Joy

Why we love this
Water play is the heartbeat of summer, and a dedicated sensory station turns a simple hose-down into a sophisticated exploration of texture and physics. The cool touch of water, the smooth clink of river stones, and the bright colors of floating toys create a rich sensory environment. This station keeps the mess outside while looking like a deliberate, stylish part of your outdoor living design, rather than a cluttered toy box.
Essential Elements:
- Galvanized steel tubs or large wooden basins
- Polished river stones and sea glass
- Measuring cups and funnels in stainless steel or silicone
- Step-stools for easy access
- A dedicated ‘splash mat’ or gravel area for drainage
How to make it
- Choose a location with excellent drainage, such as a gravel path or a patch of grass that needs extra water. Avoid placing it on wooden decks where standing water might cause damage.
- Set up two or three galvanized tubs at varying heights. Use sturdy wooden crates or custom-built cedar stands to elevate them to a comfortable height for your children.
- Fill one tub with clean water and another with a ‘dry’ sensory element like large river stones or kinetic sand. This allows for ‘mixing’ and textured play.
- Provide high-quality tools. Avoid flimsy plastic; instead, use stainless steel kitchen scoops and silicone funnels that feel good in the hand and last for years.
- To keep it looking ‘designer’, choose a cohesive color palette for the toys—such as muted blues and greens—that complements the natural tones of your garden.
How to Construct a Living Privacy Screen for a Secluded Garden Retreat

Why we love this
There is nothing more luxurious than a ‘secret garden’ that feels completely shielded from the outside world. A living privacy screen offers a soft, breathing boundary that changes with the seasons. The scent of flowering vines like Star Jasmine or the rustle of tall grasses creates an immersive green wall that provides both visual privacy and a cooling effect during hot summer afternoons. It’s a sophisticated alternative to a cold, hard fence.
Essential Elements:
- Tall, narrow planters or a dedicated planting trench
- Sturdy trellis system (wire or wood lattice)
- Fast-growing climbers (Clematis, Honeysuckle, or Jasmine)
- Drip irrigation system for consistent moisture
- Organic fertilizer for lush growth
How to make it
- Install a vertical support system. For a high-end look, use stainless steel cables run horizontally between two wooden posts; this creates a ‘floating’ green wall effect.
- Select your plants based on your light levels. For shade, use climbing Hydrangea; for full sun, nothing beats the fragrance and density of Star Jasmine.
- Space your plants 12 to 18 inches apart to ensure they have room to grow but will eventually overlap to form a solid wall of greenery.
- Manually ‘train’ the young vines onto the trellis using soft garden ties. This ensures they grow upward and fill in the gaps evenly.
- Install a simple drip irrigation line along the base of the plants. Living screens require consistent water to maintain their density, and an automated system ensures they never look thirsty or sparse.
How to Illuminate a Moonlit Pathway for Enchanting Evening Glows

Why we love this
The magic of a home truly comes alive at dusk when the right lighting transforms paths into enchanting trails. Soft, low-level illumination guides the eye and highlights the textures of your landscaping that are often lost during the day. We love the ‘moonlight’ effect—subtle, warm, and inviting—that makes your garden feel like a high-end resort after the sun goes down, perfect for evening strolls with a glass of wine.
Essential Elements:
- Low-voltage LED path lights in a brass or black finish
- Solar-powered ‘fairy’ lights for trees and shrubs
- Flagstones or pea gravel for the path material
- A digital timer or smart-home lighting controller
- Landscape staples for hiding wires
How to make it
- Map out your path with a gentle curve rather than a straight line. Curves feel more organic and expensive. Lay your flagstones or pour your gravel first.
- Position your lights every 4-6 feet, staggering them on either side of the path. Never place them in a perfectly straight line, as this creates a ‘runway’ look that lacks sophistication.
- Angle the light heads downward. The goal is to illuminate the ground and the plants, not to shine light into people’s eyes. This ‘downlighting’ technique is a professional secret for luxury exteriors.
- Use ‘warm white’ (2700K) bulbs. Cool white or blue-toned lights can feel industrial and harsh, while warm light mimics the cozy glow of a candle.
- Tuck wires 2-3 inches under the mulch or soil, using landscape staples to keep them from surfacing. Connect to a smart timer so your garden ‘wakes up’ automatically at sunset.
Final Thoughts on Creating Your Luxury Exterior
Transforming your home’s exterior into a multi-million dollar retreat doesn’t happen overnight, but each project you tackle adds a layer of soul and sophistication to your space. The beauty of DIY is that you can customize every texture and tone to reflect your personal style. Remember, luxury is found in the consistency of your materials, the health of your plants, and the care you put into the details. Happy building!