

Transform Your Space: Lifestyle Habits and Decor Secrets of the Ultra-Chic
Have you ever walked into a home and immediately felt a sense of calm, as if every pillow and plant was placed there by a master artist? We often think that the ‘ultra-chic’ lifestyle is reserved for those with endless budgets, but the truth is far more intimate. It’s about the intentionality of our surroundings—how the light hits a velvet cushion at golden hour, or the way the scent of fresh eucalyptus lingers in a hallway. Your home is not just a place to sleep; it’s a living, breathing canvas that reflects your soul.
I remember when my own living room felt like a cluttered waiting room rather than a sanctuary. By shifting my focus from ‘stuff’ to ‘atmosphere,’ I unlocked a new way of living that prioritized peace and beauty. Today, I’m sharing the viral lifestyle and decor secrets that will help you curate a space that feels expensive, soulful, and uniquely yours. Whether you have a tiny apartment or a sprawling backyard, these tips are designed to help you romanticize your daily life.
How to Design Simple Front Yard Landscaping for Instant Curb Appeal

Why we love this
There is nothing quite like the feeling of pulling into your driveway and being greeted by a lush, manicured garden that feels like a warm embrace. Simple front yard landscaping relies on the sensory contrast between structured greenery and soft, flowering textures. Imagine the earthy aroma of fresh cedar mulch wafting through the air, paired with the vibrant visual of deep purple salvia swaying in the breeze. It creates a professional, high-end look that instantly elevates your mood and makes your home the crown jewel of the neighborhood.
Essential Elements:
- Pressure-treated timber or stone edging
- Dark brown or black hardwood mulch
- Evergreen shrubs (like Boxwoods) for year-round structure
- Perennial flowers (Lavender, Daylilies, or Hostas)
- Solar-powered warm LED path lights
How to make it
- **Define the Perimeter:** Use a garden hose to lay out a curved or straight line for your flower beds. Once satisfied, use a sharp spade to cut a 4-inch deep trench along the line to create a clean edge that prevents grass from creeping in.
- **Soil Preparation:** Turn over the existing soil to a depth of 6 inches. Amend it by mixing in a 50/50 ratio of organic compost and topsoil. This ensures your plants have the nutrients they need to thrive and provides a visual cue of dark, rich earth.
- **The Professional Layout:** Place your tallest evergreen shrubs at the back (near the house) and taper down to smaller perennials in the front. Keep plants at least 18 inches away from the foundation to allow for air circulation and growth.
- **Planting Technique:** Dig a hole twice as wide as the root ball. Gently tease the roots, place the plant so the top of the root ball is level with the soil, and backfill. Firm the soil with your hands to remove air pockets.
- **The Finishing Layer:** Spread a 3-inch layer of hardwood mulch over the entire bed. Professional tip: Avoid ‘mulch volcanoes’ around the base of stems; leave a small gap to prevent rot. Water deeply until the soil is saturated to a depth of 2 inches.
How to Curate a Dreamy Office Desk Setup for Focused Work Sessions
Why we love this
A curated workspace is the ultimate gift to your future self. When your desk is a harmony of ergonomic function and ethereal beauty, the ‘flow state’ becomes second nature rather than a struggle. Picture the soft glow of a pleated silk lamp shade illuminating a matte oak surface, while the subtle clacking of a mechanical keyboard provides a rhythmic, satisfying soundtrack to your productivity. It’s about creating a tactile environment where the scent of a beeswax candle and the sight of a single green leaf in a glass bud vase keep you grounded and inspired all day long.
Essential Elements:
- Ergonomic desk (standing or fixed height)
- Large wool felt desk mat
- Task lighting with adjustable warmth
- Acrylic or wooden monitor riser
- Minimalist cord management clips
How to make it
- **The Foundation:** Start with a completely clear surface. Wipe the desk down with a microfiber cloth and a mild citrus-based cleaner to remove dust and provide a fresh, energizing scent.
- **Ergonomic Alignment:** Position your monitor so the top third of the screen is at eye level. This prevents neck strain. Place your chair so your elbows are at a 90-degree angle to the desk surface.
- **Layering Textures:** Lay down a large wool felt mat. This serves as a visual anchor and provides a soft, warm texture for your forearms to rest on, which is much more comfortable than cold wood or laminate.
- **Illumination Strategy:** Place a task lamp on the opposite side of your dominant hand to eliminate shadows while writing. Use a bulb with a 2700K temperature for a warm, inviting glow that mimics natural sunset light.
- **The Aesthetic Finish:** Group small items in odd numbers (the rule of three). Place a small plant, a ceramic mug, and your notebook in a cluster. Use cable sleeves to hide all black plastic wires behind the desk legs for a seamless, ‘ultra-chic’ look.
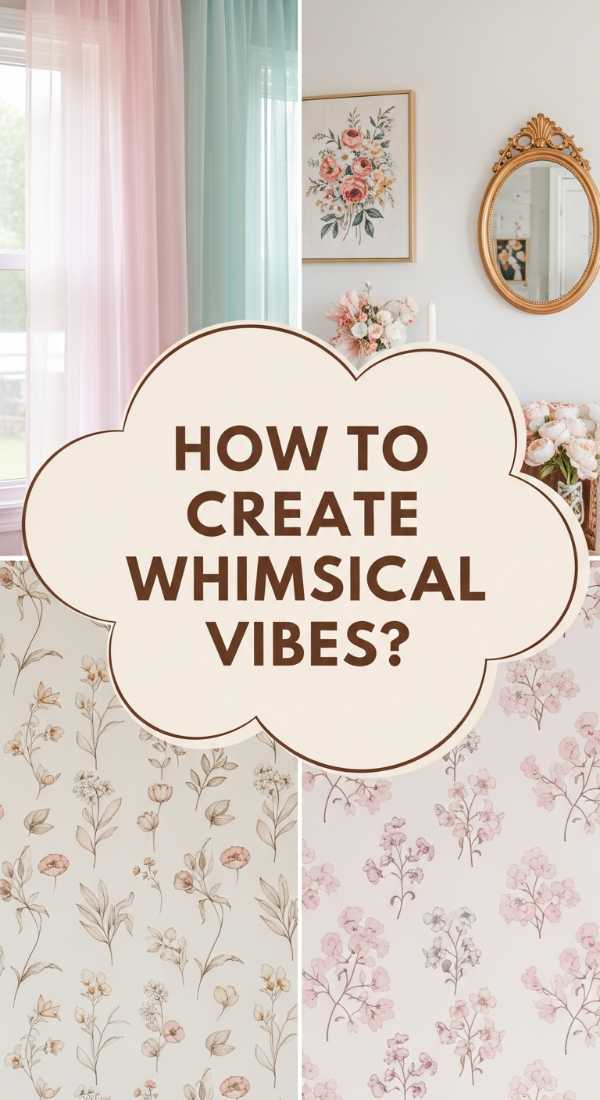
How to Achieve a Whimsical Apartment Aesthetic for a Summery Atmosphere

Why we love this
Whimsical apartment decor is all about capturing the fleeting, golden essence of a summer afternoon and bottling it up inside your four walls. It’s the feeling of sheer, billowy curtains dancing in a light breeze and the play of sunlight through colored glass catching on the walls like a kaleidoscope. This aesthetic leans into ‘dopamine decor’—using soft pastels, scalloped edges, and botanical prints to create a space that feels light, airy, and a little bit magical, regardless of how much square footage you actually have.
Essential Elements:
- Sheer linen or voile window treatments
- Pastel-toned throw pillows and blankets
- Rattan or wicker accent furniture
- Pressed flower wall art
- Assorted vintage colored glass vases
How to make it
- **Light Manipulation:** Remove heavy drapes and replace them with white sheer panels hung high and wide. This maximizes natural light and creates a visual cue of ‘airiness’ that is central to the whimsical look.
- **Textile Swapping:** Replace heavy velvets or dark wools with lightweight linens and cotton muslins. Look for items with scalloped edges or delicate floral embroidery to add that ‘fairytale’ touch.
- **The Glass Vignette:** Collect 5-7 glass vases in shades of amber, seafoam, and rose. Place them on a windowsill where they can catch the direct sun. The visual cue of light passing through the glass creates a shimmering, whimsical effect on your floors.
- **Vertical Greenery:** Use hanging macrame planters to bring greenery up to eye level. Choose trailing plants like Pothos or String of Pearls to create a ‘living jungle’ feel that softens the hard lines of an apartment.
- **Scent and Sound:** Use a reed diffuser with notes of sea salt and peony. Add a small battery-operated ‘fountain’ or a wind chime near the window to introduce the soothing sound of movement, completing the summer atmosphere.
How to Build Cheap Pool Decks for a Luxurious Backyard Oasis

Why we love this
There is a specific kind of luxury found in the contrast between sun-warmed wood and cool, sparkling blue water. Building a budget-friendly pool deck is about creating a functional ‘resort’ vibe without the high-end contractor price tag. Imagine stepping out of the water onto a smooth, cedar-stained surface that doesn’t burn your feet, surrounded by the tropical rustle of potted palms. It transforms an above-ground pool from an afterthought into a deliberate, chic destination for summer lounging and ice-cold cocktails.
Essential Elements:
- Pressure-treated 2×6 boards for decking
- 4×4 support posts
- Concrete deck blocks (for a floating foundation)
- Exterior-grade deck screws
- Weatherproof wood stain in ‘Honey’ or ‘Walnut’
How to make it
- **Site Leveling:** Measure the area around your pool. Clear all grass and weeds, then lay down landscape fabric and a layer of gravel. This is a critical visual cue for a professional finish and prevents rot underneath.
- **The Floating Frame:** Place concrete deck blocks every 4 feet. Inset your 4×4 posts and use a spirit level to ensure every post is perfectly vertical. Connect them with 2×6 rim joists to create the outer frame of your deck.
- **Inner Joists:** Install inner 2×6 joists spaced 16 inches apart ‘on center.’ Use joist hangers for maximum stability. Professional tip: Check your level constantly; a deck that slopes toward the pool is a safety hazard.
- **Decking Boards:** Lay your top boards perpendicular to the joists. Use a 16-penny nail as a spacer between boards to allow for water drainage and wood expansion. Sink the screws just below the surface of the wood.
- **The Finishing Touch:** Sand any rough edges with 80-grit sandpaper. Apply two coats of a high-quality semi-transparent stain. This not only protects the wood but provides that ‘ultra-chic’ rich color that makes cheap materials look like premium mahogany.
How to Style a Patriotic Front Porch for the Ultimate Americana Celebration

Why we love this
Patriotic decor, when done with a ‘chic’ eye, evokes a sense of timeless nostalgia and community. It’s the visual equivalent of a homemade apple pie cooling on a windowsill. We love the crisp juxtaposition of navy blue against stark white architectural details, punctuated by the vibrant pop of geranium red. The sound of a heavy cotton flag flapping in the wind and the sight of a classic wooden rocker with a striped cushion creates a welcoming, ‘Main Street USA’ charm that feels both grand and incredibly cozy.
Essential Elements:
- High-quality cotton American flag with wooden pole
- Red, white, and blue bunting
- White wooden rocking chairs
- Red geraniums in classic navy blue pots
- Outdoor throw pillows with subtle star or stripe patterns
How to make it
- **The Focal Point:** Mount a flag bracket at a 45-degree angle on a porch pillar or beside the front door. Ensure the flag is sized correctly for the house (typically 3×5 feet) so it hangs elegantly without dragging.
- **Bunting Placement:** Drape pleated fans (bunting) along the porch railing. Use zip ties or small hooks hidden underneath the railing to secure them. Space them evenly for a symmetrical, professional look.
- **Seating Layering:** Arrange your rocking chairs in a conversational grouping. Add a navy-and-white striped outdoor rug underneath to define the space and provide a tactile, comfortable area for bare feet.
- **Floral Accents:** Use ‘Big Red’ Geraniums for their saturated color and hardy nature. Place them in large, heavy pots to anchor the corners of the porch. Visual cue: Deadhead spent blooms daily to keep the red looking vibrant and fresh.
- **Lighting for Dusk:** Wrap porch railings in warm white twinkle lights or place lanterns with LED candles on the stairs. This ensures the patriotic theme stays ‘ultra-chic’ even after the sun goes down.
How to Create a Hippie Garden for a Boho Outdoor Retreat

Why we love this
The hippie garden is an antidote to the rigid perfection of modern landscaping; it is a celebration of the wild, the colorful, and the free. Imagine walking barefoot onto a mosaic of mismatched stepping stones, surrounded by the tall, swaying stalks of sunflowers and the spicy scent of marigolds. It’s a space where nature is allowed to lead, creating a lush tapestry of textures—from fuzzy lamb’s ear leaves to the delicate crinkle of poppy petals. It feels like a secret sanctuary where time slows down and creativity flourishes.
Essential Elements:
- Wildflower seed mix (Zinnias, Cosmos, Poppies)
- Upcycled garden decor (vintage teapots, painted pallets)
- Outdoor floor cushions and low tables
- Solar-powered Moroccan lanterns
- Bamboo or beaded wind chimes
How to make it
- **The Layout:** Abandon straight lines. Create a winding path using irregular flagstones or salvaged bricks. Leave gaps between the stones for ‘creeping thyme’ to grow, which releases a herbal aroma when stepped on.
- **Controlled Chaos Planting:** Scatter wildflower seeds liberally in sunny patches. Don’t plant in rows; instead, toss them by hand to mimic natural growth. Lightly rake them into the soil and keep the area moist for 14 days until sprouts appear.
- **Height and Texture:** Install a rustic wooden trellis or teepee made of bamboo poles. Grow climbing plants like Morning Glories or Sweet Peas to create vertical ‘walls’ of greenery that offer privacy and a sense of enclosure.
- **The Zen Zone:** Clear a flat area and lay down an outdoor jute rug. Add weather-resistant floor pillows and a low wooden ‘opium’ table. This creates a functional space for meditation or tea within the garden.
- **Layering Sound and Light:** Hang wind chimes at varying heights to capture different breeze levels. Scatter lanterns throughout the plants rather than just on the path; this creates a ‘firefly’ effect at night that is purely magical.
How to Master the Vintage Grandma House Aesthetic for a Cozy Farmhouse Feel

Why we love this
This aesthetic—often called ‘Grandmacore’—is about the deep, soul-level comfort of heritage and history. It’s the tactile joy of a heavy, hand-knitted quilt and the visual warmth of ‘cluttered’ shelves filled with mismatched china. We love this because it rejects the sterile ‘all-white’ trend in favor of patterns, textures, and items that tell a story. The air should smell of dried lavender and old books, and every corner should offer a soft place to land, making it the ultimate style for those who value ‘cozy’ above all else.
Essential Elements:
- Floral wallpaper or peel-and-stick murals
- Antique wooden furniture with a distressed patina
- Lace doilies and crochet coasters
- Gallery wall of vintage botanical prints
- Overstuffed armchairs in velvet or linen
How to make it
- **Wall Transformation:** Choose a wall and apply a vintage-inspired floral wallpaper. Look for patterns with muted tones—sage greens, dusty roses, and ochre—to avoid a ‘dated’ look and keep it ‘ultra-chic.’
- **The Curation Process:** Visit local thrift stores for a ‘statement’ piece of furniture, like a dark wood secretary desk or a hutch. Don’t paint it; the scratches and wear are the visual cues of authenticity that define this style.
- **Textile Layering:** Drape a handmade quilt over the back of a sofa. Layer a smaller lace cloth over a solid wooden side table. This ‘pattern on pattern’ technique adds the visual density required for the Grandma House feel.
- **Open Shelving:** Replace cupboard doors with tension rods and cafe curtains, or display mismatched tea sets on open shelves. Group items by color rather than type to keep the look intentional rather than messy.
- **Botanical Touches:** Dry your own flowers (like Hydrangeas or Roses) by hanging them upside down for two weeks. Place them in stoneware pitchers around the house for a permanent touch of nature that never needs watering.
How to Arrange Summer Table Centerpieces for Beautiful Family Gatherings
Why we love this
A great centerpiece is the heartbeat of a dinner party; it sets the tone for conversation and connection. In the summer, we love centerpieces that feel ‘just gathered’ from a sun-drenched meadow. Imagine the refreshing zing of sliced lemons submerged in water, the delicate scent of sweet peas, and the flickering light of tapered candles as the sun sets. It transforms a simple meal into an event, making guests feel cherished and creating a visual feast that rivals the food being served.
Essential Elements:
- Low-profile wooden dough bowl or long tray
- Fresh citrus fruits (lemons, limes, oranges)
- Eucalyptus or olive branch greenery
- Glass hurricane vases with pillar candles
- Small bud vases for individual blooms
How to make it
- **The Base Layer:** Place a linen table runner down the center. Use a long, shallow vessel (like a wooden dough bowl) to anchor the arrangement so it doesn’t block the view of guests across the table.
- **The Greenery Foundation:** Lay stems of silver-dollar eucalyptus or olive branches along the length of the tray. Let some leaves spill over the edges for a relaxed, ‘ultra-chic’ organic look.
- **Citrus Accents:** Place whole lemons or oranges nestled within the greenery. For a professional ‘caterer’ look, slice a few lemons thinly and press them against the inside of a glass vase filled with water before adding flowers.
- **Floral Highlighting:** Don’t use one big bouquet. Instead, use 5-7 small bud vases and place 1-3 stems of seasonal flowers (like Peonies or Dahlias) in each. Distribute these throughout the greenery for pops of color.
- **Height and Light:** Place three pillar candles in hurricane glasses at varying heights (6″, 8″, and 10″). This ensures the flame is protected from evening breezes and adds a sophisticated glow to the ‘summer harvest’ theme.
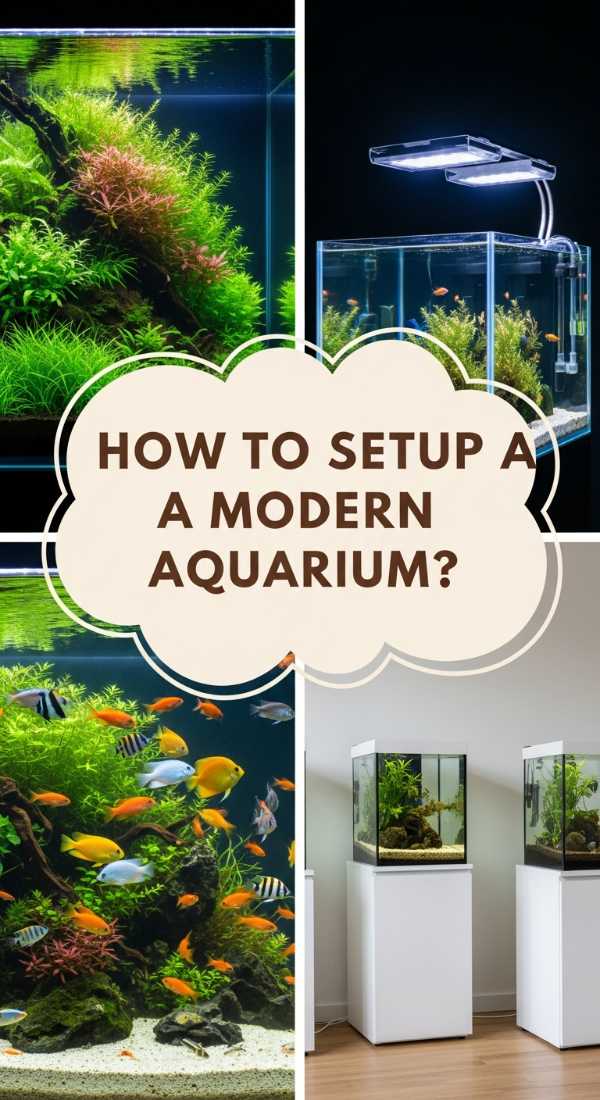
How to Design a Modern Aquarium Setup for a Serene Living Space

Why we love this
A modern aquarium is more than a pet habitat; it is ‘living art’ that introduces the soothing element of water into your home. The gentle hum of a high-end filter and the hypnotic movement of vibrant fish against a backdrop of lush green moss create an immediate ‘zen’ effect. We love the crisp, clean lines of a rimless tank and the way a well-lit aquascape can brighten a dark corner, acting as a natural humidifier and a focal point that sparks endless curiosity and calm.
Essential Elements:
- Rimless glass aquarium (10-20 gallon is ideal for starters)
- Natural ‘Dragon Stone’ or ‘Seiryu Stone’ hardscape
- Aquarium-safe driftwood (Spider wood or Driftwood)
- Live aquatic plants (Anubias, Java Fern, or Monte Carlo carpet)
- Full-spectrum LED lighting with a ‘sunrise/sunset’ timer
How to make it
- **The Foundation:** Place your tank on a dedicated, leveled stand. Add a 2-inch layer of nutrient-rich ‘aquasoil’ at the back, sloping it down to 0.5 inches at the front. This slope creates a visual cue of depth, making the tank look larger.
- **Hardscaping:** Arrange your stones and driftwood following the ‘Rule of Thirds.’ Avoid placing a large rock dead-center; instead, place it slightly to the left or right to create a more dynamic, natural-looking composition.
- **Planting Technique:** Use long tweezers to tuck the roots of live plants into the soil. For ‘epiphytes’ like Anubias, use a tiny drop of gel superglue to attach them to the rocks or wood. Ensure the ‘rhizome’ is not buried in soil or it will rot.
- **Filling the Tank:** Place a saucer on the soil and pour water slowly over it. This prevents the water force from uprooting your plants or disturbing the soil. Fill until the water is about 1 inch from the rim.
- **The Cycling Phase:** Run the filter and light for 8 hours a day. Professional tip: Wait 2-4 weeks for the nitrogen cycle to complete (test for zero ammonia) before adding fish. This patience ensures a clear, thriving, and chic ecosystem.
How to Construct Cheap She Sheds for a Private Backyard Sanctuary
[IMAGE_10]
Why we love this
The ‘She Shed’ is the ultimate lifestyle luxury—a dedicated space for dreaming, creating, or simply ‘being’ without the interruptions of household life. We love the transformation of a basic utility structure into a boutique-style getaway. Imagine opening a French door to a space filled with your favorite books, the smell of fresh paint and lavender, and a soft rug underfoot. It’s a physical manifestation of boundaries and self-care, providing a sanctuary that feels miles away even if it’s only twenty feet from your back door.
Essential Elements:
- Prefabricated wooden storage shed kit
- Exterior paint in a ‘sophisticated’ neutral (Slate, Sage, or Cream)
- Vinyl plank flooring (easy to clean and install)
- Battery-powered or solar lighting fixtures
- Comfortable lounge chair or small daybed
How to make it
- **Base Construction:** Level the ground and build a pressure-treated wood platform or use a concrete pad. A level base is the most important ‘visual cue’ for a shed that looks expensive rather than DIY.
- **Assembly and Weathering:** Follow the shed kit instructions to assemble the walls and roof. Immediately apply a high-quality exterior primer and two coats of paint. Paint the trim a contrasting color (white or black) for that high-end ‘ultra-chic’ architectural pop.
- **Interior Insulation:** If the budget allows, add fiberglass batts between the studs and cover with thin plywood or shiplap. This makes the space feel like a ‘room’ rather than a ‘shed’ and helps regulate temperature.
- **Flooring Overhaul:** Lay down peel-and-stick vinyl planks directly over the shed’s plywood floor. Choose a ‘light oak’ finish to maximize the sense of space and provide a tactile, indoor feel.
- **Personal Styling:** Hang floor-to-ceiling curtains to soften the corners. Install a small solar panel on the roof to power a single overhead light and a charging station. Add a ‘front porch’ feel by placing two large planters and a welcome mat at the entrance.
Conclusion
Transforming your lifestyle and home decor doesn’t require a total overhaul or a celebrity’s bank account. As we’ve explored, the ‘ultra-chic’ look is built on a foundation of intentionality, sensory details, and a few clever DIY projects. Whether you are planting a wildflower garden to invite nature in or curating a desk setup that honors your work, you are creating a life that feels as good as it looks. Remember, the most beautiful home is one that serves your peace and reflects your unique journey. Go forth and curate your sanctuary!
Frequently Asked Questions
Q: How can I make my home look chic on a very tight budget?
A: Focus on ‘The Big Three’: Lighting, De-cluttering, and Textiles. Swap harsh overhead lights for warm lamps, remove anything that doesn’t serve a purpose or bring joy, and add high-quality textures like linen or cotton through thrifted finds.
Q: What is the easiest way to start with landscaping?
A: Start with ‘the edge.’ Creating a clean, crisp line between your lawn and your garden beds immediately makes even a simple yard look professionally designed.
Q: How do I choose a color palette for a whimsical aesthetic?
A: Look at a summer sunset or a wildflower meadow. Pick one ‘anchor’ neutral (like creamy white) and two ‘accent’ pastels (like lavender and butter yellow) to keep the space looking cohesive rather than chaotic.