

Have you ever walked into a room in your own home and felt… nothing? Not joy, not peace, just a sense of ‘meh’? We’ve all been there. Life moves so fast that our surroundings often become a backdrop rather than an inspiration. But here is the secret: your environment is the silent narrator of your daily story. When you take the time to intentionally curate your space, you aren’t just decorating; you are reclaiming your energy and setting the stage for the life you actually want to lead.
An aesthetic reset isn’t about spending thousands on a total renovation. It’s about those viral, high-impact changes that shift the entire vibe of your home and your headspace. Whether it’s the way the light hits a new center piece or the crisp sound of a favorite playlist filling a room, these small shifts create a ripple effect of productivity and happiness. Let’s dive into the trends that are currently taking over our feeds and, more importantly, our hearts.
How to Achieve Simple Landscaping for Instant Curb Appeal

Why we love this
There is nothing quite like the earthy, grounding aroma of fresh cedar mulch and the vibrant contrast of deep green boxwoods against a freshly pressure-washed walkway. Simple landscaping transforms your home’s first impression from an afterthought into an inviting sanctuary. The tactile sensation of soft grass and the visual rhythm of neatly edged beds create a sense of order and pride every time you pull into your driveway, making the transition from the chaotic outside world to your private haven feel seamless and sweet.
Essential Elements:
- Dark hardwood or cedar mulch
- Evergreen shrubs (Boxwoods or Hostas)
- Solar-powered LED path lights
- Steel or plastic garden edging
- Colorful seasonal annuals
How to make it
- Begin by defining your borders using a garden hose to map out organic, flowing curves around your home’s foundation. Avoid harsh straight lines for a more modern, high-end look.
- Use a sharp spade or an edging tool to cut a 3-inch deep trench along your marked line, removing any existing grass or weeds within the bed to ensure a clean slate.
- Assess your soil quality and mix in a 2-inch layer of organic compost to provide the nutrients your new plants will need to thrive throughout the seasons.
- Position your larger ‘anchor’ shrubs first, spacing them at least 2 feet apart to allow for growth. Dig holes twice as wide as the root ball and just as deep, ensuring the crown is level with the soil.
- Tuck in your smaller floral accents between the shrubs, then spread a consistent 3-inch layer of mulch across the entire bed. This regulates soil temperature and provides that professional ‘finished’ look.
How to Personalize Office Desk Setups for Absolute Focus

Why we love this
The perfect desk setup feels like a warm embrace for your brain, filtering out the noise and inviting deep, creative flow. Imagine the smooth, cool touch of a felt desk mat beneath your wrists and the subtle, woody scent of a high-quality candle burning nearby. When your workspace is curated with intention—combining ergonomic comfort with aesthetic beauty—the daunting mountain of emails starts to feel like a series of manageable, even enjoyable, tasks. It’s about creating a ritual of productivity that treats your work with the respect it deserves.
Essential Elements:
- Large wool or vegan leather desk mat
- Ergonomic monitor riser or arm
- Minimalist cable management clips
- Small potted succulent or dried florals
- Warm-toned task lighting
How to make it
- Start with a total ‘desk declutter’ by removing every single item until you have a bare surface. Wipe it down with a microfiber cloth to remove dust and static.
- Place your desk mat in the center. This defines your primary workspace and protects the desk surface while providing a soft tactile landing for your hands.
- Position your monitor so the top third of the screen is at eye level. If using a riser, ensure it aligns with your natural line of sight to prevent neck strain.
- Implement the ‘Three Item Rule’ for decor: choose one functional item (a lamp), one organic item (a plant), and one personal item (a framed photo) to prevent visual clutter while maintaining personality.
- Bundle all cords using Velcro ties or a cable box tucked under the desk. Visible ‘cord spaghetti’ is the biggest killer of focus; keeping them hidden creates a sense of mental clarity and space.
How to Integrate JBL Speakers for Immersive Home Audio

Why we love this
Sound is the invisible architecture of a room, and there is a specific, soul-stirring richness to the bass of a JBL speaker that fills a space without distorting the melody. The texture of the fabric-covered housing feels modern and durable, while the crisp highs of a jazz record or a lo-fi beat create an atmosphere that feels alive. Whether you’re hosting a dinner or enjoying a quiet morning coffee, having a high-fidelity audio setup turns a mundane Tuesday into a cinematic experience, grounding you in the present moment through the power of sound.
Essential Elements:
- JBL Charge or PartyBox speaker
- Stable, vibration-dampening surface
- Wall mounts or floor stands (optional)
- Bluetooth-enabled device
- Smart home integration hub
How to make it
- Select the ‘sweet spot’ for your speaker, ideally in a corner or against a wall to allow the bass to reflect and resonate more deeply throughout the room.
- Power on the device and enter pairing mode. Ensure your source device (phone or tablet) is updated to the latest OS to prevent any lag or connectivity stutters.
- Download the JBL Portable app to access the equalizer settings. Boost the mids for vocal-heavy podcasts or enhance the bass for party playlists to tailor the sound to your specific environment.
- If using multiple speakers, utilize the ‘PartyBoost’ feature to sync them. Place speakers in opposite corners of the room to create a true stereo soundstage that surrounds the listener.
- Test the volume levels at different points in the room. You want the sound to be ‘felt’ but not overbearing; look for a balance where the audio feels like it’s coming from the air itself rather than a single box.
How to Construct Cheap Pool Decks for Summer Fun

Why we love this
There is a specific, nostalgic joy in the feeling of sun-warmed wood beneath bare feet and the smell of chlorine and sunscreen drifting through the air. A DIY pool deck bridges the gap between ‘temporary backyard setup’ and ‘summer oasis,’ providing a solid, elevated platform for lounging and laughter. It’s about creating a destination in your own backyard where the water feels more accessible and the summer days stretch out just a little bit longer. The sight of towels draped over a wooden railing is the ultimate signal that vacation has finally arrived.
Essential Elements:
- Pressure-treated 2×4 and 2×6 lumber
- Decking screws (weather-resistant)
- Leveling blocks or concrete footings
- Safety railing or balusters
- Outdoor-grade wood stain or sealant
How to make it
- Measure the height of your above-ground pool and subtract 1.5 inches for the thickness of the decking boards. This ensures the deck sits perfectly flush with the pool’s top rail.
- Set your foundation using concrete deck blocks placed on leveled, compacted gravel. Space them no more than 4 feet apart to ensure a sturdy, bounce-free surface.
- Build the outer frame using 2×6 pressure-treated joists, securing them with galvanized lag bolts. Use a spirit level at every corner—even a slight tilt will feel uncomfortable once the deck is finished.
- Install interior joists every 16 inches on center. This provides the structural integrity needed to support multiple adults and heavy outdoor furniture.
- Lay your decking boards with a 1/8-inch gap between them to allow for water drainage and wood expansion. Sand any rough edges immediately to prevent splinters before applying a waterproof sealant.
How to Apply Vinyl Lattice Panels for Total Backyard Privacy
Why we love this
Privacy is the ultimate luxury, and there is a romantic, secret-garden quality to vinyl lattice panels that filter the sunlight into beautiful geometric patterns. The crisp white or deep coffee-toned vinyl feels clean and permanent, offering a visual shield that doesn’t feel heavy or claustrophobic. Imagine sitting on your patio, hidden from the street, with the gentle rustle of climbing vines weaving through the lattice. It creates an outdoor ‘room’ that feels intimate and safe, allowing you to fully relax without the feeling of prying eyes.
Essential Elements:
- Vinyl lattice panels (4×8 size is standard)
- Lattice ‘H’ channel connectors
- U-channel end caps
- Stainless steel screws
- Wooden or metal support posts
How to make it
- Measure the height and width of the area you wish to enclose. Use a circular saw with a fine-tooth blade to cut the vinyl panels to size, ensuring you wear safety goggles to protect against flying plastic bits.
- Secure your vertical support posts firmly into the ground or attach them to your existing deck railing. Space them exactly according to the width of your panels.
- Slide the lattice into ‘U-channel’ frames. This is a critical step; the frames allow the vinyl to expand and contract in the sun without warping or buckling.
- Drill oversized pilot holes through the channel and into the posts. Using slightly larger holes allows the screws to hold the lattice in place without pinching the material as it reacts to temperature changes.
- Snap on the decorative end caps for a professional finish. For an extra aesthetic boost, plant fast-growing climbers like Clematis or Ivy at the base to create a living wall over time.
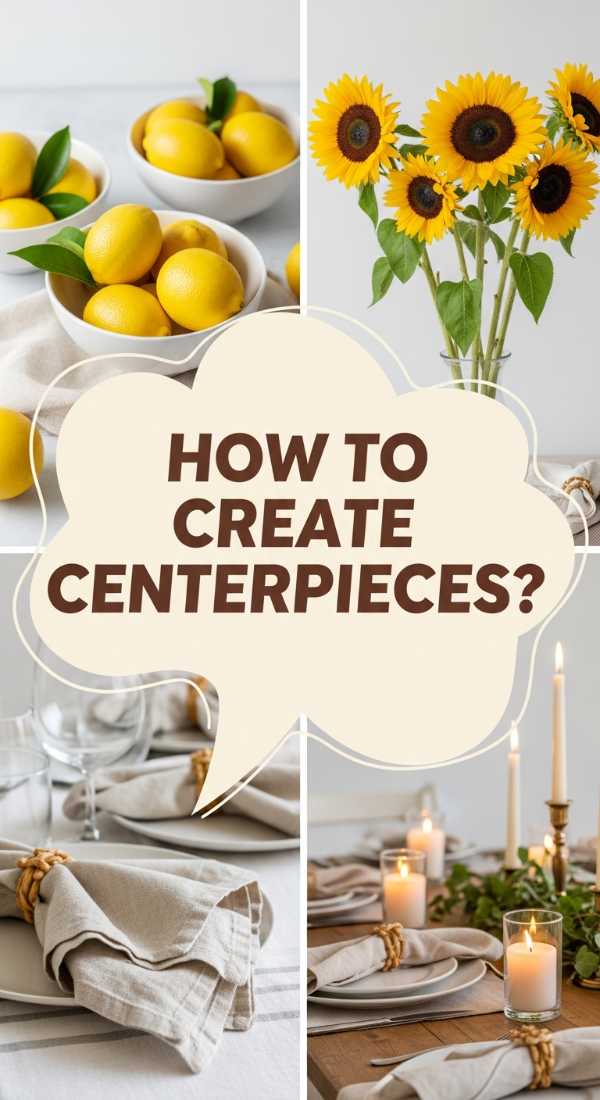
How to Design Summer Table Centerpieces for Al Fresco Entertaining

Why we love this
A beautiful summer table is a feast for the eyes before the food even arrives. The scent of sliced lemons mingling with fresh eucalyptus, the rough texture of a linen runner against a wooden table, and the soft glow of tapered candles as the sun begins to set create an atmosphere of pure magic. It’s about elevating a simple meal into an event, making your guests feel cherished and the conversation flow more freely. These centerpieces capture the fleeting essence of summer—bright, organic, and effortlessly elegant.
Essential Elements:
- Low-profile wooden or ceramic vessel
- Fresh citrus fruits (lemons, limes, oranges)
- Seeded eucalyptus or olive branches
- Unscented pillar or taper candles
- Neutral linen table runner
How to make it
- Lay down your linen runner first, allowing it to bunch slightly for a ‘lived-in’ organic texture rather than pulling it perfectly flat.
- Place your main vessel in the dead center of the table. If using a long rectangular table, consider three smaller vessels spaced evenly to draw the eye down the length of the setting.
- Create a green ‘base’ by layering eucalyptus or olive branches. Let the leaves spill over the edges of the vessel to create movement and a sense of abundance.
- Incorporate your ‘pops’ of color by nesting whole and halved citrus fruits among the greenery. The exposed flesh of a cut lemon adds a glistening, sensory element that feels incredibly fresh.
- Stagger candles of varying heights throughout the arrangement. Ensure they are unscented so they don’t compete with the aroma of the food, and light them 10 minutes before guests arrive for a warm, welcoming glow.
How to Curate Patriotic Front Porches for Classic Americana Vibes

Why we love this
There is a timeless, comforting soul to a patriotic porch that evokes memories of parades, apple pies, and warm July evenings. The rhythmic snap of a heavy cotton flag in the breeze and the classic contrast of navy blue, crisp white, and bold red create a look that is both nostalgic and incredibly dignified. It’s an aesthetic that feels like a warm welcome home, celebrating a sense of community and heritage. The sight of red geraniums in white wicker planters is a visual shorthand for summer bliss that never goes out of style.
Essential Elements:
- Embroidered cotton American flag
- Pleated bunting or fans
- Red geraniums or petunias
- Navy blue outdoor throw pillows
- White rocking chairs or a porch swing
How to make it
- Install a high-quality flag bracket at a 45-degree angle near your front door. Opt for a ‘tangle-free’ spinning pole to ensure your flag always drapes beautifully regardless of the wind direction.
- Attach pleated bunting to your porch railings using zip ties hidden behind the fabric. Space the pleats evenly for a symmetrical, polished look that screams ‘Main Street USA.’
- Swap out your standard porch cushions for navy and white striped versions. This adds a nautical, Americana touch that feels sophisticated rather than kitschy.
- Flank your front door with oversized white planters filled with bright red flowers. The red-white-blue triad is most effective when the colors are concentrated in clusters.
- Add a final touch with a natural coir doormat and a simple wreath made of dried baby’s breath or red berries to tie the entire entryway together.
How to Build a Whimsical Apartment Aesthetic for Creative Inspiration

Why we love this
A whimsical apartment is a love letter to your inner child, filled with unexpected pops of color, eclectic textures, and a ‘more is more’ philosophy that sparks constant creativity. Think of the soft glow of a mushroom lamp, the velvety touch of a mustard-yellow sofa, and walls adorned with art that makes you smile. This aesthetic rejects the sterile and the boring, opting instead for a space that feels curated but never stiff. It’s an environment that gives you permission to be yourself, surrounding you with objects that have stories and soul.
Essential Elements:
- Wavy or ‘squiggles’ floor mirror
- Eclectic gallery wall with mismatched frames
- Textured throw blankets (pom-poms or fringe)
- Mushroom-shaped accent lamps
- Indoor vines (Pothos or Heartleaf Philodendron)
How to make it
- Start with a neutral base (like a cream rug) to prevent the space from feeling chaotic. Whimsy requires a canvas to stand out against.
- Choose a ‘hero piece’ that defies traditional design, such as a curved velvet chair or a neon sign. Position this in a high-traffic area to set the tone for the room.
- Layer your lighting. Avoid the ‘big light’ at all costs; instead, use 3-4 small lamps with warm bulbs to create pockets of cozy, magical light throughout the apartment.
- Mix textures shamelessly. Pair a sleek glass coffee table with a chunky knit rug and a silk pillow. The sensory contrast is what creates that ‘whimsical’ depth.
- Incorporate ‘living art’ by hanging plants from the ceiling at different heights. Use macrame hangers to add another layer of texture and visual interest to your vertical space.
How to Perfect the Vintage Grandma House Aesthetic for Timeless Comfort

Why we love this
Commonly known as ‘Grandmacore,’ this aesthetic is all about the deep, soul-level comfort found in heritage and history. It’s the scent of Earl Grey tea and old paper, the sight of delicate floral wallpaper, and the heavy, reassuring weight of a handmade quilt. This style embraces the ‘slow life,’ encouraging you to sit in a creaky wooden chair and actually read a book. It’s a beautiful rebellion against the ‘fast furniture’ culture, prioritizing pieces that feel like they’ve been loved for generations and creating a home that feels like a continuous, warm hug.
Essential Elements:
- Thrifted floral porcelain tea sets
- Lace doilies or embroidered linens
- Antique wooden bookshelves
- Pressed flower wall art
- Quilted or ruffled throw pillows
How to make it
- Visit local antique malls or thrift stores to find ‘anchors’ like a solid oak side table or a brass floor lamp. Look for ‘patina’—the wear and tear that shows a piece has lived a life.
- Introduce floral patterns through textiles. A chintz-patterned armchair or a set of rose-printed curtains immediately grounds the room in that vintage comfort.
- Curate a ‘styling nook’ on a bookshelf. Mix your favorite novels with vintage glass bottles, a small clock, and perhaps a bowl of dried lavender for an olfactory vintage touch.
- Use lace runners on dark wood surfaces. The contrast between the delicate white thread and the deep brown wood is a hallmark of this timeless aesthetic.
- Keep the technology hidden. Place your TV inside a cabinet or use a decorative cloth to cover chargers, ensuring the ‘spell’ of the vintage vibe isn’t broken by modern plastic.
How to Master Aquarium Setup Ideas for Serene Indoor Living
[IMAGE_10]
Why we love this
An aquarium is more than a pet habitat; it is a living, breathing piece of art that brings the tranquil pulse of the underwater world into your living room. The soft, rhythmic hum of the filter and the gentle dance of aquatic plants in the current create a meditative focal point that lowers blood pressure and calms the mind. Watching colorful fish glide through a miniature forest of green lace-leaf plants is a hypnotic experience that connects you to nature, providing a sense of ‘blue space’ serenity that is rare in our digital-heavy lives.
Essential Elements:
- Rimless glass aquarium tank
- Live aquatic plants (Anubias or Java Fern)
- Natural driftwood or dragon stone
- Substrate (fluval stratum or fine sand)
- LED ‘daylight’ spectrum lighting
How to make it
- Choose a rimless tank for a sleek, high-end look that doesn’t obstruct the view. Place it on a dedicated, leveled stand away from direct sunlight to prevent excessive algae growth.
- Design your ‘hardscape’ first using natural wood and stones. Follow the ‘Rule of Thirds’—place your tallest piece of wood off-center to create a more dynamic and natural visual flow.
- Add your substrate, sloping it higher towards the back of the tank. This creates an illusion of depth, making your miniature underwater world look much larger than it actually is.
- Plant your ‘background’ species first, then move to smaller foreground plants. Use long tweezers to tuck roots securely into the substrate, ensuring they aren’t buried too deep (especially the rhizomes of Anubias).
- Fill the tank slowly by pouring water over a small plate to avoid disturbing the sand. Add a high-quality water conditioner and allow the tank to ‘cycle’ for at least two weeks before adding fish to ensure a healthy ecosystem.
Final Thoughts on Your Aesthetic Reset
Your home should be a reflection of the best version of yourself. Whether you are drawn to the nostalgic charm of a vintage-inspired parlor or the crisp, modern lines of a high-tech audio setup, the goal is the same: to create a space that nourishes you. Don’t feel pressured to do everything at once. Pick the one trend that speaks to your soul, start there, and watch how your daily life begins to shift in beautiful, unexpected ways.
Frequently Asked Questions
Q: Do I need a large budget for these resets?
A: Not at all! Many of these, like the summer centerpieces or the whimsical apartment touches, can be achieved with thrifted finds or items you already have. It’s more about the arrangement than the price tag.
Q: How do I choose which aesthetic is right for me?
A: Look at your ‘saved’ photos on social media. Is there a recurring theme? Do you prefer bright and airy or dark and moody? Your subconscious has probably already chosen for you!
Q: Are live plants hard to maintain in an aquarium or home?
A: Start with ‘low-light’ varieties like Pothos for your room or Anubias for your tank. They are incredibly hardy and give you the green look without the high-stress maintenance.